How to Crochet Giant Sunburst Granny Square for Spring
With a step-by-step tutorial, learn how to crochet a large, beautiful granny square, perfect for blankets or afghans. Using chunky acrylic yarn and a 6mm hook, the video begins with creating a magic circle with 16 double crochets and progresses through rounds featuring puff stitches, three-double-crochet clusters, and four-double-crochet clusters to build texture. The piece is squared off with treble crochets at the corners and finished with double and single crochet rounds for a polished look.
The instructor emphasizes checking stitch counts, weaving in ends, and customization with colors, resulting in striking and easy-to-assemble crochet blocks. So, follow through with us for the complete tutorial.

How to Make a Large Granny Square
This tutorial demonstrates how to crochet a large, beautifully textured granny square. It is a detailed, step-by-step guide, ideal for beginners and experienced crocheters alike. The design is versatile, allowing users to create afghans, blankets, or other larger projects using multiple squares. Below is a structured summary of the process explained in the video.
Materials and Tools
- Yarn: Chunky Monkey acrylic yarn in two colors (e.g., one for the center and another for the borders).
- Hook Size: A 6mm crochet hook is recommended, as it works well with the chosen yarn.
- Additional Supplies: Scissors and a yarn needle to weave in ends.
Tutorial Step-by-Step
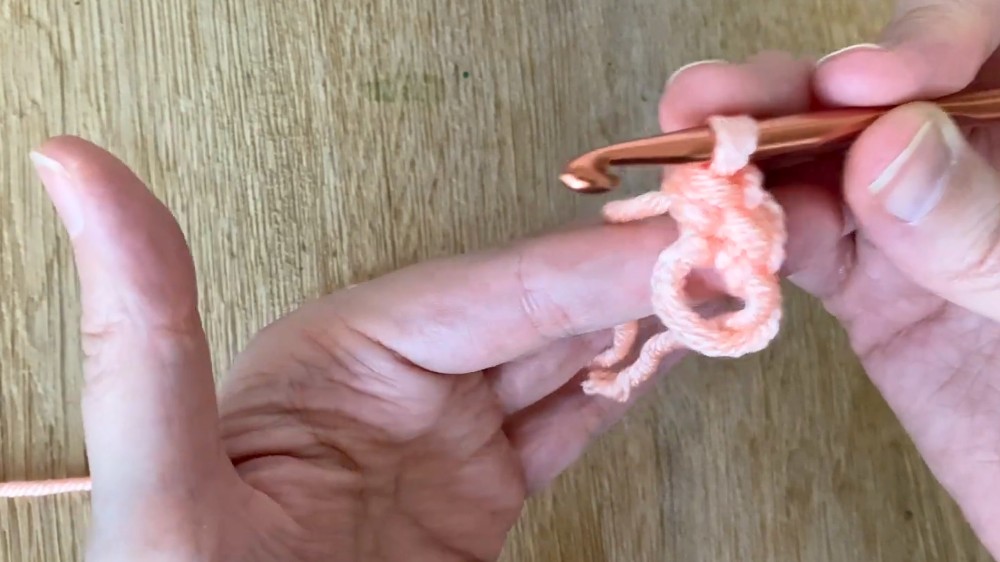
1. Creating the Magic Circle and Base Round
- The tutorial begins with a magic circle, where the first round is crafted.
- Instead of the traditional “chain three” for double crochets, a stacked single crochet is used for a neater appearance.
- The base round is completed with double crochets worked into the magic circle.
2. Second Round: Puff Stitches
- Puff stitches are introduced for added texture.
- Each puff stitch is created by pulling the yarn through a specific number of loops, giving the design a soft and unique look.
- A chain is worked between each puff stitch.
- Once completed, the round is closed by joining to the first puff stitch.
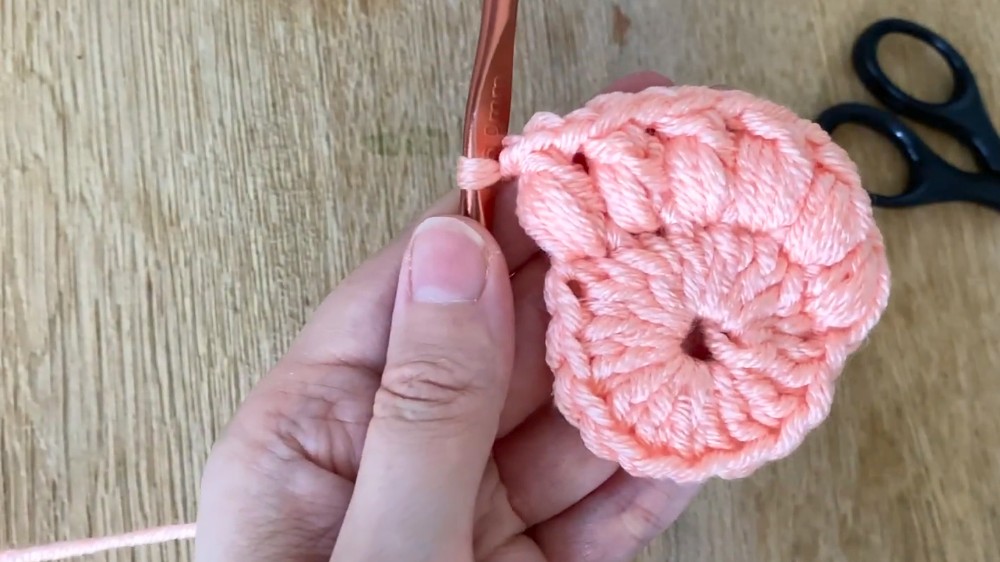
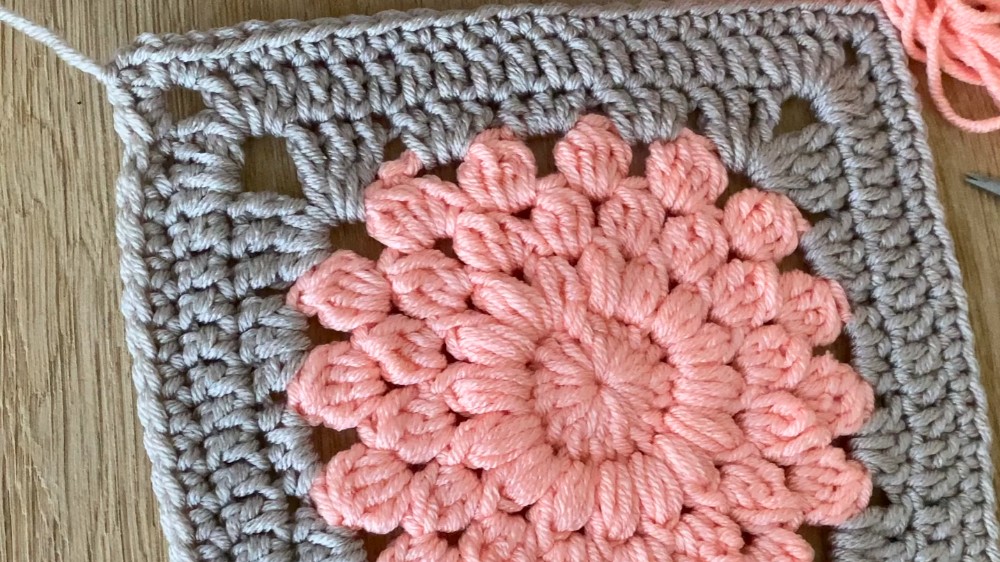
3. Third Round: Three Double Crochet Clusters
- The next round uses clusters of three double crochets worked together.
- The clusters are worked into the chain spaces of the previous round to maintain the design’s structure.
- Chains are added between clusters to maintain spacing.
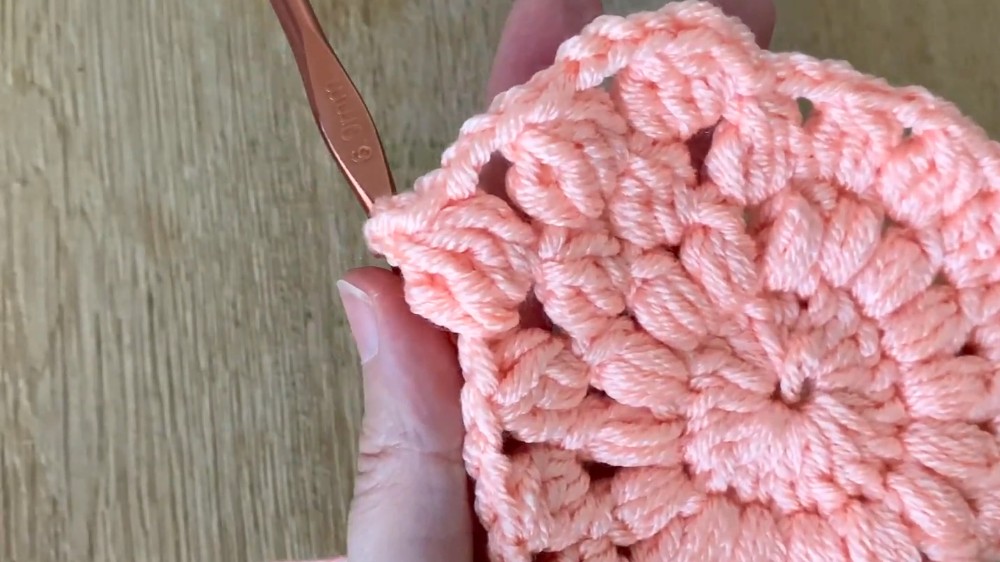
4. Fourth Round: Four Double Crochet Clusters
- This round builds on the previous one, creating larger clusters by combining four double crochets together.
- Chains between clusters are increased to ensure that the circle becomes larger while maintaining its shape.
- After completing the round, the yarn is fastened off and the ends are woven in.
Squaring the Circle
- To transition the circular design into a square, the tutorial introduces treble crochets at the corners.
- The sides are filled with combinations of double crochets and half-double crochets, creating a balanced and squared structure.
- This process is repeated on all four sides of the square.

Adding Borders
- Double Crochet Border:
A round of double crochets is worked across the entire square, allowing each side to look uniform. - Single Crochet Edge (Optional):
For a polished look, a supplemental round of single crochets is added. The corners are finished with two single crochets and a chain two to maintain the square shape.
Final Details
- The instructor emphasizes the importance of weaving in the ends securely to prevent unraveling.
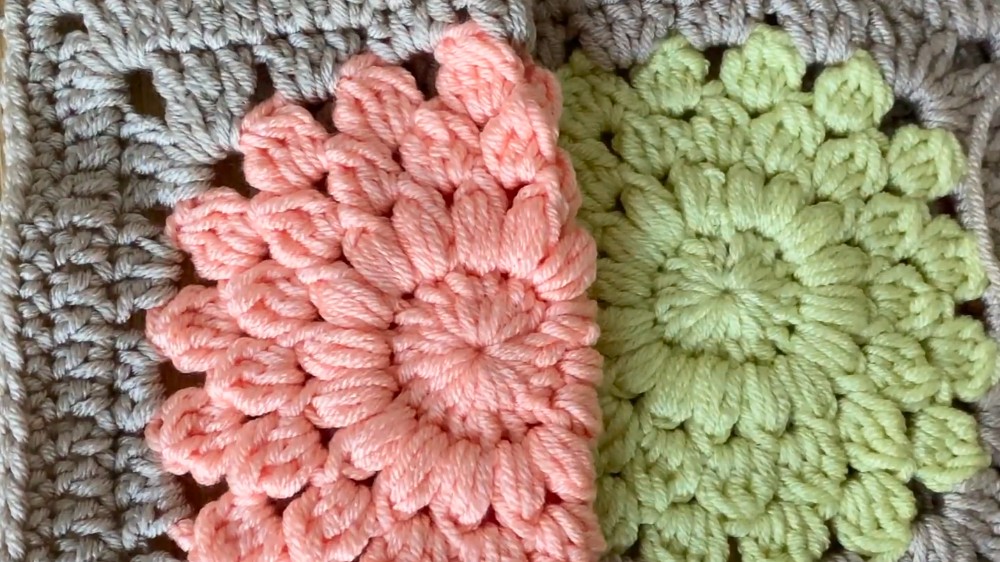
- A visual demonstration of the final result shows how the squares can be joined to create larger projects.
- Color combinations (e.g., peach and mint) are discussed for creating vibrant blankets.
Conclusion
The tutorial is an excellent guide for creating large, textured granny squares that can be used in various crochet projects. The project works up quickly, and the resulting squares are easy to sew together. The tutorial emphasizes customization through color selection and finishing details, empowering viewers to create unique and visually stunning designs.