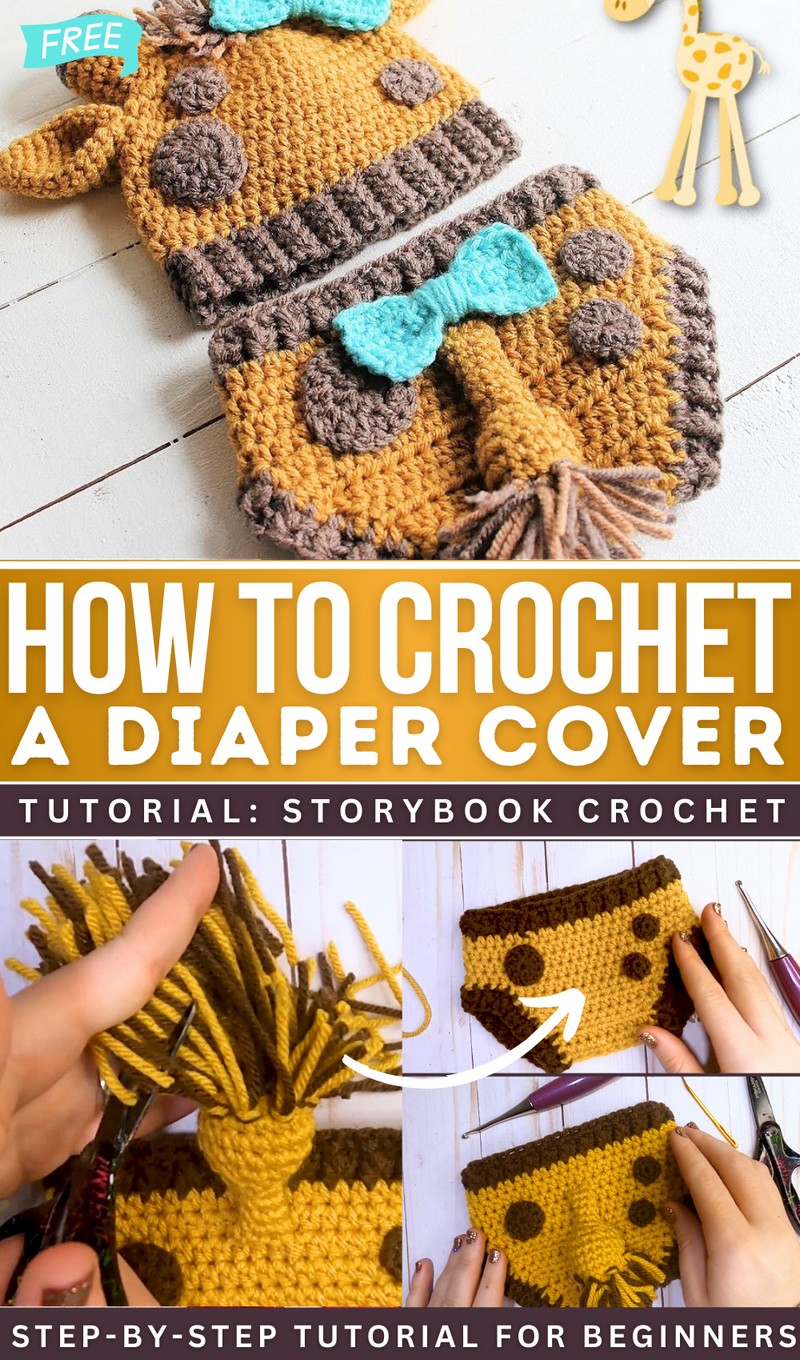
How to Crochet Giraffe Diaper Cover (Tutorial for Beginners)
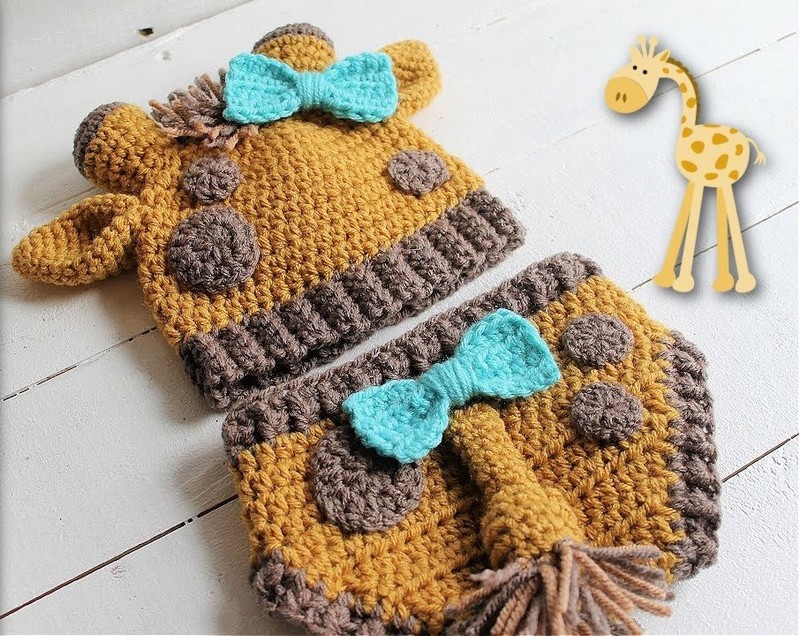
Learn how to crochet a comfy and cute giraffe diaper cover that you can couple with the giraffe hat pattern, with a step-by-step tutorial from Storybook Crochet. The finished diaper cover is both cute and functional, perfect for baby photo shoots or shower gifts. It features a lovely little tail and giraffe spots, which are easy even for beginners. Let’s get started!
Supplies and Skills: The project uses worsted yarn in two colors (golden yellow and dark brown) and basic crochet techniques like magic rings, single crochet, and double crochet stitches, making it suitable for beginners or those with intermediate skills.
What is the best yarn for this crochet baby diaper cover?
The best yarn for crocheting diaper covers is soft, durable, and non-irritating to a baby’s skin. Cotton or cotton-blend yarns are ideal due to their comfort and breathability, though soft acrylic yarns are also popular for their elasticity and affordability. Look for worsted-weight yarns, as they provide the right thickness and structure for diaper covers.
Choose machine-washable yarn to ensure easy cleaning. Avoid scratchy or overly textured yarns that might irritate delicate skin.
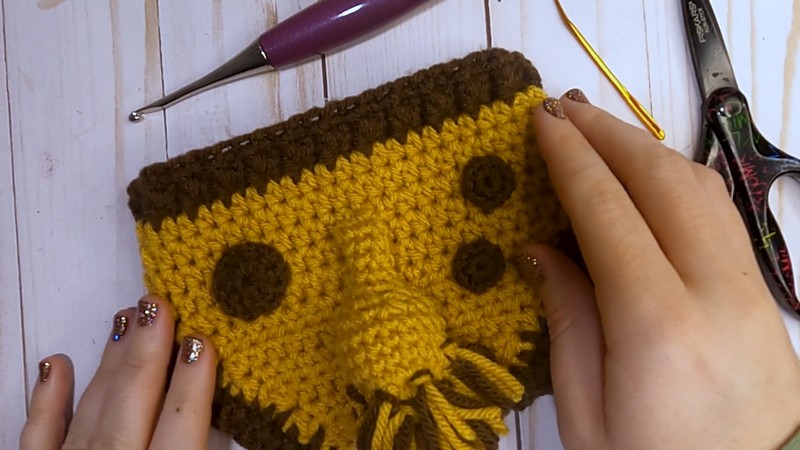
The tutor gives step-by-step instructions, including how to create spots, sew them onto the cover, and crochet a stuffed tail with colorful “hairs.” She emphasizes patience, careful sewing, and using basic tools like a G hook, scissors, a yarn needle, and fiber fill.
Free Crochet Giraffe Diaper Cover Pattern
Materials
- Worsted weight yarn (Sample uses “I Love This Yarn” from Hobby Lobby)
- Main Color: Golden yellow
- Contrast Color: Dark brown
- G/4.0 mm crochet hook
- Yarn needle
- Scissors
- Small amount of fiberfill (for stuffing the tail tip)
- Stitch marker (optional)
- Additional smaller hook (optional, for attaching tail fringe)
Abbreviations (US Terms)
- ch – chain
- sc – single crochet
- dc – double crochet
- sl st – slip stitch
- inc – increase (2 stitches in the same stitch)
- dec – decrease (single crochet 2 together)
- st – stitch
- magic ring – adjustable loop/magic circle
Special Notes
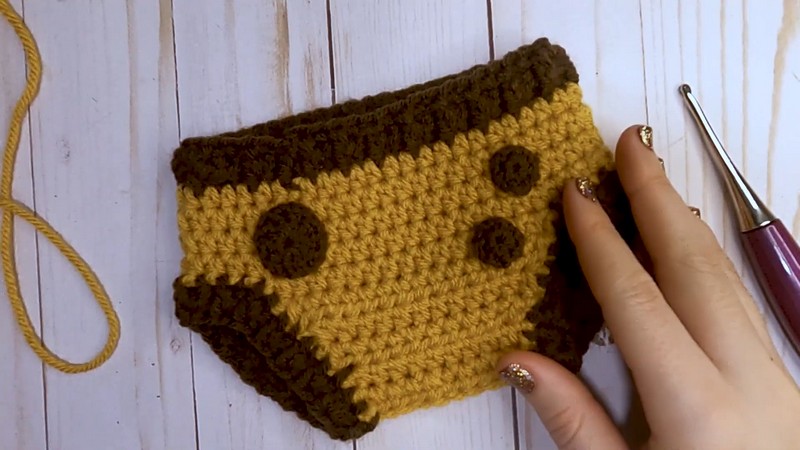
- The pattern is written for decorative elements (spots and tail). Please complete your basic diaper cover first using the designated pattern for your chosen size.
- Color changes are crucial for the giraffe look; use brown for the first two rounds at the waistband and leg openings, and gold for the main body.
- Stuff only the base of the tail for a 3D effect.
- The number of spots and yarn lengths for the tail fringe can be varied for personal preference.
- Ensure all ends are securely woven in for safety.
Pattern
1. Spots
Small Spots (Make 4)
With Brown Yarn:
- Begin with a magic ring.
- Round 1: 6 sc in magic ring. (6 sts)
- Pull tight to close. Sl st to first sc to join.
- Fasten off, leaving a long tail for sewing.
- Weave in starting end.
Large Spots (Make 2)
With Brown Yarn:
- Begin with a magic ring.
- Ch 2 (does not count as a stitch).
- Round 1: Work 9 dc into the magic ring. (9 sts)
- Pull tight to close. Sl st to top of first dc to join.
- Fasten off, leaving a long tail for sewing.
- Weave in starting end.
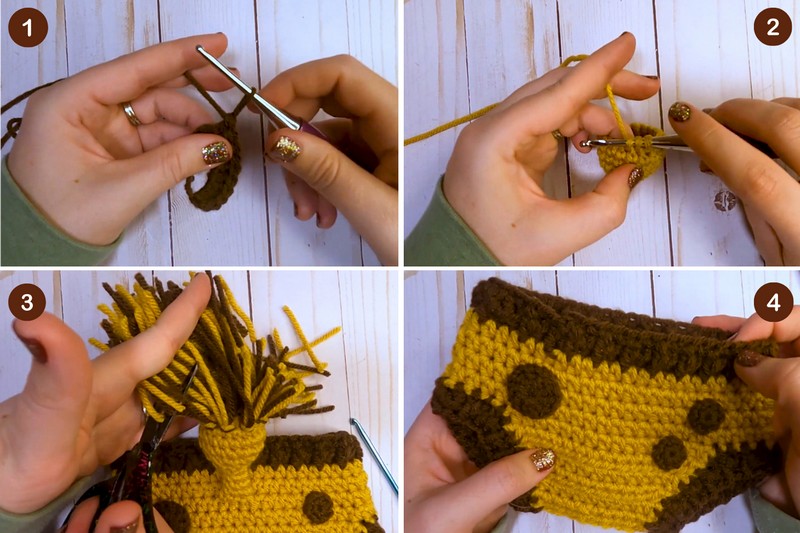
Attaching Spots
- Place two large and four small spots on the diaper cover, arranging as preferred.
- Using yarn needle and long tail, sew spots securely onto the cover front and back.
- Weave in all ends.
2. Tail
Tail Base (Main Color – Yellow)
- Begin with a magic ring.
- Round 1: 6 sc in magic ring. (6)
- Pull tight to close. Do not join, work in continuous rounds.
Tip: Mark the first stitch of each round with a stitch marker.
Round 2:
- 2 sc in each st around. (12)
Round 3:
- *1 sc in next st, inc (2 sc in next st); repeat from * around. (18)
Rounds 4–6:
- 1 sc in each st around. (18 each round)
Round 7:
- *1 sc, dec over next 2 sts; repeat from * around. (12)
Round 8:
- Dec over every 2 sts around. (6)
Lightly stuff the tail’s base with fiberfill before proceeding.
Rounds 9–13:
-
1 sc in each st around. (6 sts per round, 5 rounds)
-
Fasten off, leaving a long tail for sewing.
Attaching Tail
- Use the yarn needle to sew closed the open end of the tail.
- Position and sew the tail to the back center of the diaper cover—about 3 rows down from the gold edge.
- Secure and weave in all ends.
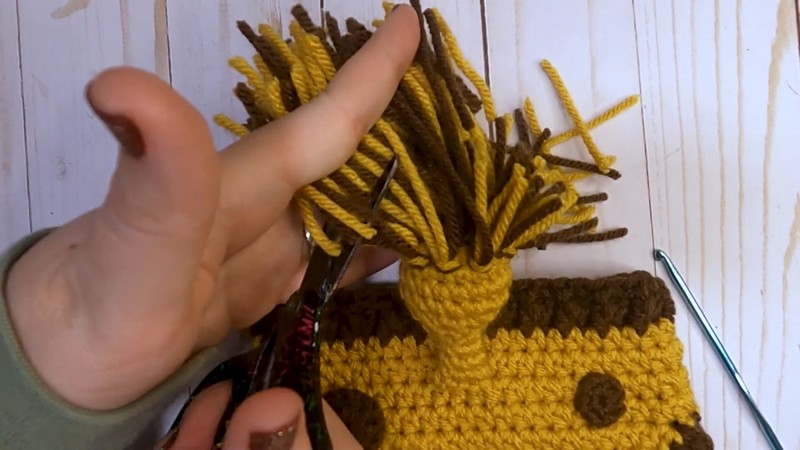
Tail Fringe (Brown and Gold)
- Cut several strands of both brown and gold yarn (approx. 3–4 inches each; number according to desired thickness).
- With a smaller crochet hook or your fingers, attach fringe to the tail (around the bottom, starting near the center and spiraling outward for about 3 rounds).
- Take one strand of each color, fold in half, use hook to pull through a stitch at tail base forming a loop, then pull yarn ends through loop and pull snugly.
- Repeat all the way around and trim fringe to approx. 1 inch or your desired length.
3. Finishing Touches
- Trim all ends evenly.
- Shape and fluff the tail fringe.
- Optional: Add a bow (see coordinating hat pattern for bow instructions).
Conclusion
You have now completed an adorable giraffe diaper cover, perfect for pairing with the matching giraffe hat. Personalize your project by adjusting the placement and number of spots or altering the tail’s thickness and length. This pattern is ideal for baby showers, newborn photos, and special gifts.
Pattern Corrections & Tips
- Correction: When working the main tail, be sure not to join the rounds unless otherwise stated; work continuously using a stitch marker for best results.
- Tip: If your magic ring is hard to close, try an alternative method or make an extra chain before starting.
- Tip: Ensure all sewn-on pieces are extra secure if the item will be used for a baby.
- Tip: Yarn thickness and hook size may slightly affect finished dimensions; adjust as needed for your specific fit.