How to Crochet Granny Diamond Stitch Hat for Beginners

Learn how to crochet a beautiful diamond granny stitch slouchy beanie with a stitch-by-stitch tutorial for beginners. Using medium-weight yarn in two colors (red and white) and a 5mm crochet hook, the pattern is explained step-by-step. The beanie starts with a customizable chain length determined by the wearer’s head size, followed by alternating front and back post double crochet stitches for the brim.
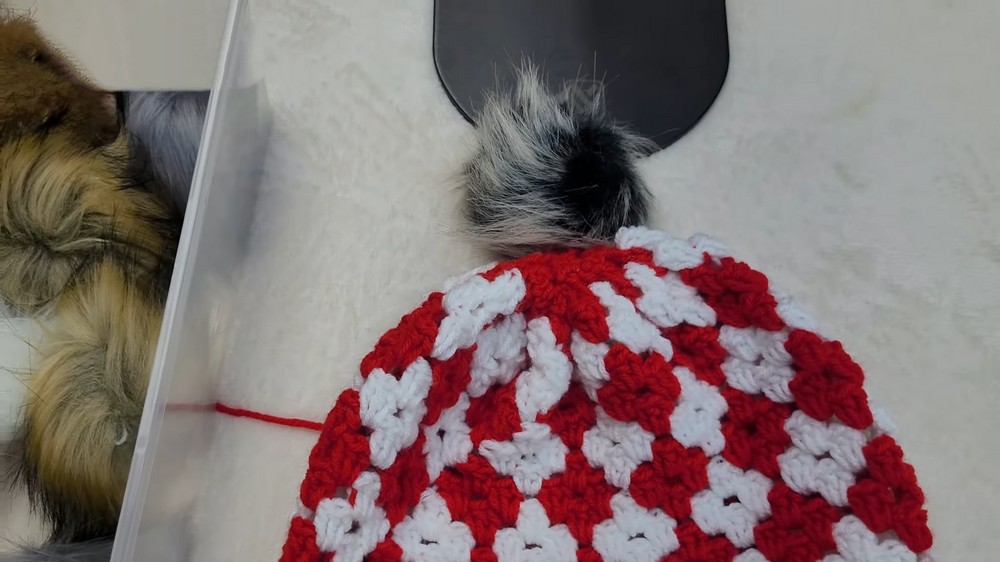
The diamond-like design is created by alternating between two colors while working three double crochets into specified spaces. The tutorial concludes with instructions to reduce and close the top, leaving the option to add a pom-pom for a finishing touch.

Diamond Granny Stitch Slouchy Beanie Tutorial
This tutorial guides viewers through making a diamond granny stitch slouchy beanie using two colors of medium-weight yarn and a 5mm crochet hook. The pattern involves creating a textured brim followed by a repeating diamond motif. The beanie can be customized for child or adult sizes based on the wearer’s head circumference.
Materials
- Yarn: Medium-weight 4-ply yarn in two colors (tutorial uses red and white).
- Hook: 5mm crochet hook.
- Additional Tools: Scissors and a yarn needle.
Steps for Creating the Beanie
Step 1: Creating the Foundation Chain
- Start with a slip knot and create a chain that fits the intended head size, ensuring no twist in the chain before joining it into a circle with a slip stitch.
Step 2: Row 1 – Establishing the Base
- Chain one and work one double crochet in each chain space around to complete the base row.
- Use slip stitch to join the last double crochet of the row to the initial chain.

Step 3: Rows 2-6 – Creating the Brim
- Alternate between front post double crochet (FPDC) and back post double crochet (BPDC) stitches to form a ribbed texture for the brim.
- Continue repeating this pattern for five to six rows based on the desired brim width.

Step 4: Beginning the Diamond Pattern
Row 1 of Diamond Motif
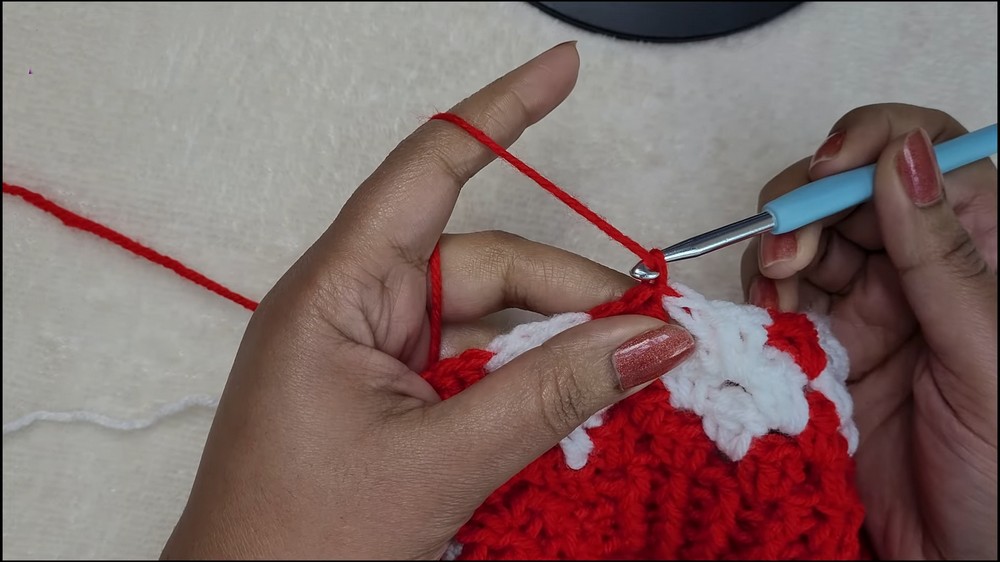
- Chain one and work three double crochets together in spaced intervals across the row, skipping two stitches between each set.
- Continue this pattern for the row.
Row 2 of Diamond Motif
- Introduce the second yarn color and alternate between the two colors with groups of three double crochets per space. Manage yarn floats by letting the unused yarn rest at the back of the work.

Step 5: Completing Additional Rows for the Design
Row 3
- Use the second yarn color for the entire row, working three double crochets in each space across the row.
- Ensure floats from the previous color are tucked neatly behind the work.
Row 4
- Alternate between the two yarn colors again, switching colors before completing the last double crochet in each set of three stitches.
Repeating the Pattern
- Repeat rows 1-4 of the diamond motif until the desired height of the beanie is achieved. For a slouchy look, aim for four complete diamond motifs. For a shallower beanie or child size, finish after fewer motifs.
Closing the Beanie
Stitch Reduction
- For finishing the top of the beanie, reduce the pattern by working two double crochets in each space instead of three, continuing with the established color sequence as needed.

Securing the Top
- After the final row, use a yarn needle to weave through the top stitches in and out of each space to pull the top together. This creates a clean, secure closure.
Optional Additions
- Add a pom-pom at the top of the beanie for decoration (optional).

Final Thoughts
The diamond granny stitch slouchy beanie offers a stylish and customizable finish, perfect for gifts or personal wear. The alternating color changes and ribbed brim provide a visually striking pattern that is simple to create with practice. Finish the project by weaving in loose ends and adjusting the fit to preference.