How to Crochet Granny Emi Sweater for Spring
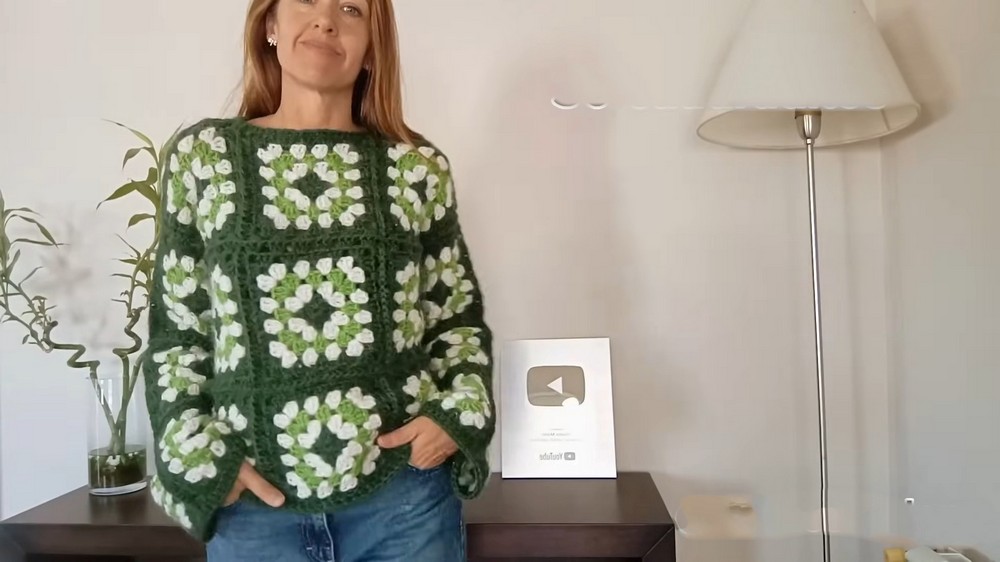
Learn how to crochet a beautiful classic granny Emi sweater using 30 granny squares with a step-by-step tutorial. The tutorial emphasizes a seamless joining technique by crocheting the squares together instead of sewing. It covers materials, granny square construction, joining techniques, and the assembly of the sweater’s front, back, shoulders, and sides, along with finishing touches for the neckline, hem, and sleeves. This sweater is perfect for spring using any three colors!
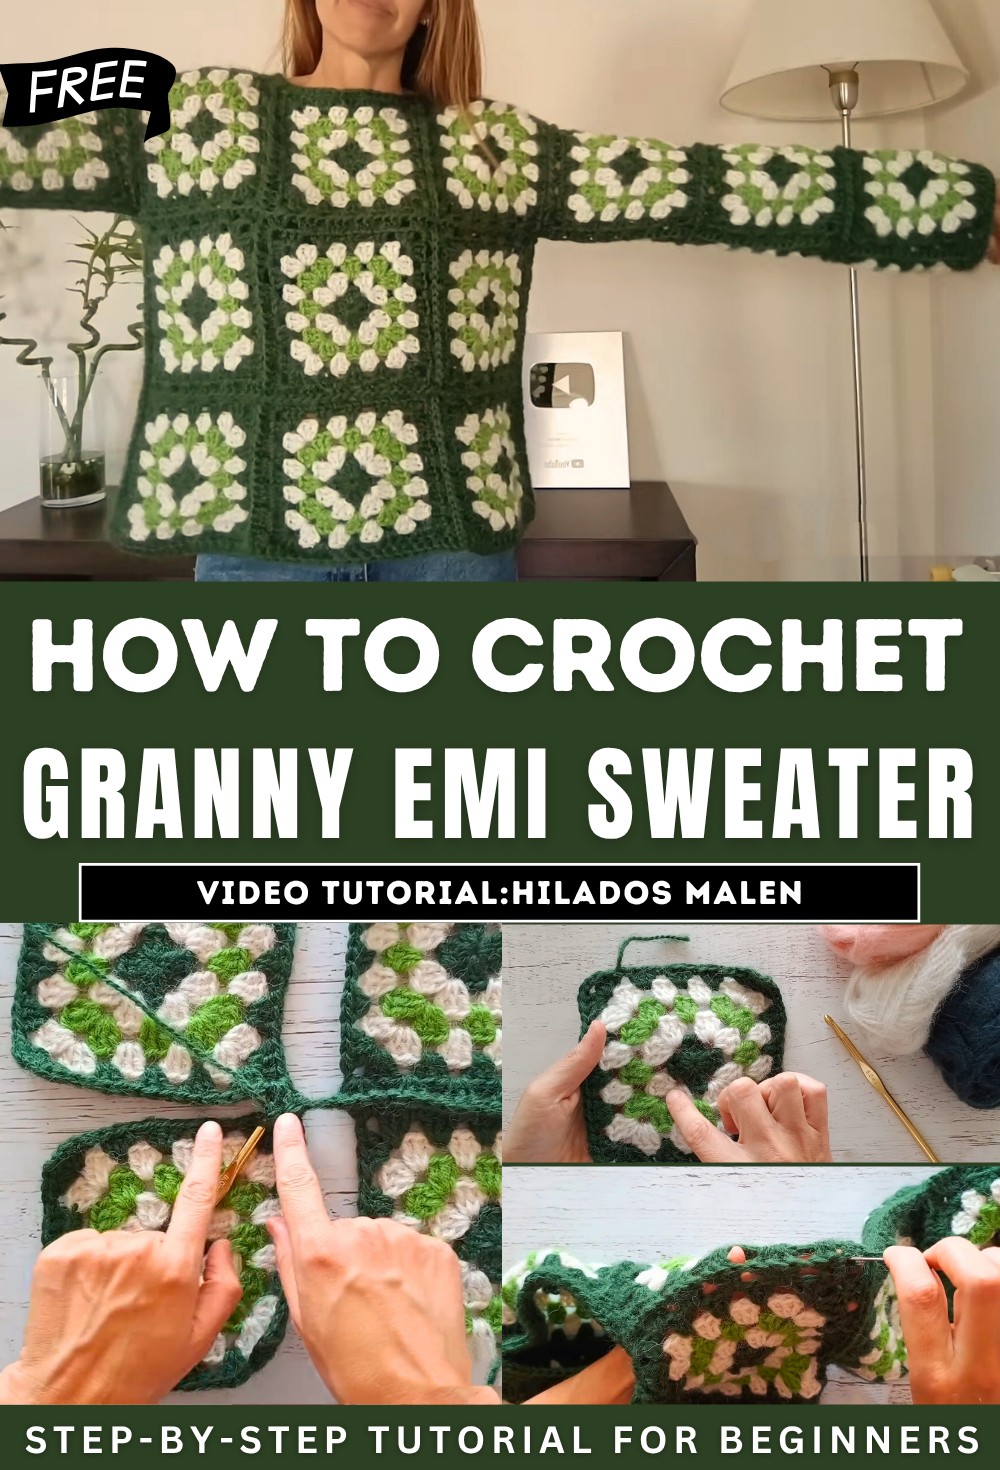
Sweater Emi Granny Tutorial
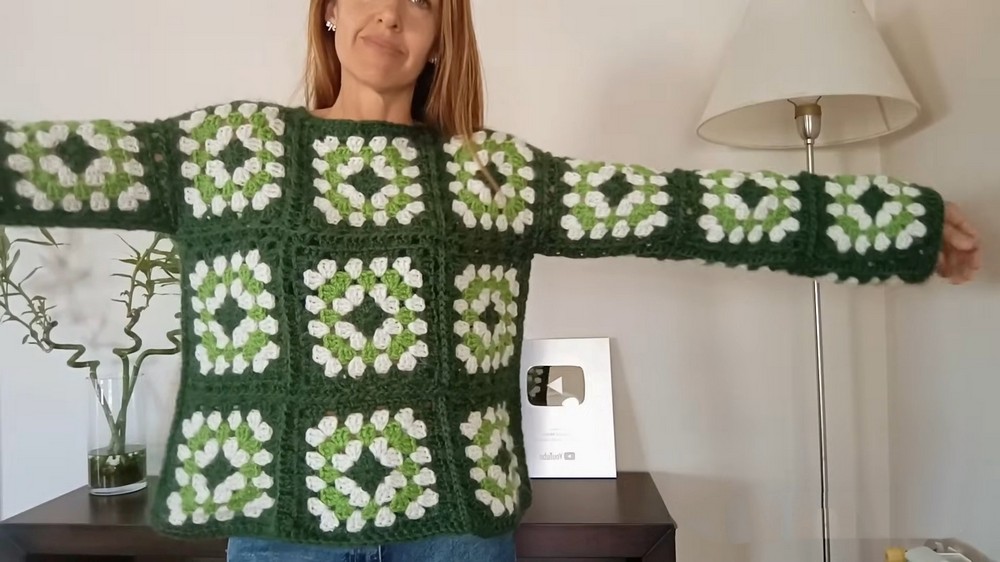
Project Overview: The video introduces a project to crochet a sweater using granny squares. A key feature is the seamless joining technique, where squares are crocheted together rather than sewn, which is highlighted as a benefit.
-
Materials:
-
Yarn: Synthetic angorita yarn, with a thickness of 2mm, is used.
-
Quantity: The tutorial recommends approximately 300g (three skeins) of the main color, two skeins of a secondary color, and one skein for a third color.
-
Hook: An 8mm crochet hook is specified for creating the granny squares.
-
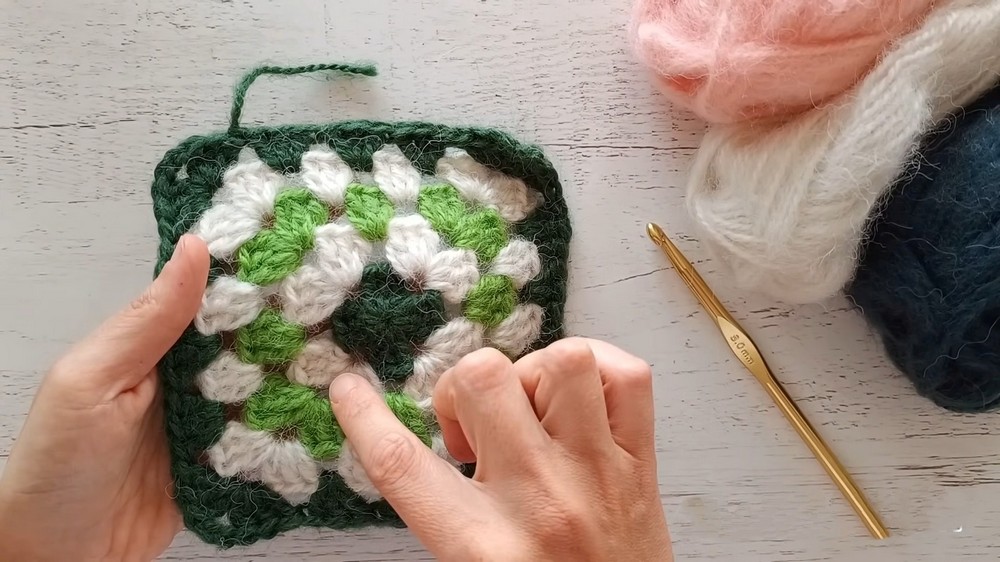
II. Granny Square Construction
-
Starting Point: The tutorial explains how to begin a granny square. This can be done either with a magic ring or an alternative method using a chain.
-
Basic Pattern: The core of the granny square involves forming groups of double crochet stitches. These groups are separated by chains to create the distinct corners and sides of the square. The video demonstrates the repetitive nature of this pattern to build up the square.
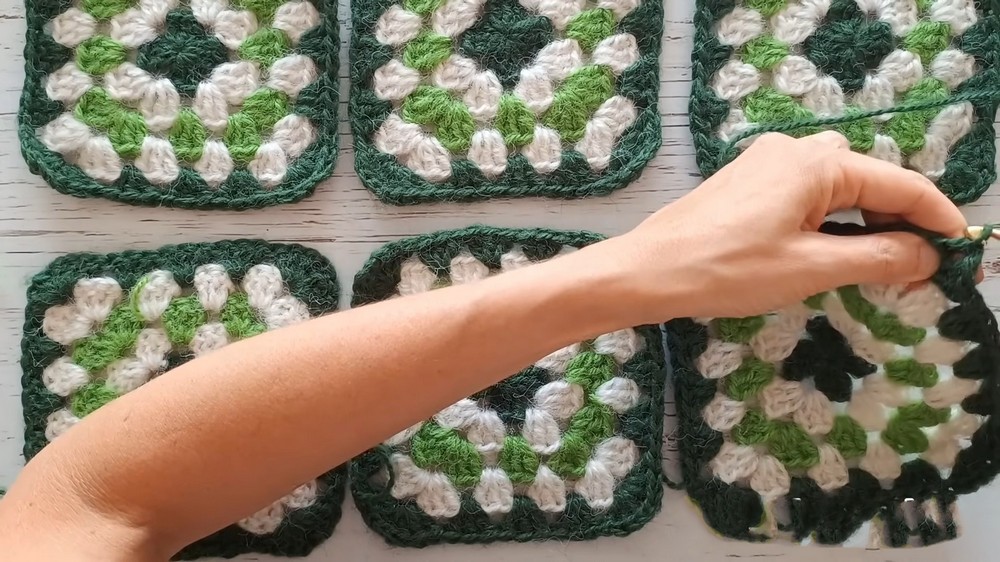
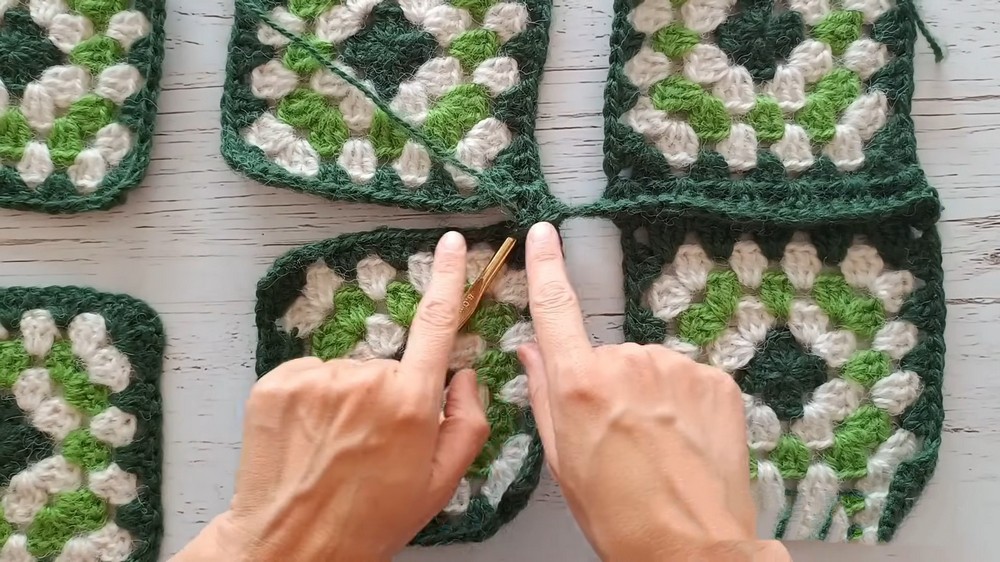
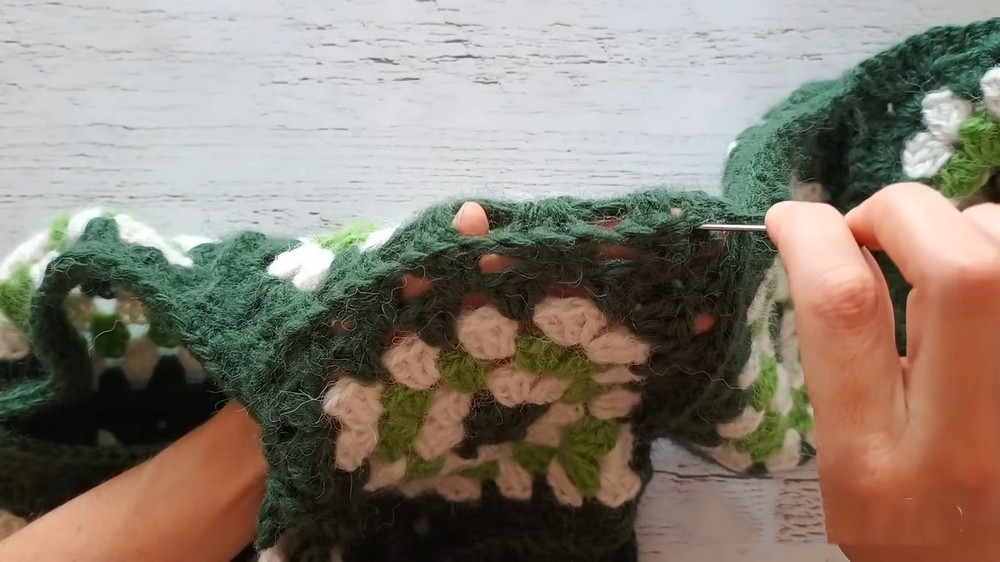
III. Joining Squares Seamlessly
-
Unique Technique: A significant part of this tutorial focuses on the unique joining method. Instead of traditional sewing, two squares are crocheted together simultaneously.
-
Method: This is achieved using half-double crochet stitches. The video illustrates how this technique creates a smooth, seamless look between the joined squares.
-
Impact on Size: It is noted that this crocheted joining method adds a small amount of length to each seam.
IV. Sweater Assembly
-
Panel Preparation:
-
Front and Back Panels: Each of these main panels of the sweater is constructed using a specific number of granny squares arranged in a grid.
-
-
Shoulder Seams: Squares are joined at the shoulders, carefully leaving an appropriate opening for the head.
-
Side Seams: The side seams of the sweater are crocheted, ensuring that openings are left for the sleeves to be attached later.
V. Finishing Touches
-
Neckline: To create a neat finish around the neckline, a slip stitch border is added. This is followed by a row of half-double crochet stitches, specifically worked into the back loop.
-
Bottom Hem: A row of double crochet stitches is worked around the entire bottom edge of the sweater to create a finished hem.
VI. Sleeve Construction and Attachment
-
Sleeve Squares: Each sleeve of the sweater requires a specific number of granny squares.
-
Sleeve Assembly: The video demonstrates how these squares are joined to form a tube, which will become the sleeve.
-
Attaching Sleeves: Instructions are provided on how to securely attach the completed sleeve tubes to the body of the sweater.
-
Cuff Finish: The cuff of each sleeve is finished with a row of double crochet stitches, providing a clean edge.
VII. Conclusion
-
The video concludes by showcasing the fully completed sweater, allowing viewers to see the final result of the detailed crocheting process.
-
Viewers are invited to subscribe for more tutorials, encouraging continued engagement with the creator’s content.