How to Crochet Halloween Fairy Flower Hat For Kids

Learn how to crochet a detailed step-by-step guide on how to crochet an adorable fairy flower nose, perfect for Halloween. Using materials like a 3mm hook, yarn, scissors, wool needles, and markers, the tutorial walks viewers through the process of creating intricate details, including the hat’s tip, body, and petals.
With clear explanations of techniques like single crochet, double crochet, and stitch increases, the project is approachable even for beginners. By following along, viewers can crochet a beautiful, whimsical accessory for children.

Fairy Flower Nose Crochet Tutorial
In the tutorial shared on N’s Rock Crochet channel, viewers are guided through a step-by-step process to crochet a fairy flower nose, a delightful accessory designed for Halloween costumes.
Materials Needed
- Yarn (lens suen 05 recommended)
- Crochet hook (3 mm, hook number 5)
- Scissors
- Woolen needles
- Stitch markers

Step 1: Crochet the Hat Tip
- Begin with a magic circle.
- Crochet rows using single crochet stitches to form the hat tip.
- Gradual increases are used to shape the tip and add curvature.
- Work until row 20 creates a stem-like structure with a natural curve.
Step 2: Create the Flower Calyx
- From row 21 onwards, increases are made to expand the structure and form a flower calyx.
- The rows progressively increase the number of stitches to create petals, which later transition into sepals.
- The calyx provides support for the eventual body of the flower.

Step 3: Crochet the Sepals
- Begin crocheting sepals starting at row 31.
- Six sepals are formed, each spanning a designated number of crochet legs.
- Techniques like chain stitches and single crochet stitches are used to define the edges and shape of each sepal.
- Sepals alternate between increasing and stabilizing rows, ensuring symmetry and balance.

Step 4: Crochet the Body of the Hat
- Return to row 30 to begin working on the flower’s body.
- Each petal base is formed using double crochet stitches and increasing stitches.
- Fake stitches are introduced between rows to create distinctive longitudinal veins along each petal, adding texture.
- Rows continue with alternating increases applied strategically on the left and right sides, ensuring even growth of petals.

Step 5: Form the Hat Brim
- Transition into creating the brim, or the top of the petals.
- Front loop stitches are used in rows to define the edges.
- Staggered reductions at both ends of the rows help shape the petal tips.
- Rows are crocheted until the petals narrow to only three stitch legs, finalizing the shape.

Step 6: Add Inner Petals
- To add dimension, a second row of staggered petals is crocheted inside the brim.
- The inner petals are worked using back loop stitches for a layered effect.
- Contrasting yarn colors can be used for a striking visual.

Step 7: Final Touches
- To add curvature to the petals, a final row of single stitches is crocheted along the edges of the inner petals.
- Three stitches are gathered at the top of each petal tip to create definition.
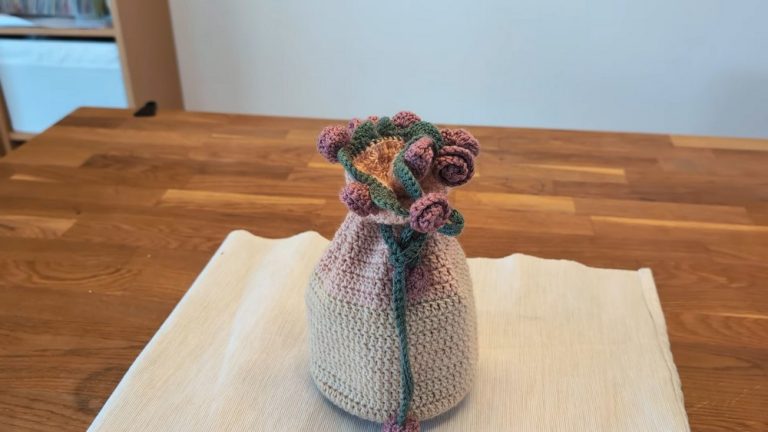
- The finished product features whimsical and dynamic layers resembling fairy flowers.

Conclusion
- The completed project is a fairy flower nose, ideal for Halloween costumes for children.