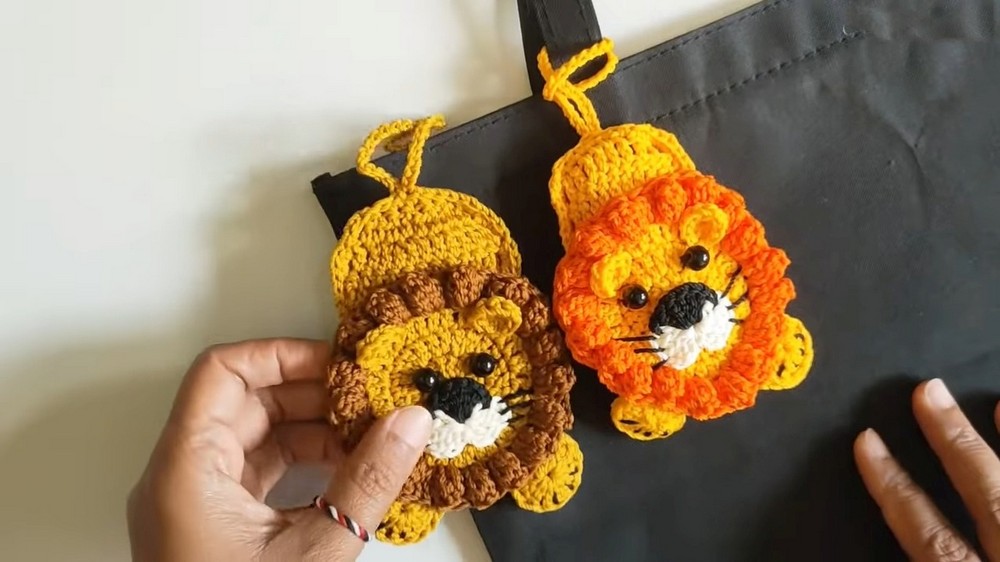
How to Crochet Lion Envelope Keychain for Beginners
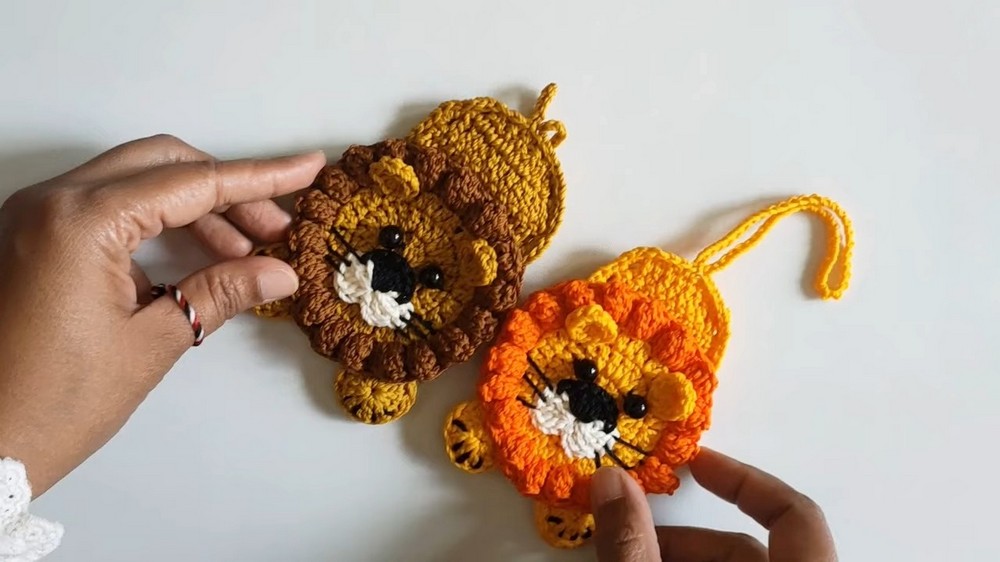
Learn how to crochet a charming lion-shaped crochet envelope that can be used as a bag hanger perfect for beginners. Using Polycherry Onitsuga yarn and a Tulip 4/0 hook, the project involves creating various crochet elements, including the body, legs, ears, nose, and decorative details like the eyes and mustache. Techniques such as magic rings, double crochet increases, and clusters are highlighted. The tutorial provides step-by-step guidance, ensuring every part is carefully crafted and assembled into a cohesive design.

Overview of the Tutorial
- The video is a step-by-step tutorial on creating a lion-shaped knitted envelope that can be used as a bag hanger.
- The creator uses Polycherry Onitsuga yarn and a 4/0 Tulip crochet hook to construct the project.
- The tutorial covers the creation of various parts of the design and includes assembly instructions to form the final product.
Materials and Preparations
- Tools and materials needed:
- Polycherry Onitsuga yarn.
- 4/0 crochet hook from Tulip.
- Additional yarn in different colors.
- Lighter (for thread tidying purposes).
- The project involves basic crochet techniques, including magic rings, double crochet, clusters, and slip stitches.
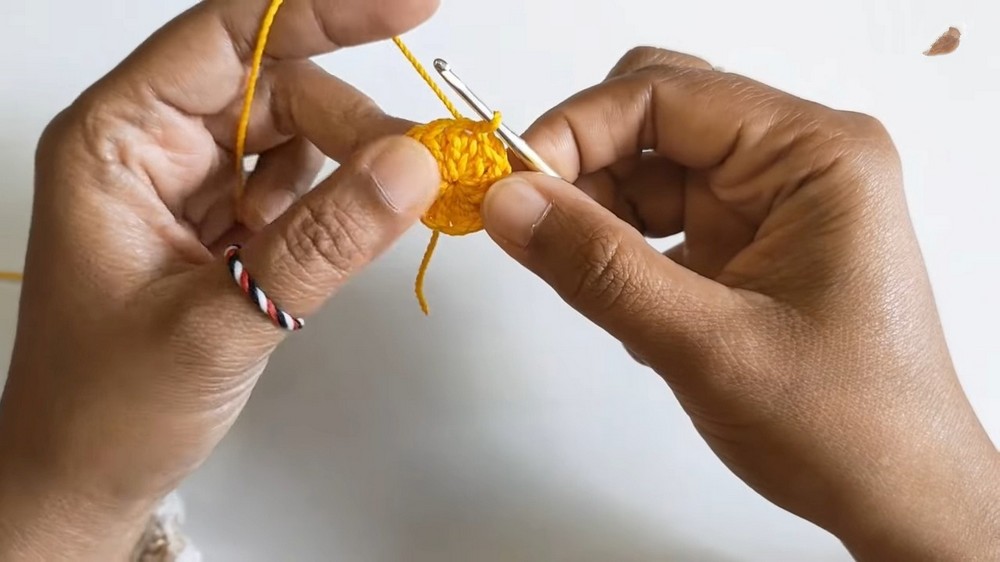
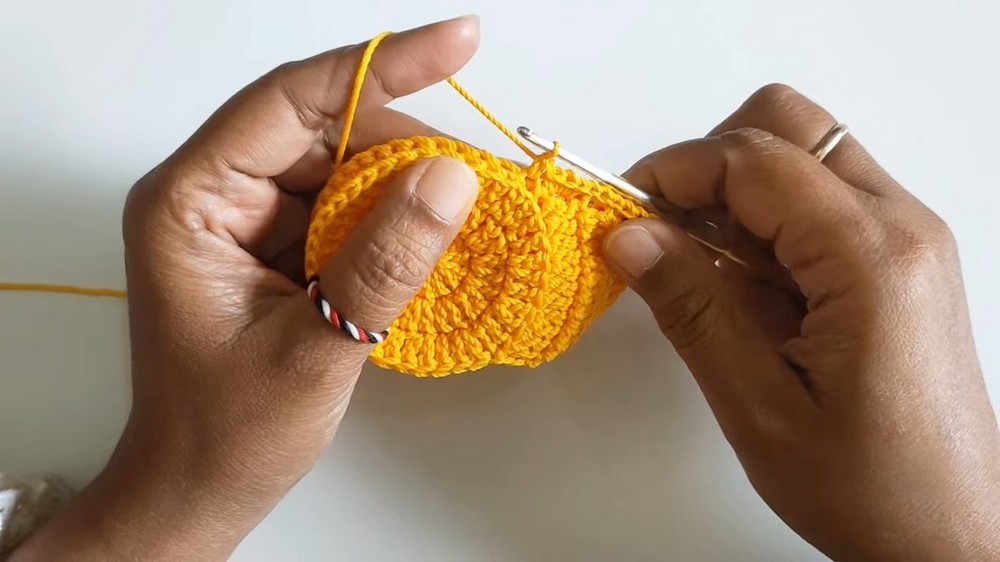
Main Processes – Body of the Lion
-
Starting the Knitting Process:
- Begin by creating a magic ring.
- Use double crochet stitches and increase patterns to expand the project incrementally.
- Focus on shaping the base while ensuring consistency in each row.
-
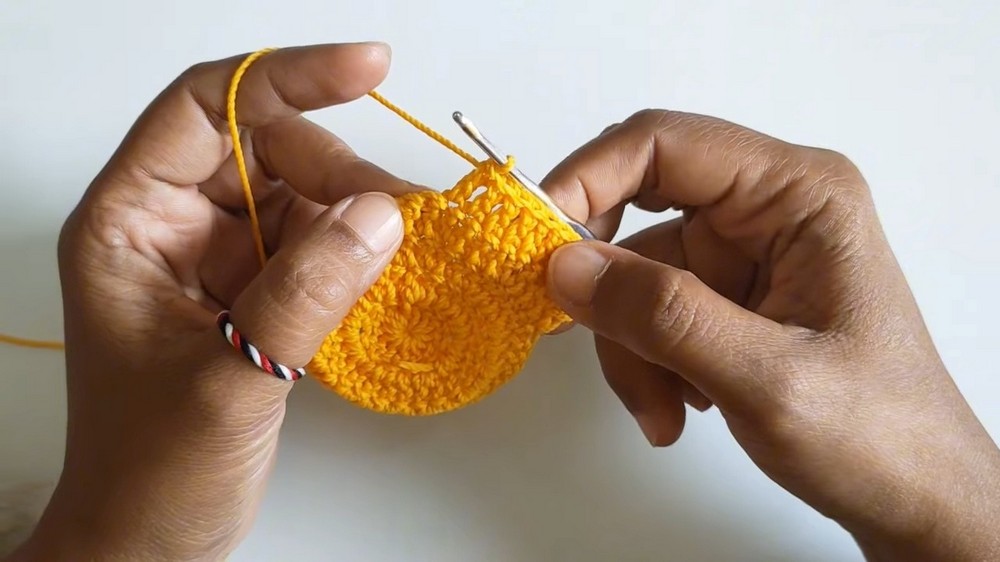
Shaping with Back Loops:
- Some rows require working only in the back loop to create texture and specific shapes.
- The back loop technique is emphasized to highlight details in key parts of the design.
-
Reversing the Work:
- Certain rows involve reversing the work to create depth and definition for the lion’s body.
-
Repeating Patterns:
- A second identical piece for the body is created following the same steps and then combined into one.
Creating Structural and Decorative Details
-
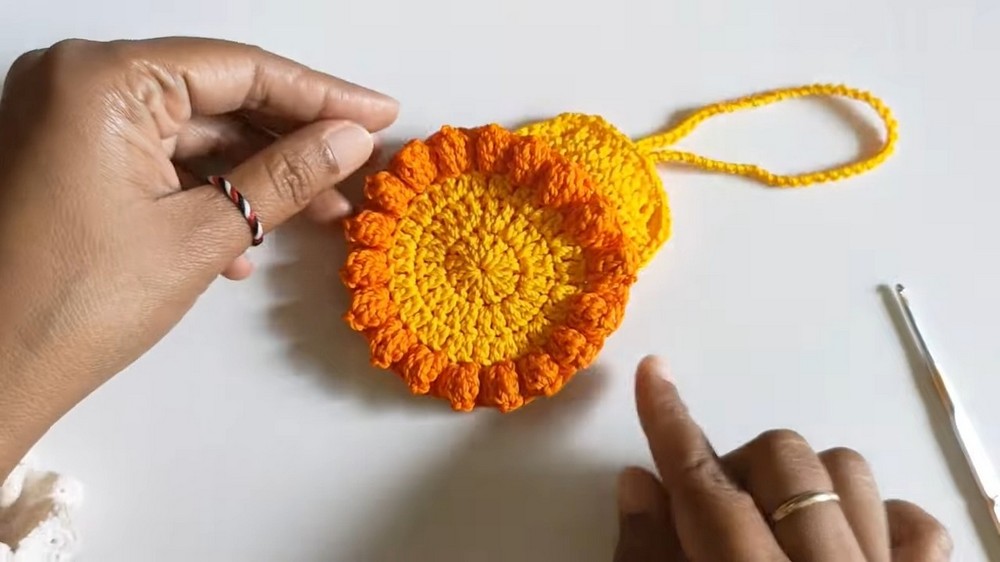
Combining Pieces:
- The two parts of the body are merged using single crochet.
- Sections like the rounded top require additional care, taking the back loop only in some places.
-
Adding Handles:
- A rope-like handle is made using chains and stitched securely to the body.
- The finishing ensures durability and aesthetic appeal.
-
Decorative Edging:
- A decorative motif is added to the body by working on the front loop of a specific row.
- Double crochet clusters and increases form a textured edge.
Lion Features Construction
-
Legs:
- Magic rings are used to shape the legs, structured with double crochet.
- Each leg is individually crocheted, stitched together, and sewn onto the body.
- Black yarn is used to detail toes by creating small stitches on the legs.
-
Ears:
- The ears are created by making a magic ring and adding half double crochet stitches.
- Two identical pieces are crafted and attached to the lion’s head.
-
Nose:
- The nose is shaped with magic rings and multiple rounds of double crochet and chain stitches.
- Black yarn is used to add unique design elements to the nose.
-
Eyes and Mustache:
- The eyes are attached securely, and the mustache is created by sewing thin, black yarn onto the design.
Final Assembly
- All pieces (legs, ears, nose, eyes, and decorative elements) are stitched securely onto the lion’s body.
- Finishing steps include tidying loose threads using a lighter for a clean and polished result.
- The final product is a detailed, lion-shaped crochet envelope that can double as a bag hanger.
Closing Remarks
- The video concludes with the creator expressing gratitude and hope that viewers find the tutorial helpful.
- The design is ideal for both beginners and intermediate crocheters, offering an engaging and creative experience.