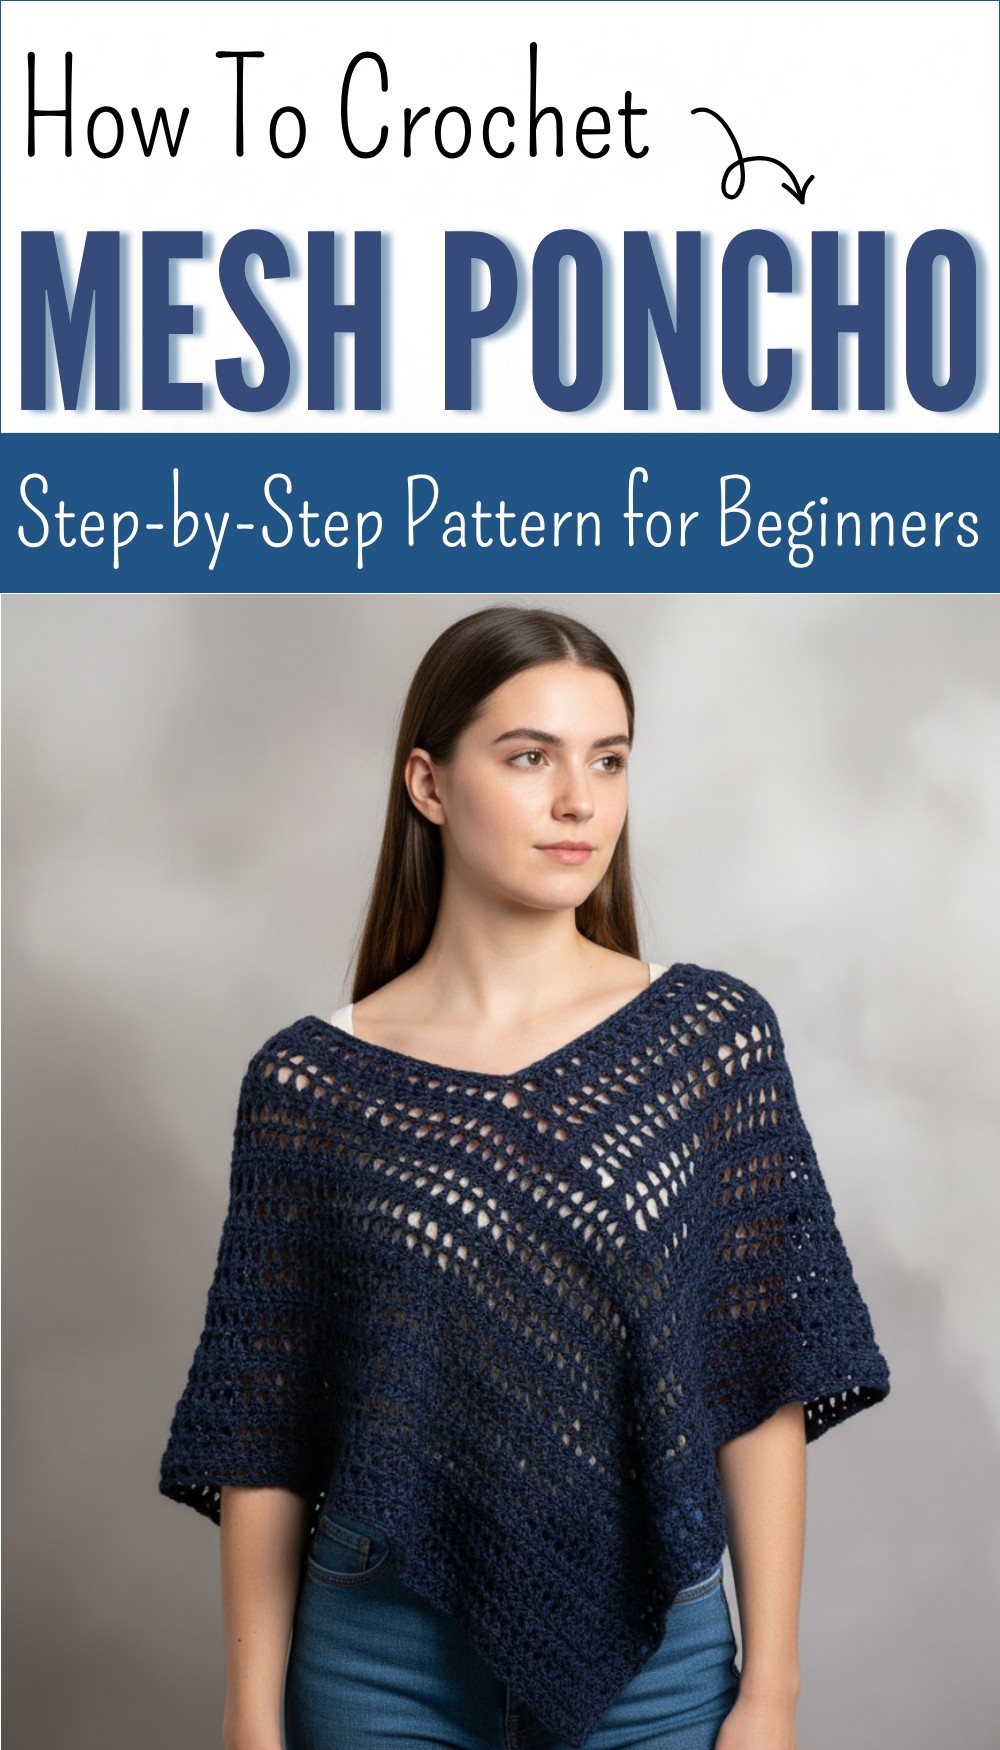
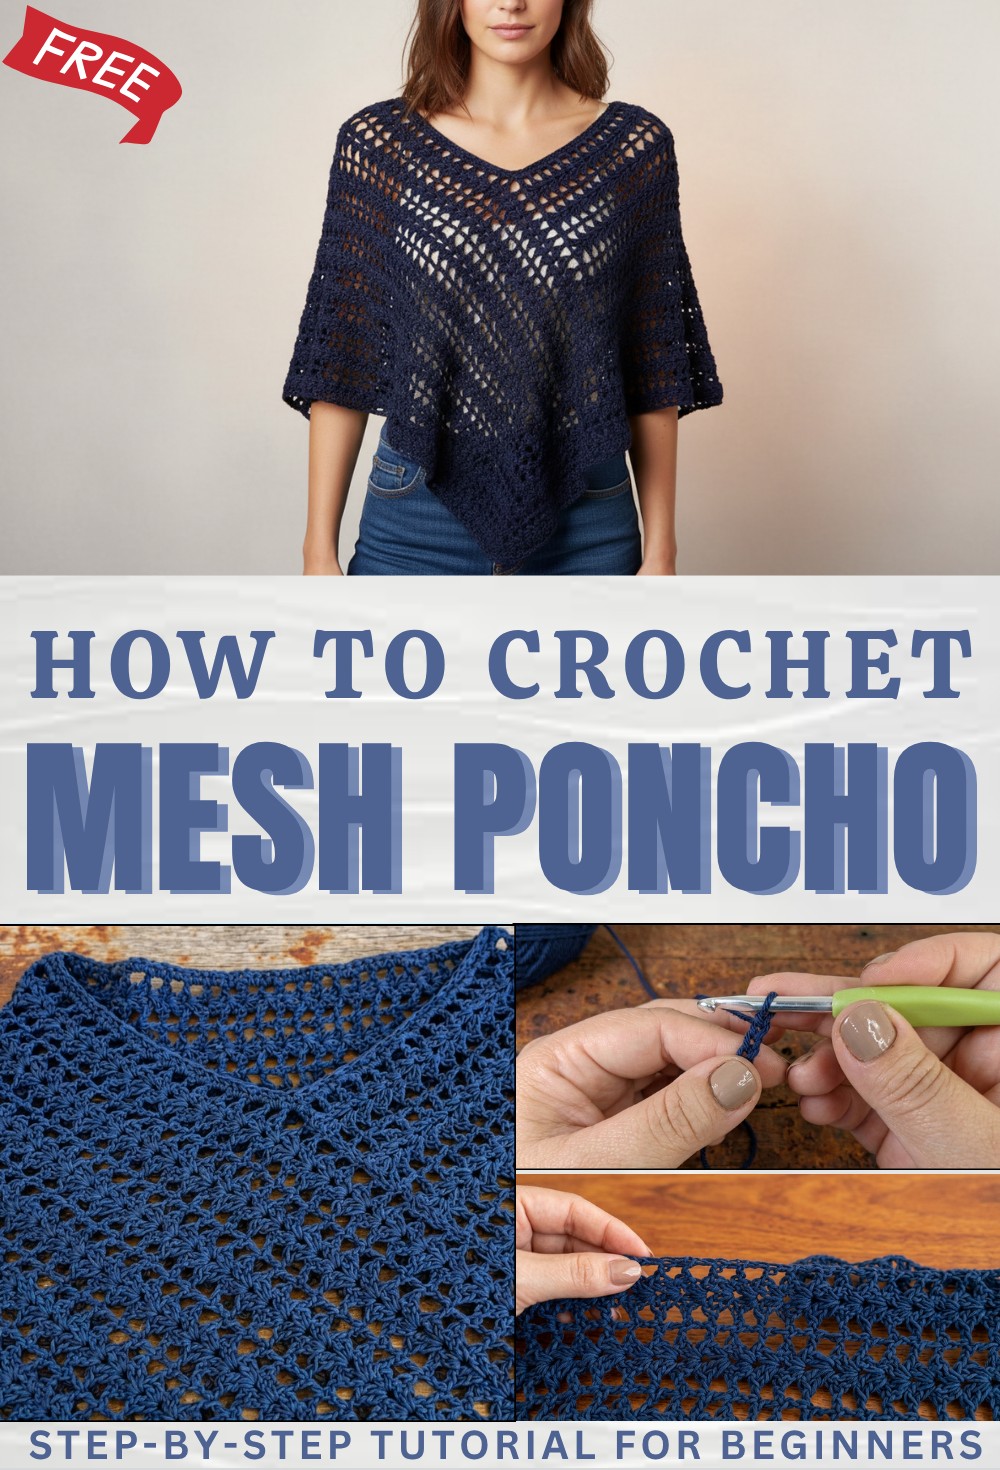
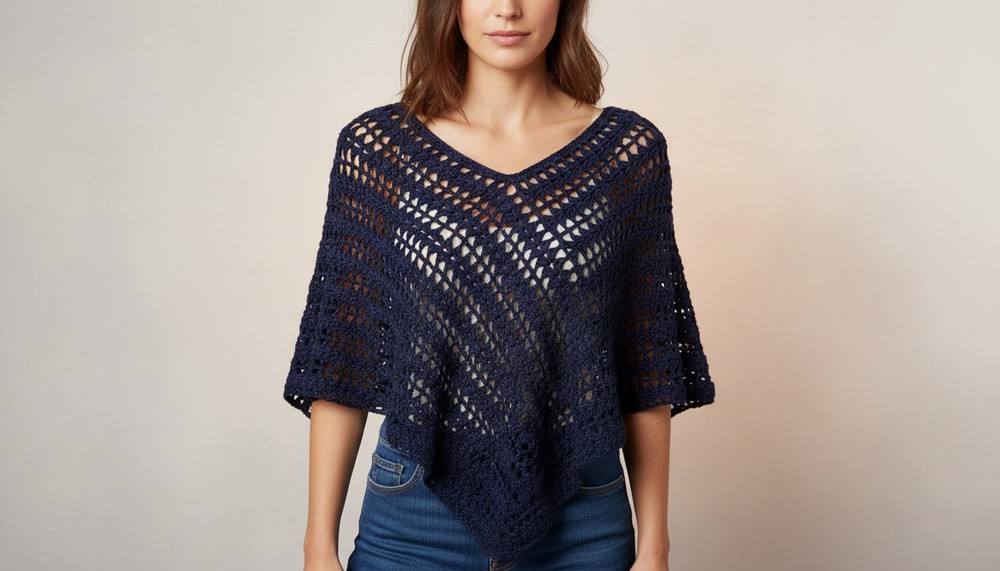
Urban Free Crochet Mesh Poncho Pattern for Any Occasion
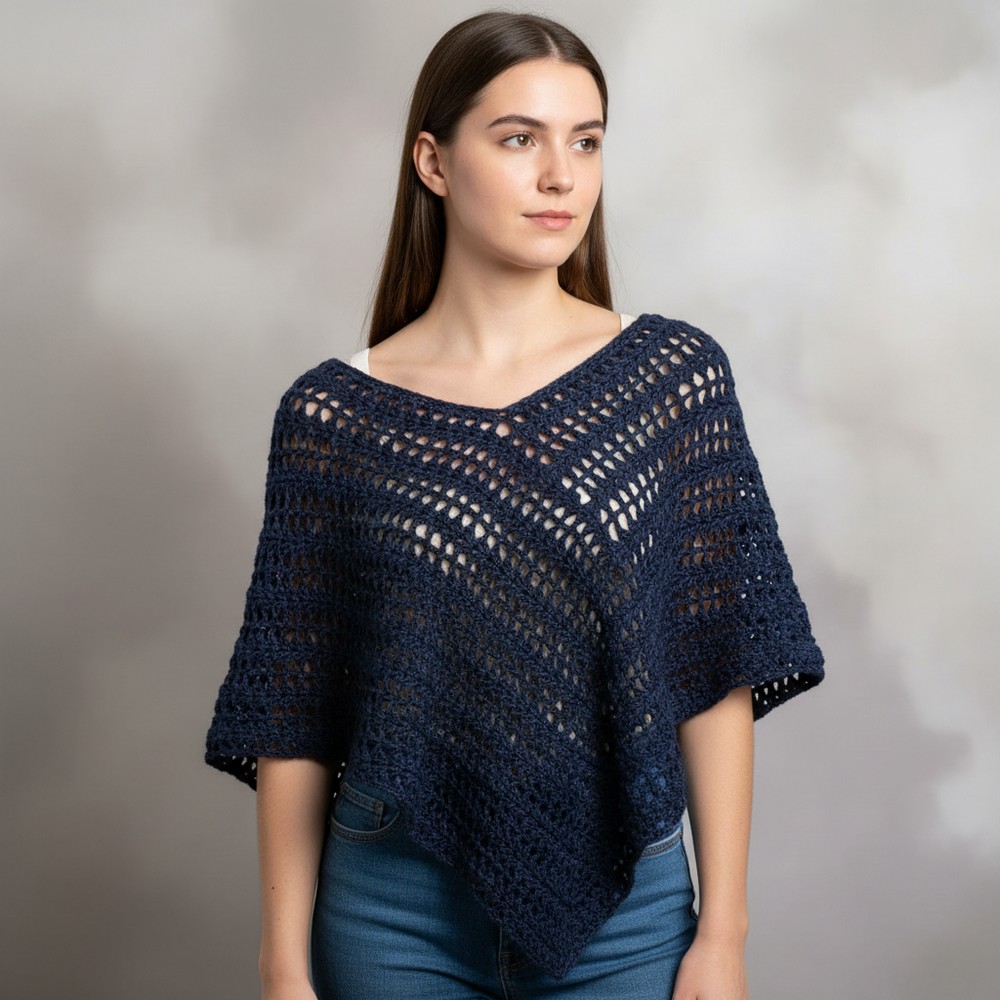
Radiate effortless charm by wearing a free crochet mesh poncho pattern with lightweight comfort and stylish openwork perfect for any outfit.
Softness and style come together to make something really special with this lovely piece. The open mesh design lets cool air flow through, making it perfect for all types of weather. Light and easy to wear, it looks beautiful with both simple and fancy outfits. You will find that the crochet mesh poncho pattern is full of little details that catch the eye, from the gentle drape around your shoulders to the way each strand makes a pretty window of texture.
Comfort Free Crochet Mesh Poncho Pattern for Daily Style
Not only does it bring a touch of elegance to every look, but it is also perfect for keeping just the right amount of warmth when the air gets chilly. This poncho is great for slipping on quickly before a walk outside or when you want to feel cozy at home. With its soft feel and pretty design, it is a smart and stylish choice for anyone to enjoy every day.
Simple Crochet Rectangle Poncho Pattern
Materials
- Yarn: Approximately 270 g cotton yarn, strand thickness about 2 mm (Worsted weight; can substitute other fibers such as acrylic or wool)
- Hook: US H/8 (5 mm) crochet hook
- Notions: Scissors, tape measure, tapestry needle, stitch markers
Key Abbreviations (US Terms)
| Abbreviation | Description |
|---|---|
| ch | chain |
| dc | double crochet |
| hdc | half double crochet |
| st | stitch |
| rep | repeat |
| sp | space |
| sl st | slip stitch |
Special Notes
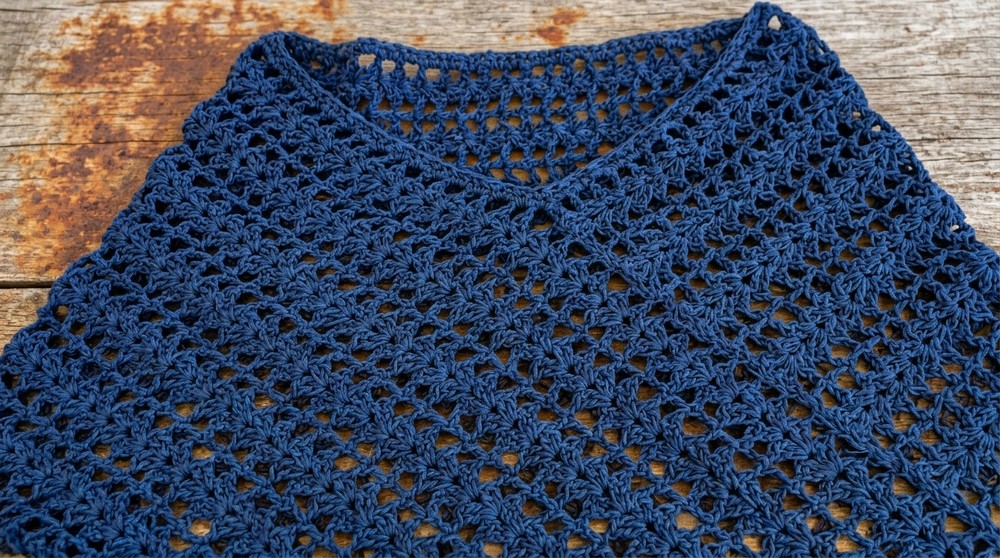
- Poncho is worked as a single large rectangle and seamed to form shape.
- The stitch pattern is a multiple of 8 + 1.
- Primer: Use stitch markers before final seam to check fit, as stitch is highly elastic.
- Neckline is finished with rounds of hdc, with decreases for shape.
Measurements (Sample: Size XL)
- Neckline: 32 cm (12.5”)
- Side width: 45 cm (17.75”)
- Poncho length (shoulder-to-point): 72 cm (28.25”)
- Rectangle to crochet: 40 cm x 135 cm (15.75” x 53”)
- Foundation chains: For 40 cm width, 73 ch (calculate for your size using multiple of 8 + 1)
Sizing tip:
Measure from the base of your neck over the shoulder to desired length for poncho width. Measure desired length from neckline down for rectangle height.
Instructions
1. Rectangle Base
1.1. Foundation Chain
- Make a starting knot.
- Ch 73 (or your calculated width; must be multiple of 8 + 1).
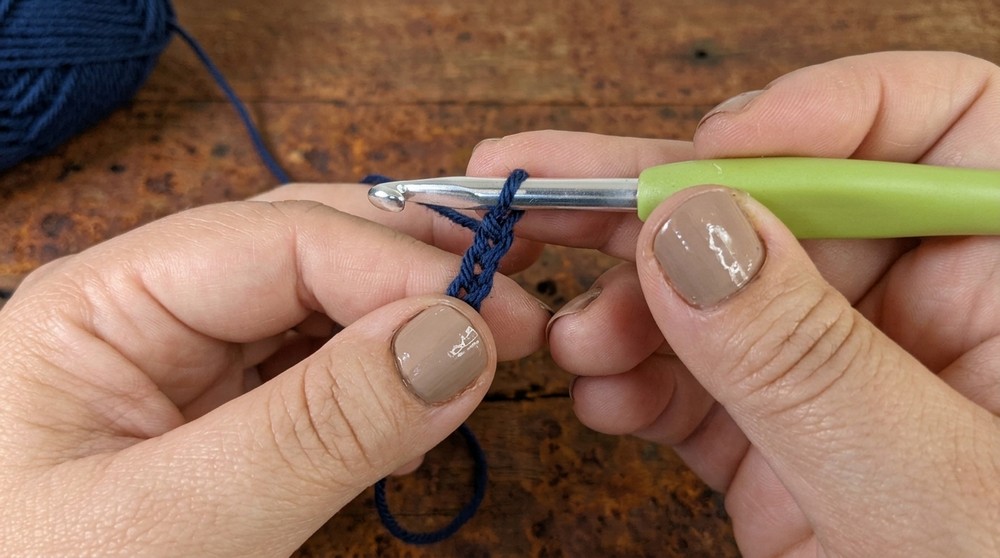
1.2. Row 1: Pattern Setup
- Ch 3 (counts as first dc, only for this row).
- Working in the back bump (“third strand” or “belly”) of chains for a neat edge:
- Dc into 9th chain from hook.
- Dc again in same chain.
- Ch 1.
- Dc twice more into same chain.
- This forms your first “fan”: (2 dc, ch 1, 2 dc) in same ch.
- Ch 1 (separation).
- Skip next 3 ch, dc in 4th ch (back bump).
- Ch 1 (separation).
- Skip next 3 ch, in 4th ch work fan: [2 dc, ch 1, 2 dc] in same ch.
- Ch 1, skip 3 ch, dc in 4th ch.
- Continue across, alternating fan and dc, separated by ch-1, ending with a dc in last ch.
- You should have 9 “fans” (for 73 ch).
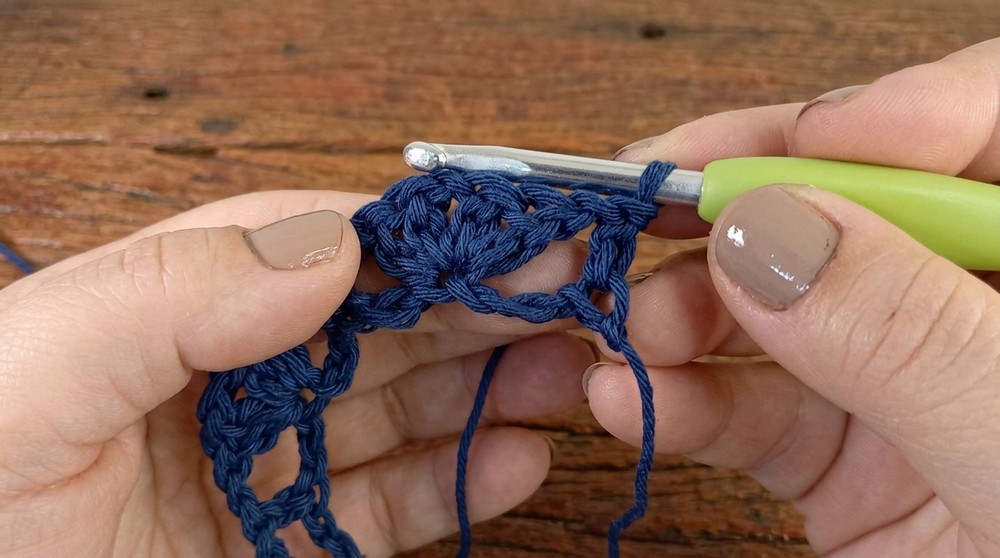
1.3. Row 2: Pattern Row
- Turn.
- Note: Do NOT use turning chains (ch 3); instead, gently raise yarn to hdc height and make your first hdc for a neater edge (see tip).
- Make 2 hdc one on top of the other at row start (no turning chains).
- Ch 1.
- In the ch-1 space at the center of a fan, work fan: [2 dc, ch 1, 2 dc].
- Ch 1.
- Dc in the next dc.
- Continue: Ch 1, fan in fan, ch 1, dc in dc, to end.
- At row end after your final fan: ch 1, dc in the next st (end of row).
1.4. Repeat Pattern Rows
- Turn and repeat Row 2 for each new row.
- Always start row with 2 hdc (not ch 3), then ch 1, then continue [fan, ch 1, dc] pattern.
- Continue until rectangle reaches desired length (for sample: 135 cm; measure in cm/inches as you crochet).
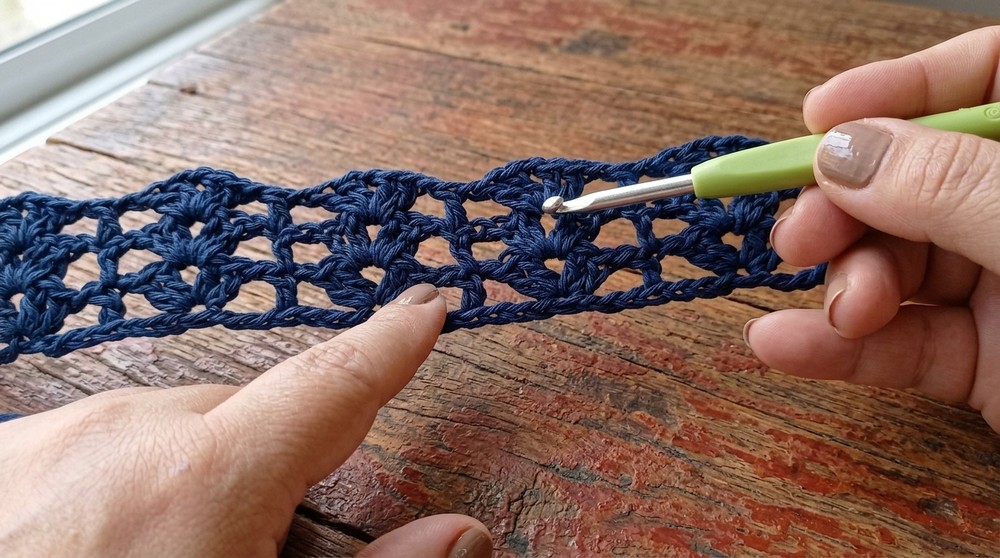
2. Assembly – Folding & Seam
- Fasten off after final row.
- Use tapestry needle and matching yarn to stitch last row to one side of the beginning foundation row, forming a peak (point) at the front; back will be straight.
- Seaming tip:
- Place panels side to side, and align starting chain with last row.
- Use a zig-zag whip stitch: insert needle alternately through chain and row stitches, working along the edge.
- Adjust fabric gently as you go to prevent stretching or wrinkling.
- Finish seam with a small knot and weave in end.

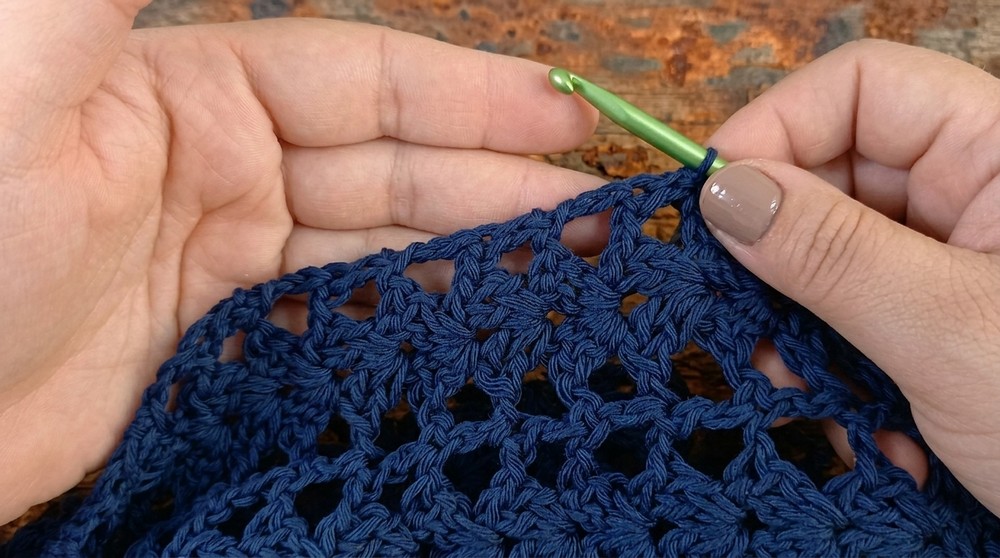
3. Neckline Edge
3.1. Round 1: hdc Edge
- Attach yarn at center of back neckline for a neat finish.
- Work loosely: In each gap (side of dc row), 2 hdc.
- In joining seam at front point: work 1 hdc on each side of seam, then yarn over and pull through both, finishing as a decrease (hdc2tog).
- Continue around neckline.
- At end of round, join to first hdc with sl st.
3.2. Round 2: hdc Edge with Decreases
- Ch 1 (does not count as stitch).
- Begin with: hdc in first st, then make decrease (hdc2tog) across next two sts.
- Alternate: hdc in one st, hdc2tog in next two sts.
- In vertex (front point): work decrease (hdc2tog) as before.
- Complete round and join with sl st.
- Fasten off and weave in all ends.
4. Finishing
- Hide all loose yarn ends with tapestry needle.
- Gently block your poncho to help stitches settle and seams lay flat (especially recommended for cotton).
Corrections & Tips
- Pattern Correction:
- For best edge, never use ch-3 turning chains after first row. Use gently raised yarn and hdc for tidy borders.
- The pattern is fan, ch 1, dc, ch 1, fan, and so on—be sure to keep the sequence consistent throughout.
- Fit Tip:
- Check size and fit by folding and using stitch markers before seaming. The stitch pattern is highly elastic; don’t add extra rows until after checking the fit.
- If using a different yarn or hook, adjust foundation chain as needed for desired width (must be multiple of 8 + 1).
- Neckline Tip:
- Do not skip the neckline finish! The poncho will stretch excessively without it. Decreases add structure and prevent bagging.
Conclusion
This simple rectangle poncho is an elegant, customizable project requiring only basic stitches and minimal shaping. The highly elastic stitch pattern gives wonderful drape and can easily be personalized for any season or size. The seamless neckline finish ensures comfortable wear and a professional look. Once complete, enjoy your handmade poncho and show off your beautiful stitches!