How to Crochet No-Sew Crochet Frog (Tutorial for Beginners)
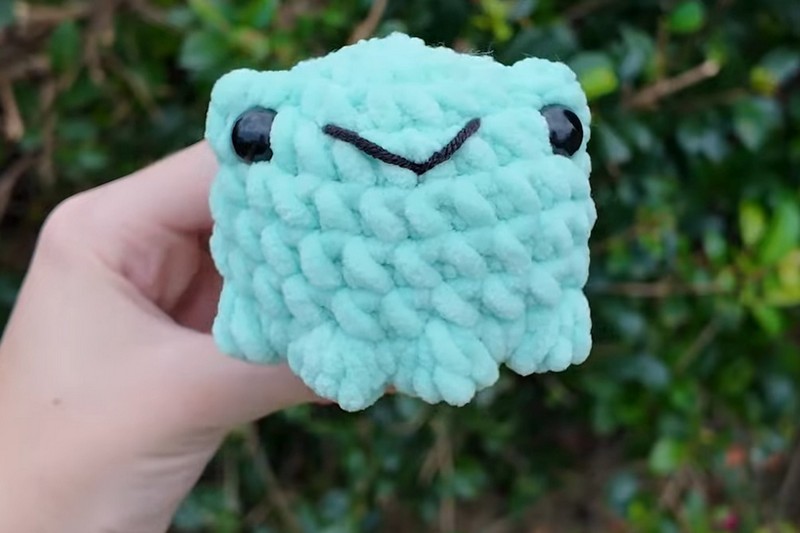
Learn how to crochet a super cute frog plushie under 20 minutes with a step-by-step tutorial for beginners. You will also learn an optional white tummy, which involves color changes in the yarn.
Therefore, both beginners and experts can crochet it since the pattern for both variations is available. There will be a complete step-by-step tutorial at the end of this post that teaches this in a fun way. Let’s get started!
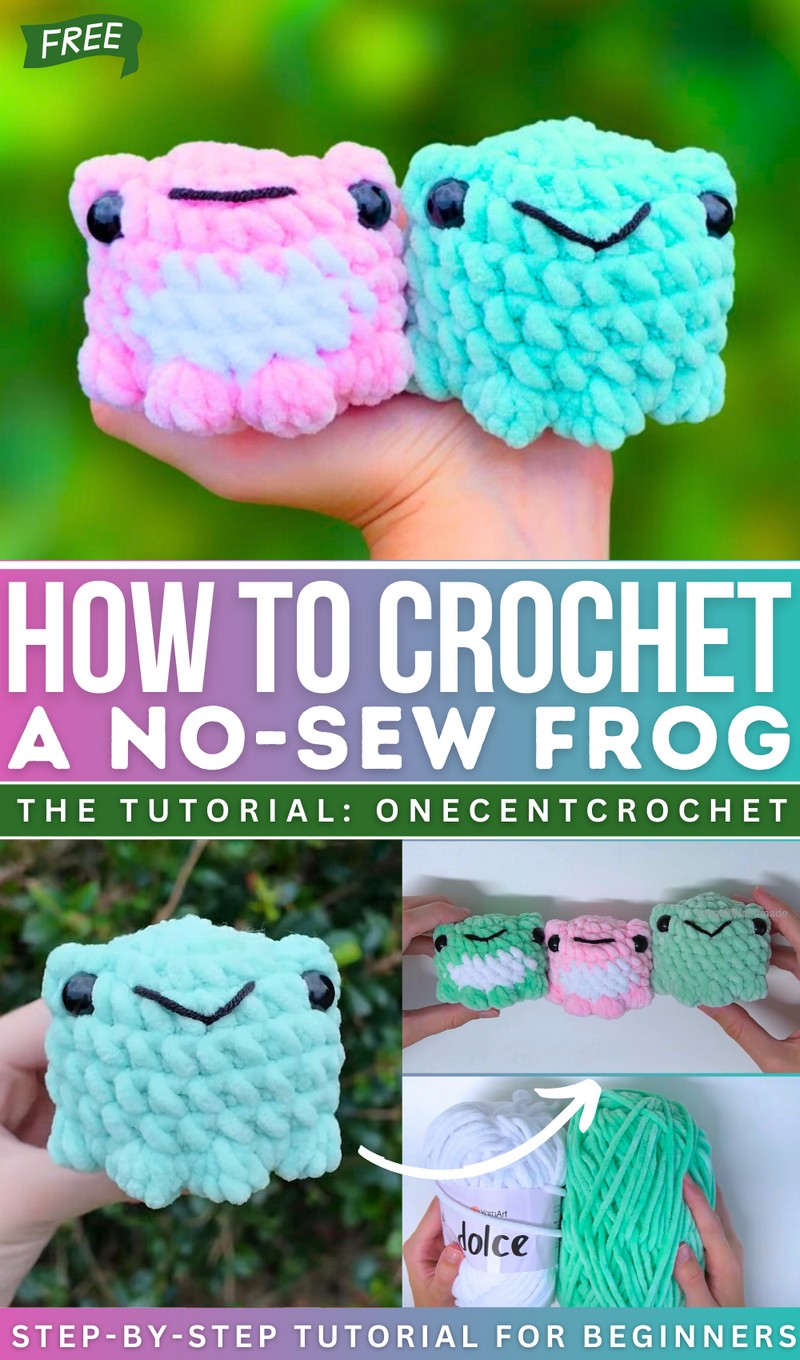
This tutorial guides you in making an adorable crochet frog plushie with an optional white tummy for added detail. The design includes features like bubble stitches for texture and clear instructions for assembling the parts, making it both functional and fun for beginners and hobbyists alike..
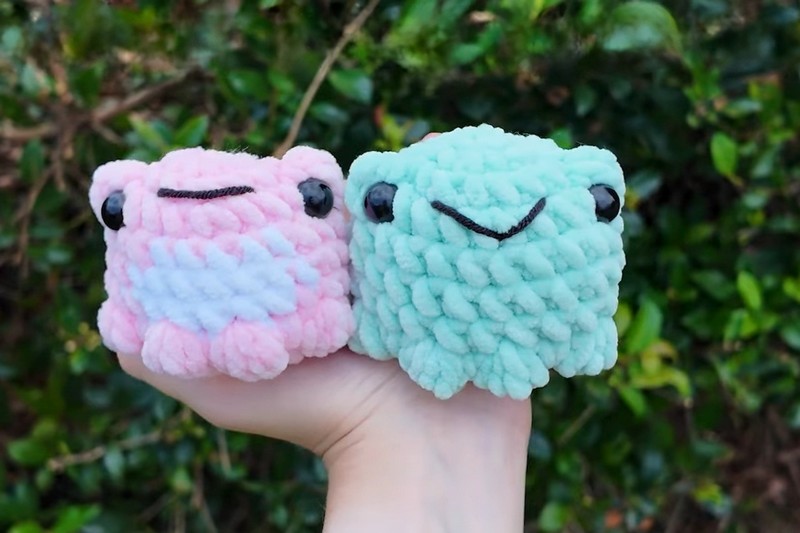
Create a pair of cute crochet frogs using soft pastel shades like pink and sea green for added charm. You can designate one as the “gentle blush frog” and the other as the “calm ocean frog” to give them a fun and unique personality. Add a small embroidered heart on each frog’s tummy for a personalized touch, making them an endearing handmade gift perfect for a loved one, a baby shower, or even an anniversary. Wrap them in a small decorative gift box or a sheer fabric pouch with a handwritten tag to add special meaning.
Crochet No-Sew Frog Plushie Pattern
Materials List
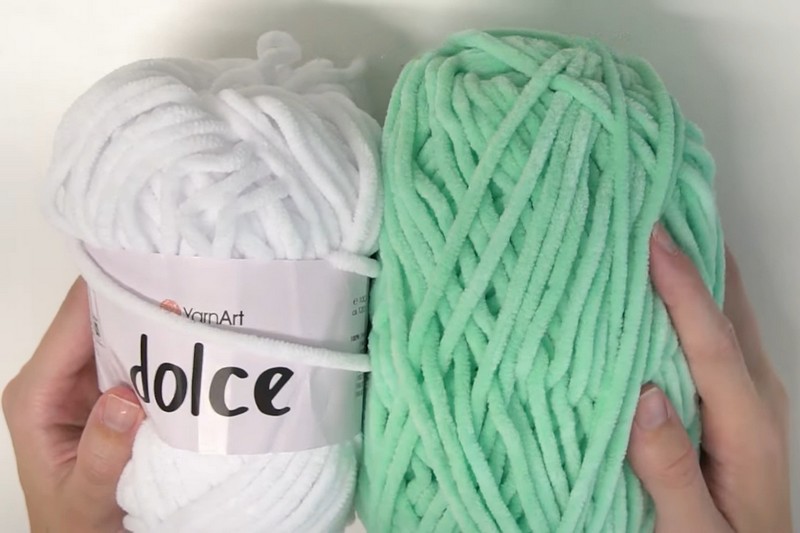
- Yarn: Weight 5 (bulky) yarn in your main color (green, aqua, etc.)
- White (optional, for tummy contrast)
- Black (thin, for mouth embroidery)
- Hook: 5.0 mm (H-8) crochet hook (or size to obtain plush, closed fabric)
- Stuffing: Polyester fiberfill or similar
- 12 mm Safety eyes (or black embroidery thread)
- Scissors
- Yarn needle
- Stitch marker (scrap yarn or locking marker)
Key Abbreviations (US Terms)
| Abbreviation | Meaning |
|---|---|
| MR | Magic ring |
| ch | Chain |
| sc | Single crochet |
| inc | Increase (2 sc in same stitch) |
| dec | Decrease (sc2tog—single crochet 2 together) |
| st(s) | Stitch(es) |
| sl st | Slip stitch |
| bobble | 4-hdc bobble stitch (for eyes/feet) |
Special Notes
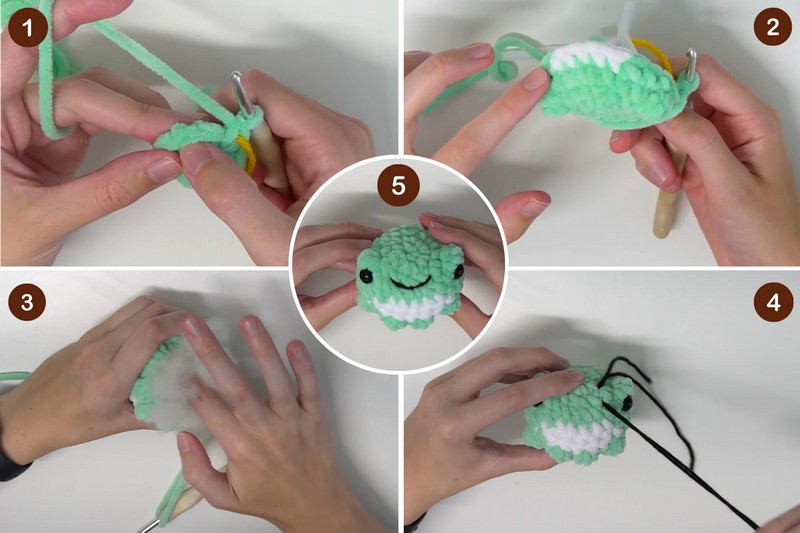
- This is a no-sew pattern (all details are built into the body except for eye placement and face embroidery).
- Worked in spiral rounds (do not join rounds unless stated).
- Stuff the plush firmly but not too tight, especially before decreasing for closure.
- For best results, use a smaller hook than recommended for the yarn for a dense fabric.
Stitch Guide
Bobble Stitch (for Frog Eyes/Feet):
- (Yarn over, insert hook into st, yarn over, pull up a loop, yarn over, pull through 2 loops) x 4, yarn over and pull through all 5 loops on hook.
Pattern Instructions
Body
With main color:
- Create a magic ring (MR), ch 2 if preferred method.
- Rnd 1: 6 sc in MR (6)
- Rnd 2: [inc in each st] x6 (12)
- Rnd 3: [sc, inc] x6 (18)
Rnd 4 (Eye Bobble Round):
- sc in next st
- bobble in next st,
- inc in next st
- (sc in next 2 sts, inc in next st) x2
- bobble in next st
- sc in next st
- inc in next st
- (sc in next 2 sts, inc in next st) x2
- (Total 24 sts, with bobbles for eyes)
Optional Color Change Section (for White Tummy)
- If NOT making a white tummy:
- Rnd 5: sc in each st around (24)
- If making white tummy:
- sc 5 in primary color, on 5th sc switch to white;
- sc 5 in white, on 5th sc switch to main color;
- sc last 14 in main color (24)
Rnd 6:
- If NOT changing color:
- sc in each st around (24)
- If WITH white tummy:
- sc 4 main color, sc 7 white, sc 13 main color (24)
Rnd 7:
- Not changing color: sc around.
- With color change: sc 5 main, sc 5 white, sc 14 main (24)
Cut and fasten off white yarn.
Eye Placement
- Insert safety eyes beside or into bobble stitches, between Rounds 4 and 5 (centered, just beside the bobbles).
Feet & Tummy Decreases (Rnd 8)
- sc in next st
- dec over next 2 sts
- bobble in next st (front foot)
- dec over next 2 sts
- bobble in next st (middle left foot)
- sc in next st
- bobble in next st (middle right foot)
- dec over next 2 sts
- bobble in next st (back foot)
- sc in next 2 sts
- dec, sc, dec, sc, dec (repeat the sequence, ensuring 18 sts total)
Decreasing & Shaping
- Rnd 9: [sc, dec] x6 (12)
- Stuff frog firmly (round, not flat!)
- Rnd 10: [dec] x6 (6)
- Fasten off with a long tail, weave through front loops only of remaining sts and pull tight to close.
Face Embroidery (Optional)
- Use black embroidery thread or thin black yarn.
- Insert needle between rounds 3 and 4, stitch a simple “V” smile, or straight line.
- Secure and hide all ends inside frog.
Pattern Correction
- If stitch counts are off, ensure you have 24 sts after the bobble round, and 18 after the feet round.
- Bobble stitches must be “popped” outward after completion.
- For even distribution, bobbles must be spaced per written pattern.
Tips
- Tummy: Color changes are made on the final yarn-over of the last main sc before the color switch.
- Tighter Fabric: Use hook smaller than typical for your yarn.
- No Safety Eyes: Use black yarn to sew/embroider eyes for <3 safety or young children.
- No bobble pop?: Use a blunt object to push bobble out from inside.
Conclusion
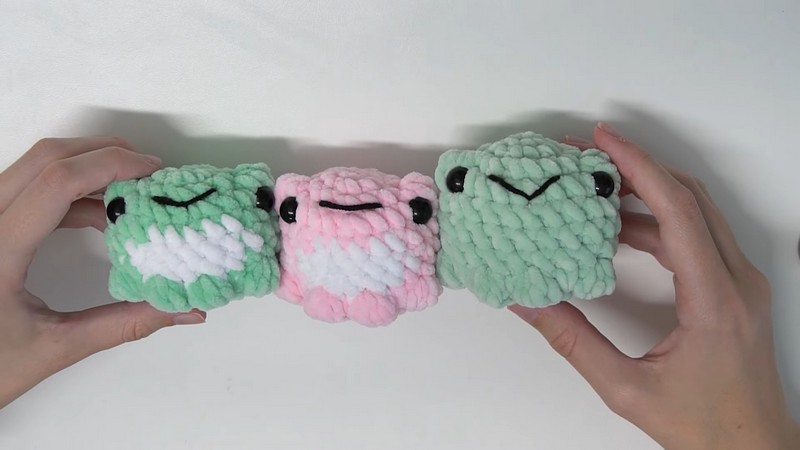
You’ve finished your squishy, no-sew frog plushie—a perfect friend for gifting, decorating, or hugging! Adjust colors and sizing as desired. Enjoy the versatility and ease of this no-sew technique.