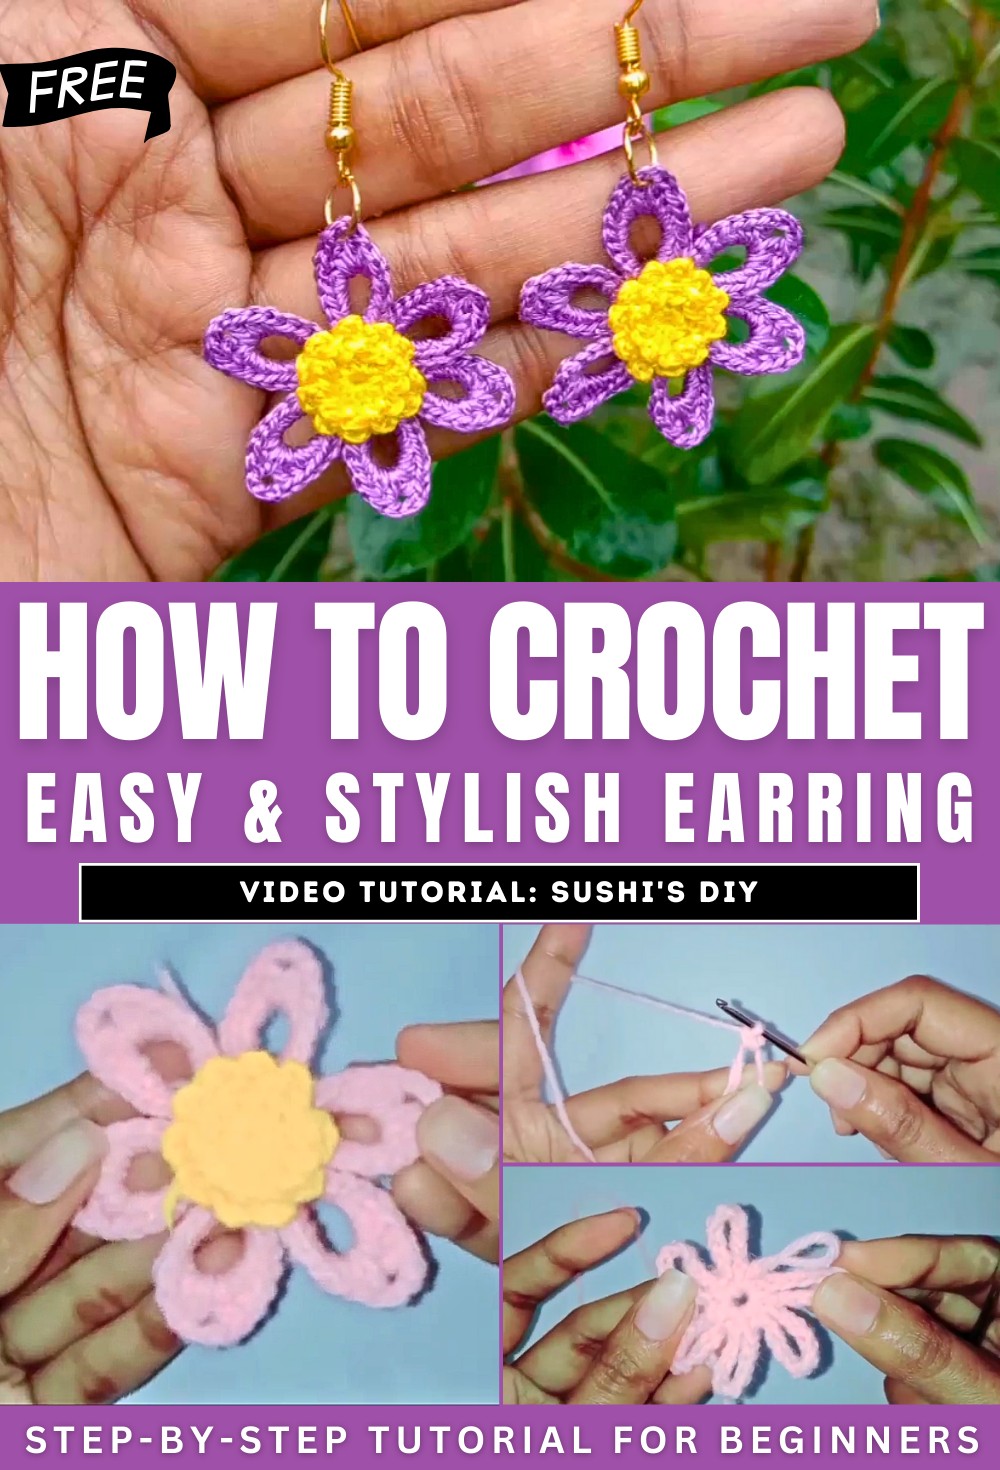
How to Crochet Pair of Flower Earrings for Beginners

Learn how to crochet a pair of easy flower earrings for spring that can be adjusted to any size with a tutorial for beginners and experts. It begins by listing the necessary materials, which include Anchor thread, a crochet hook, earring hooks, a jump ring, scissors, pliers, and glue. The tutorial then guides viewers through creating the first layer, a flower shape, by starting with a magic ring and then forming the petals.
It then moves on to the second layer, explaining how to create it using half-double crochet stitches and then adding subsequent rows. Finally, the video demonstrates how to assemble the two crocheted layers and attach them to the earring hooks using a jump ring to complete the earrings. So, follow through with us for the complete tutorial.
Crochet Earring Tutorial
This tutorial provides a detailed guide on how to crochet beautiful and easy earrings. The presenter takes you through every step of the process, from creating a floral base to assembling the earrings into a complete project. Whether you’re a beginner or have some crochet experience, this tutorial is simple and easy to follow. Below is a structured summary:
Introduction
The video begins with an introduction to the project: crafting elegant crochet earrings. The presenter introduces the materials needed for this tutorial and also highlights that larger yarn and crochet hooks are used for demonstration purposes.
Materials Needed:
- Anchor Thread No. 8
- 0.5 mm crochet hook
- Earring hook
- Jump rings
- Scissors
- Pliers
- Glue
The presenter explains that the pattern is straightforward and fun to make.

Step 1: Creating the Flower Base
The first layer of the earring design starts with creating a floral base.
Steps to Create the Flower Base:
- Begin with a magic ring to form the foundation.
- Create multiple chain spaces within the ring to make the petals.
- Continue this pattern until all the petals are formed.
- Close the magic ring and secure the layer with a slip stitch to complete the base.

At this stage, the first layer of the flower is completed, and it has a symmetrical petal structure.
Step 2: Adding Petals
The next step is shaping the petals in the chain spaces made in the first layer.
Steps to Make Petals:
- For each petal, stitches are worked into the chain spaces to create a fuller and more dimensional appearance.
- The presenter demonstrates how to work both sides of each chain space, ensuring uniformity in all petals.
- After finishing each petal, secure the stitches with slip stitches.

Once the petals are complete, the floral layer is ready. This forms the decorative element of the earrings.
Step 3: Creating the Second Layer
The earring design includes a second layer to add volume and texture.
Steps to Make the Second Layer:
- Start with another magic ring and create a circular base.
- Work around this base to create additional designs, focusing on the front loops in the second row.
- For the next layer, work into the back loops of the stitches to create a unique three-dimensional effect.
- Repeat the pattern across the row and finish by securing the stitches, fastening off, and weaving in the thread ends.

The result is a textured, multi-layered floral component that forms an integral part of the earrings.
Step 4: Assembling the Earrings
The final step is assembling and attaching the layers to create wearable earrings.
- Align and stack the two floral layers carefully.
- Attach the earring hook to the design using a jump ring and pliers.
- Apply glue if needed to ensure the earring stays secure.

Conclusion
The completed earrings are floral, elegant, and visually appealing. The presenter concludes the tutorial by showing the finished product and encouraging creativity in trying different color combinations. The step-by-step guidance makes this project ideal for crocheters at all skill levels.