How To Crochet Rose Flower Plant for Decorating the Area

With a step-by-step guide for beginners and experts, learn how to crochet a beautiful rose flower plant using crochet techniques. Hina explains the entire process clearly, from making a magic circle to forming petals of different sizes and adding details like leaves and sepals. She highlights the importance of precision in stitching, gluing, and assembling the flower to achieve a realistic look. The tutorial is detailed and beginner-friendly, ensuring that viewers can follow along easily.
This creative project not only showcases the art of crochet but also inspires viewers to crochet their own decorative rose flowers at home. So, follow through with us for the complete tutorial.

Crochet Rose Flower Tutorial
This video provides a detailed tutorial on how to crochet a rose flower. The instructions cover all the necessary steps, from gathering materials to crocheting each part and assembling the final product. It is a comprehensive guide suitable for those who want to create a realistic-looking crochet rose.
Materials Needed
- Hook: A 2.5 mm or 3 mm hook.
- Yarn: Three-ply wool yarn is recommended.
- Adhesive: A glue gun or glue stick for assembly.
- Stem: A stick, wire, or wooden chopstick for the stem.
- Leaf Wire: A 0.2 mm wire for the leaves.
- Yarn Marker: An optional marker to keep track of rounds.

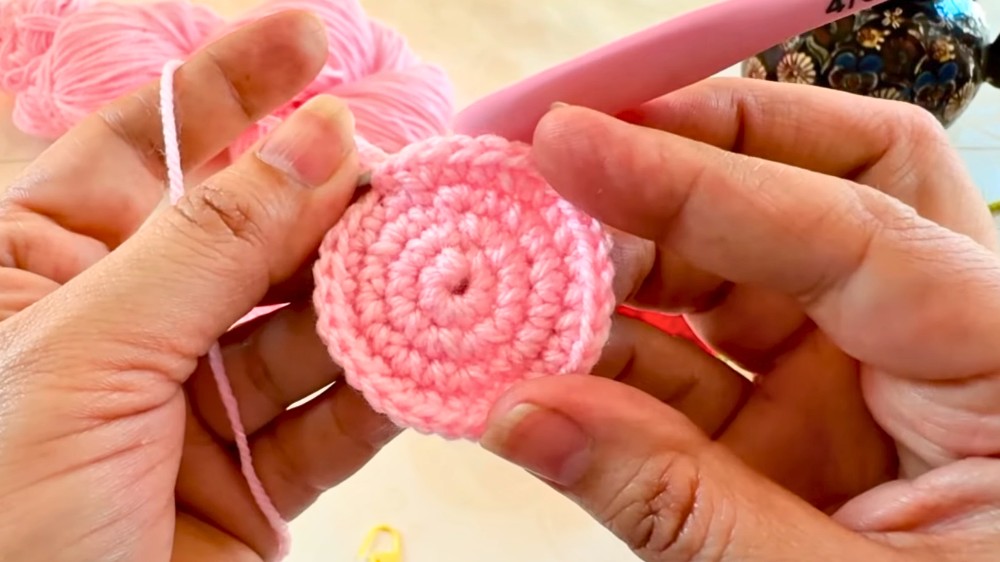
Creating the Petals
The tutorial is broken down into two sections for creating petals: small and large. The process for both starts with a magic circle. The small petals are made with several rounds of increasing single crochet stitches, followed by a final round with a consistent stitch count. A zig-zag border is then created by alternating chains and slip stitches to give the petals a natural look. Three small petals are needed for the center of the rose.
The large petals are made similarly, starting with a magic circle and multiple rounds of increasing stitches. They are also finished with a zig-zag border. Four large petals are used for the outer layer of the rose.

Making the Leaves
To make the leaves, a slip knot and a starting chain are created. A 0.2 mm wire is attached along the base of the chain for support.
The same pattern is then repeated on the other side of the chain. A zig-zag border is added to give the leaf a natural appearance. The yarn is then wrapped around the wire to form the stem of the leaf. Two leaves are used for the rose.

Making the Sepals (Calyx)
The sepals, the green part beneath the rose, are made by starting with a magic circle and working double crochet stitches. The circle is closed, but a small hole is left for the stem.
Each completed sepal petal is attached to the center circle with a slip stitch. A total of five sepal petals are made.

Assembly
The final part of the tutorial is a detailed guide on assembling all the crocheted pieces. The small petals are wrapped and glued around a stick to form the center of the rose, followed by the larger petals to create a full, layered look. The sepal piece is then attached to the base of the rose.
Green yarn is wrapped around the stick to cover the stem, and the leaves are attached by wrapping the yarn around their base.
The wrapping continues all the way to the end of the stem. The video concludes with the finished, assembled rose.