Crochet Shell Stitch Baby Blanket – Free Step-By-Step Pattern

Brighten your nursery with free crochet shell stitch baby blanket pattern, delightful texture, color, & cuddly comfort for your little one.
Tiny hands deserve the softest touch and a blanket that feels just like a gentle hug. With its flowing arches and sweet shell-like curves, a crochet shell stitch baby blanket pattern creates a charming look that delights both eyes and hearts. This pattern brings out a plush, bumpy texture that babies love to snuggle into, and the airy weave keeps little ones cozy but never too warm.
Free Pattern: Crochet Shell Stitch Baby Blanket for Newborns
Many people use this blanket for nap time, stroller rides, or as a special gift that stands out at any baby shower. Unique borders and color combinations add even more personality, making every blanket one-of-a-kind. This design stands out for being both decorative and simple to make, even for those new to crochet. Each stitch weaves in softness, warmth, and care, wrapping babies in pure comfort while adding a beautiful touch to any nursery.
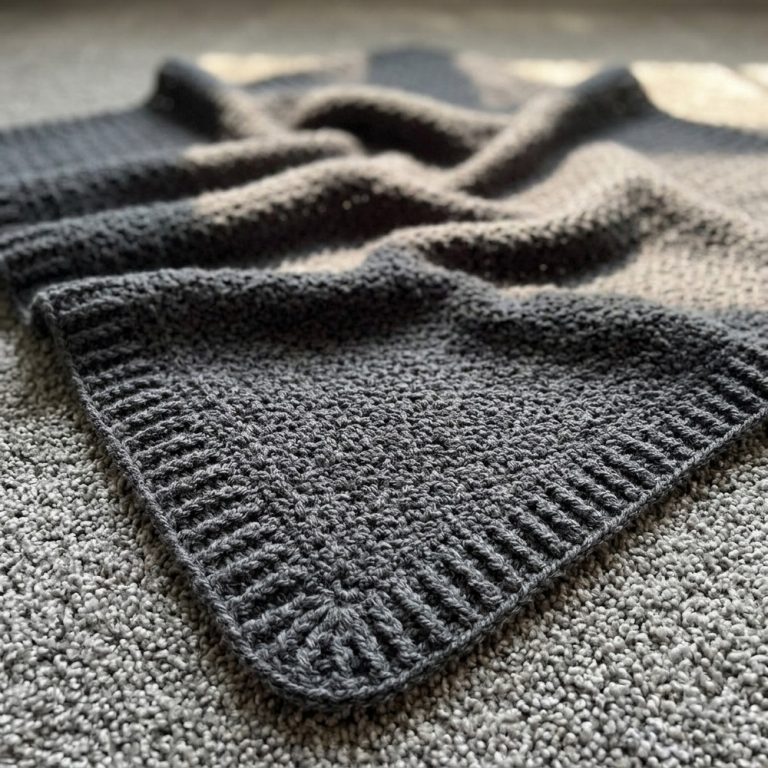
Slanted Shell Stitch Baby Blanket
Materials
- Yarn: DK/Light Worsted/Weight 3 Yarn
Example used: Sirdar Snuggly Soothing (five balls) - Hook: US Size 7 (4.5mm)
- Notions:
- Scissors
- Tapestry / yarn needle
Optional:
- Small amount of coordinating yarn for a bow motif
- Stitch markers (recommended)
Key Abbreviations (US Terminology)
| Abbreviation | Meaning |
|---|---|
| ch | chain |
| sc | single crochet |
| dc | double crochet |
| fp-sc | front post single crochet |
| st | stitch |
| sp | space |
| rep | repeat |
Special Notes
- Starting Chain: Multiple of 4. For the full blanket, ch 128; for a sample swatch, ch 24.
- Finished Size: Approx. 26 x 26″ (66 x 66 cm).
- One “slanted shell” = (sc, ch 3, 3 dc) all into the same designated st or space.
- Working into Back Bumps: For the first row, insert your hook into the back bump of each chain for a neat edge.
- Front Post Single Crochet: Insert hook from front to back around post of st, yarn over, pull up loop, yarn over, pull through both loops.
Pattern Instructions
Foundation
- For the blanket: Ch 128.
- For a sample swatch: Ch 24.

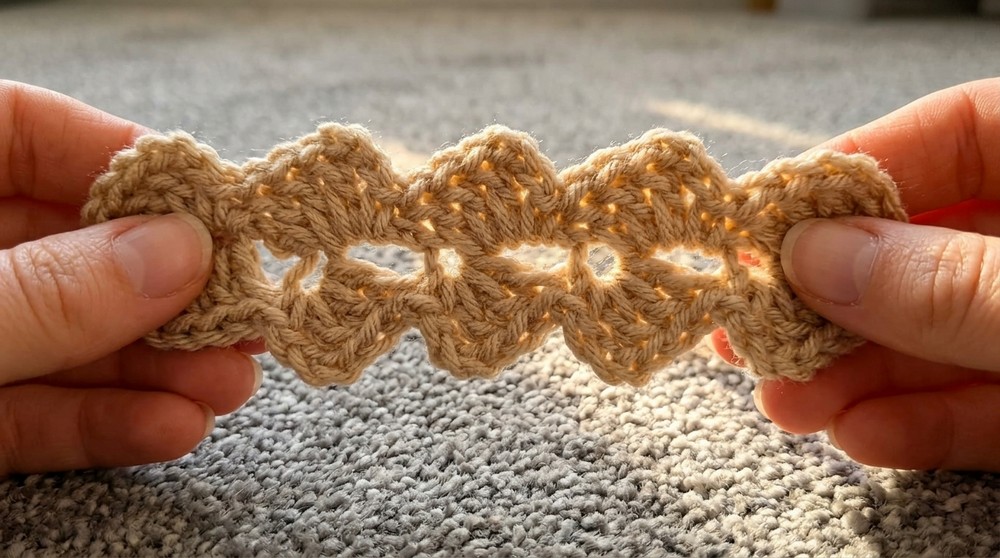
Row 1
- 3 dc in 4th ch from hook (counts as 1 shell; skip next 3 ch).
- Work the slanted shell as follows:
- Skip next 3 ch, in the next ch: (sc, ch 3, 3 dc) all in the same ch.
- Repeat previous step across the row until 4 ch remain.
- Skip next 3 ch, in the last ch, sc.
- Do not turn your work yet—continue to work along the bottom side of the chain.

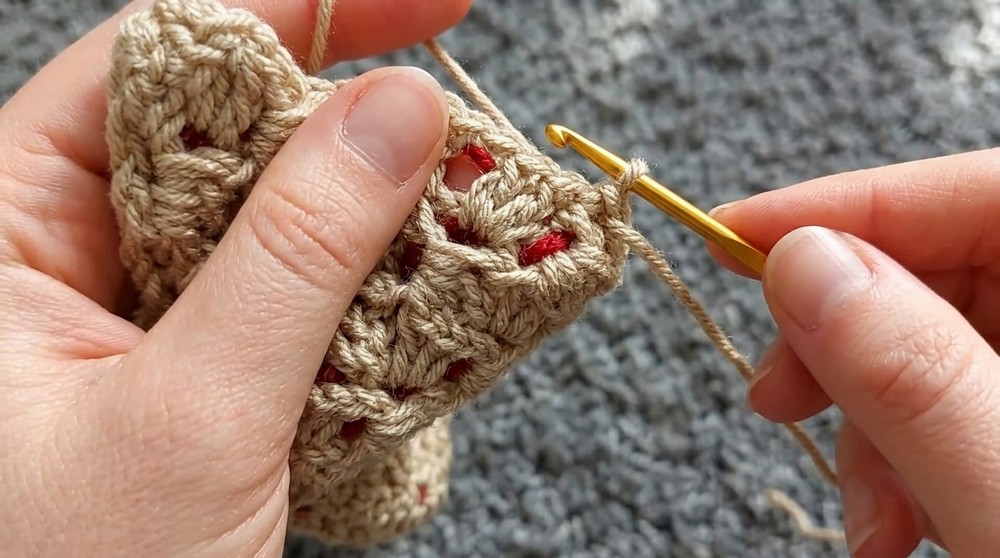
Begin Round to Work Along the Other Side of the Foundation Chain:
- Ch 3, rotate work to crocheting along the other side of the starting chain.
- In the next ch-3 space (under the “skipped” chains in the last row), 3 dc.
- Repeat the following across:
- Into each next ch-3 sp: (sc, ch 3, 3 dc).
- When one ch-3 space remains, skip it and work sc at the base of the last shell (aligning with the row start).
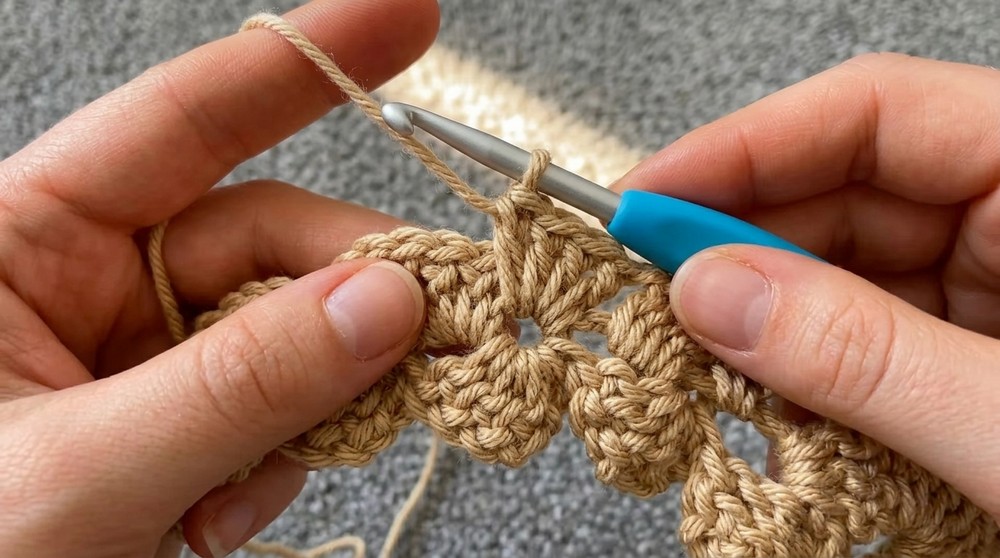
Row 2 (and All Subsequent Rows)
- Ch 3, turn.
- 3 dc in same st (base of the ch-3).
- Skip next 2 sts.
- Fp-sc in next st (insert hook front to back around the post of the indicated st, draw up a loop, yarn over, draw through both loops).
- Ch 3.
- 3 dc in next ch-3 sp (from previous row).
- Repeat (Skip next 3 sts, fp-sc in next st, ch 3, 3 dc in ch-3 sp) across until 1 shell remains.
- End the row with sc in sc of previous shell (immediately before last shell).
Repeat
- Repeat Row 2 until you have 80 rows of the slanted shell pattern, or until the blanket reaches your desired length.
Finishing
- Fasten off: Cut yarn, ch 1, pull through to secure.
- Weave in all ends neatly along row edges with tapestry/yarn needle.
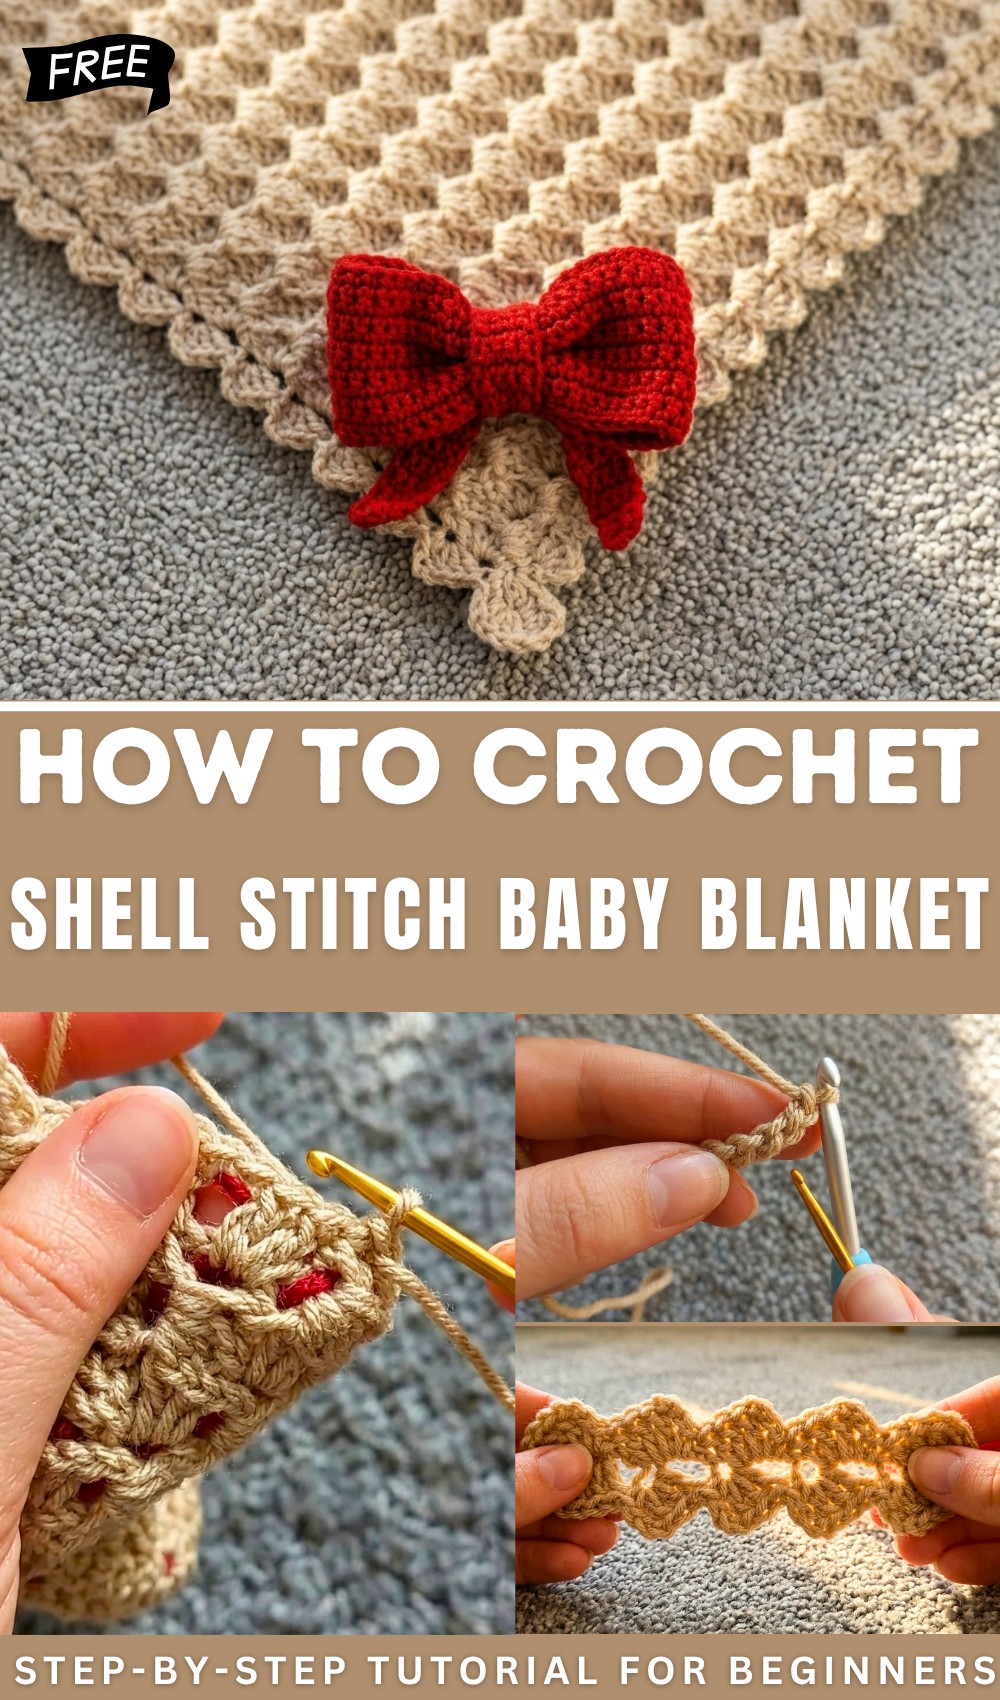
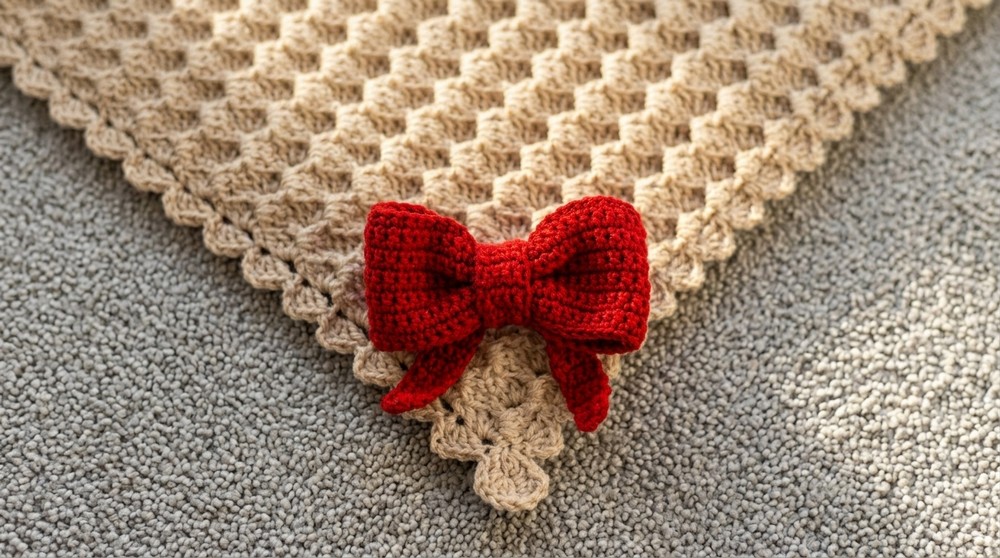
Optional: Add Bow Motif
(Refer to the separate bow tutorial as linked by the designer.)
- Using yarn and tapestry needle, sew bow to a blanket corner by inserting needle under bow’s center and securely attaching with several knots.
- Weave and hide all yarn tails inside the blanket fabric for a neat finish.
Conclusion
The Slanted Shell Stitch Baby Blanket works up quickly, making it a delightful and practical handmade gift. The edges remain straight thanks to the technique of working into back bumps, and an optional crocheted bow adds a sweet touch for gifting.
Pattern Correction
- Designer’s original description for the row repeat is accurate. Ensure you are always skipping the correct number of stitches for consistent shells.
- Note: There is technically no turning chain at the end of Row 1—continue straight into the opposite side of the starting chain for the round.
Tips
- Count your shells each row to ensure accuracy (full blanket: 61 shells on Row 1, 30 shells on subsequent rows).
- For neat edges, always work into both loops or back bumps as directed.
- Use stitch markers at the start and end of each row to avoid missing stitches and to keep edges straight.
- If making a border, single crochet evenly around the finished blanket before sewing on bow or other embellishments.