How To Crochet Simple Flower Coaster for Spring

In this post, learn how to crochet a beautiful flower coaster using cotton yarn that does not require any magic ring to start, perfect for beginners. Tips on using two yarn strands for thickness and switching colors are covered. The tutorial emphasizes attention to detail, using stitch markers, and hiding loose ends, resulting in a versatile and elegant coaster using any color. Follow through with us for the complete tutorial!

The YouTube video offers a step-by-step tutorial on how to crochet a flower-shaped coaster. The instructor demonstrates the process in an accessible manner, making this project suitable for beginners and advanced crocheters alike. The coaster design is customizable in terms of yarn type, color, and hook size, and can serve as an elegant accessory in your home or as a DIY gift.

Free Flower Coaster Crochet Pattern
Materials
- Yarn: Any yarn (60% cotton, 40% acrylic used in sample); use 100% cotton for heat-resistant coasters; two colors recommended
- Tip: Use two strands together to thicken the yarn if desired
- Hook: 3.5 mm
- Scissors
- Yarn needle (for weaving in ends)
- Stitch marker (optional)
Key Abbreviations (US Crochet Terminology)
- ch: chain
- sl st: slip stitch
- sc: single crochet
- dc: double crochet
- st: stitch
- rep: repeat
- inc: increase (work 2 stitches in one)
Special Notes
- When changing colors, work the slip stitch with the new color.
- Stitch marker helps track the start of the round.
- For heat resistance, ensure you use cotton yarn for hot drinks.
- Work petals through back loops only for a ridged look.
Pattern
Center Circle
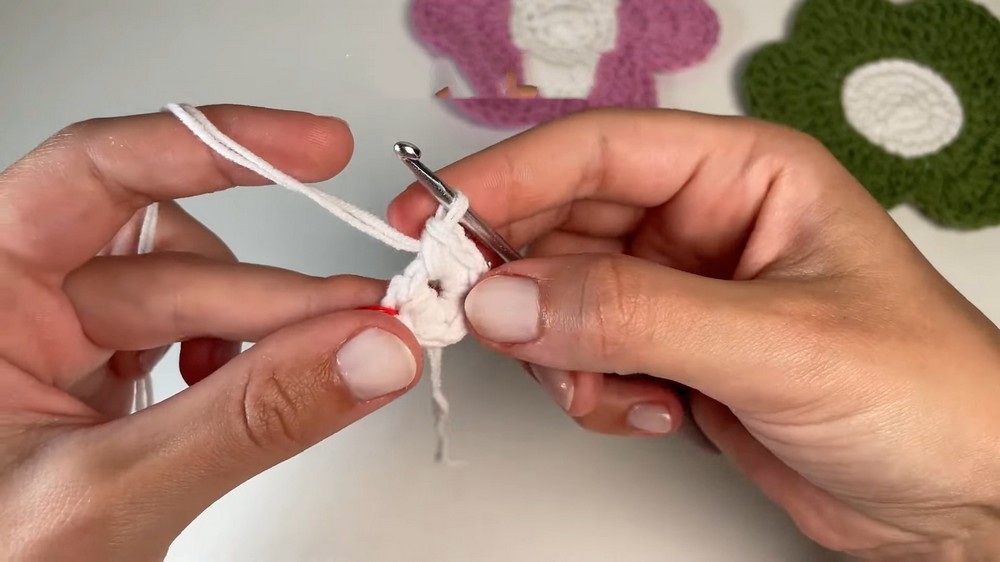
- Using main color, make a slip knot.
- Ch 4, sl st into first ch to form a circle.
Round 1
- Ch 1 (does not count as a st).
- Work 6 sc into the circle.
- Place stitch marker in first sc.
- Pull tail to close the center tightly.
- Join: Remove marker, sl st to first sc.
- [6 sts]
Round 2
- Ch 1.
- In same st (where marker was), 2 sc (inc) and mark first sc.
- 2 sc in each st around.
- Join: Remove marker, sl st to first sc.
- [12 sts]
Round 3
- Ch 1.
- In same st, 2 sc (inc) and mark first sc.
- 2 sc in each st around.
- Join: Remove marker, sl st to first sc.
- [24 sts]
Round 4
- Ch 1.
- 1 sc in each st around (24 sc), placing marker in first sc.
- Join: Remove marker, sl st to first sc.
- [24 sts]
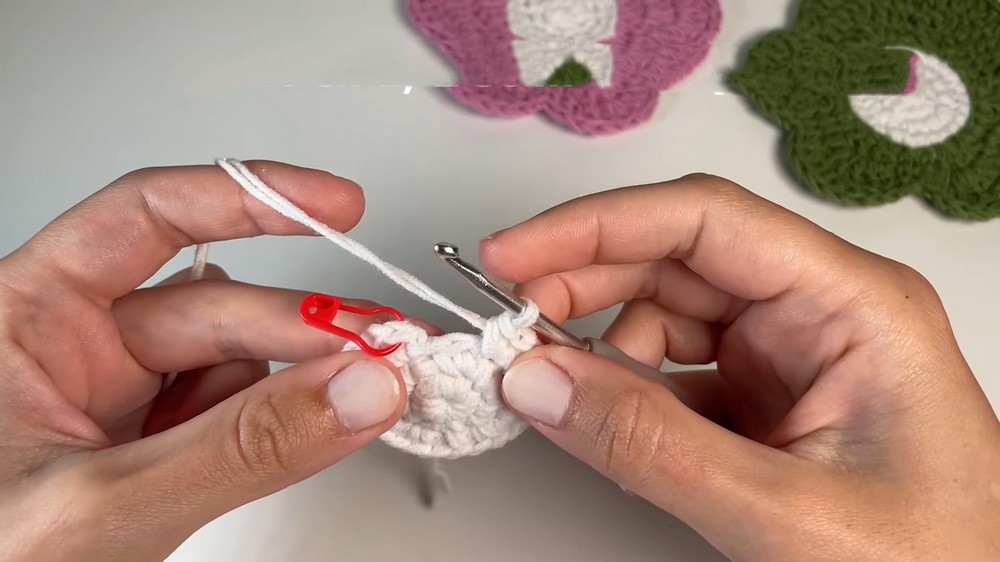
Round 5 – Color Change & Slip Stitch Row
- Change color: During sl st, pull through new color.
- Hold old color at back, tighten as needed.
- Ch 1 to secure new color.
- Slip st in each st around (24 sl st), mark first sl st.
- Join: Remove marker, sl st to first st (through back loop).
- [24 sts]
Round 6 – Petal Base (Work in Back Loops Only)
Pattern repeat:
- 1 sc in next st
- 2 dc in next st
- 2 dc in next st
- 1 sc in next st
- Begin:
- Ch 1.
- In same st, 1 sc (back loop only), place marker.
- (2 dc in next st, back loop only), (2 dc in next st, back loop only), (1 sc in next st, back loop only); rep around.
- Continue this sequence to end of round.
- Join: Remove marker, sl st to first sc.
- [24 sts]

Round 7 – Petal Expansion
Pattern repeat:
- 1 sc in next st
- 1 sc in next st
- 2 dc in next st
- 2 dc in next st
- 1 sc in next st
- 1 sc in next st
- Begin:
- Ch 1.
- In same st, 1 sc (back loop only), mark first sc.
- 1 sc in next st (back loop only).
- (2 dc in next st), (2 dc in next st), 1 sc in next st, 1 sc in next st; rep around.
- Continue this sequence to end.
- Join: Remove marker, sl st to first sc.
- [24 sts]
Round 8 – Final Petal Row
Pattern repeat:
- 1 sc in next st
- 1 dc in next st
- 1 dc in next st
- 2 dc in next st
- 2 dc in next st
- 1 dc in next st
- 1 dc in next st
- 1 sc in next st
- Begin:
- Ch 1.
- In same st, 1 sc (back loop only), mark first sc.
- 1 dc in next st (back loop only).
- 1 dc in next st (back loop only).
- 2 dc in next st (back loop only).
- 2 dc in next st (back loop only).
- 1 dc in next st (back loop only).
- 1 dc in next st (back loop only).
- 1 sc in next st (back loop only).
- Repeat this petal sequence around.
- Join: Remove marker, sl st to first sc.
- [24 sts]
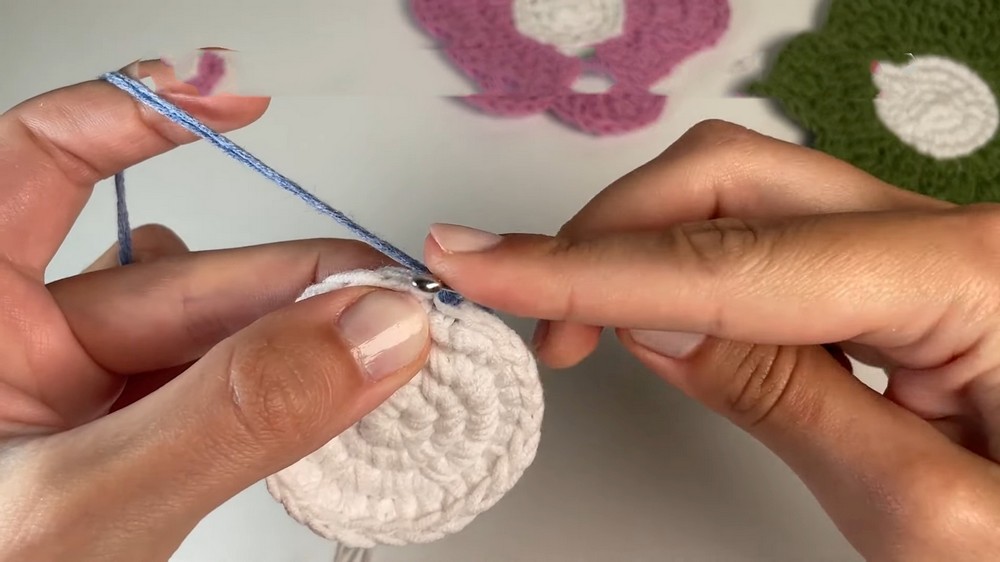
Finishing
- Ch 1, cut yarn.
- Pull end through and weave in all ends with a yarn needle, going back and forth, ensuring they are secure and invisible.
- Trim any excess.

Conclusion
This flower coaster uses basic stitches and simple increases, making it suitable for all skill levels. Petals are formed through repeated increases in double crochets, and color changes add a visual pop. The final product is perfect as a coaster or decorative motif.
Pattern Corrections & Tips
- Count your stitches after every round, especially after increases.
- Use cotton yarn for heat resistance if making as a coaster.
- Work petals into back loops only for ridged texture and petal definition.
- For thicker coasters, use doubled strands.
- Place stitch marker for each round start to maintain correct stitch placement.
- Change colors by completing last sl st of previous round with new color.
- Weave in ends securely to prevent unraveling.