Free Crochet Flower Mandala Pattern For Spring
If you want a pattern and tutorial to make a crochet flower mandala for spring, this is your lucky day! In this post, I will reveal the complete method to level up from the simple round mandala and make it into a flower shape.
After following my guide and testing your own, you will end up with a colorful, mesh, and attractive decor option. Great for gift-giving! I shall only use the same basic crochet techniques, and teach with the step-by-step photos and instructions. If you already have not learned the stitches I used, I shall also review them for you.
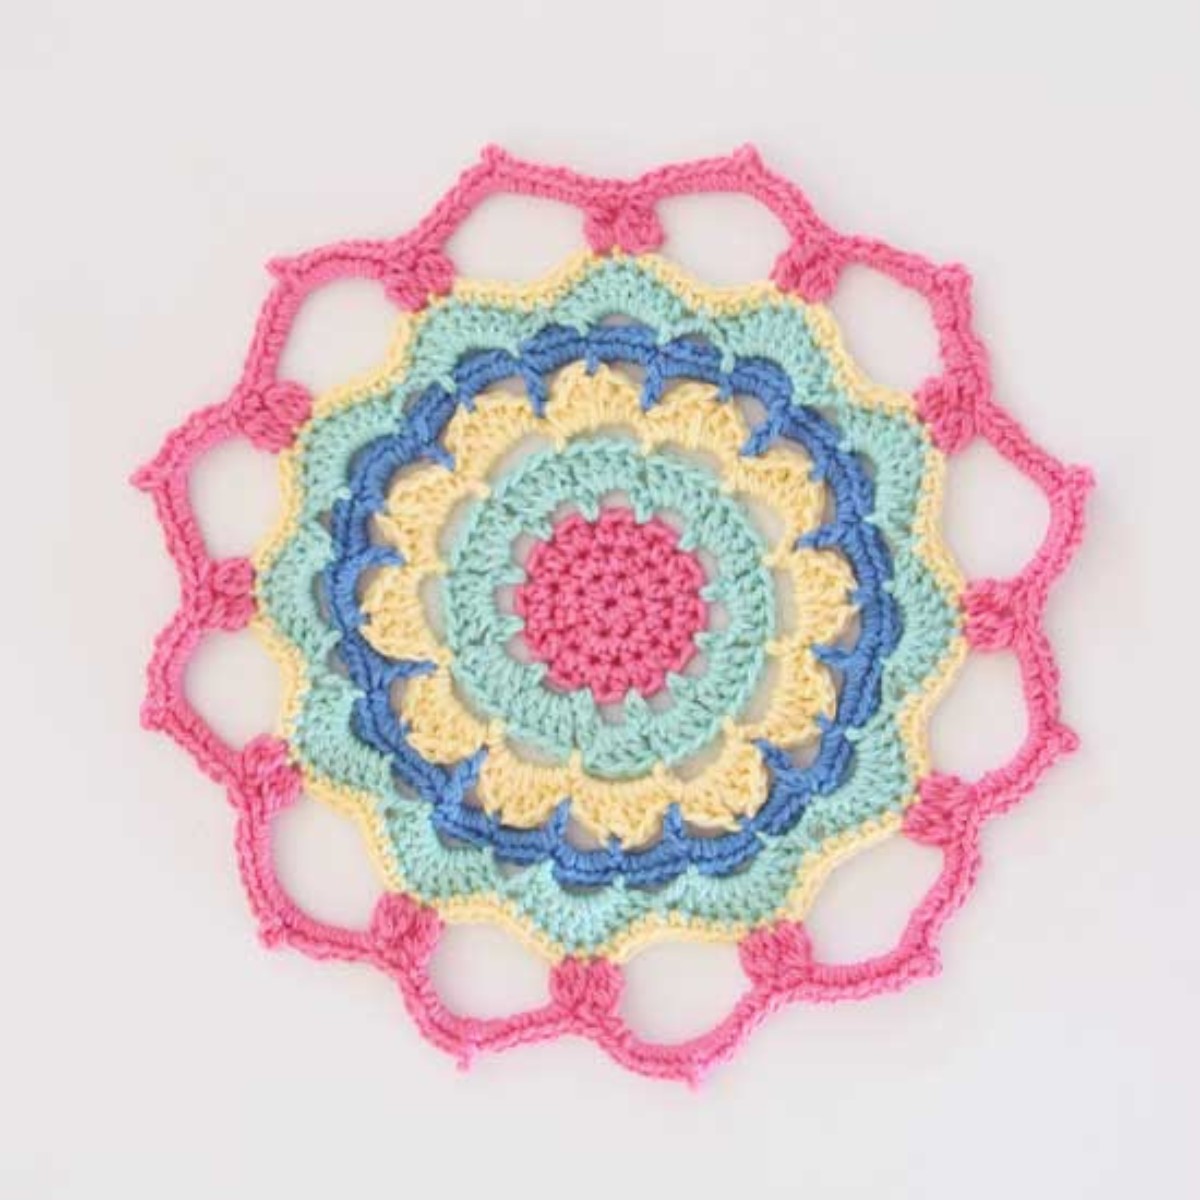
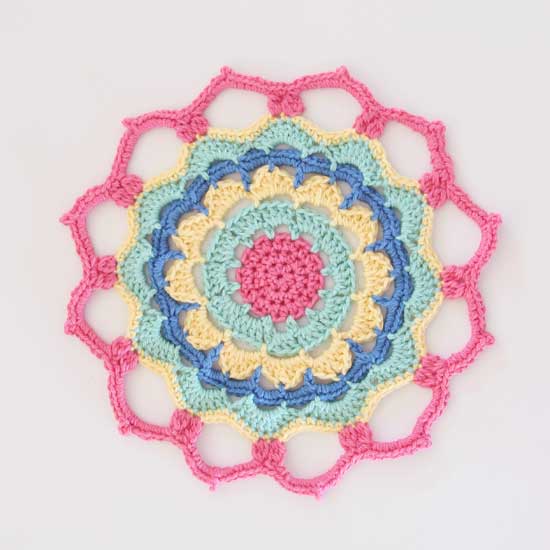
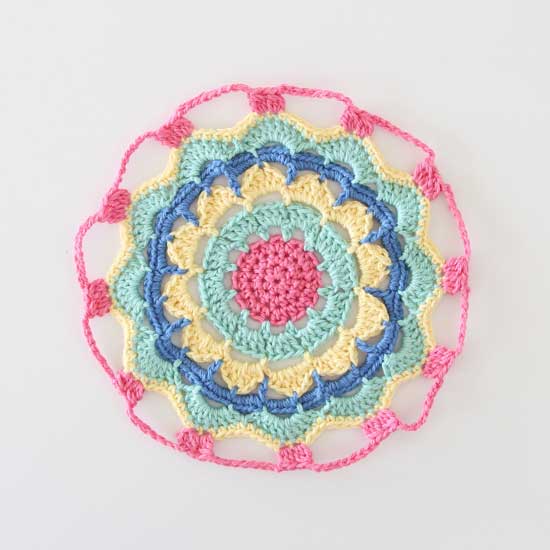
Flower Power Mandala
Quick Tips Before Starting The Crochet Flower Mandala?
These few tips will be helpful before you start following the crochet flower mandala pattern:
- Take a Break: Having a break while working on a crochet mandala can improve your efficiency and lessen mistakes. It is especially necessary when you have not tried crochet flower mandala before. It will be also helpful to prevent the hand from cramping.
- Maintain Even Tension: Even tension leeds to the even sticthes and ultimately the even shape of the flower mandala. It will come with accurate holding and practice.
- Use LightColors: If you are a beginner, working with a light color of yarn and worsted weight is the best choice. However, for mandala you may also practice on the light weight yarn.
Stitch Knowledge Required
Below are the recall of the abbreviations and procedure of the sticthes that I shall use in this crochet pattern:
- Magic Ring
- sl st = slip stitch: It is used to join the rounds without adding height. To Make skip stitch, insert the hook into stitch, YO and pull through the loop.
- ch = chain: It will mainly help to make spaces and also work as the turning chains. YO and pull through the loop to make a chain.
- dc = double crochet: It is known as single crochet in the US and first stitch that adds height the work. It leaves very less gaps. To do, insert the hook into the stitch, YO and pull up a loo. YO and pull through both the loops.
- htr = half treble: It is called half-double crochet in the US and taller than the double crochet (UK). To do, YO, insert hook into the stitch, YO and pull up a loop. YO and through allthree loops on hook.
- tr = treble: It is called double crochet in the US. To do this, YO, insert hook into the stitch, YO and pull up a loop. YO and pull through two loops, YO again and pull through the last two.
- dtr = double treble: It is called treble crochet in US. To do this, YO, insert hook into the stitch, YO and pull up a loop. YO and pull through two loops, YO again and pull through the two. YO again and pull through the last two.
Free Crochet Flower Mandala Pattern
Skill Levels: Beginners
Materials Needed:
- 4mm Hook
- Heirloom Cotton 8ply
Pattern Note: This free crochet flower power mandala pattern is written in UK terms, with both US and UK Shorthand terms at the end of the tutorial.
Flower Mandala Instructions
Below are the step-by-step instructions as promised:

Rounds 1-3
Round 1 – Start with pink. To begin make a magic ring, chain 1 (this doesn’t count as a stitch) then work 8htr into the ring. Slst to the top of the first htr to join the round. (8htr)
Round 2 – Chain 2 (counts as 1 htr), then 1 htr into in the same stitch. Work 2 htr into each htr from the previous round. Slst to the top of the ch2 to join. (16htr)
Round 3 – chain 2 (counts as 1htr), then work 2htr in the next stitch. Continue to work for 1 hour, then 2 htr into each stitch from the previous round. Slst to the top of the ch2 to join. (24htr) Fasten off.
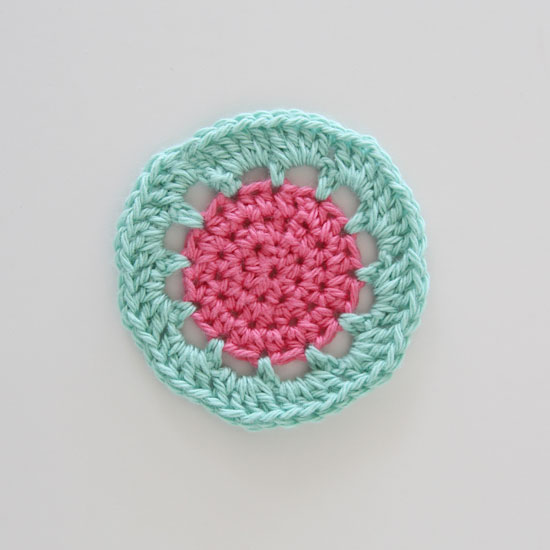
Rounds 4 & 5
Round 4– Switch to green. Ss into any htr from the previous round. Ch1 (doesn’t count as a st) then 1dc. Ch 3, miss a stitch and then dc into the next. Continue to ch3, then dc into every second stitch all the way around. Sl st into the first dc to join round. (12 x ch-3 spaces, 12dc).
Round 5 – Sl st into first ch-3 space. Ch3 (counts as 1tr) then work 3tr into the same ch-3 space. Work 4tr into each ch-3 space all the way around. Sl st into the top of the first ch3. (48tr)(12x4tr) fasten off.

Rounds 6 & 7
Round 6 – Switch to yellow. Ss between any two groups of 4trs from the previous round. Ch 5, sl st in between the first two groups of 4tr from the previous round. Continue to ch5, and then sl st in between the tr groups all the way around. (12sl st, 12x ch-5 spaces)
Round 7 – *Sl st into the next ch-5 space and work 1dc, 1htr, 1tr, 1dtr, 1htr, 1dc* Repeat for * to * all the way around. After the last dc, cut the yarn and thread it into a needle. Fasten off. (12 petals).
Round 8
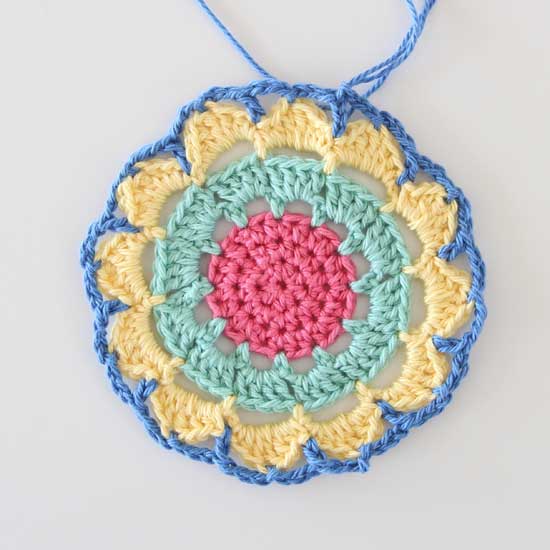
Round 8 – switch to blue. Ss in between any of the 2dc from the previous round. The base of the petal. Ch6 (counts at 1tr, ch3). Ss into the top of the dtr from the previous round and ch3. *Tr between petals, ch 3, ss at petal top, ch3* repeat from * to * around. Finish by ss into the 3rd chain of the initial ch6. (12tr, 12ss, 24xch3)
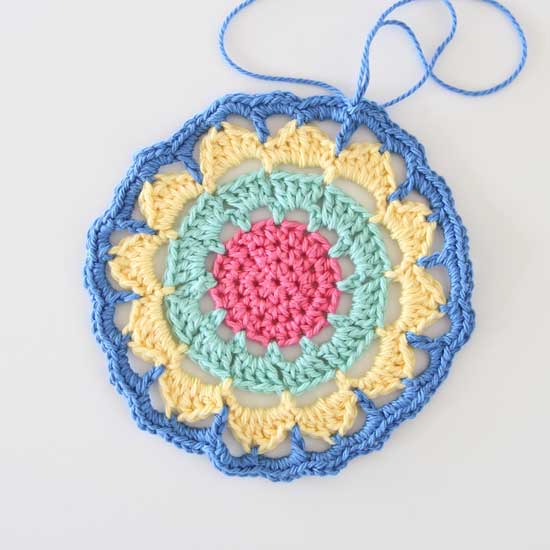
Round 9
Round 9– Ss into ch-3 space. Ch 1 (doesn’t count as stitch). Work 5dc in each ch-3 sp around. Fasten off. (120dc)
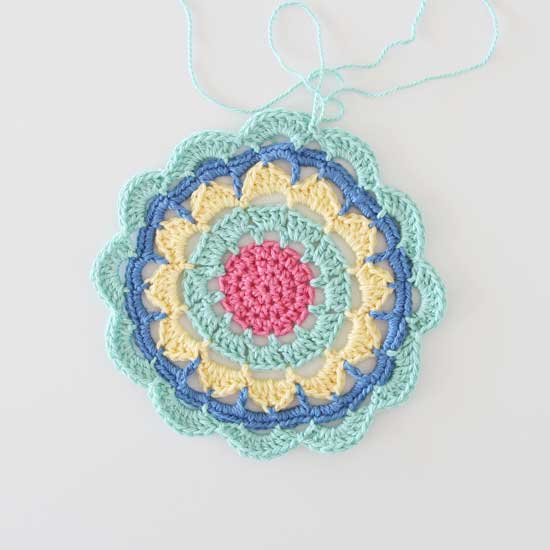
Round 10 & 11
Round 10 – switch to green. Ss in between any two 5dc groups. *Ch4, ss in between every 5dc groups * repeat from * to * around. (24ss, 24xch4)
Round 11 – ss into the next ch-4 space, ch3 (counts as one to) then work 7tr into the same space. Ss in the following ch-4 space. Work 8tr in the next ch-4 space. Continue to work 8tr into a ch-4 space and then ss into the next – alternating around. (12ss, 12x8tr groups).
Round 12
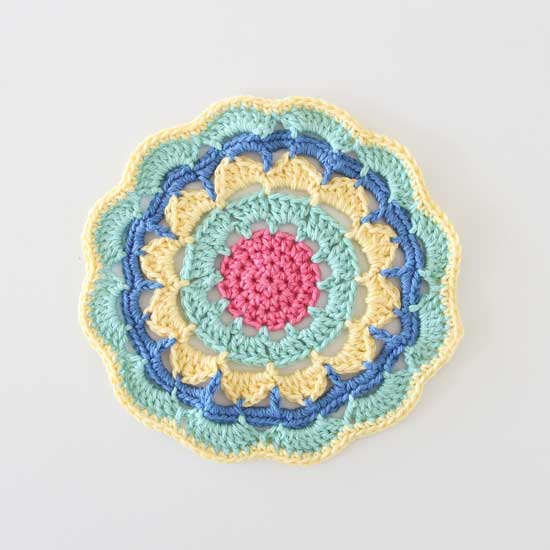
Round 12– switch to yellow. Ss into any tr from the previous round. Ch1 (doesn’t count as a st). Work 1dc into each stitch around.
Round 13
Round 13 – switch to Pink. Find the top two dcs of any petal. Ss into the first of those 2dcs and ch3, then tr2tog (counts as 1 tr3tog) ch1, then tr3togther into the next dc, ch 9. * tr3tog in first of top two dcs, ch 1, tr3tog in the next dc, ch9 *repeat * to * around. ss into top of tr3tog. (23x tr3tog, 12x ch9)
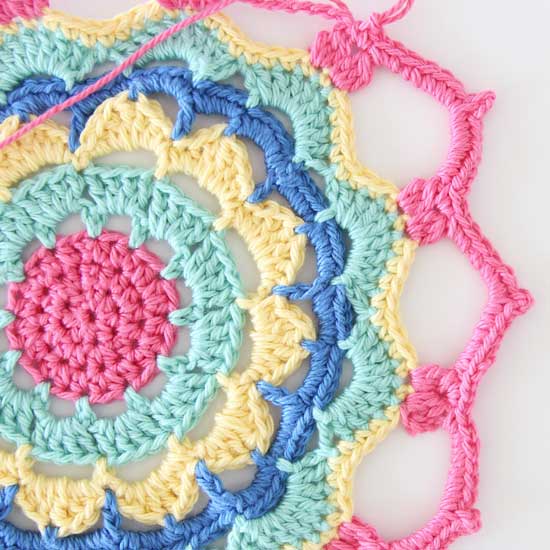
Round 14
Round 14 – * ss between any tr3tog pair, work 2dc in the ch-1 space. In the ch-9 space, work 7dc, 3ch, 7dc* repeat from * to * around and fasten off. (12x 7dc,ch3,7dc groups, 12x 2dc pairs).
Shorthand Instructions – UK
Round 1 – magic loop then work 8htr
Round 2 – 2htr in each tr (16htr)
Round 3 – 1htr, 2htr around (24htr)
Round 4 – Ch3, skip st, dc in next – repeat around (12dc,12xch-3)
Round 5 – 4tr in each ch-3 space (12x 4tr)(48tr)
Round 6. – Ch5 then sl st in between gap between two 4tr groups. Repeat around. (12sl st, 12x ch-5 spaces)
Round 7 – 1dc, 1htr, 1tr, 1dtr, 1tr, 1htr,1dc into each ch-5 space.
Round 8 – Tr between petals, ch3, ss at petal top, ch3. Repeat around. (12tr, 12ss, 24xch3)
Round 9 – 5dc in each ch-3 group. (120dc)
Round 10 – Ss in between 5dc groups, ch 4. Repeat around. (24ss, 24xch4)
Round 11 – Work 8tr into a ch-4 space, ss in the next – alternate around. (12ss, 12x8tr groups).
Round 12 – Work 1dc into each stitch around.
Round 13 – in the top two dcs of each petal work, 1tr3tog, ch1, 1tr3tog and then ch9 – repeat around. (24x tr3tog, 12x ch9)
Round 14 – Work 2dc in the ch-1 space and then in the ch-9 space, work 7dc, 3ch, 7dc – repeat around (12x 7dc,ch3,7dc groups, 12x 2dc pairs). Fasten off.
Shorthand Instructions US
Round 1 – magic loop then work 8hdc
Round 2 – 2hdc in each tr (16hdc)
Round 3 – 1hdc, 2hdc around (24hdc)
Round 4 – Ch3, skip st, sc in next – repeat around (12sc,12xch-3)
Round 5 – 4dc in each ch-3 space (12x 4dc)(48dc)
Round 6. – Ch5 then sl st in between gap between two 4dc groups. Repeat around. (12sl st, 12x ch-5 spaces)
Round 7 – 1sc, 1hdc, 1dc, 1tr, 1dc, 1hdc,1sc into each ch-5 space.
Round 8 – Dc between petals, ch3, ss at petal top, ch3. Repeat around. (12dc, 12ss, 24xch3)
Round 9 – 5sc in each ch-3 group. (120sc)
Round 10 – Ss in between 5sc groups, ch 4. Repeat around. (24ss, 24xch4)
Round 11 – Work 8dc into a ch-4 space, ss in the next – alternate around. (12ss, 12x8dc groups).
Round 12 – Work 1sc into each stitch around.
Round 13 – in the top two sc of each petal work, 1dc3tog, ch1, 1dc3tog and then ch9 – repeat around. (24x dc3tog, 12x ch9)
Round 14 – Work 2sc in the ch-1 space and then in the ch-9 space, work 7sc, 3ch, 7sc – repeat around (12x 7sc,ch3,7sc groups, 12x 2sc pairs). Fasten off.