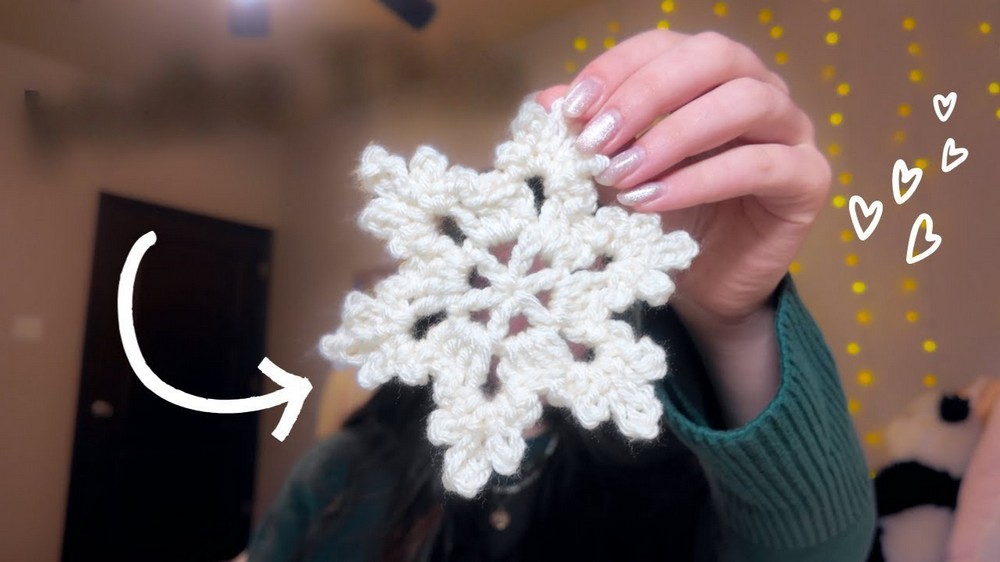
How to Crochet Snowflake Ornament for Christmas
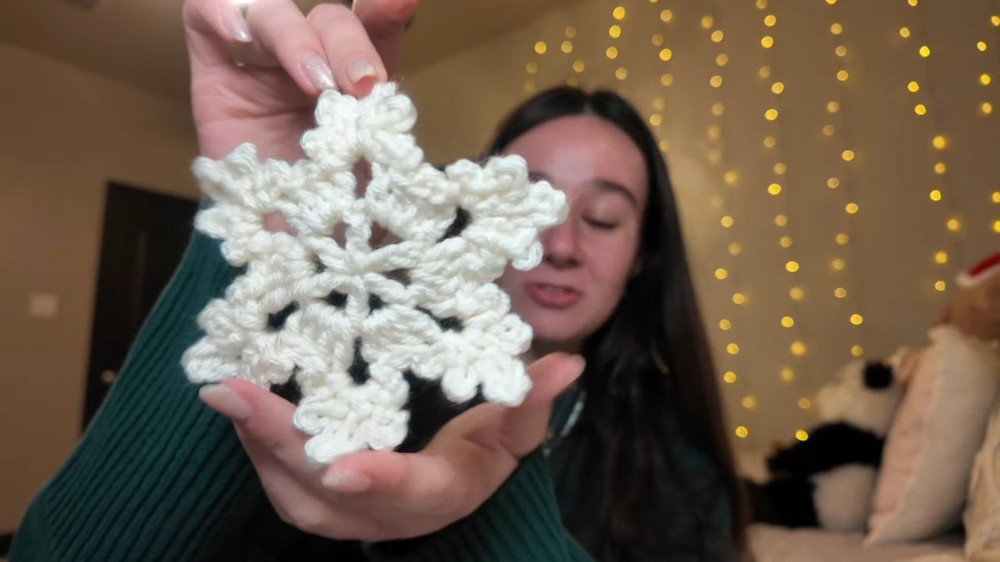
In this post, you’ll learn how to crochet a simple and beginner-friendly snowflake ornament that can also double as a cute coaster. The pattern uses basic techniques like slip stitches, chains, and double crochets, making it quick and accessible. The tutorial covers each step in detail, from creating a magic ring to adding decorative spikes for the snowflake design.
Additionally, Maddie shares tips on turning the snowflake into an ornament, making it perfect for festive holiday decorations. Let’s get started!

Free Simple Crochet Snowflake Pattern
This tutorial by Maddie provides a step-by-step guide to crocheting a snowflake that can be used as an ornament, a coaster, or a decorative winter project. The pattern is beginner-friendly and utilizes basic crochet techniques.
Materials List
- Yarn: #3 Light/DK or #4 Worsted weight cotton or acrylic yarn (in white or pale blue for a classic snowflake, or any color you choose)
- Crochet hook: US Size G-6 (4.0 mm) or size appropriate for your yarn
- Tapestry/yarn needle: for sewing in ends and making the ornament loop
- Scissors
Key Abbreviations
| Abbreviation | Meaning |
|---|---|
| ch | chain |
| sl st | slip stitch |
| dc | double crochet |
| st(s) | stitch(es) |
| sp | space |
| MR | magic ring/magic circle |
| rep | repeat |
Special Notes
- Pattern written in US crochet terminology.
- Work is in rounds.
- Adjust yarn and hook size to change the final snowflake size.
- Blocking is recommended for crisp snowflake points.
Pattern Instructions
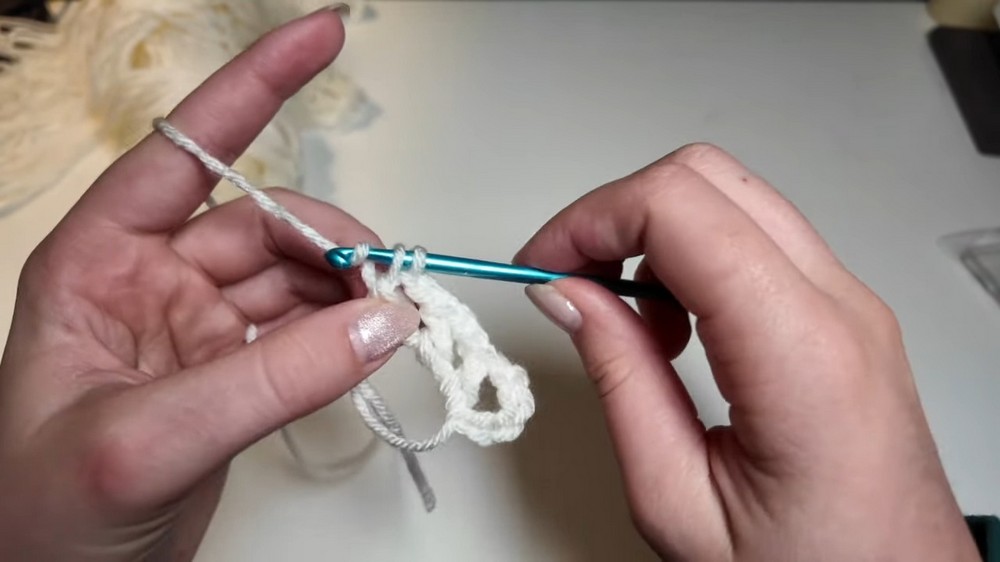
Round 1: Center
- Make a Magic Ring (MR):
- Wrap yarn around finger to form a ring. (See magic ring tutorials if you need help.)
- Ch 5 (counts as 1 dc + ch-2).
- [Dc in ring, ch 2] Repeat from * to * a total of 5 times (you will have 6 dc, including the beginning ch-3).
- Pull magic ring tight.
- Join with a sl st into the 3rd ch of your beginning ch-5.
(6 dc, 6 ch-2 sps)
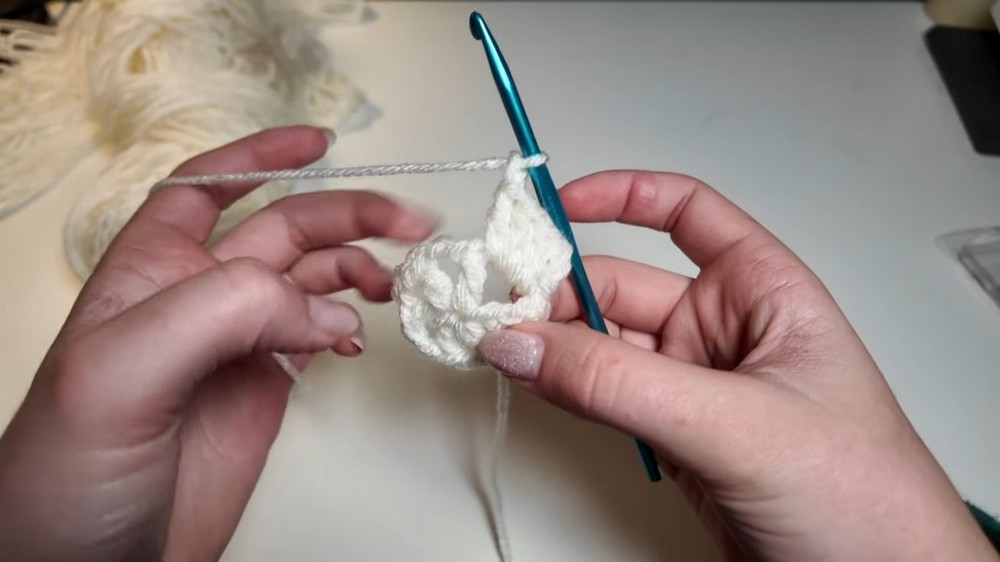
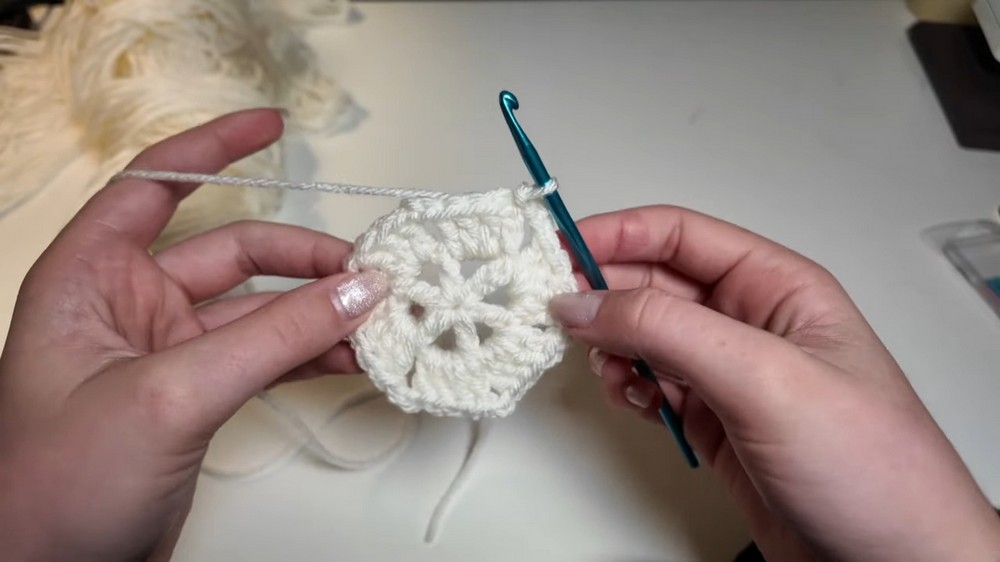
Round 2: Shells
- Sl st into the first ch-2 space.
- Ch 3 (counts as first dc).
- 3 dc in the same ch-2 sp (4 dc total in this sp).
- Ch 2.
- In the next ch-2 sp, work 4 dc, ch 2.
- Repeat from * to * in each ch-2 space around.
- Join with sl st to top of initial ch-3.
(6 groups of 4 dc, separated by ch-2)
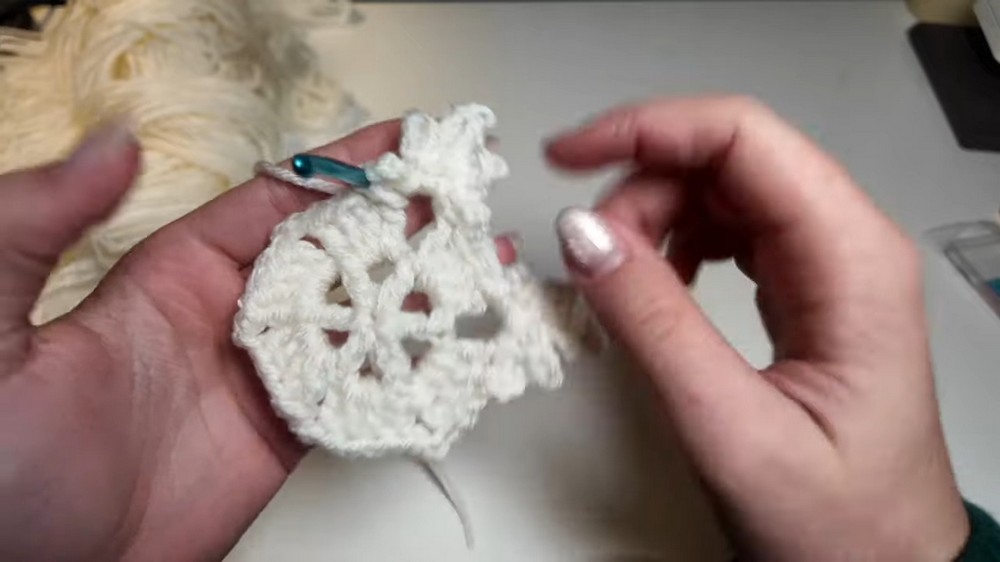
Round 3: Snowflake Spikes
- Sl st in each of next 3 dc to reach the next ch-2 sp.
- In each ch-2 space around, work the following:
- [Ch 3, sl st in same ch-2 sp]
- [Ch 5, sl st in same ch-2 sp]
- [Ch 7, sl st in same ch-2 sp]
- [Ch 5, sl st in same ch-2 sp]
- [Ch 3, sl st in same ch-2 sp]
- After finishing the spike, sl st in each of the next 4 dc (between the chain spaces) to reach the next ch-2 space.
- Repeat Step 2 for each ch-2 space around.
- After the final spike, sl st to initial st of round.
- Ch 1, fasten off.
Finishing
- Weave in ends with tapestry needle.
- Optional: Lightly block the snowflake by dampening and pinning the points to shape.
- To make an ornament: Use a yarn tail to create a hanging loop (see below).
To Make a Hanging Loop
- Thread tail onto yarn needle.
- Sew the tail to the center of the snowflake.
- Pull a section of the tail into a loop, using your hook to guide it through a suitable stitch.
- Knot securely and weave in the remaining tail.
Conclusion
You have made a quick, elegant snowflake ornament or coaster! This pattern is highly adaptable—try different yarns or edge with metallic thread for variety. These snowflakes make wonderful gifts, home décor, or festive additions to your holiday celebrations.
Pattern Correction & Tips
- Keep tension even, especially with chains, to ensure neat spikes and uniform snowflake arms.
- If working too loosely, the snowflake may require extra blocking to lay flat.
- To enlarge, substitute treble (tr) crochets for double crochets, or use a larger hook.
- Add a touch of fabric stiffener or spray starch if you’d like your snowflakes especially crisp for ornaments.