How to Crochet Stylish Flower Phone Bag for Beginners
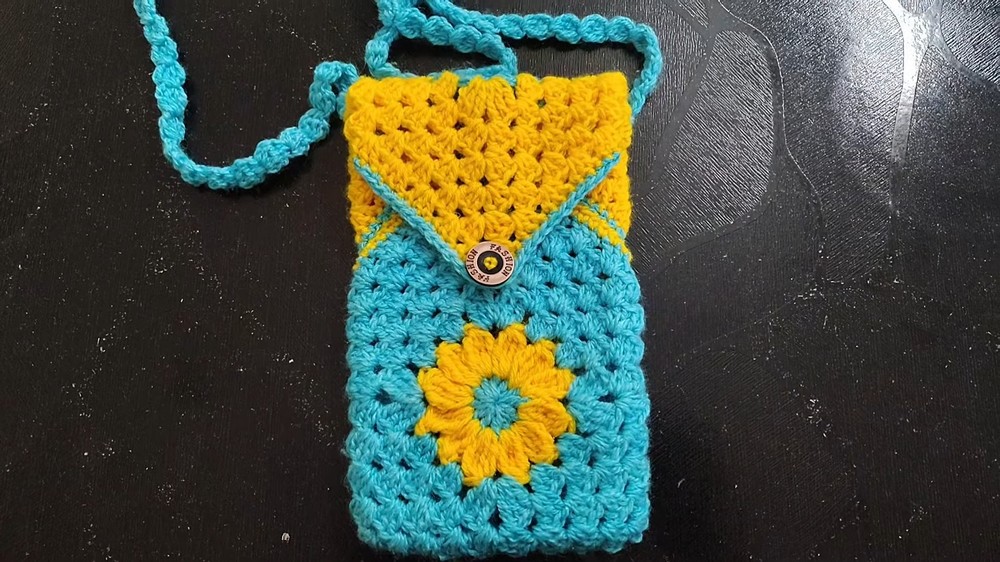
Learn how to crochet a simple yet unique sling bag using just two granny squares following a step-by-step tutorial for beginners. The tutorial provides a step-by-step guide, starting with making daisy granny squares, followed by joining techniques, and adding a stylish border and a cord.
The process adds basic crochet tools, such as a crochet hook, darning needle, and yarn. This fun and creative project is perfect for crochet enthusiasts looking to create a beautiful and functional accessory.

Stylish Phone Bag Tutorial
The project uses only two daisy granny squares, making it beginner-friendly and creative. A step-by-step tutorial is provided for crafting the bag, with detailed demonstrations and explanations.
Materials Required
- Two different colors of yarn (you can customize the colors as desired).
- A size 4 crochet hook.
- Darning needles for sewing.
- A button for closure.
- Stitch markers to identify corners.
Creating the Daisy Granny Squares
-
Starting the Flower
- The granny square begins by making a daisy flower in the center using a magic ring.
- The flower consists of 12 petals, with petal formation demonstrated in detail.
-
Marking the Flower’s Corners
- The daisy petals form the foundation of the square.
- Using stitch markers, four corners are marked after every three petals to create a square shape.

-
Expanding into a Square
- Add multiple rounds to create the desired size of the granny square, ensuring symmetry and consistency.
- Corner sections are crafted uniquely with treble crochets to give the square structure.
-
Bordering and Finishing
- After the granny square is ready, a border is added using single crochets with a contrasting yarn color.
- This helps in connecting the squares neatly and creating a polished look.

Joining the Squares
-
Aligning the Squares
- The two granny squares are positioned correctly, with the right side of the square facing outward.
- Stitch markers are used to make alignment and sewing accurate.
-
Sewing Technique
- The corners and edges are matched, and the squares are sewn together using a darning needle.
- Double thread is used for durability, ensuring the bag retains its shape.

Creating the Closure
- A button is attached to the front of the bag for secure closure.
- The position of the button is marked carefully before sewing to ensure alignment with the flap.

Making the Cord for the Bag
-
Cord Crafting Steps
- A unique cord is created using a cluster stitch technique, forming a decorative yet sturdy strap.
- The length of the strap depends on personal preference.

-
Attaching the Strap
- The cord is securely connected to both sides of the bag, ensuring stability for carrying.

Final Assembly
- Once the squares are joined, the button is attached, and the strap is secured, the sling bag is complete.

- The finished bag is stylish, functional, and made entirely from granny squares.
Video Guide
https://youtu.be/hvnyeLiYaPM