How to Crochet Amigurumi Fish For Beginners
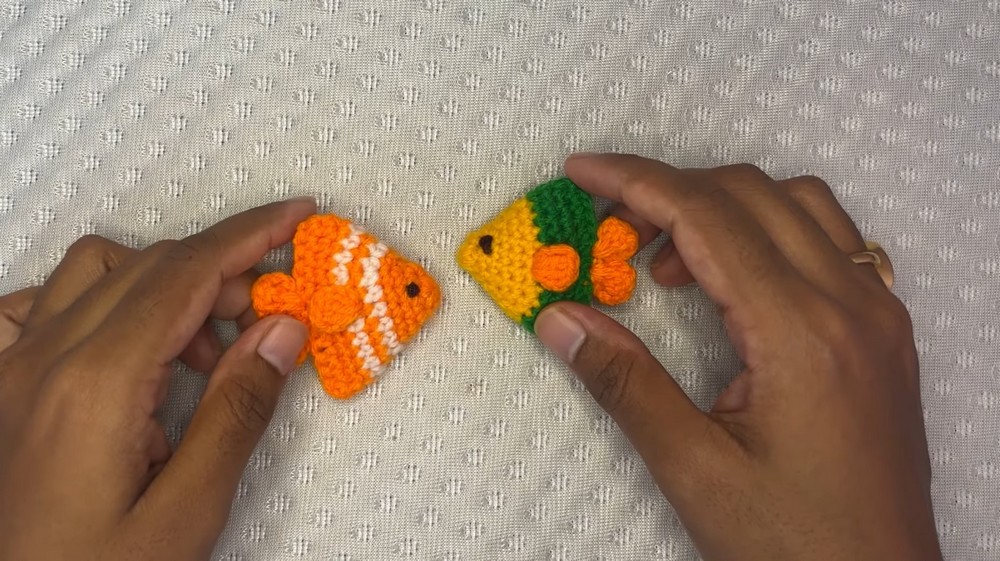
Learn how to crochet a small fish, also known as an amigurumi fish, with a step-by-step tutorial for beginners and experts. The host explains that this is a beginner-friendly project using basic crochet stitches. The video covers the materials needed, creating the base with a magic circle, and increasing the rounds to expand the fish’s body. It demonstrates how to change yarn colors and then stuff the piece before closing it.
Finally, it shows how to add the fins and tail by crocheting chains and double crochets, and how to embroider the eyes. So, follow through with us for the complete tutorial.

How to Crochet a Little Fish
The tutorial presents a step-by-step guide to creating an adorable crochet fish that can be used as a keychain, children’s toy, or home decoration. This beginner-friendly project utilizes easy crochet techniques and basic materials, making it accessible for crocheters of all skill levels. Below is a summary of the process outlined in the tutorial:
Introduction
- The creator introduces the project: a small crochet fish.
- Suggested uses include keychains, kids’ toys, or decorative items.
- Made using three colors (orange, white, and an optional third)—but the choice of colors is flexible.
- Materials used in the tutorial:
- Acrylic wool yarn.
- A 3 mm crochet hook.
- Instructions are intended for beginners and make use of simple crochet techniques.
Getting Started
Creating the Magic Circle
- The magic circle is used to begin crocheting the fish.
- Two loops are created, and the stitches are worked within the circle.
- The method ensures that the center of the circle is tight and without holes.
First Round
- Single crochets are made into the magic circle.
- Once the first round is complete, the circle is tightened, and a slip stitch is used to close it.

Building the Body
Increasing Rounds
- Each subsequent round follows an increasing pattern:
- Alternating single crochets and increases (two single crochets in one stitch) are worked to expand the shape.
- For each new round, the increases are spaced further apart (e.g., every second stitch, then every third stitch, etc.).
- Changes in yarn color are demonstrated in the tutorial, with clear instructions for transitioning between colors without cutting threads.

Maintaining Shape
- After the necessary increases, the shape is maintained by working single crochets evenly around the body.
- Two rounds are worked without increases to finalize the basic fish form.
Assembling the Body
Closing the Shape
- The fish body is folded in half.
- Single crochets are used to join the two sides together.
- The body is filled with polyfil or cotton stuffing as it’s closed.

Sewing Ends
- Loose yarn ends are sewn and hidden inside the fish for a clean finish.
Creating the Tail
- The tail is composed of three stitches:
- Chains and double crochets are made in the same stitch to create a fan shape.
- This is repeated twice to create the fish’s tail.
Adding the Fins
- Small fins are added below the tail using a similar technique:
- Chains and double crochets are structured in a fan-like design.
- Fins can be made in the same or contrasting colors.

Finishing Touches
Sewing Threads
- Remaining threads are sewn inside and trimmed for a neat appearance.

Adding Eyes
- Optional safety eyes (Amy Groomy eyes) or hand-stitched eyes can be added to give the fish its personality.

Conclusion
- The finished fish is presented as a cute and customizable project.
Video Guide
https://youtu.be/XPBJSgJ5g4M