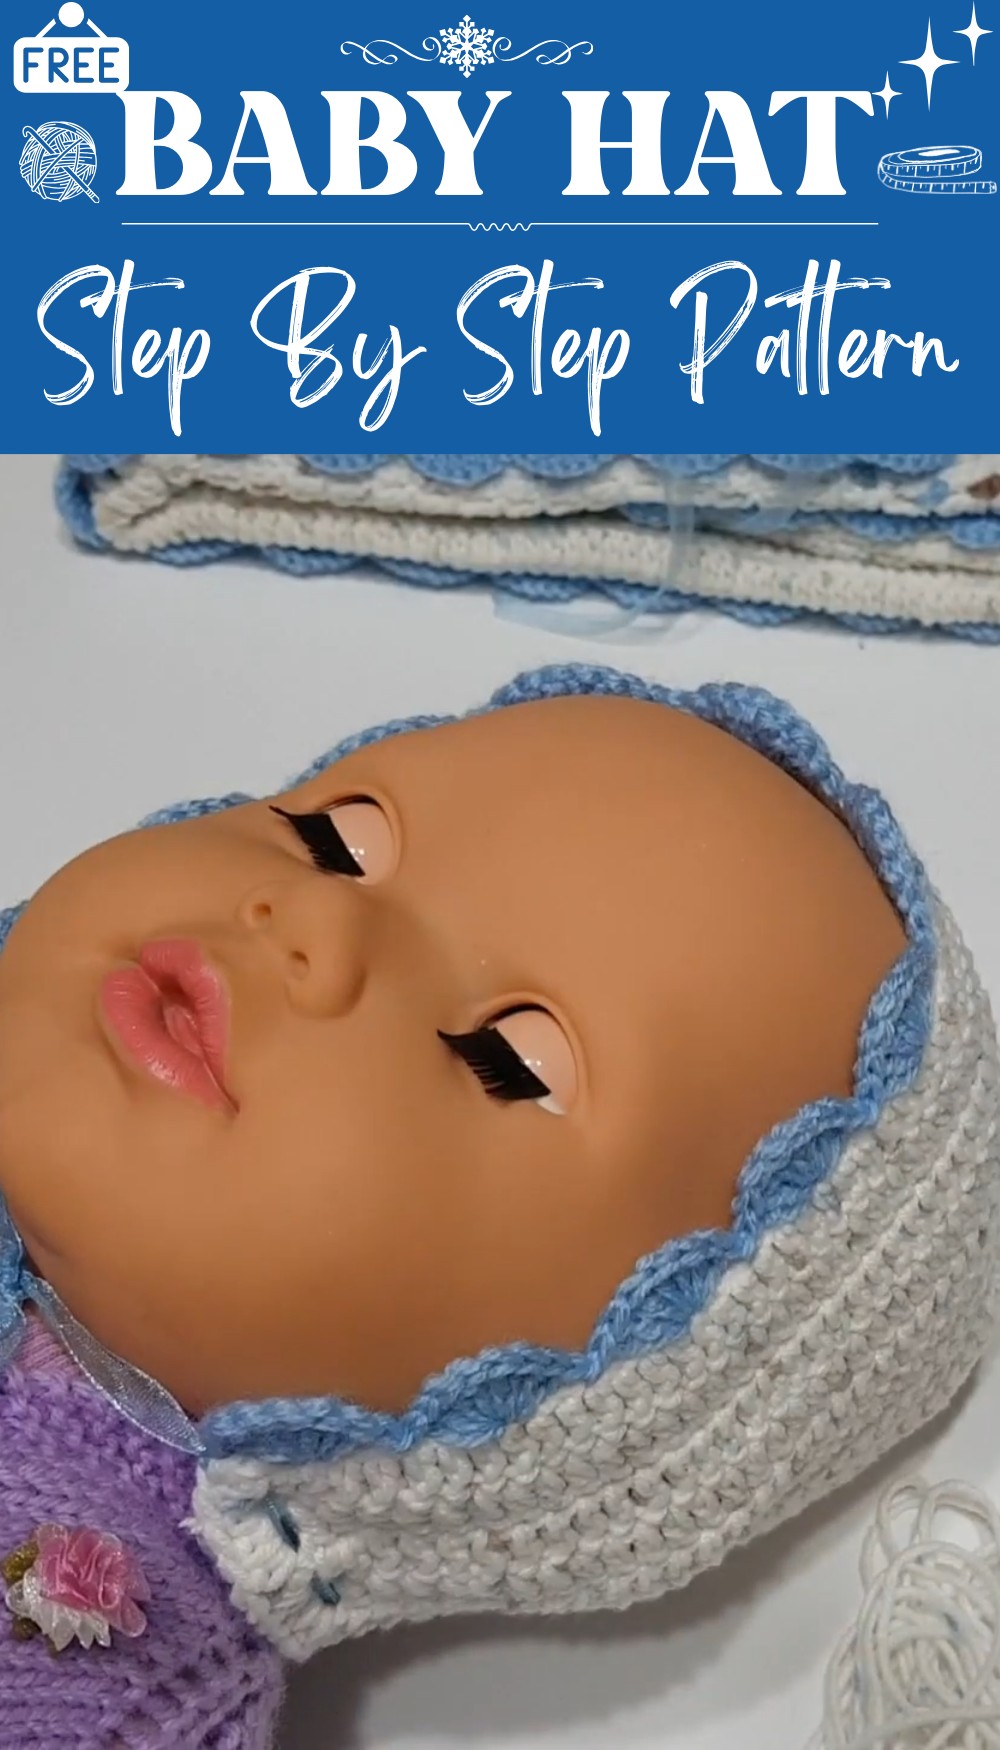
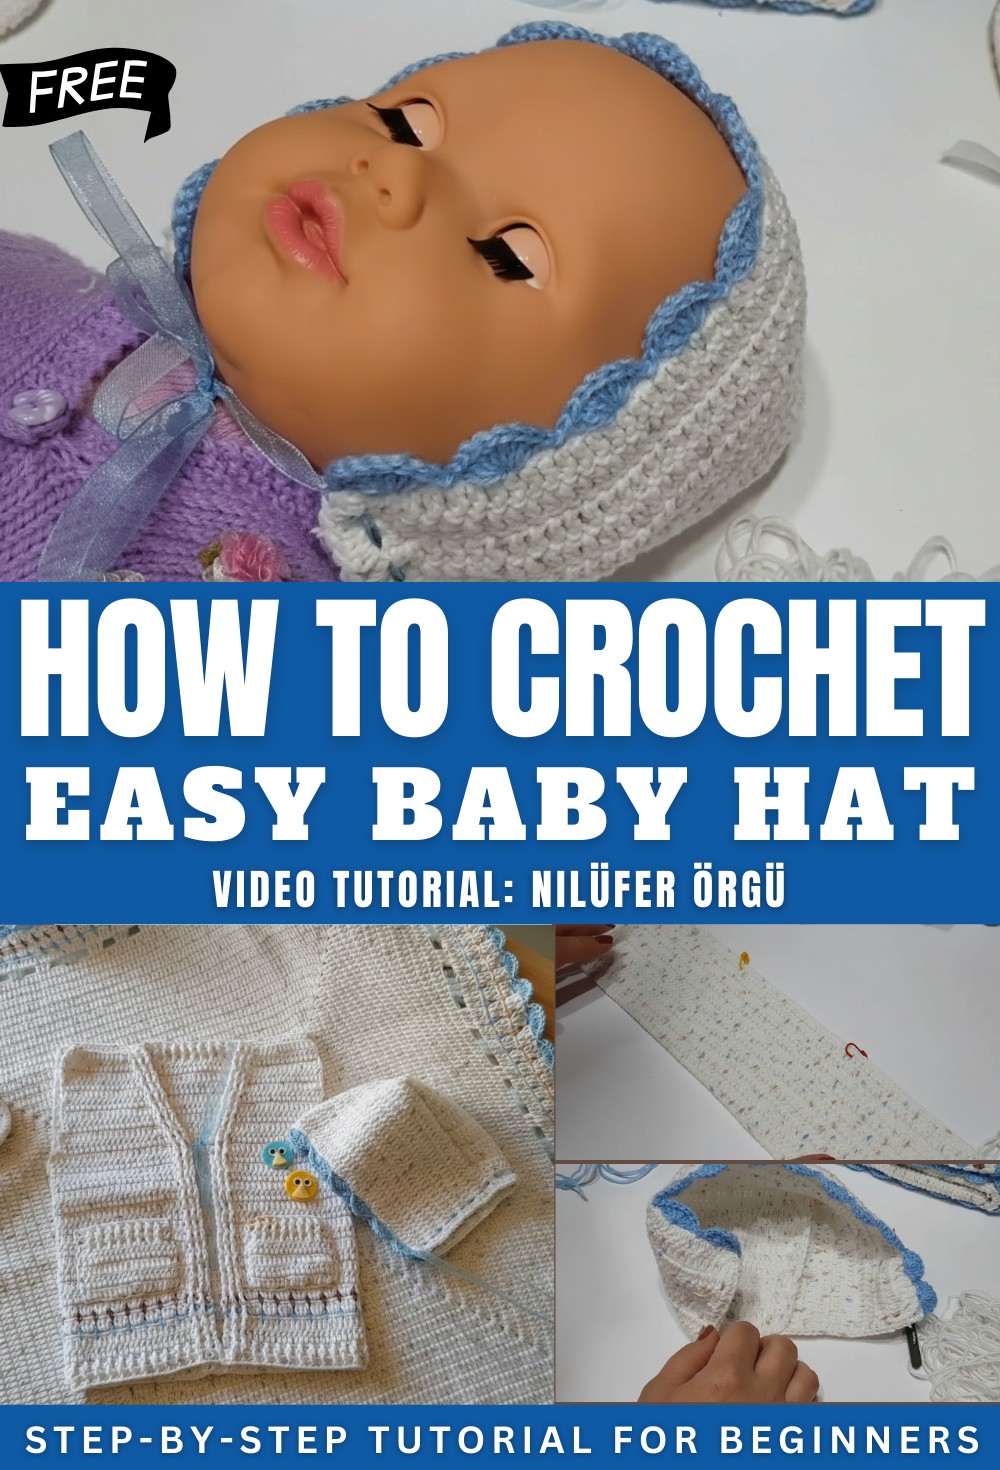
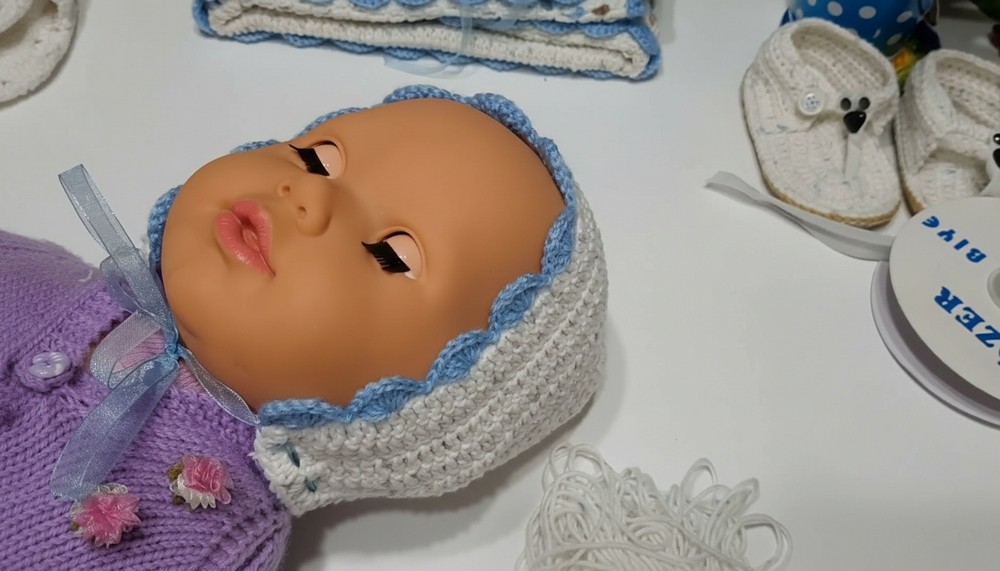
Free Crochet Baby Hat Pattern for Boys and Girls
Warm little heads with this free crochet baby hat pattern that’s perfect for creating sweet one-of-a-kind gifts every parent adores.
No store-bought cap ever matches the gentle charm that handmade yarn can offer. A crochet baby hat pattern brings soft stitches together, forming a peaceful and inviting look perfect for little ones. Each hat carries warmth and care, making even the simplest designs feel special. Light colors and gentle textures work together to cradle a baby’s head, keeping it cozy and protected through every season.
Quick Free Crochet Baby Hat Pattern for Newborns
Using a crochet baby hat pattern allows anyone to make something truly personal—each stitch adds comfort, each color brings extra delight. It’s easy to see and feel the love in these creations as they softly shield a newborn from cool breezes or bright sunlight. Every finished hat adds sweetness to outfits and keeps tiny heads safe. Making one is a simple way to share affection and give a unique treasure that stands apart from anything found in stores.
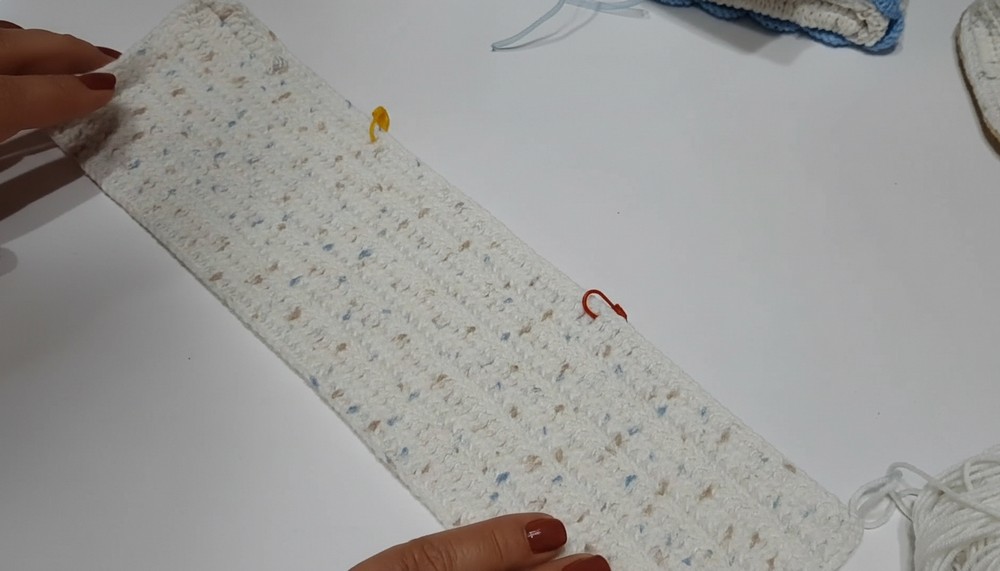
Very Easy Baby Hat Crochet Pattern (Rectangle-to-Beanie)
Materials
- Yarn: Soft cotton yarn (DK or light worsted recommended), same or coordinated with your leftover blanket/vest projects; approx. 25–35 g (or suitable leftover yarn).
- Hook: US G/6 (4 mm) crochet hook or size for gauge.
- Notions: Yarn/tapestry needle, scissors, stitch markers, measuring tape
- Optional: Small amounts of contrasting yarn for edging/embellishment; ribbon or soft lace for tie; decorative items (faux flowers, felt shapes, buttons).
Key Abbreviations (US Terms)
- ch: chain
- dc: double crochet
- sl st: slip stitch
- sc: single crochet
- st(s): stitch(es)
- rep: repeat
- tog: together (as in dc2tog: double crochet two together)
Special Notes
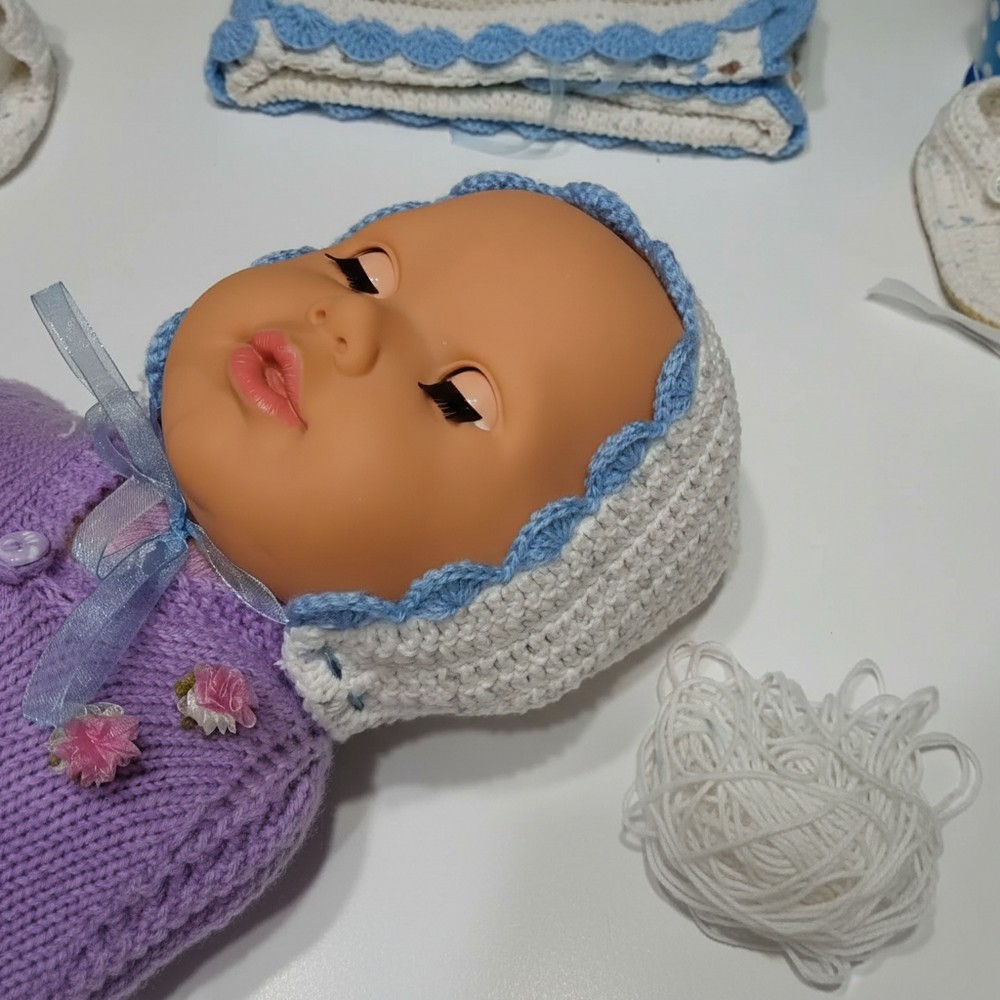
- Sizing: Model is suitable for a baby/toddler (approx. 12 months; fits head 45–48 cm / 17.5–19 in circumference).
- Shape: Made as a flat rectangle which is then seamed up the back and gathered at the top.
- Customization: You may stripe or add an edging with leftover yarn, or add appliques/ribbon for a matching set.
Pattern
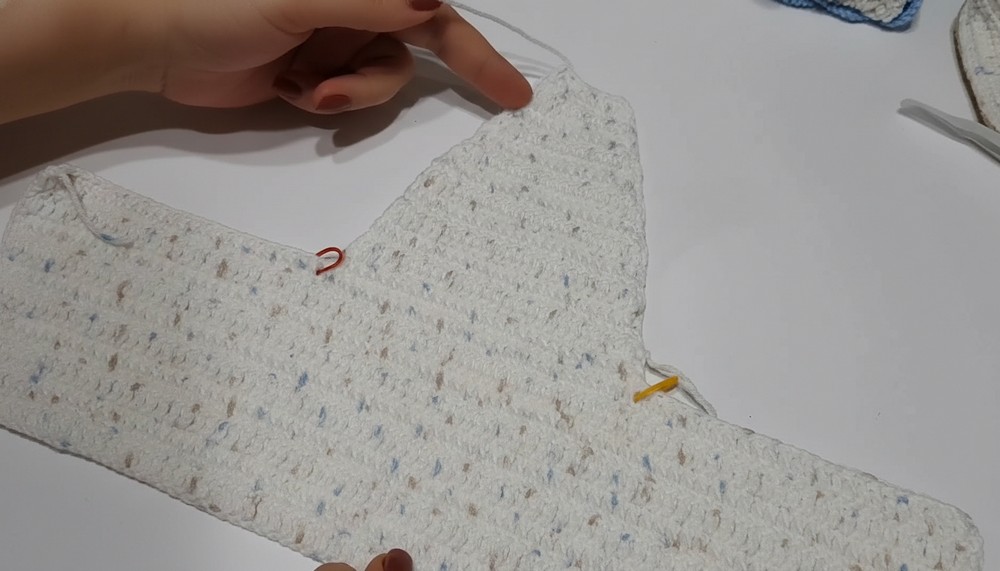
1. Rectangle Body
Foundation Row:
- Ch 81.
- Row 1: Dc in 4th ch from hook (counts as first dc + ch-3), dc in each ch across (80 dc).
- Turn.
Rows 2–10:
- Ch 3 (counts as dc), dc in each st across (80 dc).
- Turn.
- Total of 10 rows (or until rectangle measures about 15 cm/6 in tall).
2. Shaping the Crown (Top of Hat)
Divide your stitches as follows:
- Place markers so you have 26 dc on one side, 28 dc in the center, and 26 dc on the other side.
- (Counts for division: 26 | 28 | 26 = 80)
Crown Shaping Rows:
For each decreasing section (working center 28 dc):
- Row 1 (Decrease – RS):
- Join yarn in 27th st (after first 26 dc), ch 3 (counts as dc), dc in next 27 sts (work 28 dc), leave rest unworked. Turn.
- Row 2 (Decrease – WS):
- Ch 3, skip next st, dc in each st to last 2, dc2tog over last 2 dc. (Work decrease at both start and end of row.) Turn.
- Continue as set, working one plain row (no decrease) then a decrease row, until you have 8–9 dc left. Each decrease row will reduce stitch count by 2.
(You should alternate one decrease row (both sides) with one even row – this gives a gentle crown curve. Continue until about 8–9 stitches remain.)
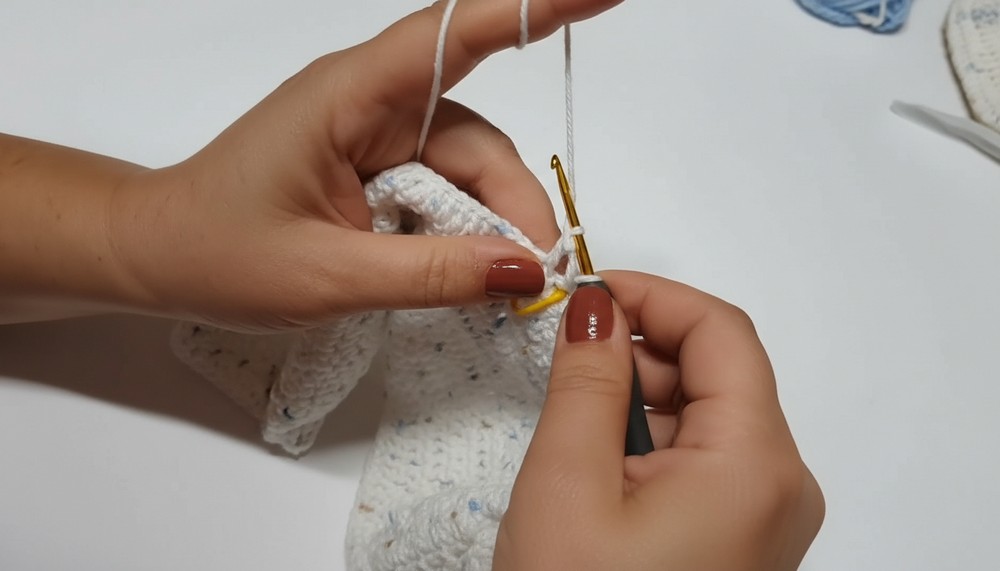
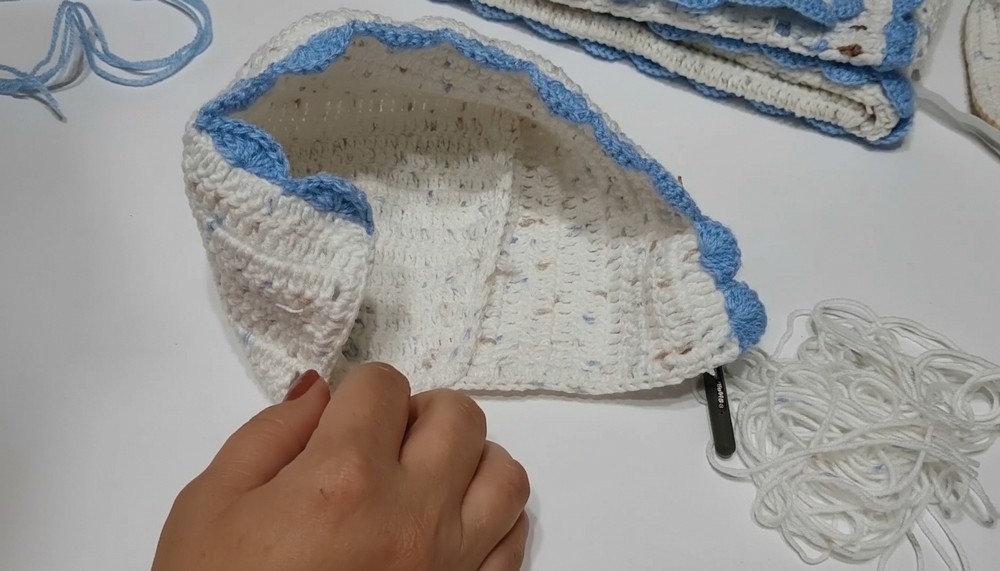
3. Seam
- Fold the rectangle right sides together, matching long edges.
- Sew or slip stitch seam along the side edge from the bottom to the crown (use the same yarn tail).
- Fasten off and weave in ends.
4. Finishing the Crown
- Gather Crown: With a yarn needle, weave through remaining 8–9 sts at crown, pull tight to close. Secure and weave in end.
5. Edging & Embellishment (Optional)
- Neck/Ear Flap Edging:
With desired color, join yarn at starting chain edge.
Work 1 round of sc or slip stitch evenly around edge for stability and neatness. Fasten off. - Shell Edging:
Work: (sc, skip 3 sts, 8 dc in next st, skip 3 sts, sl st in next st) around edge for a scalloped border. - Ribbon or Cord:
If you wish, weave a ribbon, cord, or crocheted chain through the neck edge as a tie. - Decorations:
Add an applique, felt shape, button, or bow to coordinate with the rest of baby’s set.
6. Sizing
- Finished hat should measure approx. 19 cm wide x 15 cm tall before seaming (fits baby head circumference approx. 45–48 cm).
- Adjust chain length and row count for desired size. For older children, increase foundation chain and/or number of rows.
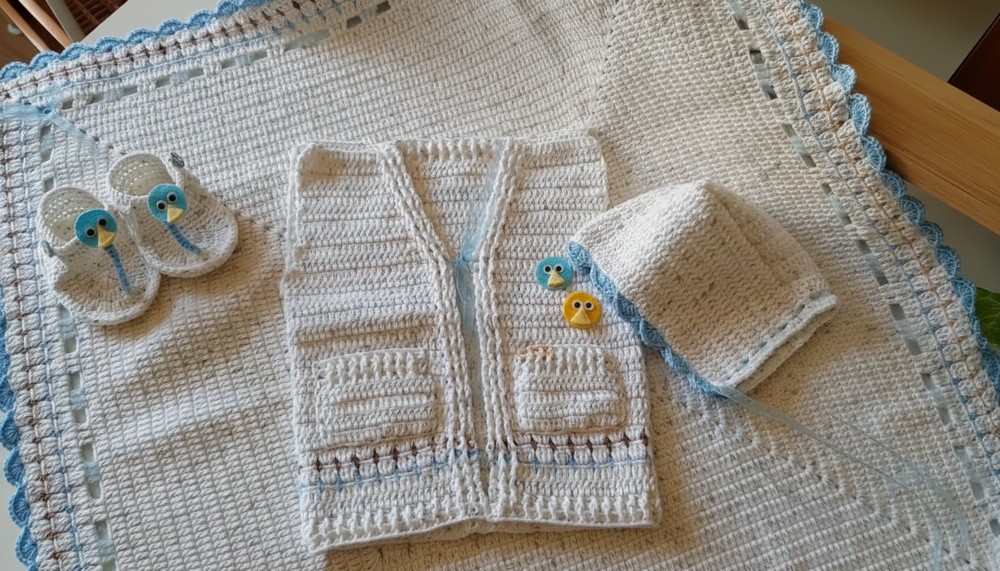
Conclusion
This pattern creates a quick and simple baby hat, perfect for using up leftover yarn from vests or blankets. Its rectangle shaping and gentle crown decreases are ideal for beginners, and the project is easy to customize with color or edging for a complete matching set.
Pattern Corrections
- Ensure you have the correct division of stitches at the crown; adjust markers so the center section is even.
- When gathering the crown, pull snug without breaking the yarn for a neat finish.
Tips
- Use the same yarn as your vest/blanket for a coordinated and professional look.
- For best results, use a soft cotton or hypoallergenic yarn that is gentle on baby’s skin.
- Blocking your finished hat will give it the best shape and drape.