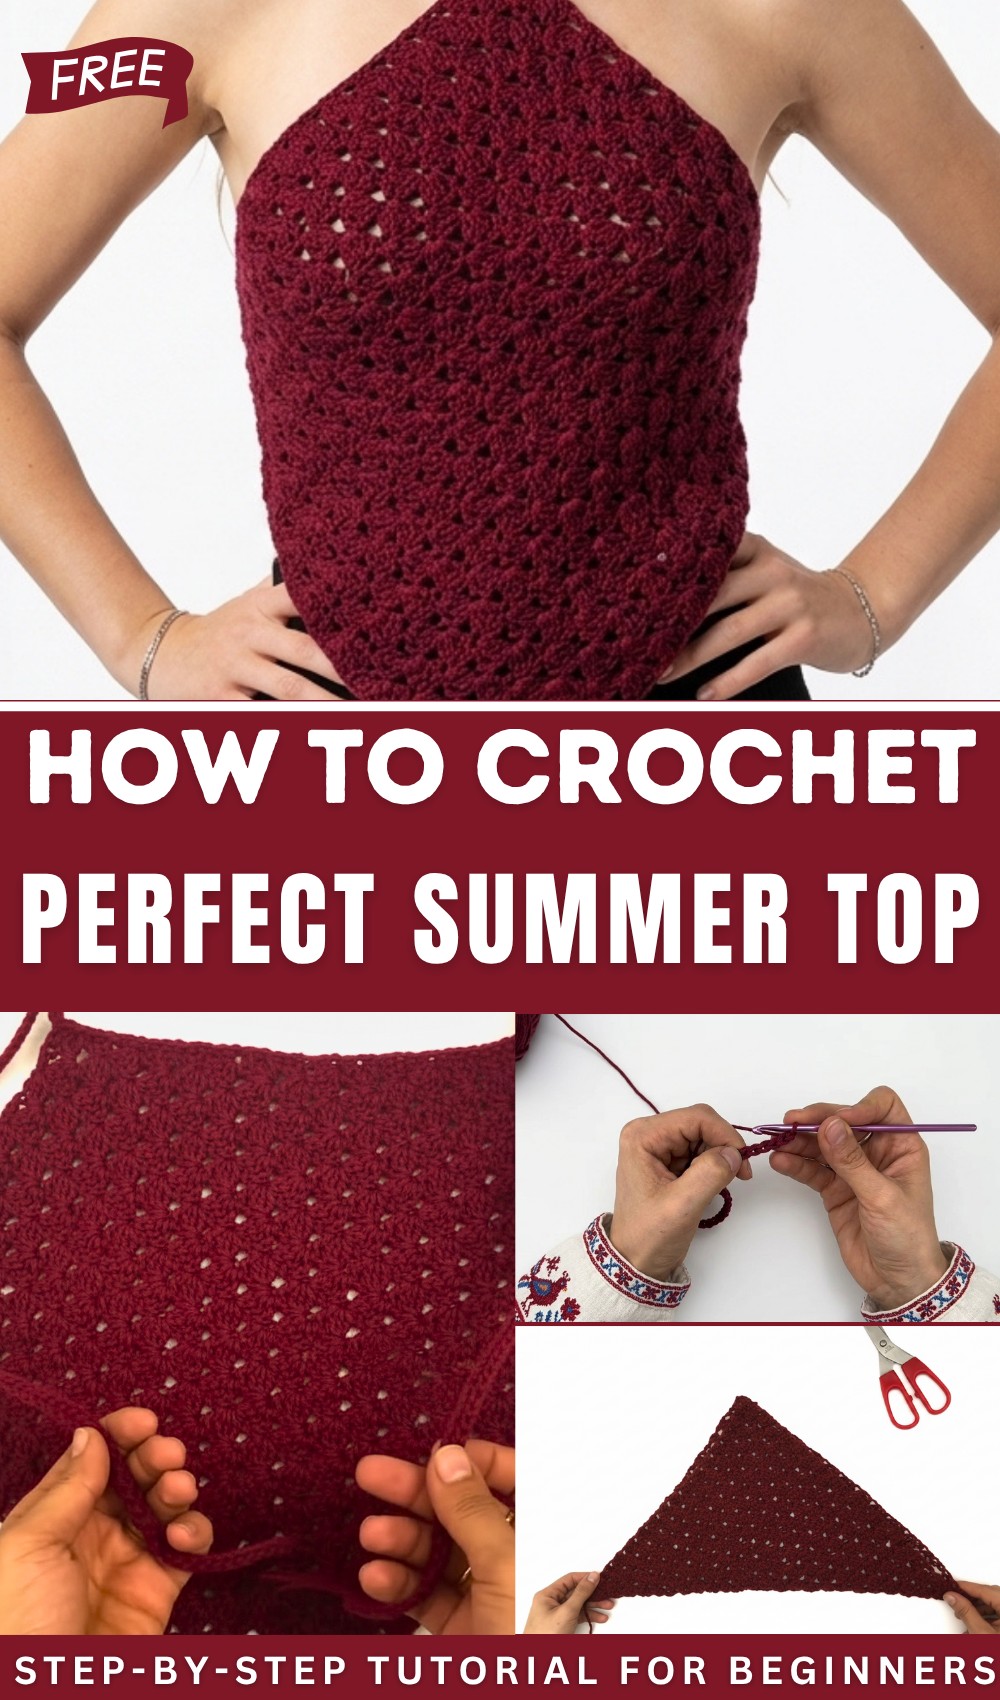
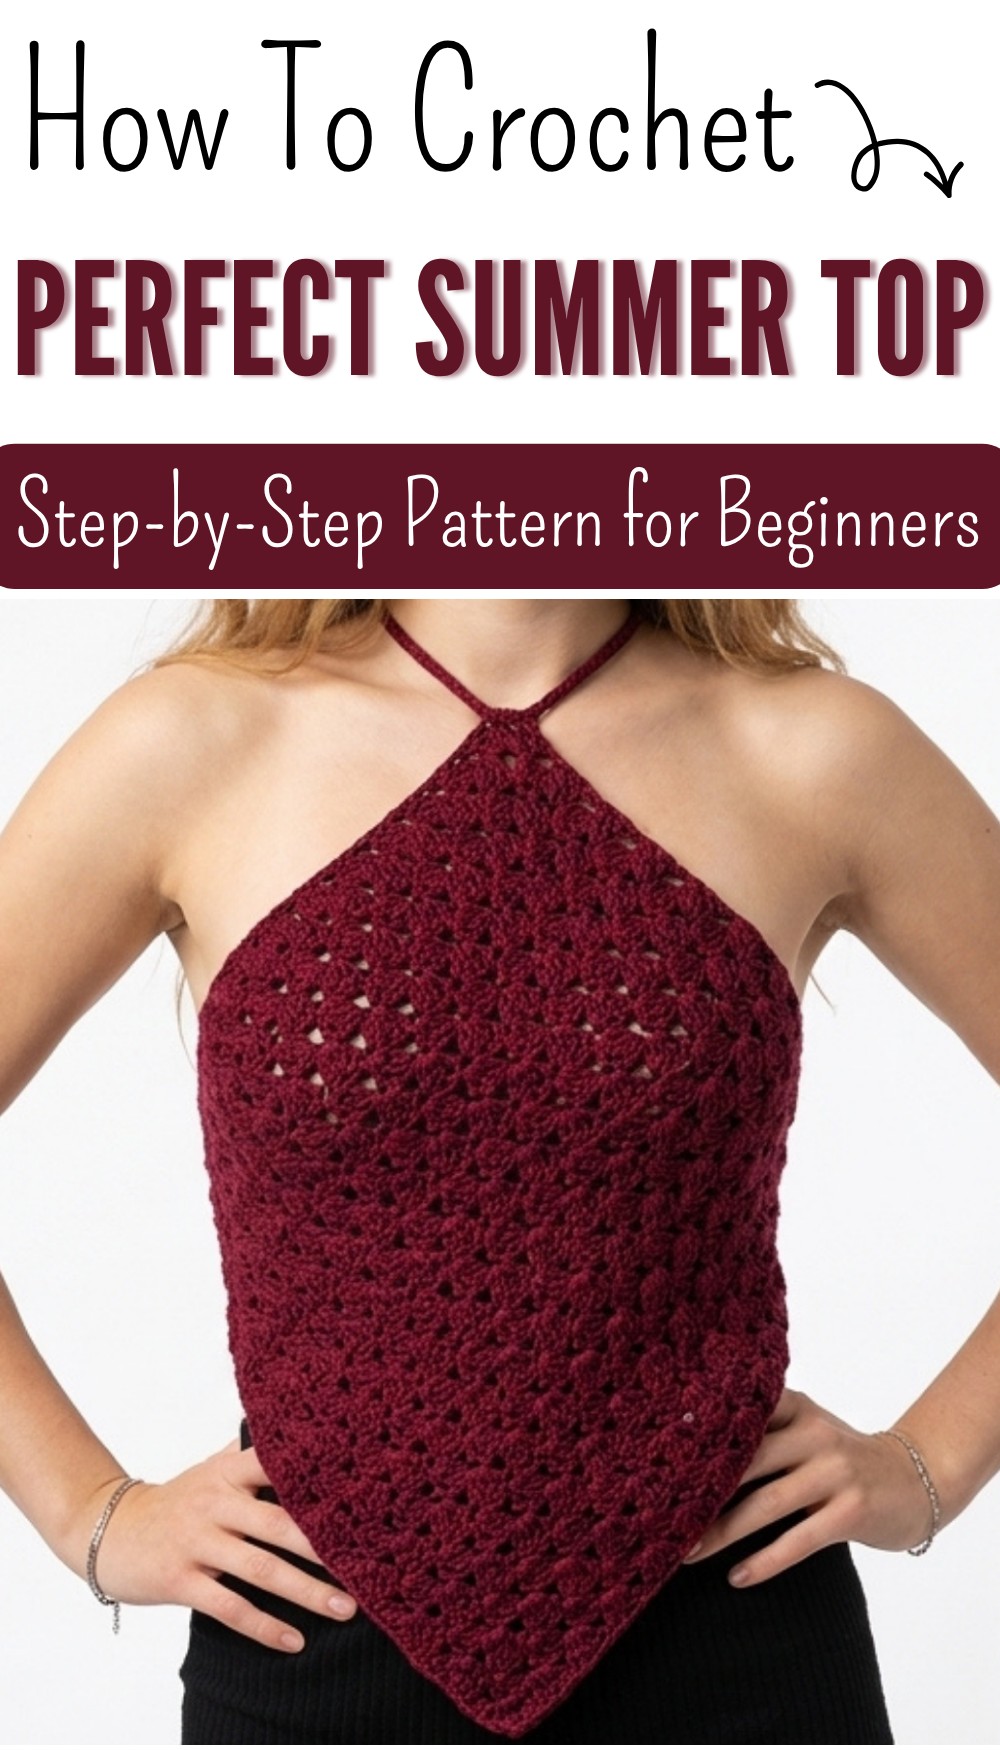
Crochet Summer Top Free Pattern That’s Quick & Easy
Find a simple and beautiful free crochet summer top pattern that is light, comfortable, and perfect for staying cool and stylish on sunny days.
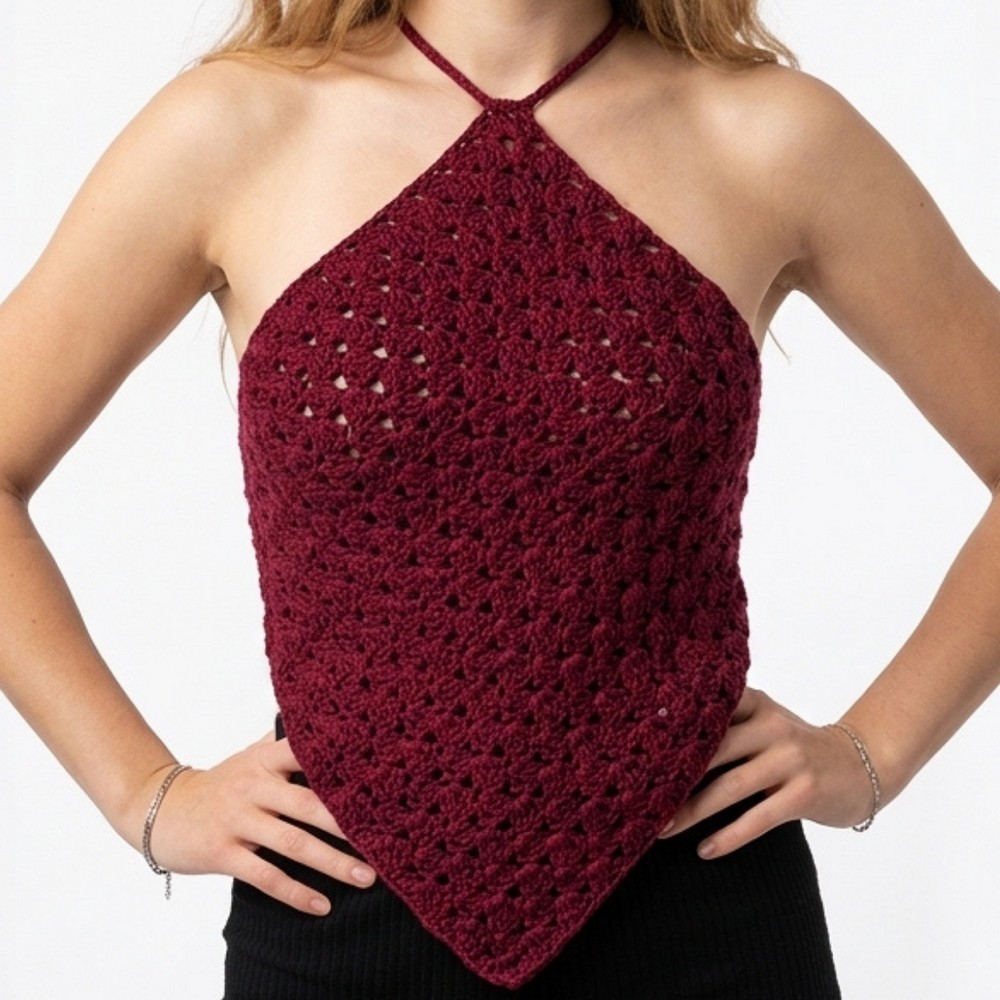
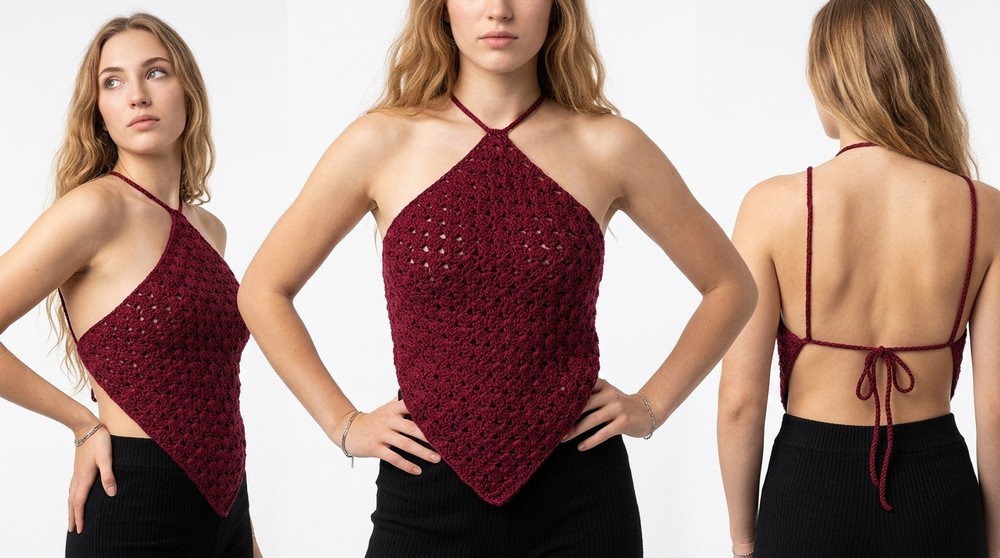
Staying cool and stylish during hot summer days can be a challenge, but this top makes it easy. Its lightweight and breathable design keeps you comfortable while adding a touch of timeless elegance. Featuring airy textures and delicate details like lace-like openings or floral accents, it feels fresh and natural, perfect for warm weather.
Perfect Free Crochet Summer Top Pattern for Any Wardrobe
This versatile piece pairs effortlessly with jeans, shorts, or skirts, making it suitable for casual outings, relaxing at the beach, or light evening gatherings. With options like sleeveless cuts, straps, or off-shoulder styles, it offers something for everyone. The soft and relaxed fit ensures both comfort and charm, giving you a perfect wardrobe addition for sunny days. It’s a simple yet stylish solution for looking your best while beating the heat.
Crochet Summer Top – Step-by-Step Pattern
Finished Size
- The tutorial uses 50 chains for the foundation (approximately medium size).
- You can adjust the size by increasing or decreasing the multiples of chains (explained further in the pattern).
Materials Needed
- Yarn: A medium-weight cotton yarn (e.g., 3 SW Cotton Spheres, as referenced in the video). Cotton is ideal for breathability and summer wear.
- Crochet Hook: Size 4.5 mm (or as recommended for your yarn).
- Scissors
- Tapestry Needle: For weaving in ends.
- Measuring Tape: For checking the square dimensions.
- Stitch Markers (optional): To keep track of edges and adjustments.
Special Techniques
- Unfinished Double Crochet: Work part of a double crochet (dc) but do not complete it until combining multiple loops.
- Cluster Stitches: Combining stitches together to create a decorative effect.
- Slip Stitch (sl st): Used for creating the cord and adding structure.
Gauge
Gauge will depend on your yarn and hook. Test by working a small swatch of the pattern:
- Width and Length: Approximately 10 cm x 10 cm (using similar stitches).
Adjust hook size as necessary for proper fit.
Pattern Instructions
Step 1: Create a Foundation Chain
- Begin with a slip knot and chain a length based on the size desired:
- Use multiples of 3 + 5 chains.
- Example: 36 + 5 = 41 chains, 47 chains, or 50 chains for medium size.
- For the tutorial, create 50 chains.
Step 2: First Row
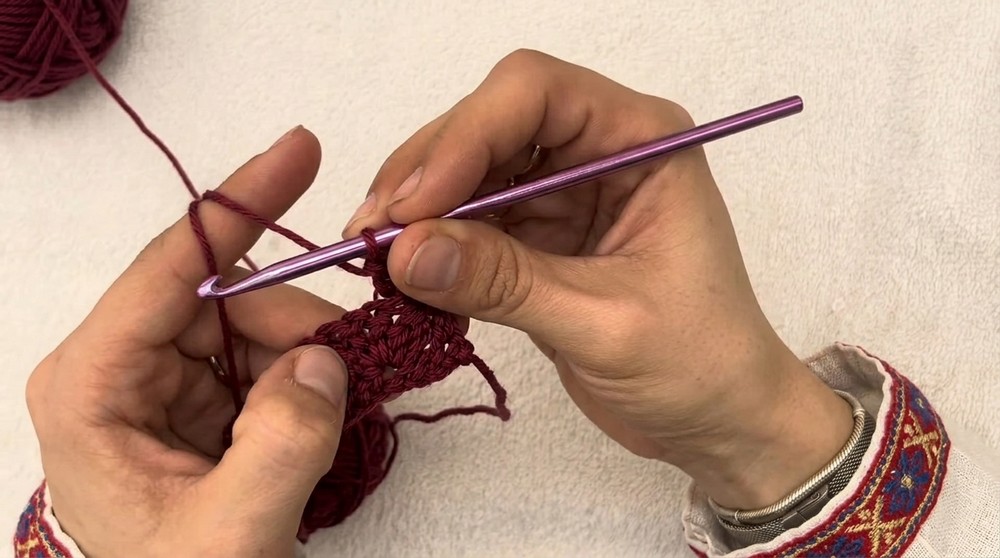
- Unfinished Double Crochet Cluster:
- Yarn over (yo), insert the hook into the 5th chain from the hook.
- Pull up a loop, yo, pull through 2 loops (leaving 2 loops on the hook).
- Repeat this twice more in the same chain to create 3 unfinished double crochets.
- You should have 4 loops on the hook.
- Yarn over and pull through all 4 loops, completing the cluster.
- Chain 1.
- Skipped Chains: Skip the next 2 chains and work 1 double crochet, followed by chain 1, into the 3rd chain.
- Still in the same chain, work 3 unfinished double crochets together.
- Repeat steps 2–4 across the row until you reach the last three chains. This creates the decorative design.

Step 3: Edge of the First Row
- For the last three chains:
- Work 1 double crochet into the last chain.
- Chain 4 and turn your work.
Step 4: Second and Subsequent Rows
- Cluster in First Stitch:
- In the same stitch as the turning chain, work 3 unfinished double crochets together.
- Pull through all 4 loops on the hook and chain 1.
- Work Across the Row:
- In each cluster’s chain space from the previous row:
- Work 1 double crochet, chain 1, and 3 unfinished double crochets together.
- Pull through loops and chain 1.
- In each cluster’s chain space from the previous row:
- Repeat the sequence to the end of the row.
- Ending the Row:
- Work a double crochet into the top of the turning chain from the previous row.
- Chain 4 and turn.
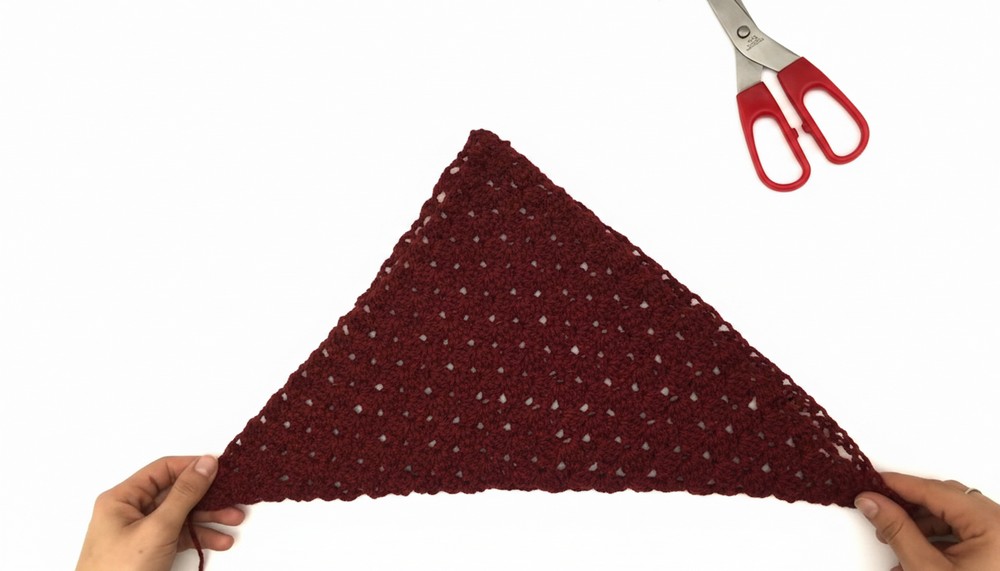
Step 5: Create a Square
- Continue following the above steps for subsequent rows, maintaining the pattern.
- Stop when your work measures the same length as the width, forming a perfect square (e.g., 50 chains for width matches 50 chains of height).
Step 6: Finishing the Square
- At the end of the last row:
- Add 1 chain, cut your yarn, and pull through to fasten off.
- Weave in the Ends: Use the tapestry needle to hide all loose ends securely.
Step 7: Making the Cord
- Create a chain long enough to serve as a tie for the top. The recommended length is 250 chains, but you can adjust this based on your desired fit:
- This should be long enough to pass through the neck and bust area and tie into a bow at the back.
- Once the chain is complete:
- Work slip stitches (sl st) into each chain to create a sturdy cord.
- At the end of the cord, cut the yarn, pull through, and secure with a small knot.
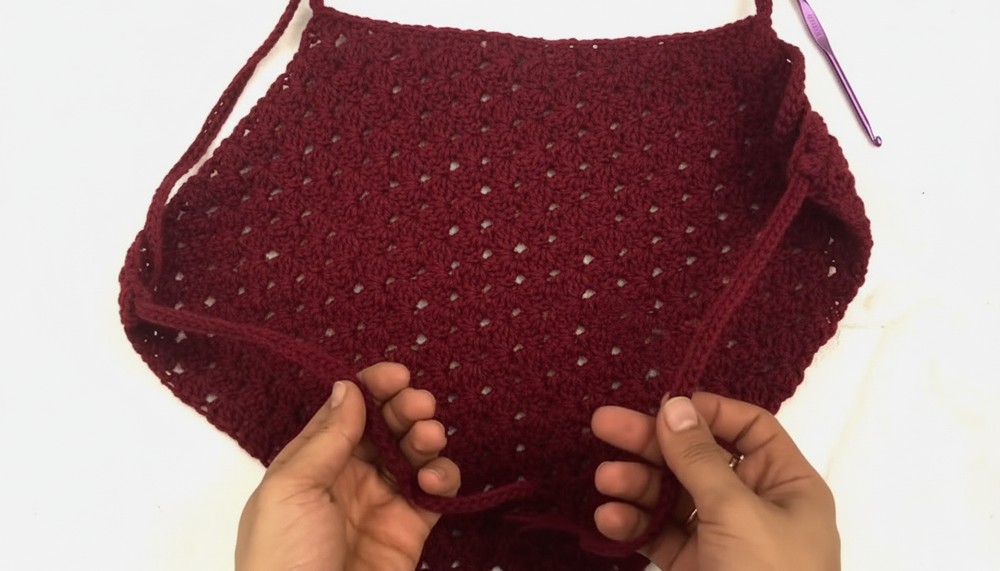
Step 8: Assemble the Top
- Use the cord to thread through the square:
- Pass the cord through the edges of the square as follows:
- At the top (neck edge): Thread it evenly around to gather the neckline.
- At the bottom (bust edge): Thread it through to gather the bust area.
- Pass the cord through the edges of the square as follows:
- Tie the cord into a bow at the back for a snug and adjustable fit.
Customization Ideas
- Change the Size:
- Increase or decrease the foundation chains while following the multiples 3 + 5 rule.
- Adjust the number of rows based on your height and fit preferences.
- Colors and Yarn:
- Use gradient or multi-colored yarn for a unique summer feel.
- Choose lighter cotton-blend yarn for airy, breathable tops.
- Add Embellishments:
- Sew beads to the ends of the cord for added decor.
- Add a scalloped or picot edge around the square for a feminine touch.
Final Touches
- Steam block your square for neat edges and to relax the stitches. This ensures a smooth and professional finish.
- Ensure all loose ends of yarn are securely woven in to prevent unraveling.
Tips for Maintaining the Pattern
- Care for Cotton Tops:
- Wash in cold water with mild detergent to maintain shape.
- Lay flat to dry for longevity.
- Consistent Stitches:
- Ensure that the 3 unfinished double crochets are uniform throughout for a clean and consistent look.
Final Words
Congratulations! You’ve completed your crochet summer top. This quick and easy project makes for a versatile addition to your summer wardrobe. It’s breathable, adjustable, and stylish, perfect for vacations, casual outings, and warm days.