How to Crochet Teddy Bear for Gifting
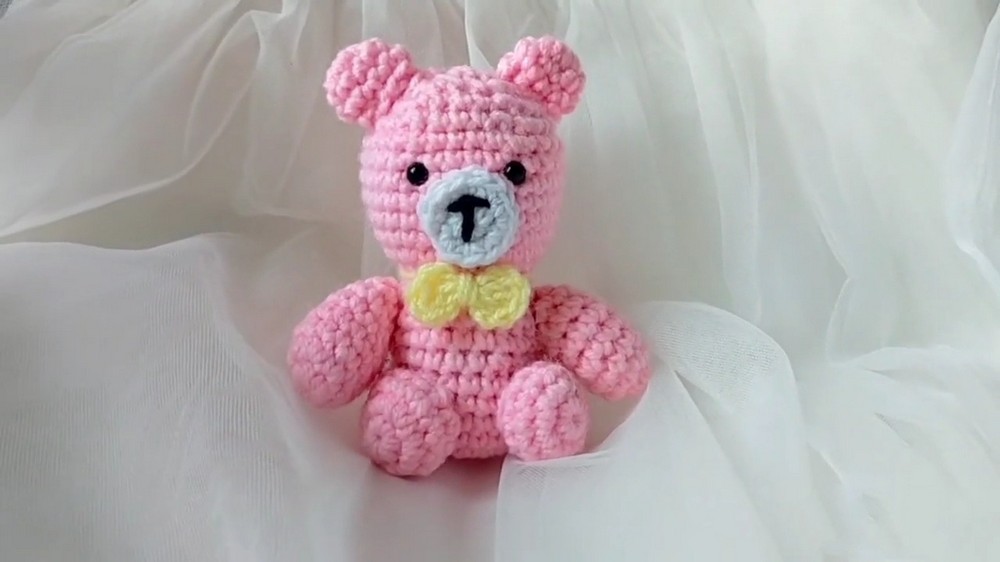
Here is a tutorial to crochet an adorable teddy bear bag charm perfect for beginners. After stuffing and assembling the parts, a cute bow is also added, making it fun. The process is beginner-friendly and customizable, making it perfect for gifts or personal accessories.

Crochet Teddy Bear Pair Pattern
The video demonstrates a step-by-step process to create a teddy bear using crochet techniques. Beginning with the body construction, the tutorial covers rounds of single chains, increases, and decreases to shape different parts like the legs, arms, tail, and ears. Detailing stitch counts for each round ensures precision in crocheting.
Materials List
- Yarn: 4-ply acrylic or cotton yarn, colors of your choice for body and accessories (beige/brown for bear, accent colors for bow, etc.)
- Hook Size: US B/1 (2.25 mm) or size suitable for amigurumi (to create a dense fabric)
- Stuffing: Polyester fiberfill
- Tapestry needle: For sewing parts and weaving in ends
- Scissors
- Stitch marker: Helpful for marking the beginning of each round
- Toy safety eyes (6 mm) or black embroidery thread (optional)
- Embroidery thread (optional for nose/mouth)
- Decorative items: Buttons, felt, ribbon for bow (optional)
Key Abbreviations
| Abbreviation | Meaning |
|---|---|
| ch | chain |
| sc | single crochet |
| inc | increase (2 sc in next st) |
| dec | decrease (sc2tog) |
| sl st | slip stitch |
| st | stitch |
| MR | magic ring |
| ( ) | repeat instructions inside |
Special Notes
- Pattern is worked in continuous rounds unless otherwise specified.
- Use a stitch marker at the beginning of each round.
- Stuff firmly as you go.
- Pattern is written in US crochet terminology.
Pattern Instructions
Body (Worked from bottom up)
Round 1:
Start with a magic ring, ch 1 (does not count as st).
Work 8 sc in MR. (8 sts)
Pull the ring tight.
Round 2:
Work 2 sc in each st around (inc in each st) (8 inc). (16 sts)

Round 3:
(Sc 1, inc) repeat around. (24 sts)
Rounds 4–7:
Sc in each st around. (24 sts per round; 4 rounds)
Round 8:
Sc in next 6 sts, (dec over next 2 sts), repeat (sc 6, dec) pattern around. (21 sts)
Round 9:
Sc in each st around. (21 sts)
Round 10:
Sc in next 5 sts, dec. Repeat around. (18 sts)

Round 11:
Sc in next 4 sts, dec. Repeat around. (15 sts)
Round 12:
Sc in next 3 sts, dec. Repeat around. (12 sts)
Stuff body firmly with fiberfill.
Round 13:
(Inc in next st, sc 1) repeat around. (18 sts)
Round 14:
(Sc 2, inc) repeat around. (24 sts)
Rounds 15–20:
Sc in each st around. (24 sts per round; 6 rounds)

Round 21:
(Sc 2, dec) repeat around. (18 sts)
Round 22:
(Sc 1, dec) repeat around. (12 sts)
Round 23:
(Dec) repeat around. (6 sts)
Finishing:
Fasten off leaving a long tail. Weave thread through remaining stitches, pull tight to close. Secure and weave in the end.
Legs (Make 2)
Round 1:
Make a magic ring, ch 1, 7 sc in MR, close ring. (7 sts)
Round 2:
2 sc in each st around (inc in each st). (14 sts)
Rounds 3–4:
Sc in each st around. (14 sts for 2 rounds)
Finishing:
Fasten off leaving a long tail for sewing. Stuff lightly.
Arms (Make 2)
Round 1:
Make a magic ring, ch 1, 8 sc in MR, close ring. (8 sts)
Rounds 2-3:
Sc in each st around. (8 sts for 2 rounds)
Finishing:
Fasten off leaving a long tail. Do not stuff or stuff only lightly.
Ears (Make 2)
Round 1:
Make a magic ring, ch 1, 6 sc in MR, close ring. (6 sts)
Round 2:
2 sc in each st around (inc in each st). (12 sts)
Rounds 3–4:
Sc in each st around. (12 sts for 2 rounds)
Finishing:
Flatten slightly, fasten off leaving a long tail for sewing.
Tail
Round 1:
Make a magic ring, ch 1, 7 sc in MR, close ring. (7 sts)
Rounds 2–3:
Sc in each st around. (7 sts for 2 rounds)
Finishing:
Fasten off with a long thread for sewing.
Muzzle
Round 1:
Make a magic ring, ch 1, 6 sc in MR, close ring. (6 sts)
Round 2:
2 sc in each st around (12 sts)
Round 3:
Sc in each st around (12 sts)
Finishing:
Fasten off with a long tail. Embroider nose/mouth as desired.
Bow (Make 1 or 2, optional)
Round 1:
Make a magic ring, ch 2, 2 dc in ring, ch 2, sl st in ring, ch 2, 2 dc in ring, ch 2, sl st in ring.
Pull magic ring closed, fasten off, leaving long tail to secure bow center and for sewing to head.
Assembly
- Sew the muzzle to the middle of the face. Embroider nose/mouth.
- Sew safety eyes or embroider eyes.
- Sew ears to sides/top of head.
- Sew arms and legs to sides/bottom of body.
- Sew tail at the back.
- Sew bow and any decorative accessories.
- Weave in all loose ends.
- Adjust stuffing and shape as desired.


Conclusion
With this pattern, you can create a cute teddy bear pair ideal for gifts or as keepsakes. The assembly and body part patterns are easy to follow and ideal for beginners or those new to amigurumi.
Pattern Corrections & Tips
- Consistency: Keep your tension firm for best results.
- Invisible decreases: For neater shaping, use invisible decreases where possible.
- Stuffing: Stuff as you go for best shape; do not overstuff limbs.
- Color changes: For character, use different colors for accessories or paw pads.
- Customize: Embroider different expressions or add clothing pieces for variety.