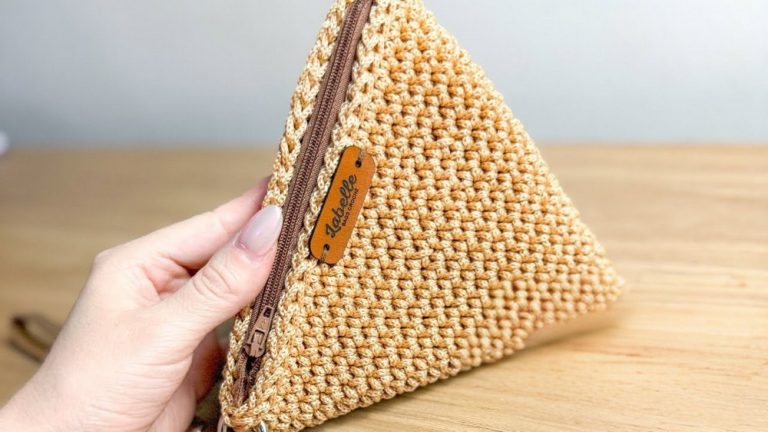
How to Crochet Textured Pencil Case for Beginners
This tutorial walks you through crocheting a stylish and functional textured pencil case using cotton yarn and a 3 mm hook. The design features a star-like textured stitch, three panels of different sizes, and a practical zipper. Step-by-step instructions guide you through chaining, pattern repeats, assembling the panels, and sewing in the zipper. It’s a beginner-friendly project that’s quick, secure, and perfect for storing your crochet tools or other small items.
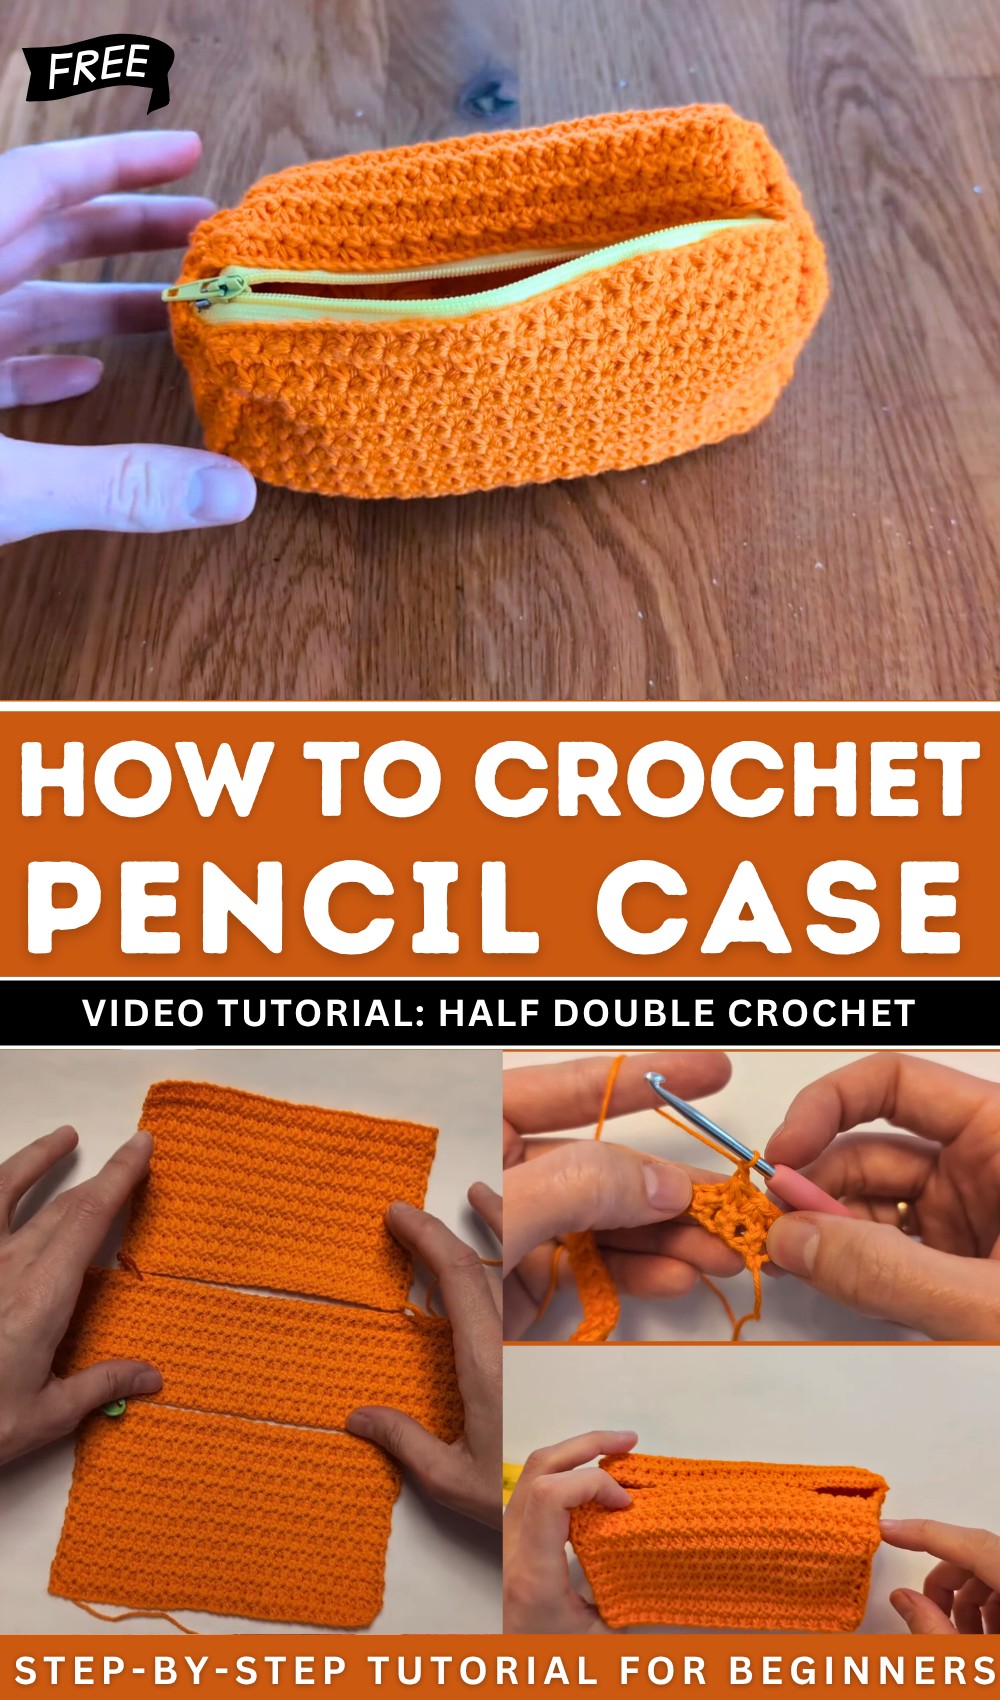
Crochet Textured Pencil Case Tutorial
This crochet tutorial guides you through creating a charming pencil case with a practical zipper for storing crochet tools or small items. Using 100% cotton yarn, a 3mm crochet hook, and simple techniques like the star-like pattern and single crochet stitch, three pieces are crafted and sewn together.
Introduction and Overview
- The tutorial provides step-by-step instructions to create a cute pencil case using crochet.
- Ideal for storing crochet tools or other small items, the pencil case features a secure zipper.
- Recommended materials:
- 100% cotton yarn (you can choose alternative yarn types).
- A 3mm crochet hook.
- A zipper.
- The finished case combines functionality with an attractive star-like crochet pattern.
Step 1: Starting the Chains
- Begin with a slip knot and create three chains:
- Two chains: Each 15 cm long.
- One chain: 30 cm long.
- Add two extra chains to each before starting the pattern.
Step 2: Establishing the Crochet Pattern
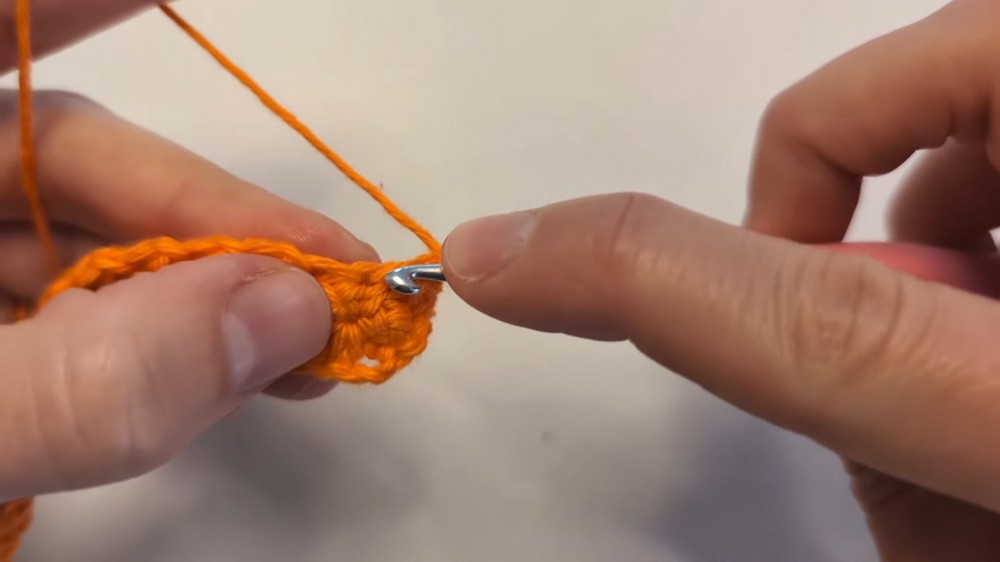
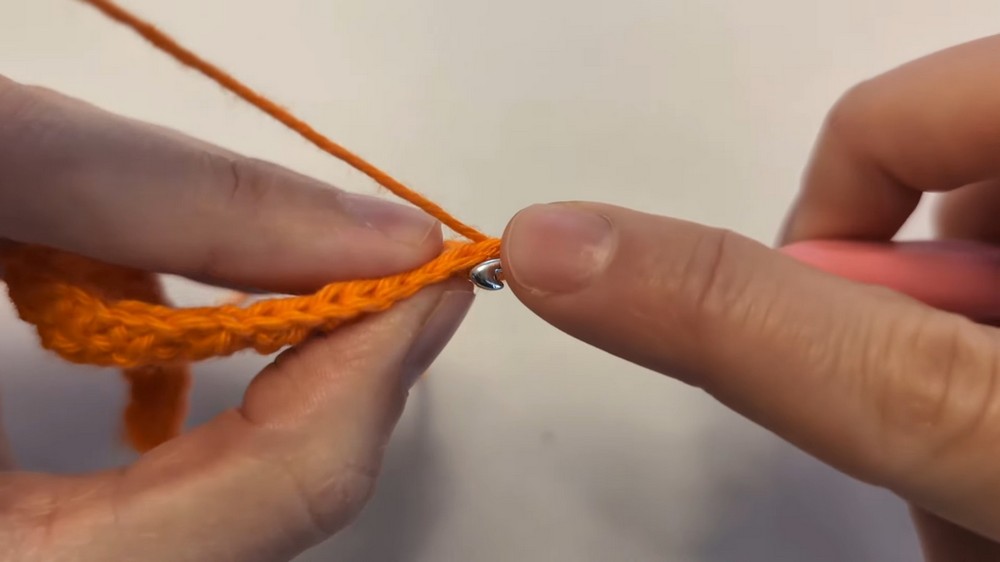
- Use a single crochet technique:
- Skip the last chain and insert the hook into the next one.
- Yarn over, pull through, and repeat to form loops (single crochet).
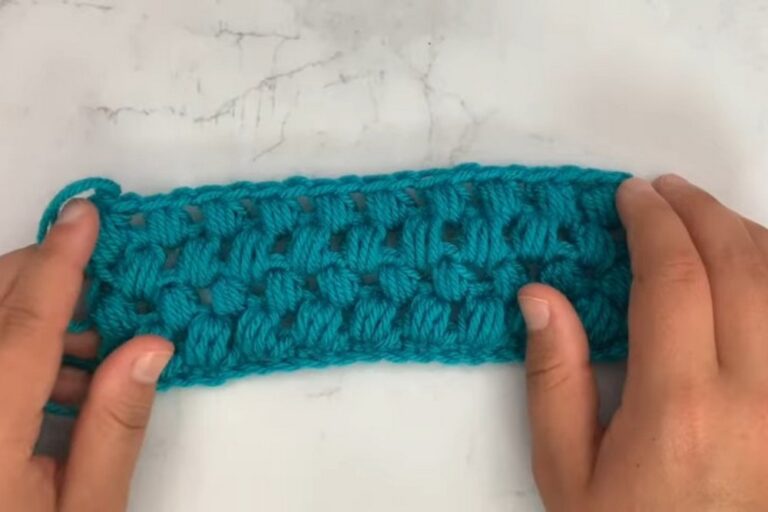
- Introduce the star-like crochet pattern:
- Insert the hook into an occupied chain and then into two free chains.
- Yarn over, pull through all four loops.
- Finish each section with a chain.
- Repeat the star pattern until the full length of the chain is completed.
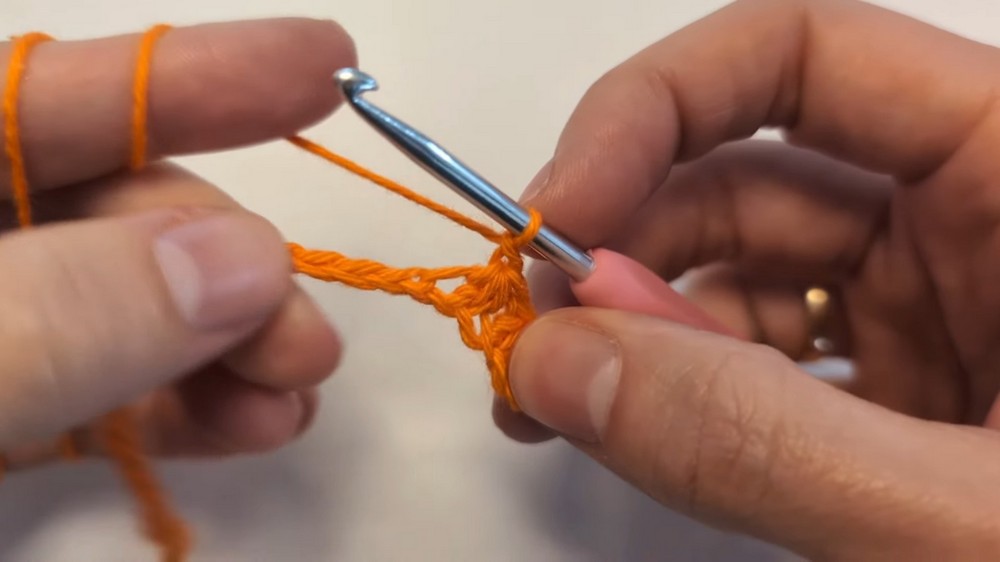
Step 3: Row-by-Row Progress
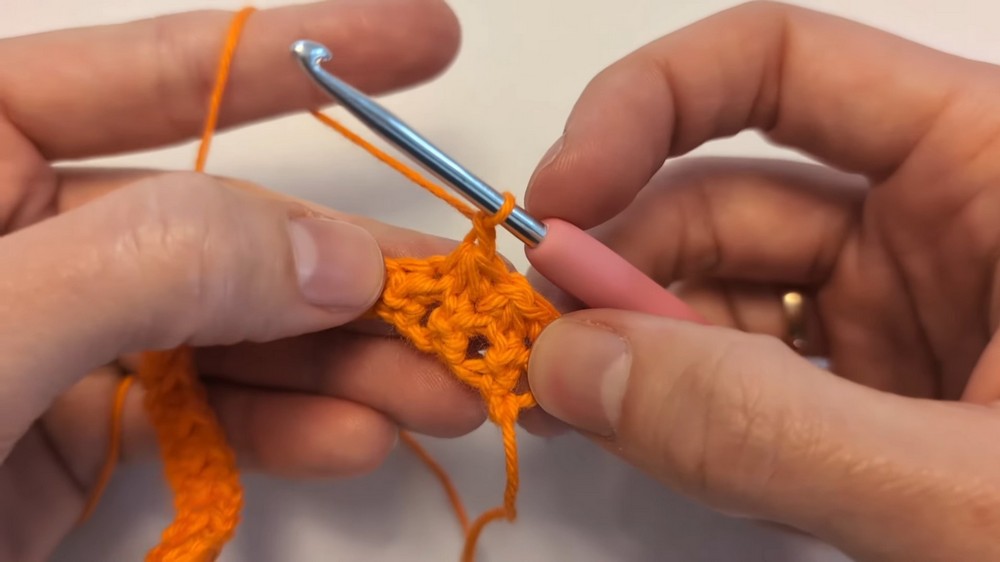
- Begin each row with chain one and a single crochet in the last occupied stitch.
- Continue the star-like crochet pattern as described:
- Insert the hook into an occupied stitch and two free stitches.
- Yarn over, pull through all loops, and chain one.
- End each row with a single crochet instead of chain one.
- Row progression continues until the desired height is reached:
- 15 cm chains should reach 9 cm in height.
- 30 cm chain should reach 6 cm in height.
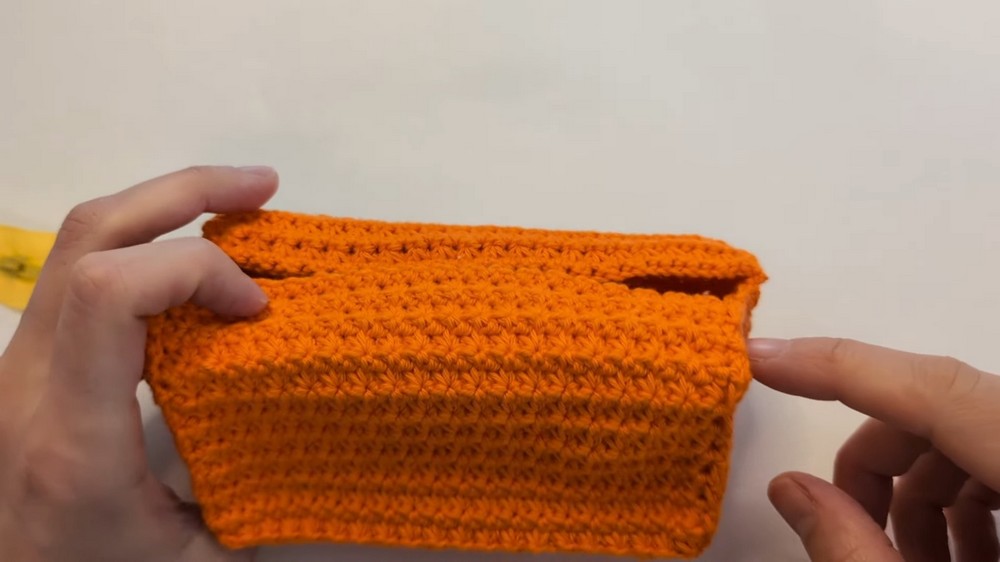
Step 4: Sewing Pieces Together
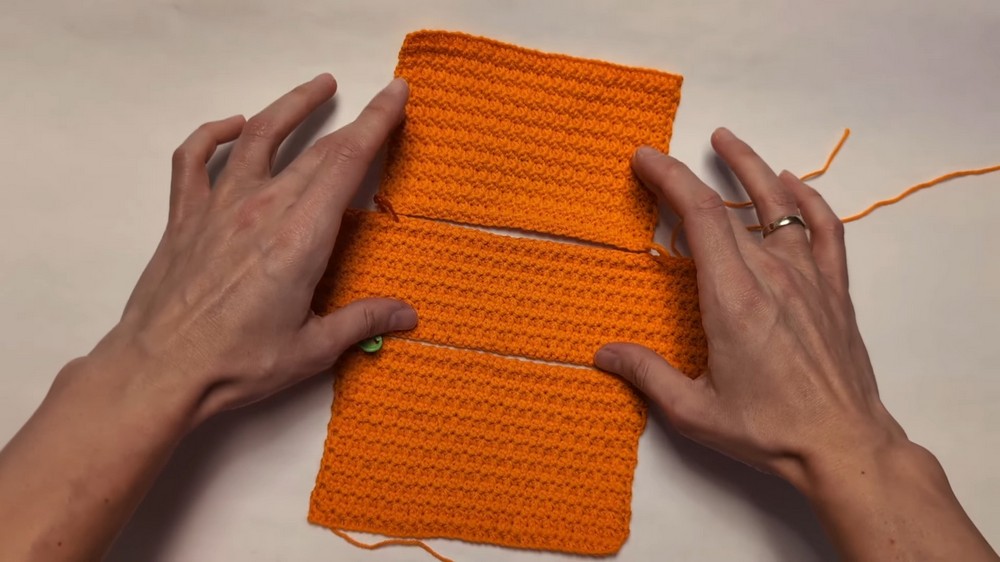
- Lay out the finished crochet pieces:
- Two pieces (15 cm x 9 cm).
- One larger piece (30 cm x 6 cm).
- Connect and sew the pieces using a zigzag stitch pattern with a darning needle and cotton yarn:
- Start at the corner and sew downward, then across, forming a foldable structure.
- Leave space for the zipper.
- Use stitch markers to ensure the pieces align properly.
Step 5: Attaching the Zipper
- Place the zipper in the designated opening and secure it with pins.
- Use the darning needle and yarn to sew the zipper in place, ensuring it aligns evenly.
- Turn the case right-side-out and test the zipper functionality.
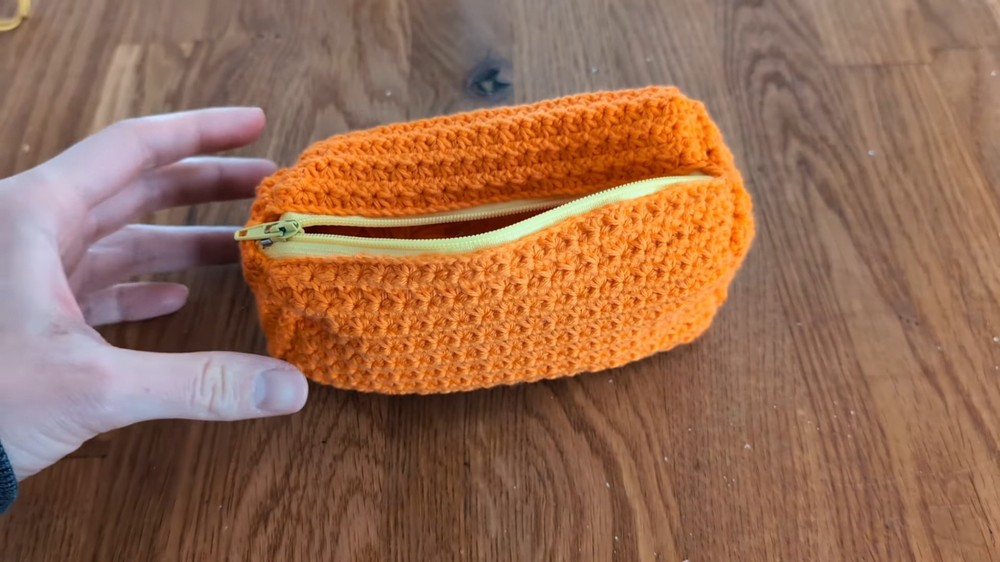
Final Product
- The completed pencil case features a secure zipper and a beautiful star-like crochet pattern.
- Perfect for crochet supplies or small items, the pouch is both functional and aesthetic.
- The tutorial emphasizes that this project is simple, fun, and beginner-friendly!