How to Crochet Two-Color Winter Hat for Beginners
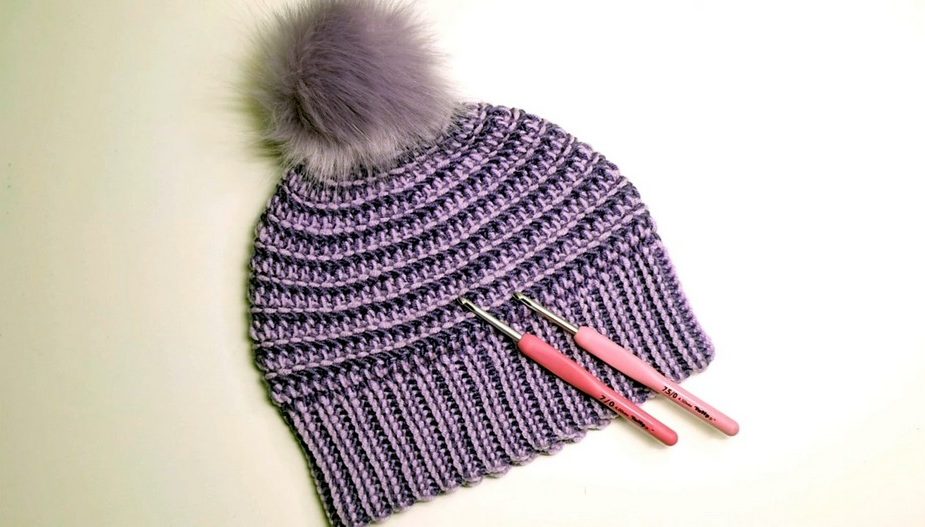
With a step-by-step tutorial for beginners, crochet a two-strand winter hat with a step-by-step tutorial for beginners. Using two yarn colors, compatible hooks, scissors, a yarn needle, and optionally a pom-pom, the process begins with crafting the brim through core chains and two-strand single crochets.
The tutorial guides them through shaping the hat, adding decorative green stitches, and incorporating decreasing rows to achieve the desired fit. The video concludes with instructions for finishing the top and adding a pom-pom for a stylish touch. So, follow through with us for the complete tutorial.

Two-Strand Crochet Headband Tutorial
This tutorial demonstrates how to crochet a headband using two strands of yarn in different colors paired with compatible hooks. In this step-by-step guide, you’ll learn to create the ribbing and the main body of the headband while mastering techniques like two-strand single crochet, slip stitching, and decreasing stitches. The tutorial also explains optional finishing touches, such as adding a pom pom.
Materials Needed
- Two strands of yarn (different colors) of the same type.
- A 4mm crochet hook for the ribbing and a 4.5mm hook for the rest of the headband.
- Scissors.
- Yarn needle.
- Tape measure.
- Optional: A pom pom with a button.

Creating the Foundation Cord
- Setting up: Begin by tying the two strands of yarn together with a slip knot.
- Cord creation: Use the bottom color (held with your middle and thumb fingers) to yarn over the hook front to back. Pull the top color through the loops to create cord chains.
- Purpose: The length of the cord determines the height of the brim.
Starting the First Row
- Two-Strand Single Crochet: Slide your hook under the side loops of the cord, alternating between yarning over the bottom strand (for tension) and pulling the top strand through the loops.
- Technique: The top strand remains consistent for the entire ribbing process, while the bottom strand alternates.

Making the Ribbing
- Rows of Ribbing: For the ribbing, each stitch is worked across the back loop only to achieve a flexible and stretchy texture.
- Turning the Work: After completing a row, chain one, turn the work like a page, and repeat the process until the ribbing reaches the desired length.
- Connecting Ends: Fold the ribbing and slip stitch the shorter ends together, alternating between the two colors for a smooth join.

Constructing the Headband Body
- Transition to Headband Body: After completing the ribbing, switch to the larger crochet hook. Place stitches along the edge of the ribbing, alternating between the top of each rib and the space between ribs.
- Green Stitch Rows: Introduce rows of alternating stitches called “green stitches,” which use both colors and build the body’s design.

Alternating Rows
- Green Stitch Row: Use five loops per stitch to create a textured pattern.
- Inside-Out Crochet: Turn the work and use two-strand single crochet rows from the inside out to form horizontal lines and maintain the headband’s structure.

Decreasing and Shaping
- Decreasing Rows: Gradually decrease the number of stitches in single crochet rows, combining stitches together periodically. Continue alternating green stitch rows and two-strand decrease rows to shape the headband to your needs.
Closing the Top
- Final Rows: In the last rows, decrease intensively to narrow the top of the headband.
- Securing the Headband: Once the stitching is complete, thread the yarn onto a needle, passing it through the stitches to close the top securely. This creates a finished look.
Optional: Adding a Pom Pom
- Pom Pom Attachment: Insert a button into the closed top and attach the pom pom for a decorative finish.
Final Touch
- Weave in any loose ends, secure the stitches, and enjoy your finished two-strand crochet headband.
This tutorial demonstrates how simple yet intricate techniques can result in a stylish, stretchy headband that’s perfect for personal use or gifting! Following the clear steps ensures a satisfying outcome.