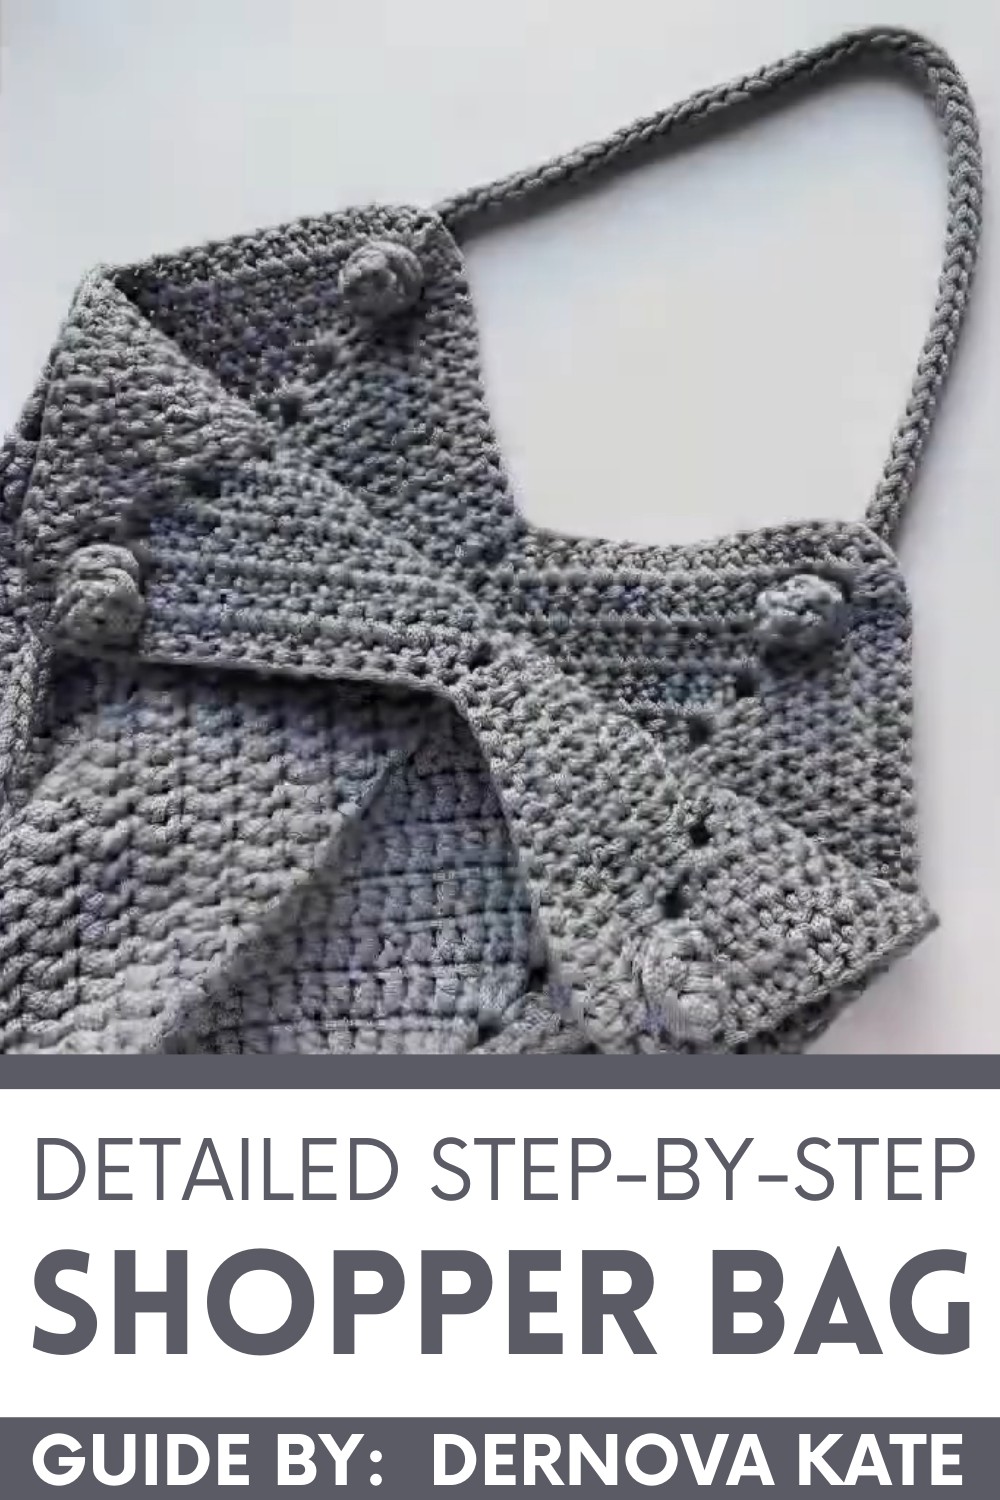
Eco-friendly Crochet Shopper Bag Pattern for Sustainable Style

Boost your daily shopping with this Crochet Shopper Bag Pattern that’s perfect for making a sturdy and stylish tote for all your groceries.

Trendy Crochet Shopper Bag Pattern for Street Style Fashion
Offering a smart way to carry your daily items, this sturdy handmade accessory is perfect for a busy life. A Crochet Shopper Bag Pattern lets you create a large, strong bag that is both useful and very pretty to look at. It is a great choice for trips to the grocery store, a day at the beach, or even a visit to the local library. The main benefit is that it is much stronger than a plastic bag and can be used over and over again, which is good for the earth.

The bag features long, comfy straps that make it easy to carry on your shoulder without feeling heavy. Because the stitches are tight and firm, the bag keeps its shape even when you fill it with heavy books or fresh food. You can pick bright, happy colors to match your favorite summer dress or use plain tones for a clean, natural look. Using a Crochet Shopper Bag Pattern gives you a stylish tool that makes your daily errands feel much more special.
Special Features
- No lining needed: minimal holes, durable structure
- Fully machine washable (no metal or leather parts)
- Soft, seamless cord handles with secure knots
- Can be folded flat for travel and storage
- Easily customizable size and colors
Uses
- Everyday tote or shopper
- Beach bag
- Diaper/mom bag
- Vacation/Travel bag
- Gift bag
Level of Difficulty
Confident Beginner to Intermediate
You should be comfortable working in rounds, counting stitches, decreasing, and crocheting double crochet and slip stitches.
Materials
- 300 meters of 4 mm polyester cord (or 3-4 mm cotton cord, or knitted/t-shirt yarn)
- 5 mm crochet hook (adjust size to your chosen yarn/cord)
- Scissors
- Lighter (for melting cord ends if using polyester)
- Yarn needle or crochet hook (for weaving in ends)
- Optional: stitch markers
Tutor’s Suggestions
- Use polyester cord for easy cleaning and melting ends; cotton or other cords also work, but won’t melt smoothly.
- Fit the bag size for your own needs—follow the guide but adjust base size as desired.
- Hide joins and ends inside stitches for a professional look.
- Handles stretch under weight; fit and test before final trimming and knotting.
Step-by-Step Pattern
1. Prepare Yarn/cord Ends
- If using polyester cord, cut off frayed ends and carefully melt them with a lighter to prevent unraveling.
- To join new cord, gently melt both ends, press them together, and fuse before they cool for a seamless, strong join.

2. Base: Square Bottom
Foundation:
- Make a slip knot and loop cord around your fingers.
- Work 3 air (chain) loops. This will serve as your first double crochet.
- Crochet one double crochet into the ring, then two more.
- You have 4 double crochets—this forms the first side.

Corners:
- Crochet 2 chain stitches for the corner.
Repeat for other sides:
- Work 4 double crochets for each of the next three sides, separated by 2 chain stitches at every corner.
- At the end, slip stitch into the third chain (from your beginning chain 3) to close the round.
Rows 2 and Up:
- Start the next round with 3 chain stitches (counts as 1 dc).
- In every corner: work (2 double crochets, 2 chain stitches, 2 double crochets) to keep square shape.
- For each side, work 1 double crochet into every stitch from the previous row.
- Continue adding rounds; each side increases by 4 stitches per round.
- Repeat until you have a square base measuring about 26 cm (or your desired size).

3. Walls/Sides of Bag
Setup:
- Find the center stitch of each side (e.g., 28 stitches per side, center between stitch 14).
- Mark the two stitches on either side of the center; these will be worked together for symmetry.
Decrease for Shaping:
- For each side, skip the first center stitch,
- Crochet the next two stitches together (a double crochet decrease: yarn over, insert in first stitch, pull through, yarn over, insert in second stitch, pull through, then draw yarn through all loops on hook).
- Skip 2 stitches and repeat decrease symmetrically on both sides.

Work Even:
- For the rest of the side, crochet double crochets normally.
- At corners, continue working (2 double crochets, 2 chain stitches, 2 double crochets).
Continue:
- As you work up, use previous decreases as a reference for center of each side.
- Work to desired wall height (e.g., about 12 rows or 29 cm).
Joining New Cord Skein:
- When you run out, lay the new cord alongside the old and crochet both into the stitches for security, then trim and hide tails as needed.
Changing Colors for Stripes (Optional):
- At the end of a row (after chain stitch), attach new color and crochet as above, hiding color transitions inside stitches.
4. Finishing Wall Edges
- After your last row, make 1 chain stitch, then join with connecting (slip) stitches.
- Cut cord, melt (if polyester) or weave in securely.
- Hide all tails between stitches along rows using hook or needle.

5. Handles (Soft Hollow Crochet Cord Style)
Foundation:
- Form a loose loop, then chain two more for a total of three base loops.
- You’ll be creating a hollow “cord” (i-cord technique) with those three loops.
Crochet Cord (Hollow Handle):
- For speed and even tension, use two hooks: one for holding loops, one for working stitches.
- Work each loop in turn, always keeping three loops in play.
- Knit to desired length (about 80-85 rows or as needed for your preferred handle drop).
Attaching Handles:
- Insert ends through bag just below the first row (for reliable support).
- Tie a knot as close to the bag edge as possible, either inside or outside for a decorative look.
- Test handle length before trimming; adjust if needed.
- Melt end (if polyester) or weave in; hide tip inside cord or handle for neatness.

6. Final Steps
- Hide all visible ends and tails inside stitches for a clean, finished look.
- Check knots, edges, and overall bag for security and neatness.

Tip
Always melt polyester cord ends and joins to prevent fraying and secure your work. Adjust your tension if needed to position joins or color changes in less visible areas.
Conclusion
Congratulations! You now have a reliable, roomy, and beautiful bag ready for shopping, travel, the beach, or daily adventures. Customizable and practical, the bag is as stylish as it is useful—you’ll find yourself using it over and over. Experiment with colors, stripe patterns, and handle lengths to craft your perfect tote.