Expressive Crochet FLOWER CUTOUT BIKINI TOP Pattern With Bloom Style
Showcase floral flair with this Crochet FLOWER CUTOUT BIKINI TOP Pattern featuring bold cutouts, comfy, and standout charm for poolside days.
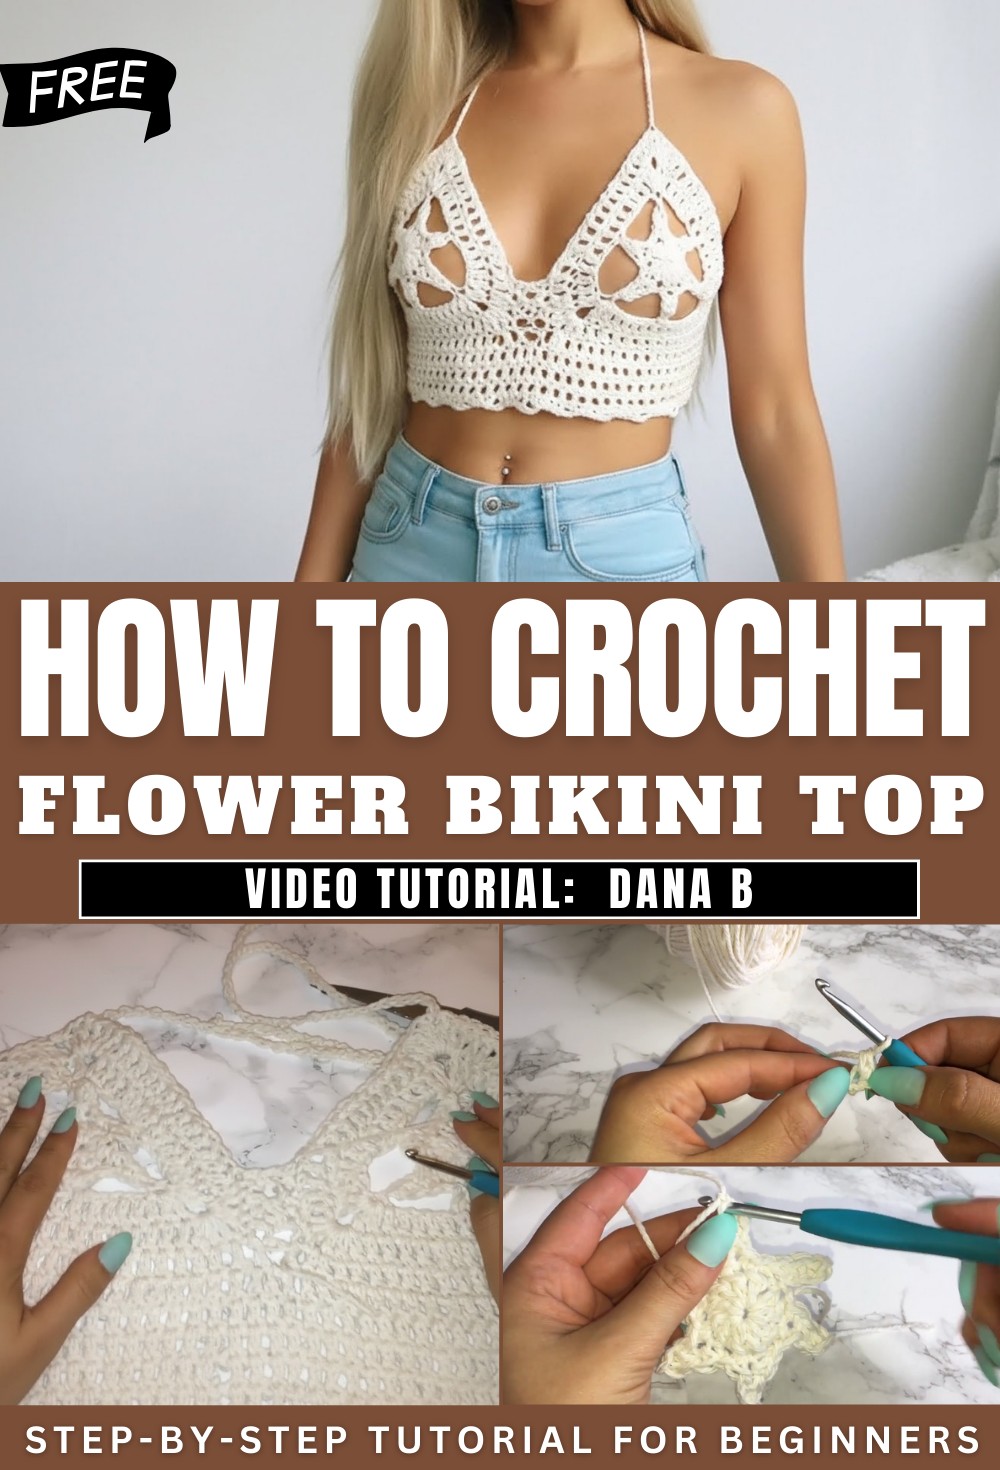
Unique Crochet FLOWER CUTOUT BIKINI TOP Pattern Featuring Floral Details
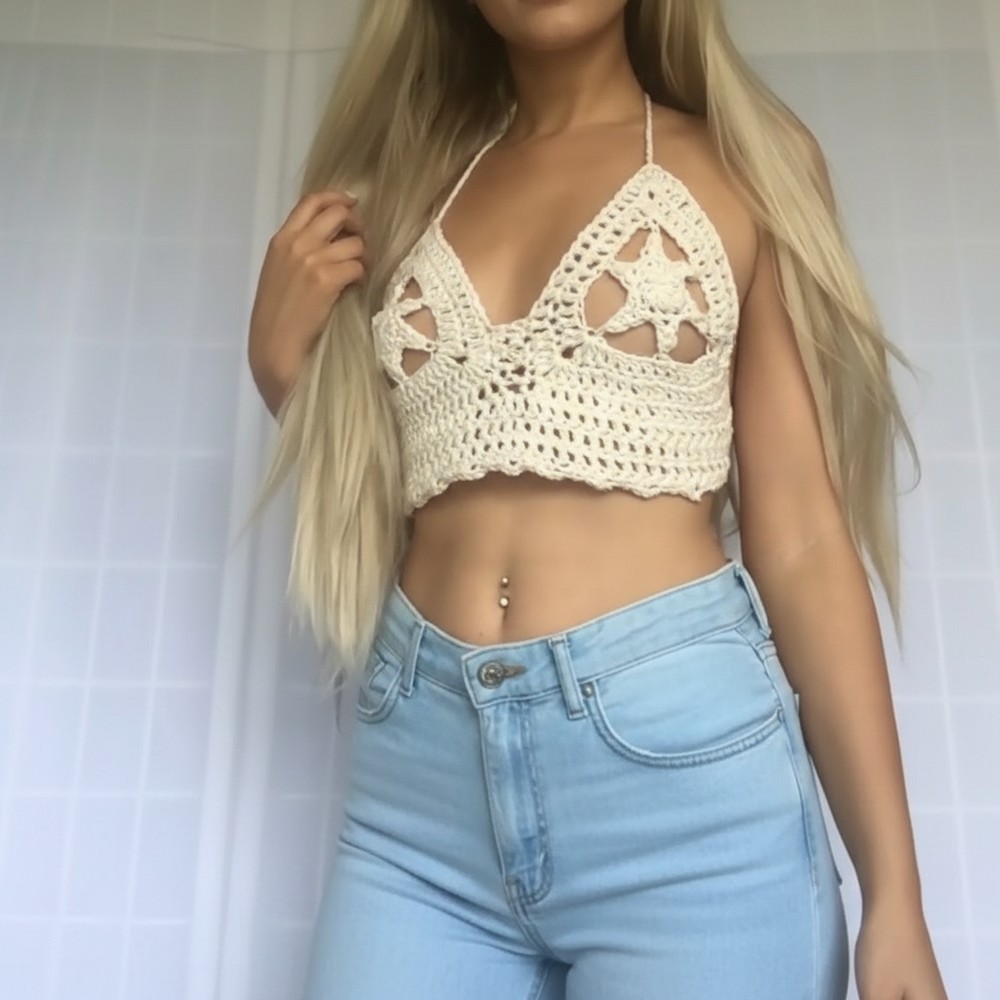
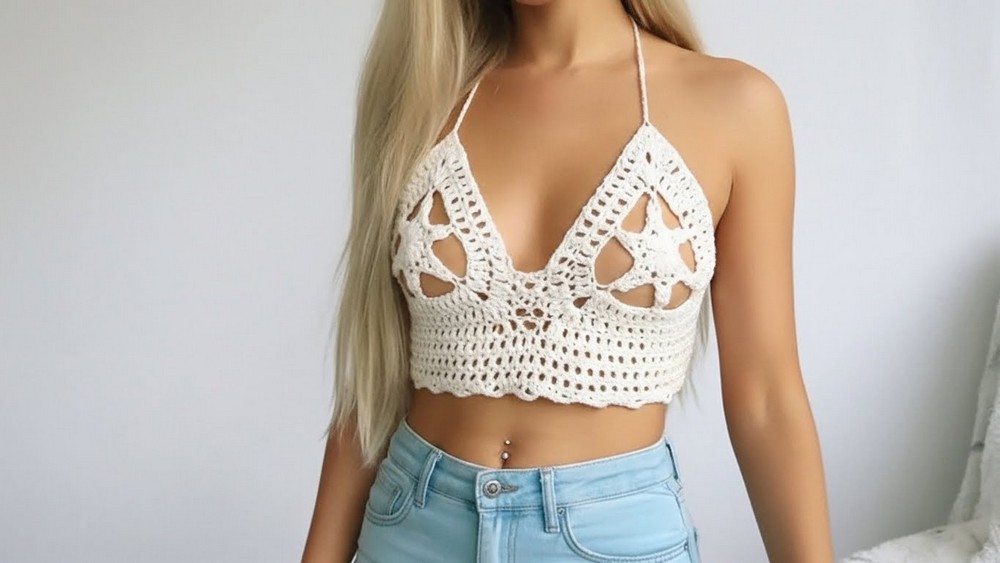
Sunlit days by the water take on a new charm with the Crochet FLOWER CUTOUT BIKINI TOP Pattern. Featuring striking floral motifs and artful openwork, this top balances whimsical detail with contemporary allure. The airy cutout design not only enhances breathability and comfort but also lets playful glimpses of skin peek through, perfect for making a statement at the beach or pool.
Beyond swimwear, its elegant silhouette transitions effortlessly to festival wear or casual summer outings, pairing beautifully with skirts, shorts, or coverups. Adjustable straps and a customizable fit ensure confidence and support, catering to a diverse range of body shapes. The floral accents add a touch of femininity while maintaining a trend-forward edge, making every ensemble feel special. With its blend of versatility and distinctive style, this pattern stands out as a radiant addition to any warm-weather wardrobe.
Project Details
-
Special Features: The top features a signature 12-point floral center and a breathable cutout design. It includes a custom-length halter bodice and an adjustable lace-up center for personalized coverage.
-
Level of Difficulty: Intermediate. The project requires managing stitch counts in rounds and rows, along with reattaching yarn for specific sections.
-
Tutor’s Suggestions: If you require a larger cup size, add an extra round of single or double crochet to the initial circular base before starting the petals. To make the cups lay flatter, increase the chains between petals from four to six or seven.
-
Uses: Perfect as a stylish bikini top, a festival bralette, or a layering piece under sheer summer tops.
-
Materials: * Weight 4 100% cotton yarn.
-
4.5 mm crochet hook.
-
Scissors and tapestry needle for weaving ends.
-
Pattern Details
Phase 1: The Circular Base
-
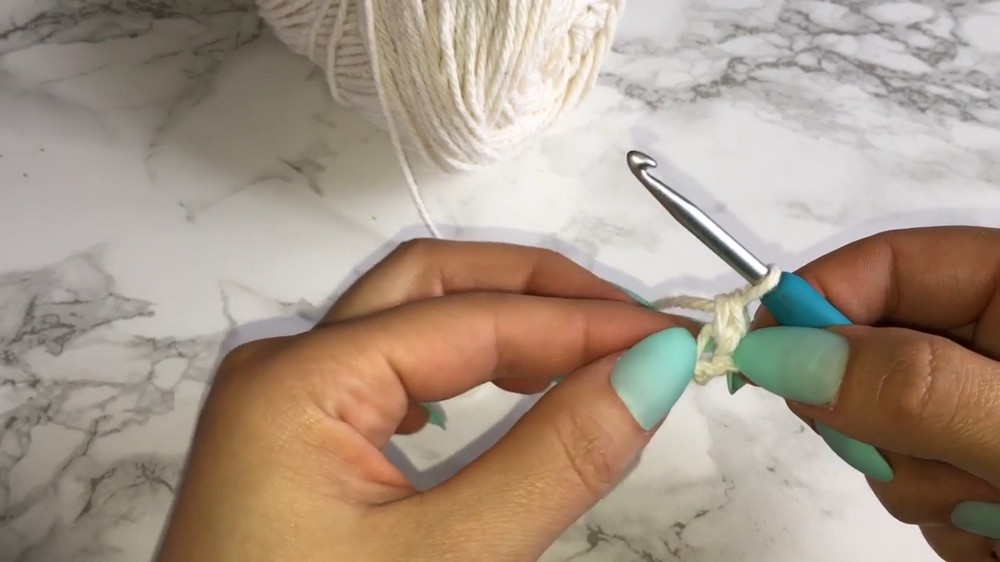
Foundation: Start with a slip knot and chain 2. Work into the first chain to form a small ring.
-
Round 1: Chain 1 (counts as 1st double crochet). Work 11 more double crochets into the center ring (12 total). Pull the tail tight to close the center hole. Join with a slip stitch.
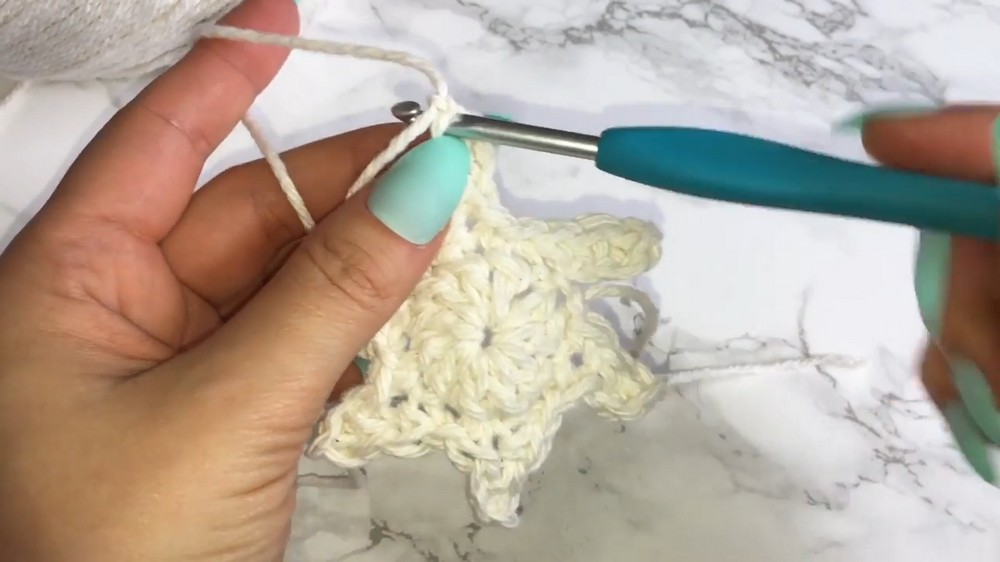
Phase 2: The Petal Row
-
Stitch Sequence: Chain 4. Work 1 single crochet in the 2nd chain from hook and the next 2 chains (3 sc total). Slip stitch into the next stitch of the base ring.
-
Repeat: Repeat around the entire circle until you have 12 small petals. Fasten off and weave in ends.
Phase 3: The Triangular Frame
-
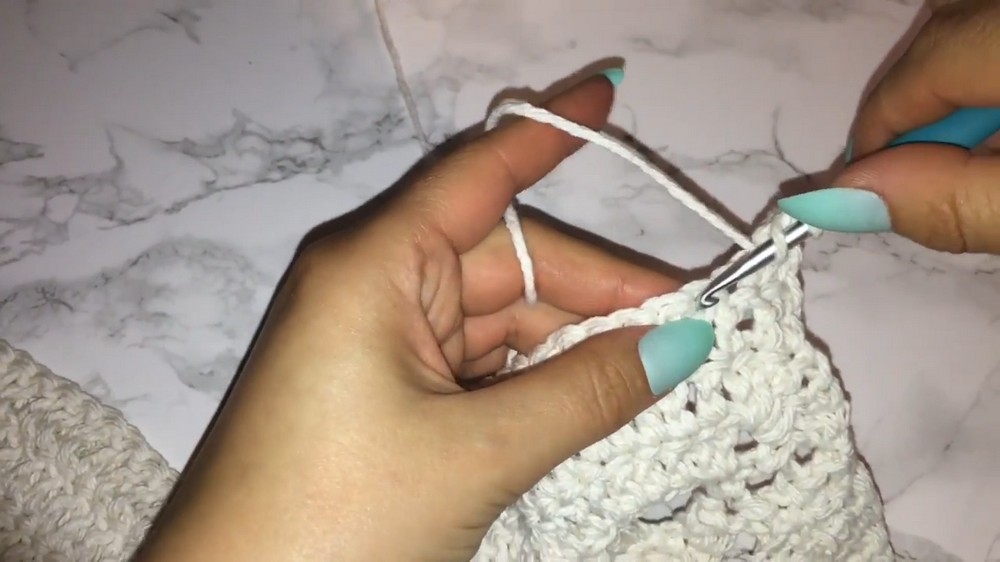
Base Prep: Reattach yarn to the top of any petal. Chain 4, single crochet into the top of the next petal. Repeat around to create a mesh border.
-
Shaping Round: Chain 2. Work double crochets into the chains. Create three corners by working (2 dc, ch 2, 2 dc) in specific petal tops to transform the circle into a triangle.
-
Growth: Work one or more rows of double crochet point-over-point. At each corner space, work (3 dc, ch 1, 3 dc) to expand the triangle to your desired size (e.g., size A-B).
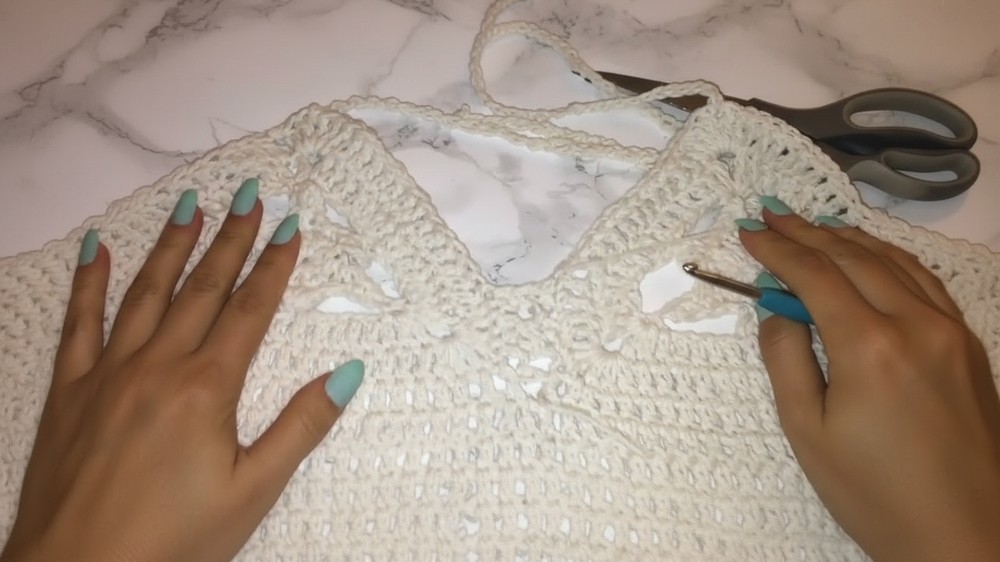
Phase 4: Bodice and Assembly
-
The Bodice: Reattach yarn to the bottom corner of one finished cup. Work double crochets across the bottom, chain 1, and continue across the bottom of the second cup to join them.
-
Length: Work 2–4 additional rows of double crochet to create a comfortable band under the bust.
-
Center Design: To add coverage between the cups, join a strand of yarn to the inner corner. Use a slip stitch, chain 1 sequence to zig-zag between the two cups as high as desired.
Conclusion
Finishing your shell cutout top provides you with a custom-engineered piece of summer fashion that showcases your mastery of intricate motifs. By combining circular floral elements with a structured triangular frame, you have created a garment that is as supportive as it is visually striking. Once you weave in the final threads and secure the back straps, your unique handmade bikini top is ready for the beach.
Pro Tip: To give the petals a crisp, defined shape, block the circular base with a light steam iron from a distance of 15 cm before you begin the triangular frame. This prevents the edges from curling during the assembly phase.