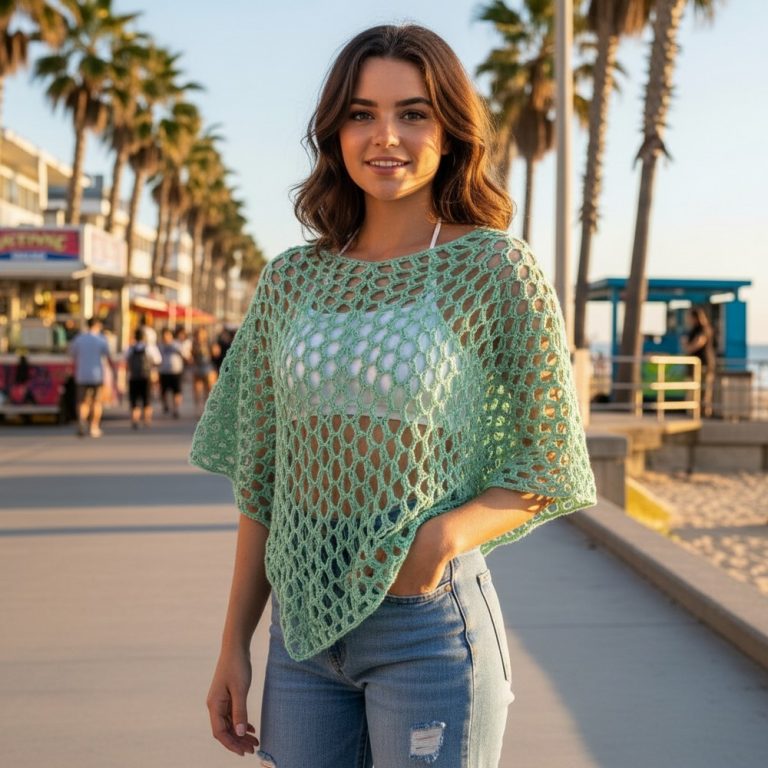
Fashionable Crochet Croppie Pattern for Versatile Wear

Upgrade outfit accents with this Crochet Croppie sleeve Pattern that adds trendy shape, light coverage, and fresh appeal to modern styling.

Relaxed Crochet Croppie Pattern Perfect for Daily Looks
Soft texture and stylish shaping come together to offer a chic wardrobe essential that feels light, modern, and wearable. This design features a cropped fit that highlights the waist beautifully, making it ideal for pairing with high-rise bottoms, flowy skirts, or layered looks. The Crochet Croppie Pattern stands out for its breathable structure, which provides comfort during warm days while maintaining a neat and elegant appearance.

The stitch definition adds visual interest without feeling heavy, giving the top a refined yet playful vibe. Yarn choices easily influence the final look, allowing for soft, smooth, or slightly textured finishes depending on preference.
Materials Needed
-
Yarn: Berroco Modern Cotton or Pima 100 (Fine Weight 2 or 3).
-
Hook: 2.75 mm crochet hook.
-
Tools: Tapestry needle for weaving ends, scissors.
Pattern Details
-
Skill Level: Intermediate.
-
Sizing: Tutorial follows a C-cup.
-
Tip: Aim for the solid base to cover about 85% of the bust before starting the lace rows.
-
Step-by-Step Instructions
Phase 1: The Solid Cup Base (Make 2)
-
Foundation: Chain 16 (for C-cup). Block off the 16th stitch and chain an additional 3.
-
Row 1: Double crochet (dc) into the 16th chain (the one you held). dc in every chain across until the very last stitch.
-
Peak Increase: In the last chain, work: 2 dc, ch 2, 2 dc.
-
Opposite Side: Continue working dc down the other side of the foundation chain to the end.
-
Growth: Repeat this pattern (dc in every stitch, 2 dc-ch 2-2 dc in the peak space) for a total of 7 rows.


Phase 2: The “Switch Up” Lace Rows
-
Row 8 (Lace Base): Work 2 half-double crochets (hdc) in the first stitch. Ch 2, skip 2, 3 hdc in the next stitch. Repeat until the peak.
-
Peak: Work 2 hdc, ch 2, 2 hdc in the peak space.
-
Finish Row: Repeat the skip-2 sequence down the other side.
-
Rows 9–10: Ch 3. Work 3 hdc, ch 2, 3 hdc into each empty chain-2 hole from the row below. Repeat for 2–3 rows until coverage is sufficient.

Phase 3: Assembly and Design
-
Center Join: Align the two cups. Slip stitch them together through the inner edges. Do not cut the yarn.
-
Lower Band: Reattach yarn to the bottom. Work 2 single crochets (sc) into every dc side-post to create a full, gap-free foundation.
-
Floral Shell Border: Work around the outer perimeter of the bralette:
-
Ch 2, skip to next empty space, work 6 dc (Shell), skip to next space, work 1 sc.
-
Repeat this shell-and-anchor pattern around the entire bralette.
-
-
Peak Detail: At the very top of each cup, work a simple sc instead of a shell to keep the point sharp for the straps.
Phase 4: Straps and Back
-
Back Panels: Attach yarn to the bottom outer corners. Ch 5, dc in the middle, ch 3, dc at the end to create a “two-box” grid. Repeat for 2–3 rows to provide a sturdy anchor for the ties.
-
Neck Straps: Attach yarn to the top sc of each cup. Work a basic chain long enough to tie comfortably (approx. 100+ chains).
-
Back Ties: Create a long chain (approx. 200 chains) to lace through the back panels.

Conclusion
Finishing this bralette provides you with a custom-engineered garment that perfectly balances structure and delicate detail. By mastering the transition from solid dc rows to the playful shell border, you’ve created a piece that is as supportive as it is visually striking. Once you weave in your final threads and secure the back lacing, your unique handmade bralette is ready for the sun.
Pro Tip: For a professional, high-end finish, “secure as you go.” Weave in your yarn tails every time you reattach for a new section; this prevents a cluttered interior and ensures the lace remains crisp and clean.