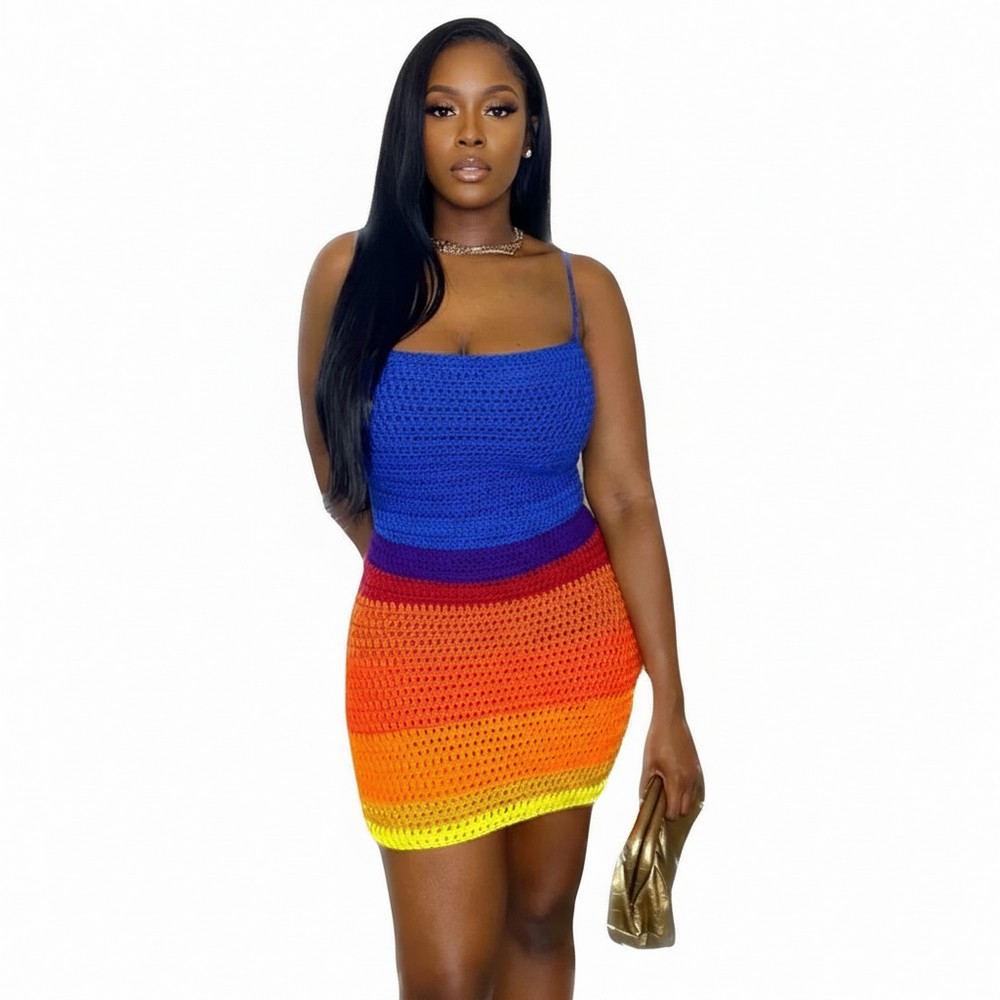
Blended Crochet Ombre Dress Pattern With Color Magic
Flow into color with this Free Crochet Ombre Dress Pattern showcasing smooth gradient tones and a graceful silhouette for standout style.
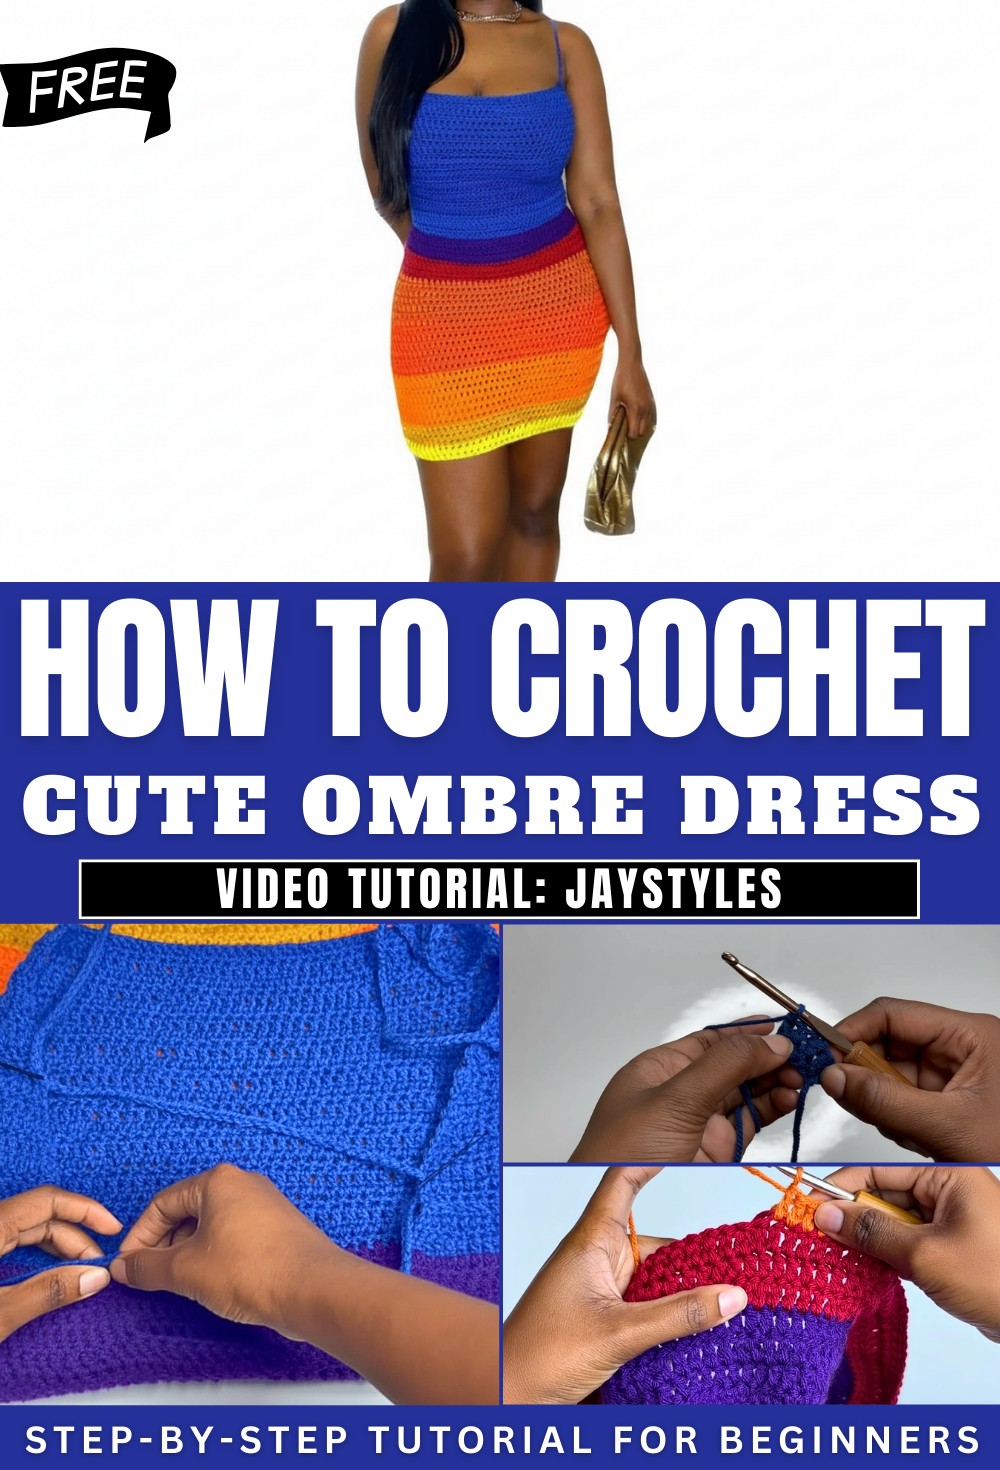
Luxe Crochet Ombre Dress Pattern With Elegant Fade
Blending gentle shades that flow seamlessly from light to dark, this stunning dress brings a unique and modern twist to any wardrobe. The crochet ombre dress pattern offers an eye-catching color effect, giving a graceful and stylish look that truly stands out. Lightweight and airy, it is perfect for warm days, casual outings, vacations, or even special events like garden parties. The design’s relaxed fit lets you move freely and stay comfortable all day.
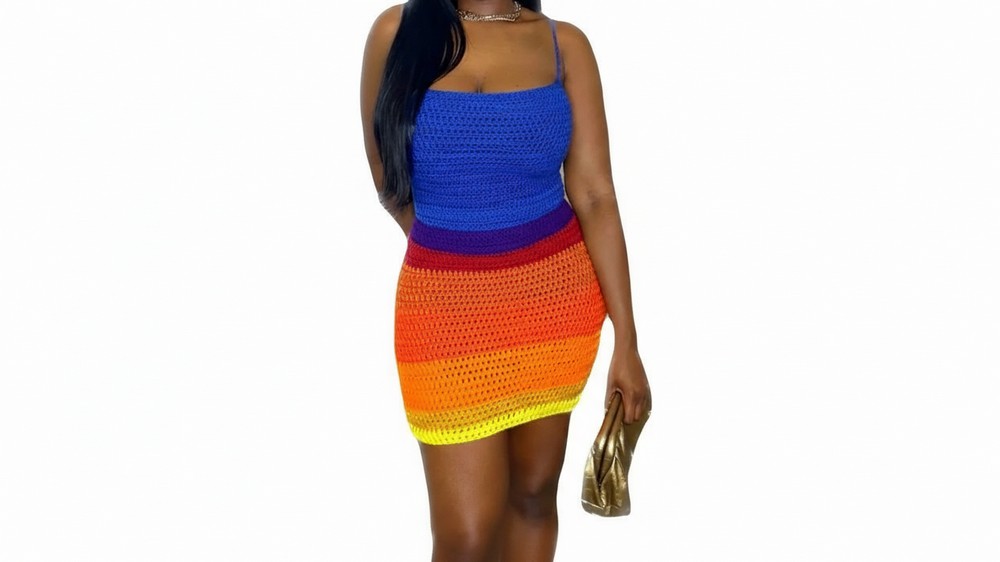
Plus, you can pick your favorite colors to make each dress personal and one-of-a-kind. The soft yarn feels good against your skin, and the flowing shape is flattering for many different body types. With easy care and lasting beauty, this pattern gives you a fashionable outfit and adds a touch of fun and elegance to your everyday look, making you feel confident and beautiful wherever you go.
Materials Needed
-
Yarn: Medium weight (Size 4) acrylic yarn in multiple colors (e.g., Blue, Purple, Red, Orange, Gold, Yellow).
-
Hook: 5.0 mm crochet hook.
-
Tools: Scissors, tapestry needle, and stitch markers.
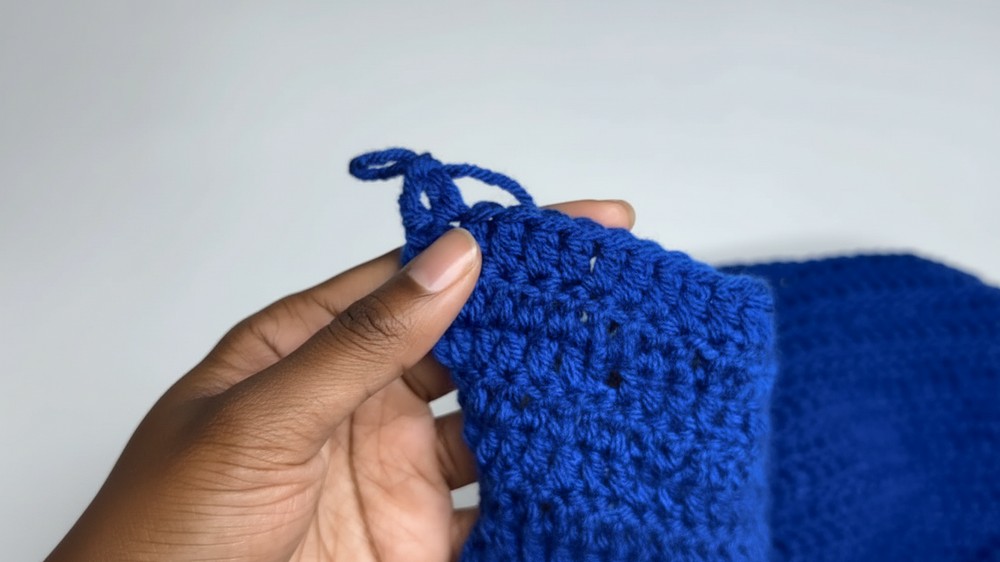
Part 1: The Triangular Top
The top is worked in one piece, starting from a foundation row and increasing on both ends to create a wrap-around shape.
-
Foundation: Work 45 Foundation Double Crochets (Fdc).
-
Alternative: Chain 46, work 45 double crochets (dc) starting in the 2nd chain from hook.
-
-
Rows 1–3: Chain 2 (counts as dc), turn. Work 1 dc in every stitch, placing 2 dc in the very last stitch of each row (increase).
-
Rows 4–19 (Body Growth): Continue dc rows, increasing at both the beginning and end of every row.
-
Note: For a size Medium (36D), work until the piece measures approx. 8 inches in height.
-
-
Rows 20–22 (Straight Edge): Work 3 rows of dc across with no increases to create a stable top edge.
-
Finish: Fasten off, leaving a very long tail for assembly.

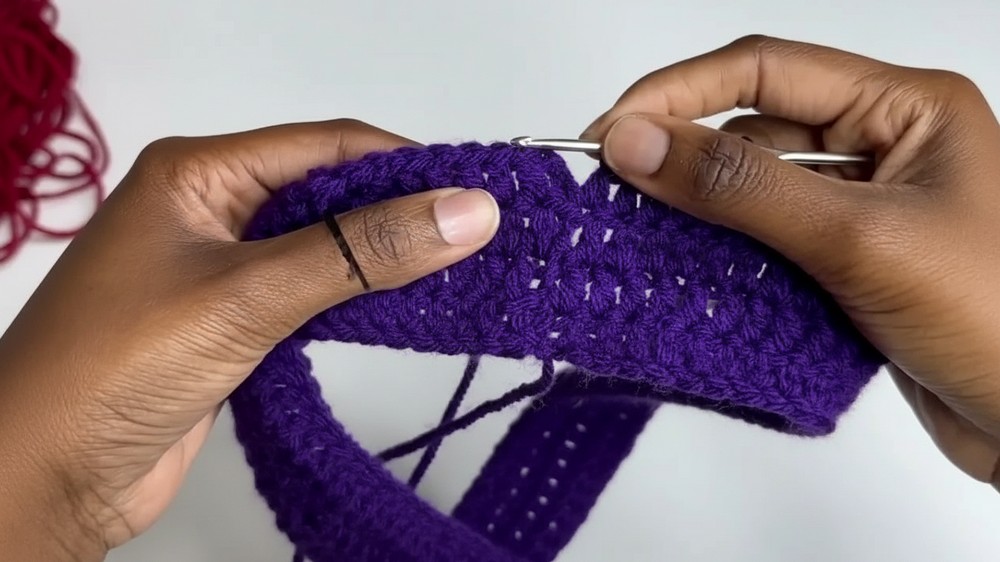
Part 2: The Skirt Portion
1. Foundation and Join
-
Foundation: Work 95 Fdc (or a count that matches your hip measurement).
-
Join Round: At the 95th stitch, join to the first stitch with a slip stitch to form a ring.
-
Base Rounds: Work 4 rounds of straight dc in the round.
2. The Increase Strategy
To create a flared look, increases are worked every 3rd row.
-
Increase Round 1: Divide your total stitches by 5. (e.g., 95 total – 5 increases = 90. 90 / 5 = 18). Place an increase (2 dc in one stitch) every 18 stitches.
-
Growth: Work 2 rounds of straight dc (no increases).
-
Repeat: Work an Increase Round (placing increases directly above the previous ones), followed by 2 straight rounds.
-
Continue this sequence for your desired length (approx. 14.5 inches total).
-
-
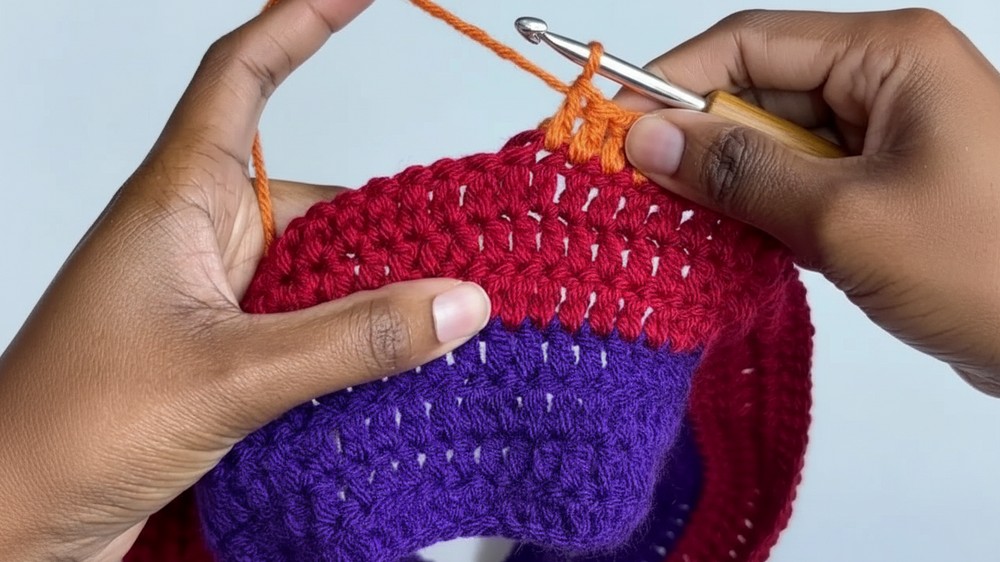
Color Gradient: The tutor used Purple (4 rows), Red (3 rows), Orange (6 rows), Dark Orange (7 rows), Light Orange (7 rows), Gold (3 rows), and Yellow (2 rows).
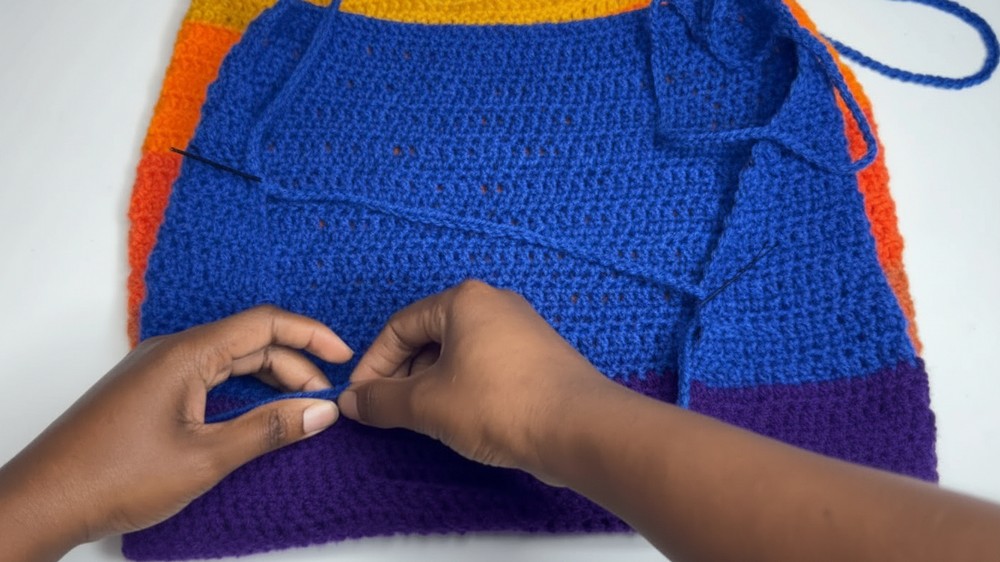
Part 3: Assembly & Straps
1. Joining Top to Skirt
-
Align the center of the top panel with the center front of the skirt.
-
Use a Mattress Stitch (or slip stitch) to sew the long tail of the top to the foundation edge of the skirt.
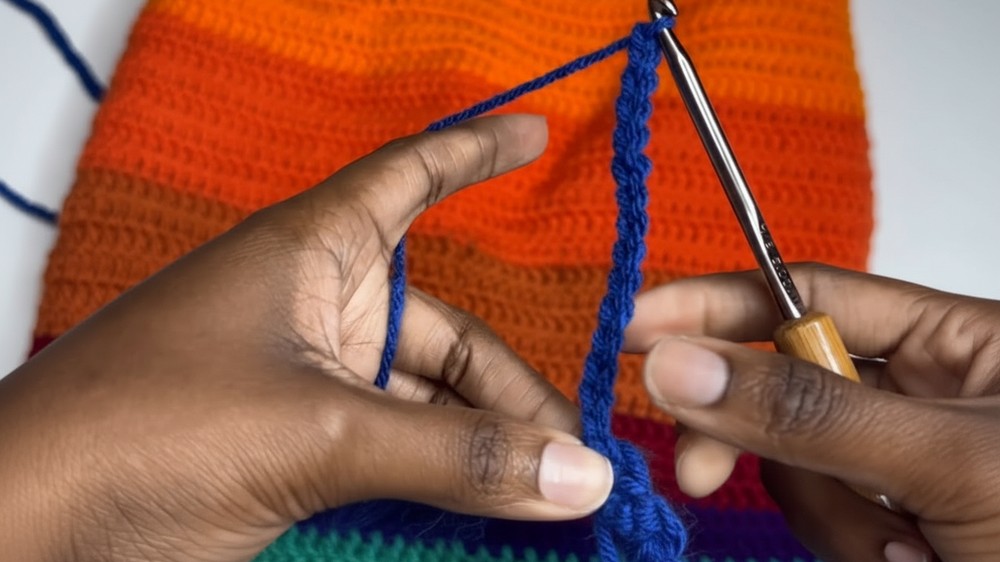
2. Long Halter Straps
-
Placement: Identify the top corners of the triangular panel.
-
Strap Construction: Attach yarn to the corner. Chain 225 (or desired length for lacing).
-
Lacing the Back: * Feed the strap into the 9th row down from the top on the same side.
-
Cross the strap and feed it through a point 7 rows further down on the opposite side.
-
Secure at the bottom corner of the back. Repeat for the other side.
-
Conclusion
Weave in all remaining ends. The unique lacing system allows the dress to be adjusted for a perfect fit around the bust and waist. The gradient colors provide a striking “sunset” or “rainbow” effect.