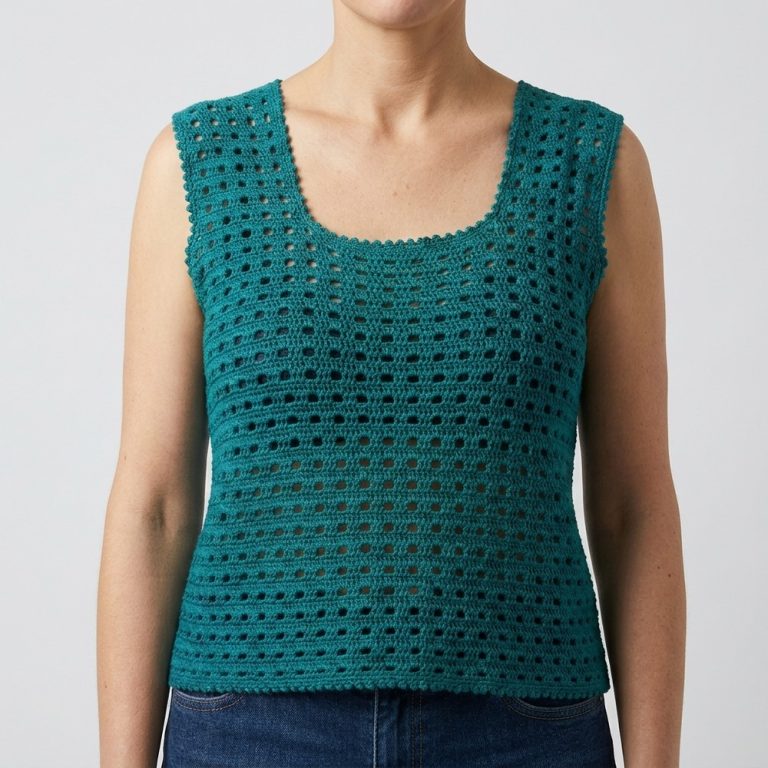
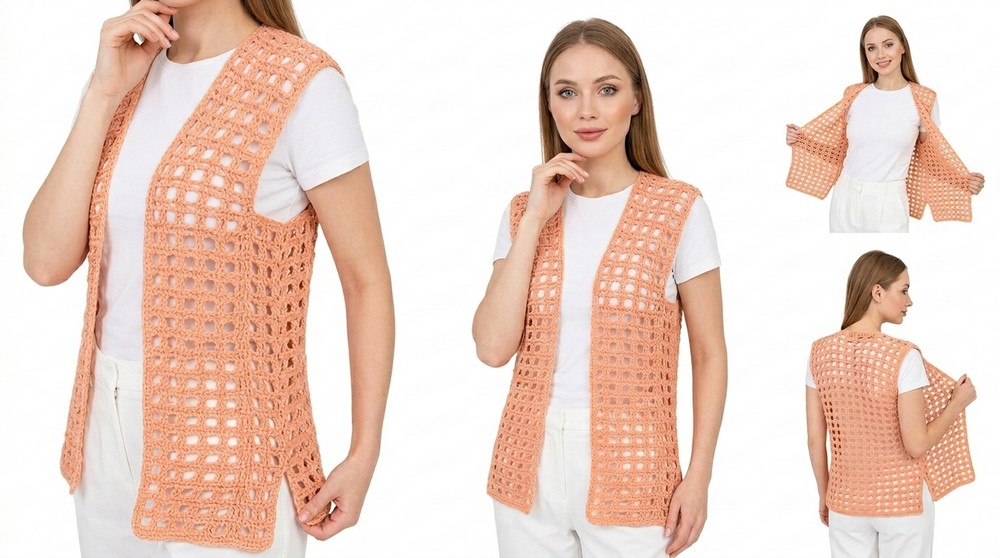
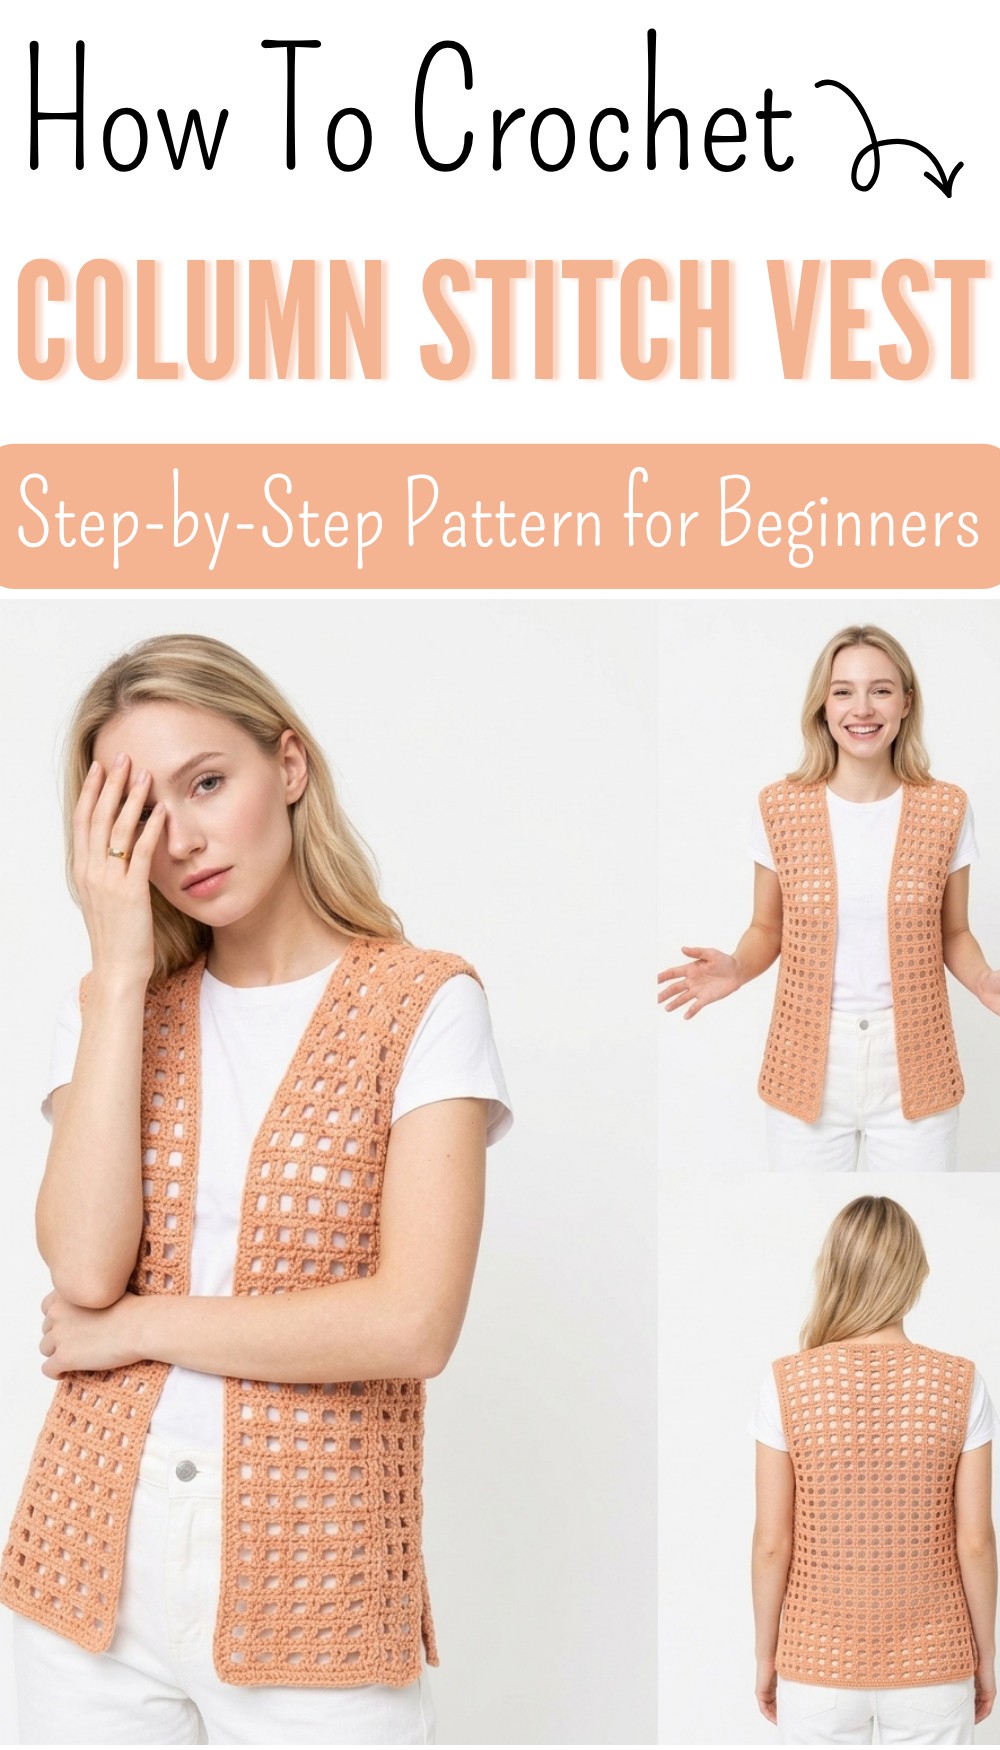
Free Crochet Column Stitch Vest Pattern with Simple Steps
Refresh your wardrobe with free crochet column stitch vest pattern that adds stylish lines and comfort to any outfit for effortless layering.
Shiny lines run up and down making a sharp and neat vest that feels nice when you touch it and looks special when you wear it out. Any shirt or dress can become new and interesting with this soft lines sitting on top adding a fresh look without being heavy or thick. With the Crochet Column Stitch Vest pattern each row brings a smooth path and a gentle hug for your body so you feel both stylish and comfortable.
Free Crochet Column Stitch Vest Pattern for Layering
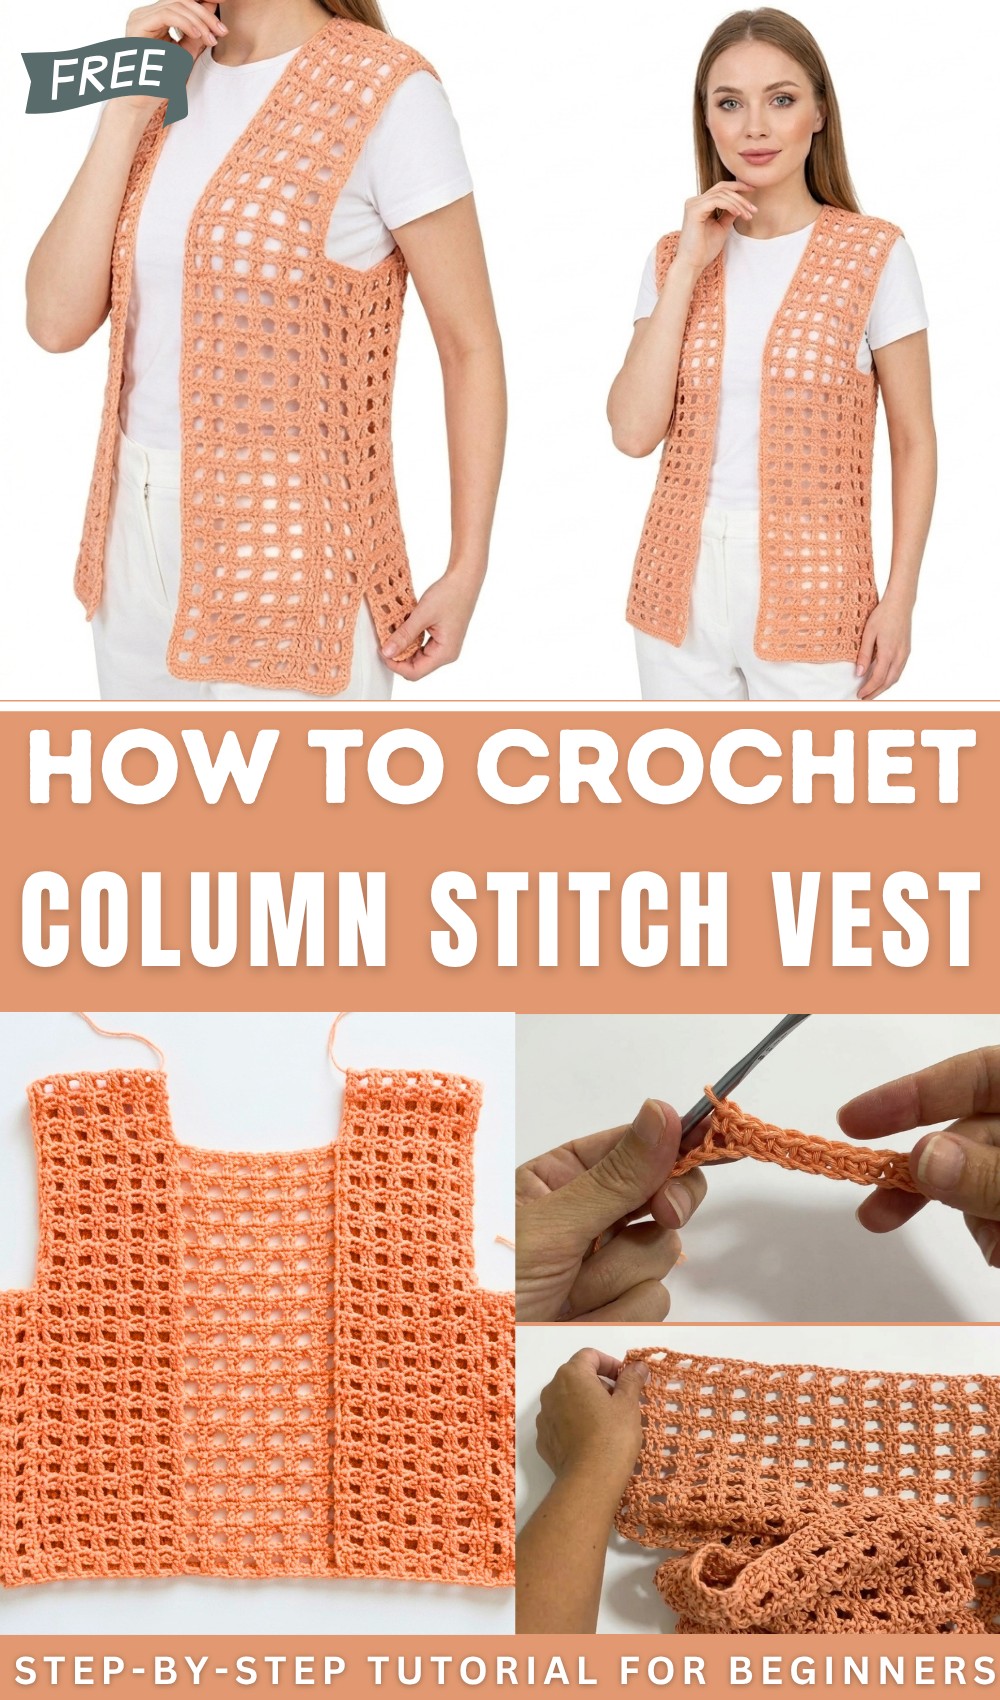
The piece is open and simple so you can put it on easily and take it off without fuss. Whether you go to a market or sit with friends everyone will notice the tidy shapes that make your look stand out. The Crochet Column Stitch Vest pattern is a smart choice to stay cool and add style while using basic steps anybody can follow plus you will enjoy the proud feeling of wearing something beautiful and handmade.
Easy Crochet Summer Vest Pattern
Materials
- Yarn: Worsted weight cotton or summer yarn (approx. 250–300g for size S/M; adjust for size)
- Pattern is also suitable for DK/worsted weight acrylic or wool for winter.
- Hook: 5.0 mm (US H-8)
- Notions: Stitch markers, scissors, yarn needle for weaving in ends, measuring tape.
Abbreviations
| Term | Meaning |
|---|---|
| ch | chain |
| sc | single crochet |
| dc | double crochet |
| st | stitch |
| sl st | slip stitch |
| rep | repeat |
| RS/WS | right side/wrong side |
Special Notes
- Gauge: 10 sts in pattern ≈ 7–7.5 cm (2.75–3″)
- Pattern is written for size S/M. Add/reduce multiples of 4 for size changes. (See “Adjusting Size”.)
- Each row begins and ends with a margin stitch.
- Panels are worked in one piece and split for front panels.
- Adapt for larger bust/shoulders by adding side panels or extending fronts.
- Leave bottom slits for extra comfort at the hips.
Adjusting Size
- Base width: Should correspond to your shoulder measurement minus a small ease if you have a larger bust.
- Multiple: Begin chain in multiples of 4 + 2 (for side margins).
- Example chain counts (approx.):
- S/M: 54 ch
- L: 74 ch
- XL: 94 ch
- Check with measuring tape and sample your gauge.
- Example chain counts (approx.):
Pattern Instructions
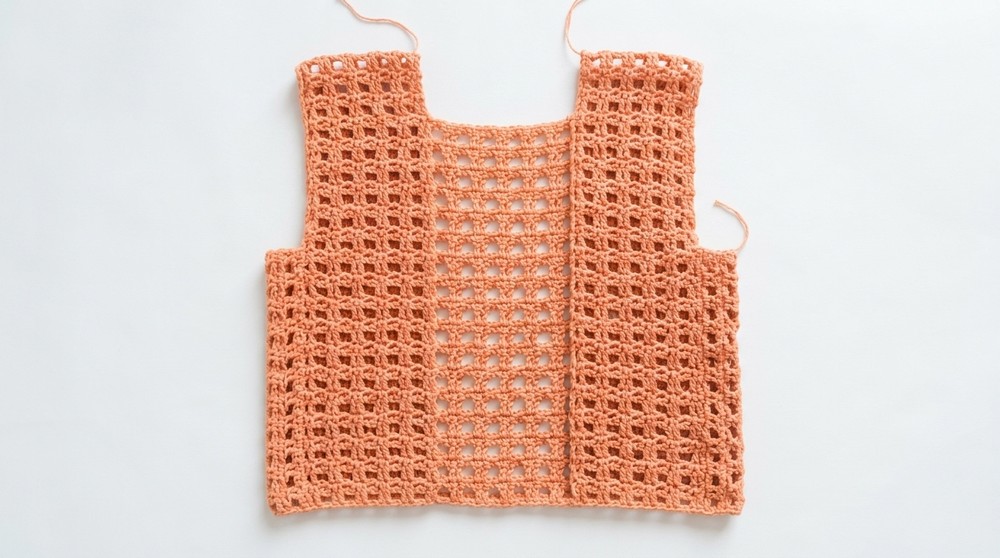
1. Back Panel
Setup:
- Chain Foundation:
- Make a foundation ch in a multiple of 4, plus 2 (for margins).
- Example: 54 ch for S/M (52 + 2).
- Make a foundation ch in a multiple of 4, plus 2 (for margins).
- Row 1 (WS):
- Sc in 2nd ch from hook and each ch across. (Total: foundation chain number sts.)
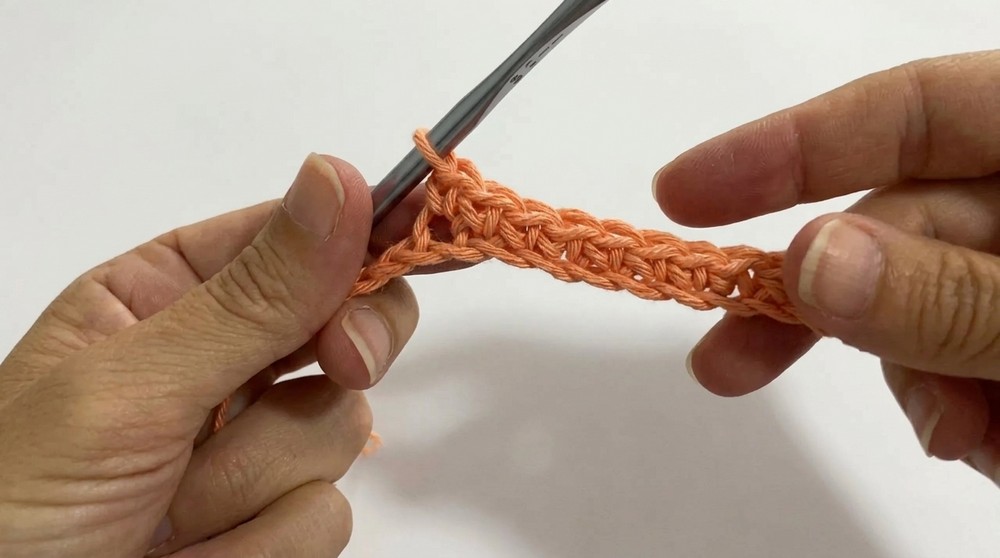
Pattern Stitch (Column Stitch/Block Mesh):
- Row 2 (RS):
- Ch 1, turn.
- Sc in first st, sc in next st, ch 2, skip next 2 sts,
- *sc in next st, sc in next st, ch 2, skip 2; rep from * to end.*
- End with 2 sc in last sts.
- Row 3:
- Ch 3 (counts as dc), turn.
- Dc in next sc, ch 2, skip ch-2 sp, dc in next 2 sc, repeat to end.
- End with dc in last st.
- Row 4 (and even rows):
- Ch 1, turn.
- Sc in first dc, sc in next dc, ch 2, skip ch-2 sp, sc in next 2 dc, rep to end.
- End with 2 sc in last 2 dc.
- Row 5 (and odd rows):
- Ch 3, turn.
- Dc in next sc, ch 2, skip ch-2 sp, dc in next 2 sc, rep to end.
- End with dc in last st.
- Repeat Rows 4–5: Repeat until you have 26 rows of dc blocks (or desired vest length, suggested ~60cm/23.5”).
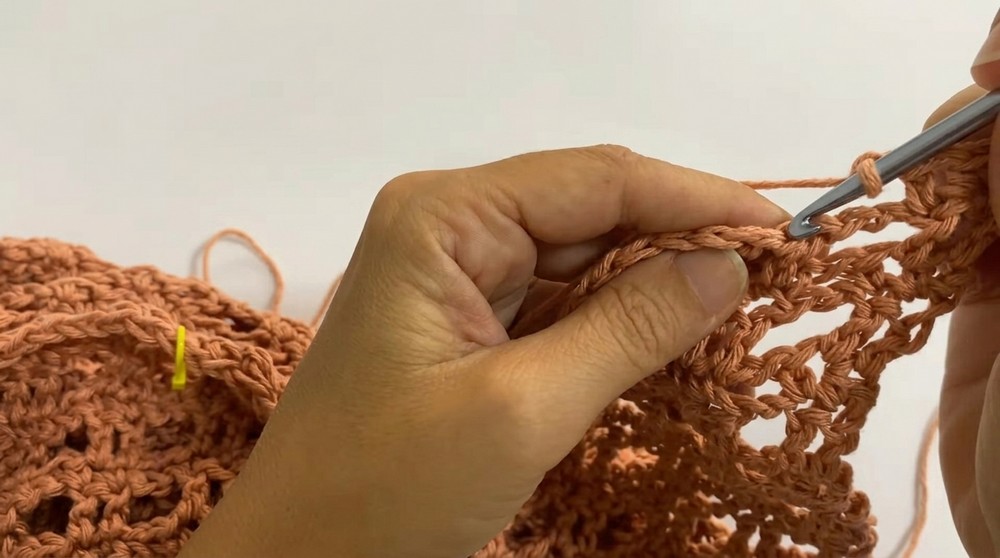
2. Divide for Front Panels
- Count block groups: Divide total number of block groups (vertical repeat columns) by 2. Allocate an equal number for each front panel, with a small center gap if needed.
- Example: 14 group blocks for back (split: 6 for right, 6 for left, 2 central left unworked for arm/neck opening).
- Mark panel starts with stitch markers if desired.
3. Work Each Front Panel
Right Panel:
- Attach yarn at the division point.
- Continue in pattern stitch over desired number of stitches (as for back), following the same pattern sequence as established.
- Work for 26 dc block rows (or to match back panel length).
- Finish with one row of sc across.
Left Panel:
- Repeat on the other side, mirroring the right panel.
NOTE: If you finish a row on a dc row, start the next panel with sc row, so pattern continues in sequence.
4. Side Panel Extensions (for hips/comfy fit)
- Attach yarn at lower edge of vest’s side (where desired for width).
- Work along side edges of Back Panel, up to armhole opening.
Row Sequence (each side):
- Sc in first 2 edge sts, ch 2, sc in next 2, continue up (as per pattern stitch).
- Ch 3, dc in next 2, ch 2, dc in next 2, etc. (match established block mesh).
- Repeat for 2 rows or as many as needed to add width (measure to fit your hips).
- Repeat for both sides.
5. Seaming
- Fold vest at shoulders, bringing front panels over back.
- Align side panel extensions.
- With yarn/hook or tapestry needle:
- Slip stitch (or whip stitch/slst, or desired join) sides together from side bottom up, matching mesh blocks.
- Leave a lower slit of 3-4 mesh blocks (approx. 11 cm/4.5″) open at hem for comfort.
- Repeat on both sides.

6. [Optional] Add Extended Front/Collar
- If desired, continue along each front edge and neckline with block mesh stitch for 2–3 rows for a wider front or “shawl collar” effect.
- You may add a button or toggle at chest to close vest.
7. Finishing
- Weave in all ends securely with yarn needle.
- Block vest gently for best drape and finished measurements.
Conclusion
This easy summer vest is constructed in one piece, divided for practical and comfortable fit. The block mesh (column) stitch grows quickly, making this a fun project for beginners or advanced crocheters looking for a relaxing make. The pattern is highly customizable in length, width, and finishing touches.
Pattern Corrections & Tips
- Pattern Correction: For best results, check gauge before starting. Adjust hook/yarn to maintain a light and drapey fabric—not too tight.
- Tip 1: Use stitch markers to keep division clear and sides symmetrical.
- Tip 2: Always start each panel with the appropriate row to preserve the stitch sequence (sc row follows dc row, and vice versa).
- Tip 3: For larger sizes add in multiples of 4 to chain count. Always compare to a garment that fits or body measurements.
- Tip 4: Want more coverage? Continue the block mesh on front edges or add fringe for a boho look.
- Tip 5: For winter, try chunky wool and larger hook for a cozy, loose cardigan!