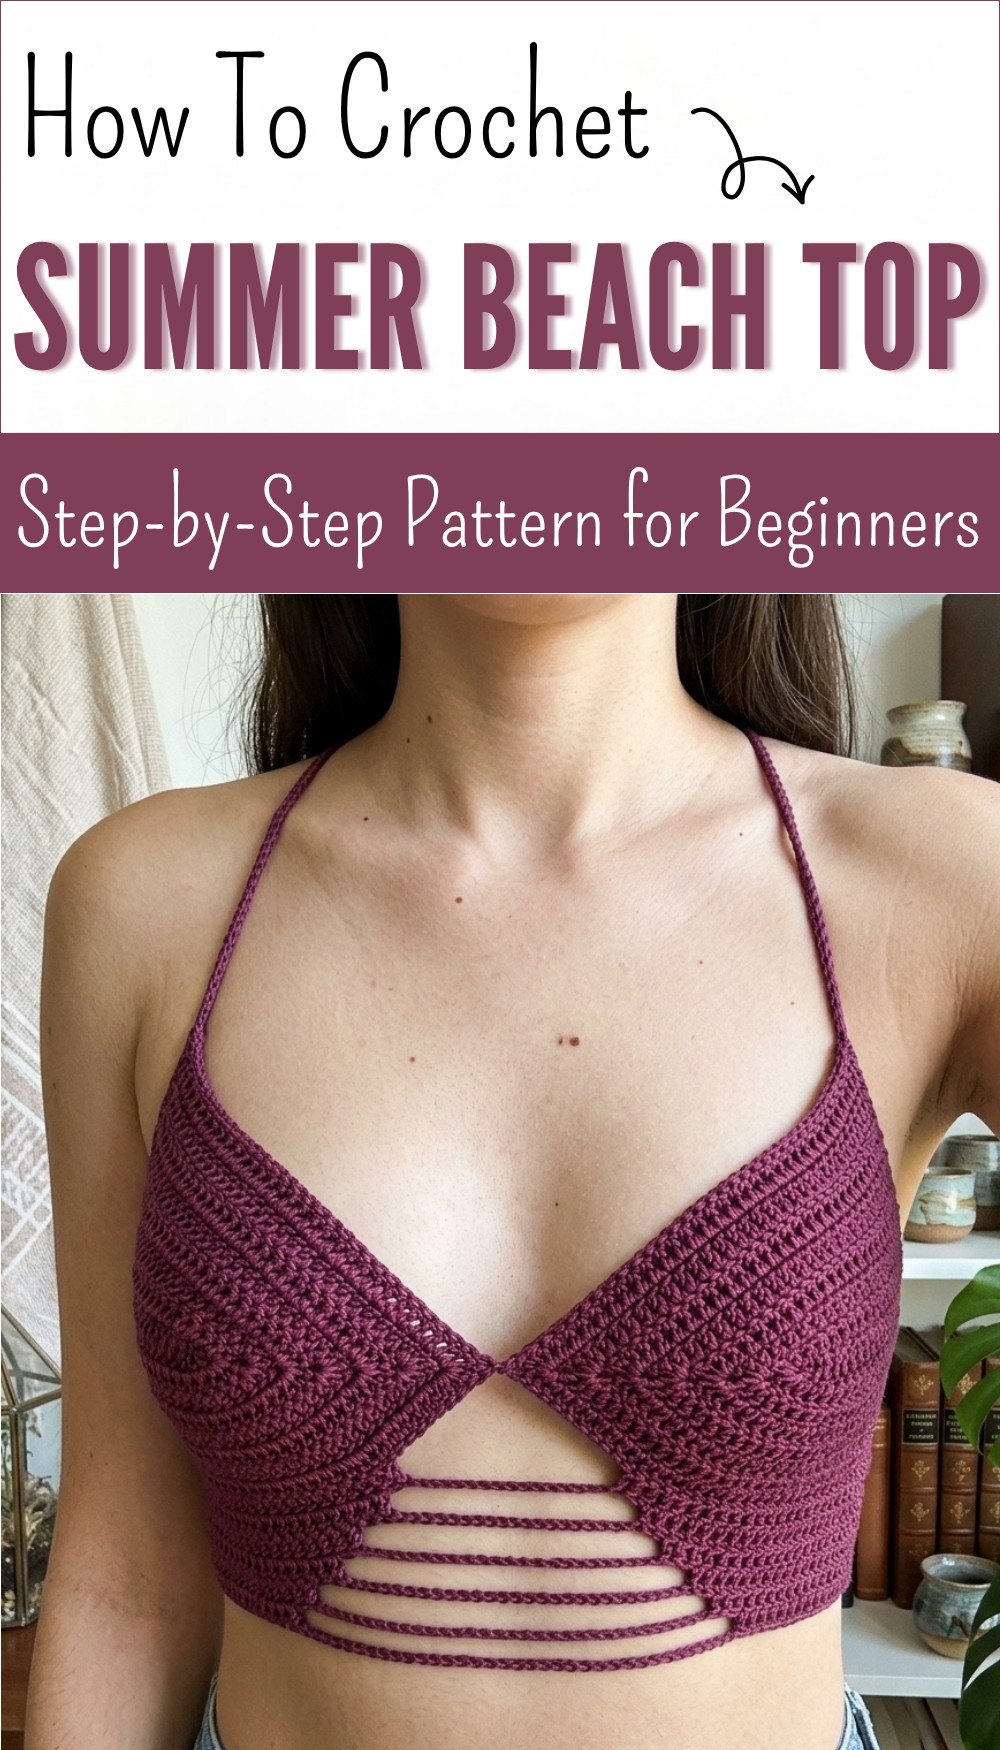
Easy Crochet Summer Beach Top Pattern (Free Guide)
Feel cool and confident with free crochet summer beach top pattern that’s perfect for sunny days at the shore or your favorite picnic spot.
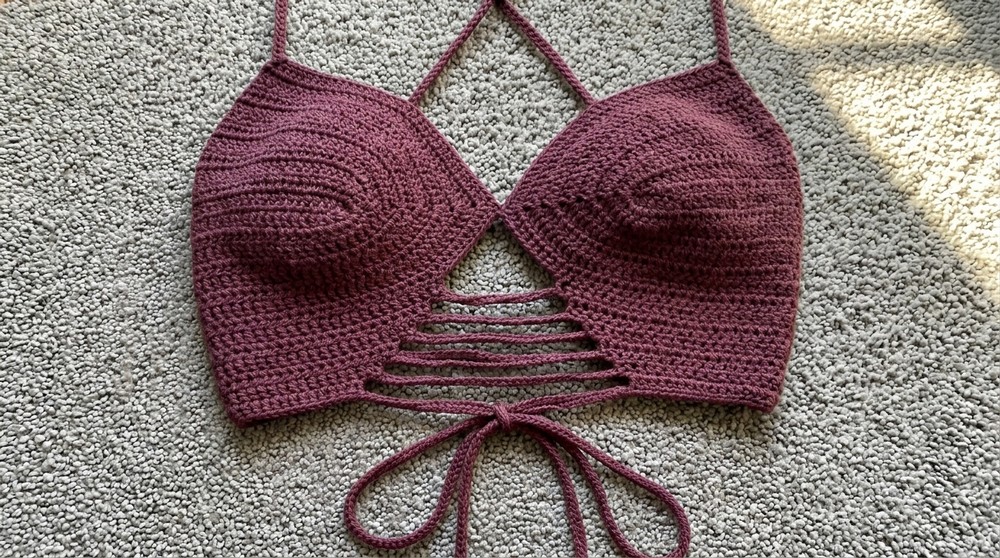
Bright yarn joins together to make a beautiful top that feels light and happy to wear under the warm sun. You will notice how lovely the color looks and how the open design helps keep you cool, making each day at the beach or park more fun. With the crochet summer beach top pattern, you can create a comfy and stylish shirt to put over your swimsuit or favorite shorts. This top dries fast after water play and is easy to wear for every summer adventure.
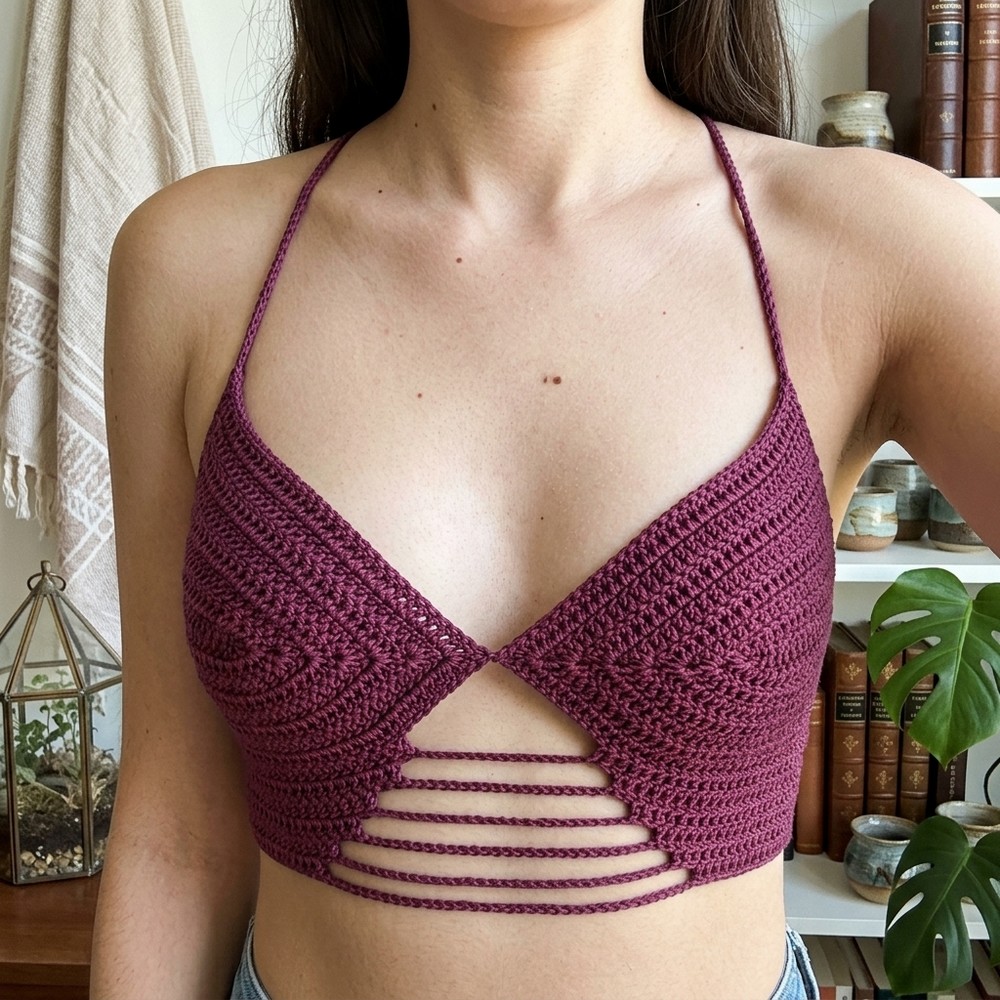
Crochet Summer Beach Top Pattern – Free Trendy & Modern Style
The pretty pattern and loose stitches make the shirt look special and give your outfit a cheerful, homemade touch. Each top you make adds smiles to your day and lets you feel proud of your work. Sharing this top with friends or family spreads happiness and makes summer memories you will always remember.
Free Crochet Summer Beach Top Pattern
Materials
- Yarn: Sport/Light weight yarn or any preferred (cotton or acrylic), approx. 100–150g for size S, adjust amount for other sizes.
- Hook: 3.5 mm–4 mm (E/4–G/6) crochet hook as suitable for your yarn.
- Yarn Needle: For weaving in ends.
- Measuring Tape: For accurate chain length and cups.
- Stitch Markers: (Optional, for marking placement.)
- Scissors
- Buttons: (Optional, for closure instead of lace-up)
Key Abbreviations
- ch = chain
- sc = single crochet
- dc = double crochet
- sl st = slip stitch
- st(s) = stitch(es)
- rep = repeat
- sp = space
Special Notes
- Adjust the foundation chain and number of rows to fit your size.
- For cups: Calculate the base measurement directly below your bust, or refer to the reference image mentioned in the tutorial (9 cm for small).
- All instructions are written in US crochet terminology.
- You will make two cups, join them at the center, and work front, sides, and straps.
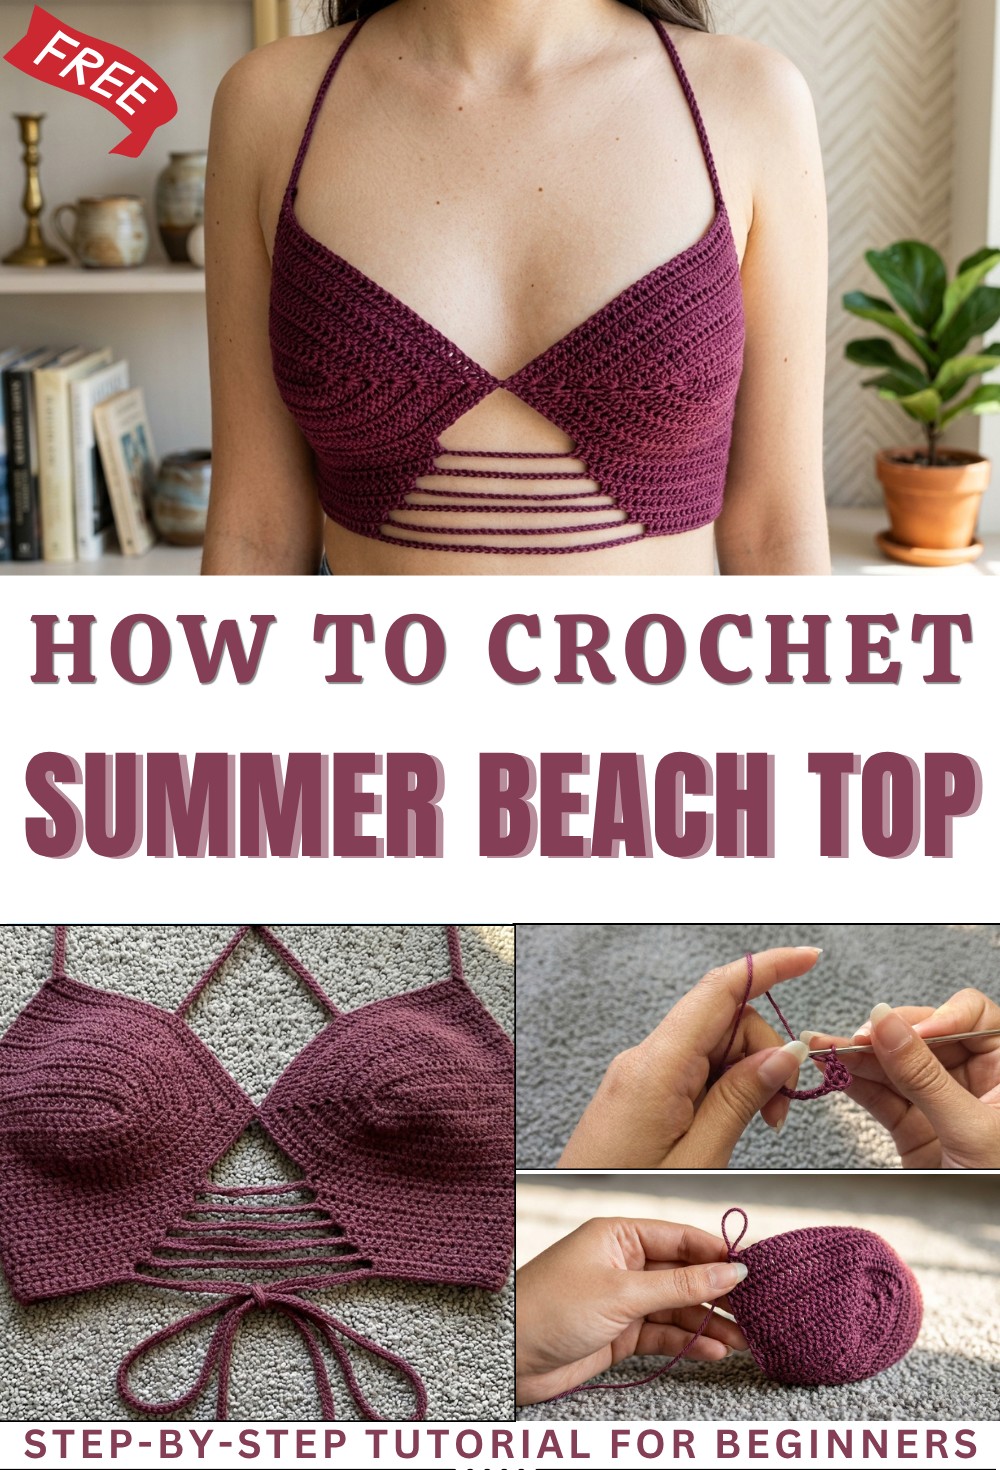
Instructions
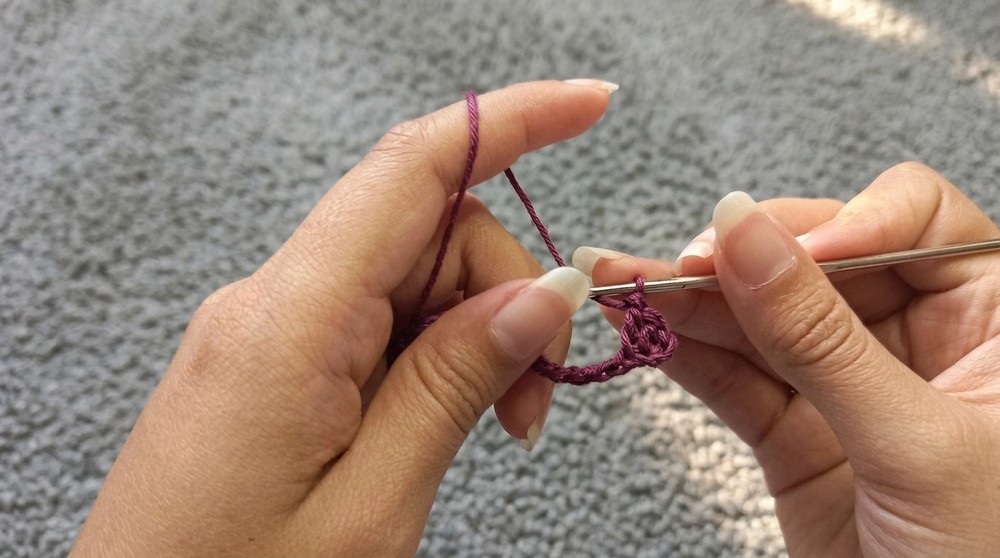
1. Stitches Used (Demo Section)
- Slip Knot: Wrap yarn, insert hook, pull through loop.
- Chain (ch): Yarn over, pull through loop on hook.
- Double Crochet (dc): Yarn over, insert into st, yarn over, pull up loop. (3 loops), yarn over, pull through 2 loops, yarn over, pull through remaining 2.
- Single Crochet (sc): Insert hook, yarn over, pull up loop. (2 loops), yarn over, pull through both.
- Slip Stitch (sl st): Insert hook, yarn over, pull through all loops at once.
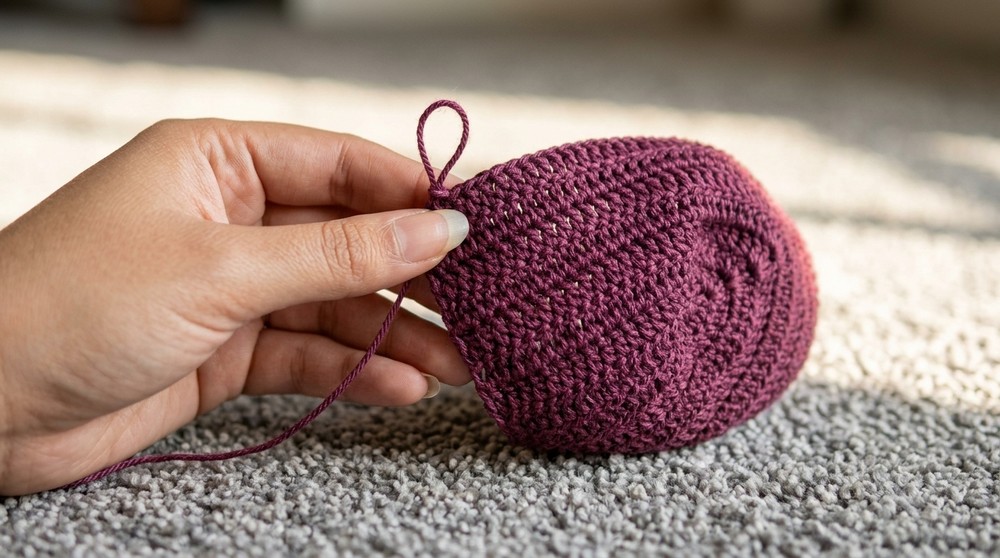
2. Cups (Make 2)
Setup:
- Make a slip knot.
- Ch a number that measures the base of one cup (e.g., for size S, ch 20 for ~9 cm. Use 1 foundation ch = 1 dc).
- Adjust for other sizes based on under-bust/cup width needed.
Row 1:
- Ch 1.
- Dc in 3rd ch from the hook (the first 2 chs count as dc).
- Dc in each ch across.
- You should have the same number of dc as chains made.
Cup Corner/Increase:
- In last ch: Work 3 dc into same st (this forms the top tip of the cup).
- Ch 1, turn.
Row 2 (Mirror Row/Other Side):
- Work 3 dc into same top/turn st for the other side.
- Continue down the opposite edge: dc in each st back to end.
- You should have (base dc count) on each side.
Next Rounds (Cup Growth & Shaping):
- For every new round:
- Ch 2, turn, skip first st (counts as 1st dc).
- Dc in each st across to cup tip.
- At cup tip (sc or ch-1 sp at top): work 2 dc, ch 1, 2 dc all in the tip to keep shaping.
- Continue dc in each st to end.
- Rep for 6–8 rows, until cup measures needed height from base to tip.
Fasten off cup 1.
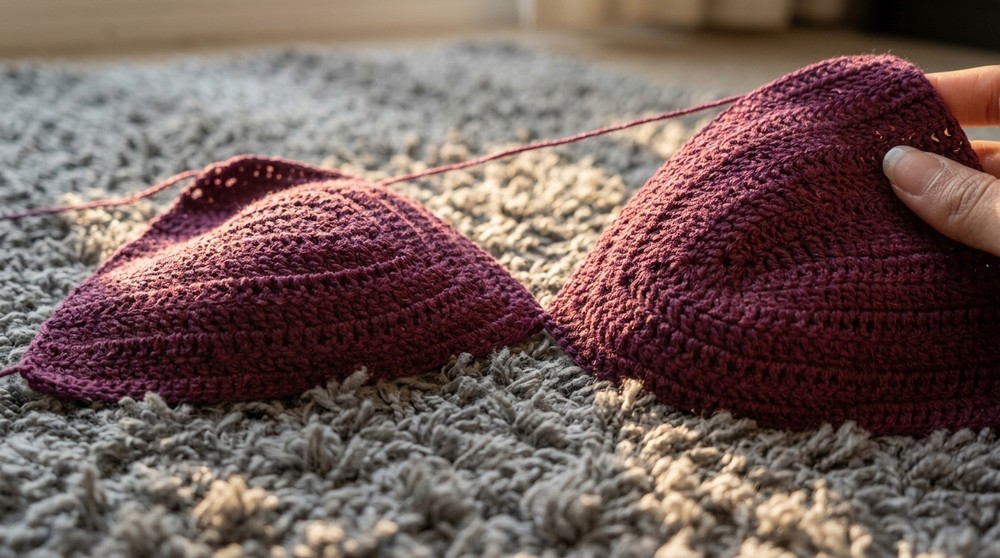
3. Joining the Cups
- Repeat for 2nd cup, but do NOT fasten off at end of last row.
- Align cups next to each other with peaks (tips) at top and flat base at bottom.
- On last row of 2nd cup, after tip, ch 1, join to adjacent cup at tip.
- Complete last row on 2nd cup.
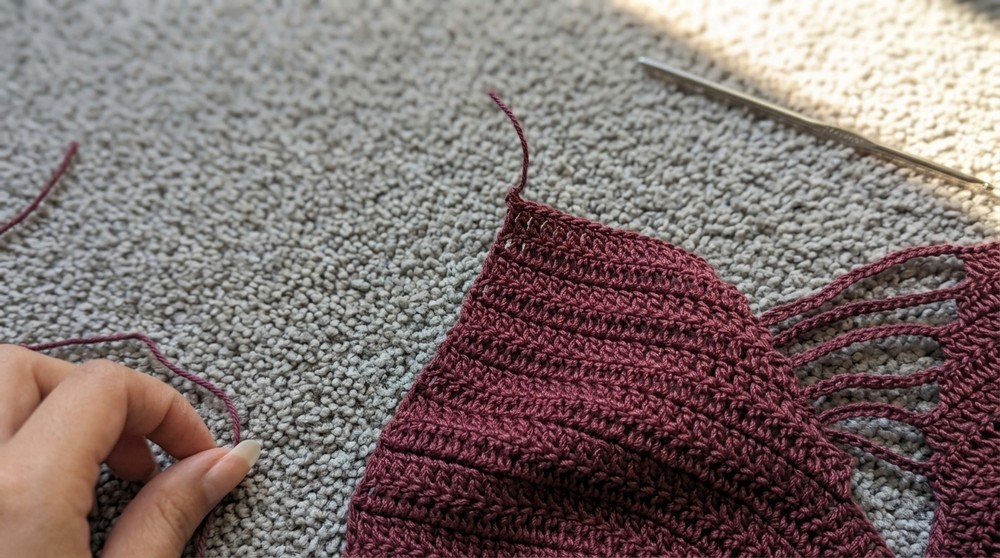
4. Top Front
First Joining Row
- Ch 2, turn.
- Dc in each st of cup until ~10 dc before join (if your cup is 20 dc wide, stop at 10).
- Ch 15 (under-bust strap/lace area),
- Skip 10 dc from join on other cup.
- Dc in next st (continue across 2nd cup).
- Dc to end of cup.
- Ch 2, turn.
Second and Subsequent Front Rows
- Dc across until 2 sts before ch-15 sp.
- Ch 19 (add 4 chains each new row as per tutorial’s logic).
- Skip 2 dc after ch sp, dc in next st.
- Continue across, ch 2, turn.
- Each row: Increase under-bust chain by 4 (e.g., 15, 19, 23, 27…).
- Repeat for 6 total rows (or your desired body length), each time increasing the center chain by 4.
5. Sides (Make Both)
- Attach yarn at bottom corner of cup (side).
- Ch 3 (counts as dc), dc in side of each row up to join, placing 2 dc per row.
- Work 3 side rows in dc.
Buttonhole (Back Lace Area)
- Next row:
- Ch 3, dc in next 3 sts (total 4 dc).
- Ch 3, skip 3 sts, dc in next (creates buttonhole).
- Repeat: 4 dc, ch 3, skip 3, dc in next across the row.
Edging
- Optional: Add a row of sc across entire edge for neatness.
6. Repeat for Other Side
- Attach yarn in mirror position (top/middle).
- Repeat side rows downward matching stitch counts.
7. Straps (Make 2)
- Attach yarn at upper cup tip.
- Ch to desired length (try on for best fit; suggested 90–100 ch for a tie).
- Optional: Work sl st in each ch back for a stable lace.
- Fasten off and repeat for second strap.
8. Lacing
- With straps, or crochet extra long chains (approx. 120–160 ch as needed).
- Thread laces through back buttonholes in a crisscross, corset-style.
9. Finishing
- Weave in all ends carefully with yarn needle.
- Adjust fit by tightening/loosening back laces.
- Block if desired for shape.
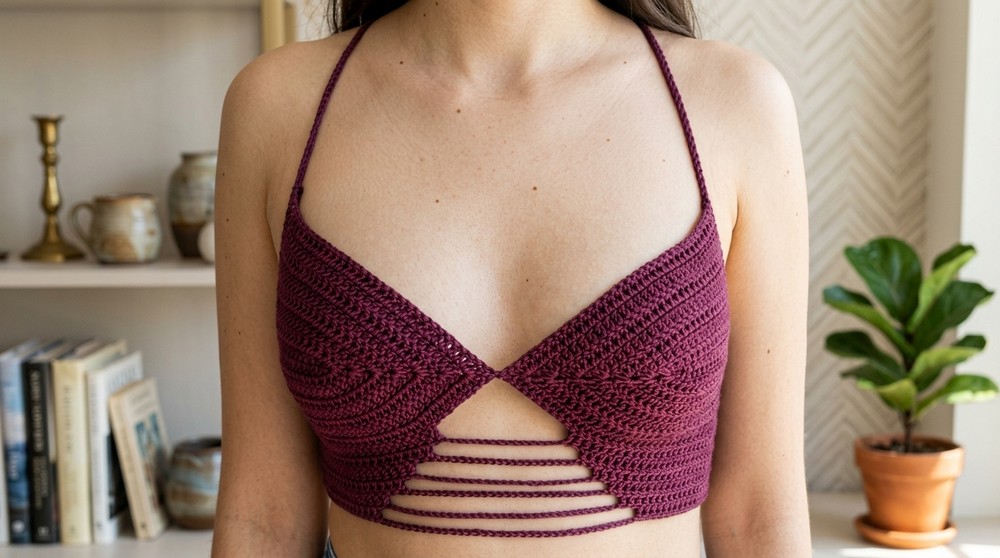
Conclusion
This easy, customizable crochet cup top is quick, flattering, and perfect for summer. Adjustable by size and length, with a corset-style back, it comfortably fits a variety of body types and is excellent practice for beginners.
Pattern Corrections & Tips
Corrections:
- Be sure to count stitches as you turn and always work the same number of stitches per cup side for symmetry.
- Increase the center chain by exactly 4 each body row for consistent shaping.
Tips:
- For better cup support, use cotton yarn and ensure snug base measurement.
- Try on frequently, adjusting chain-lengths and rows for perfect coverage and support.
- Add decorative stitches (e.g., shells) to edges if desired.
- Insert elastic cord into straps for more hold.