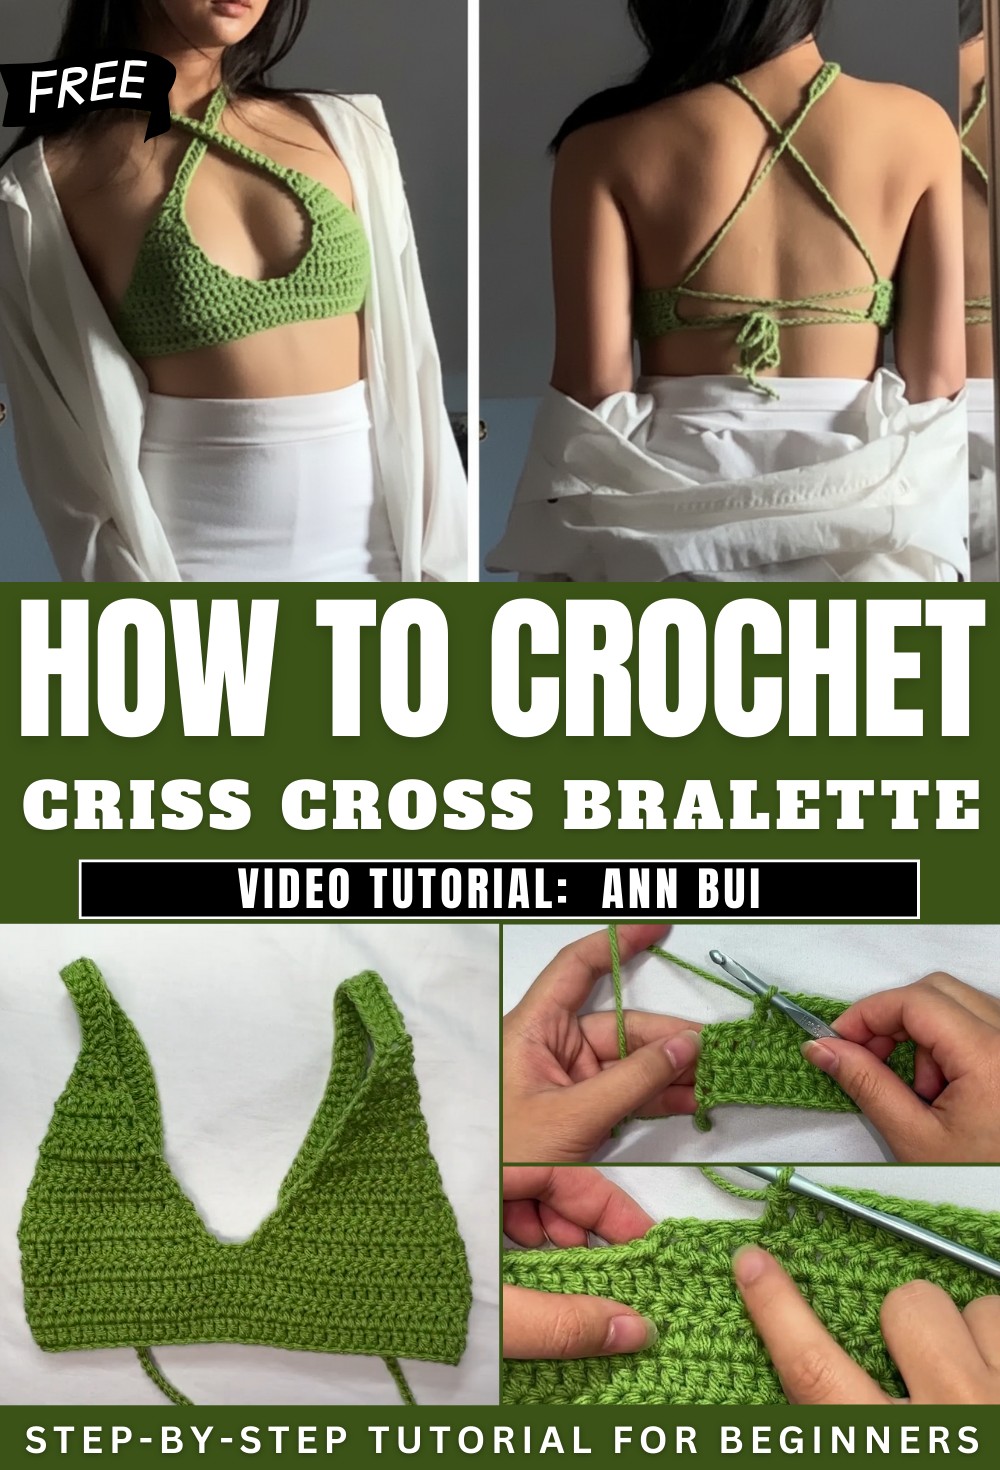
Edgy Crochet Criss Cross Bralette Pattern With Fashion Forward Feel
Highlight warm day style with this Crochet Criss Cross Bralette Pattern offering snug fit, modern straps, and stylish appeal for casual wear.
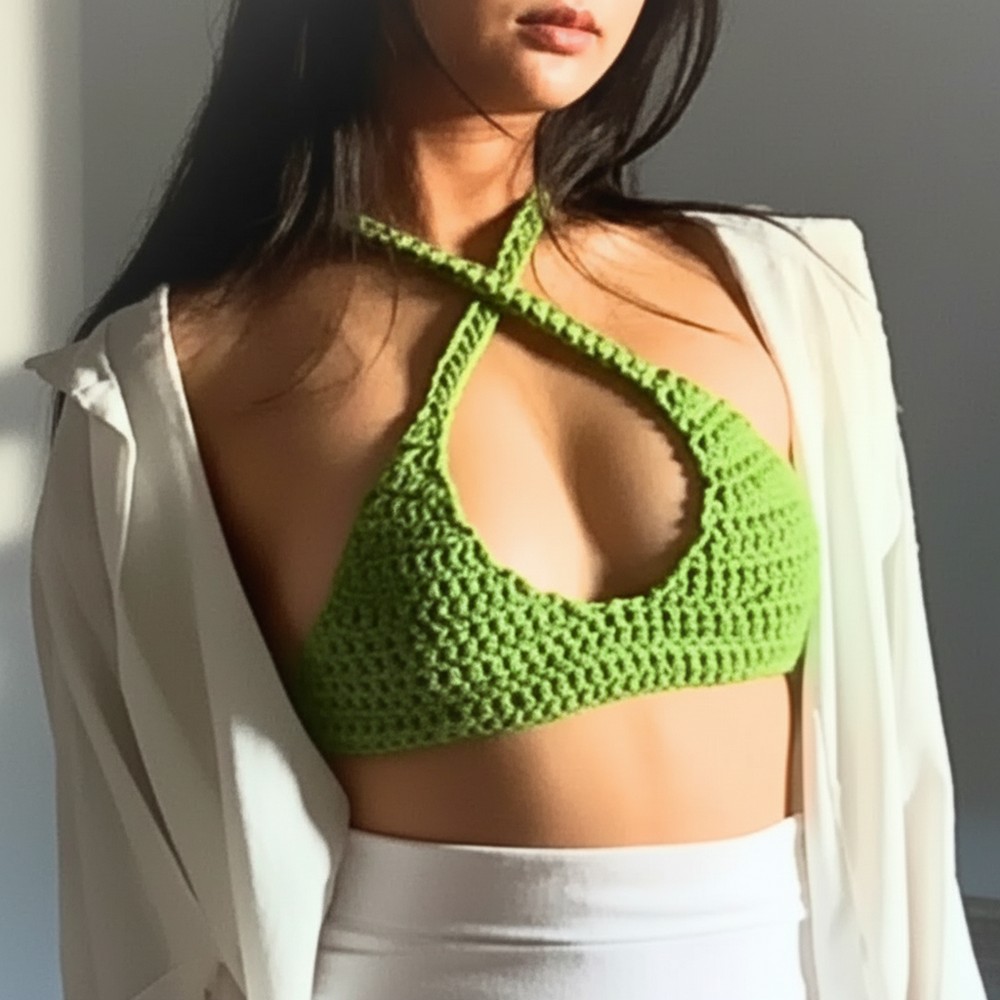
Flirty Crochet Criss Cross Bralette Pattern Built for Statement Looks
Every wardrobe deserves a touch of originality and comfort, which is exactly what the Crochet Criss Cross Bralette Pattern delivers. Featuring striking crossed straps at the front, this design stands out for its playful charm and modern appeal. The lightweight, breathable fabric makes it ideal for warm days or as a bold, stylish layer beneath sheer tops. With adjustable sizing and endless color possibilities, the Criss Cross Bralette easily adapts to suit every personality and occasion.
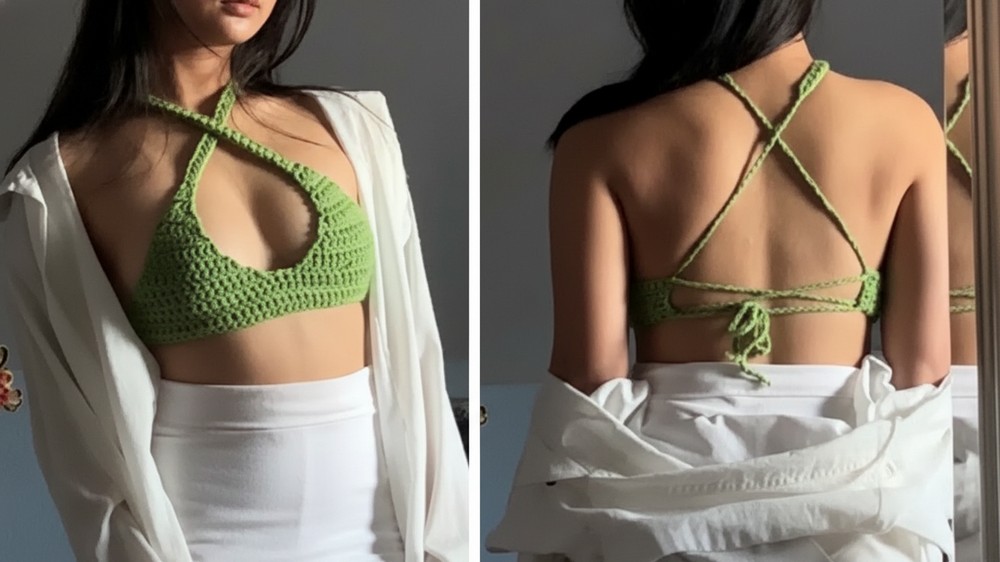
Its flattering silhouette offers support and style for all body types, making it a favorite for festival wear, lounging, or casual outings. More than just another top, the Bralette invites individuality and trend-forward thinking into everyday outfits.
Materials Needed
-
Yarn: Medium weight yarn (Category 4).
-
Hook: Size appropriate for your yarn (e.g., 5mm or 5.5mm).
-
Tools: Measuring tape, 3 stitch markers (or bobby pins), scissors, and a tapestry needle.
Phase 1: The Rectangular Base
-
Calculate Your Foundation: Take your bra band size and subtract 10. (Example: 36 – 10 = 26 inches). The tutor uses 18 inches for a size Small.
-
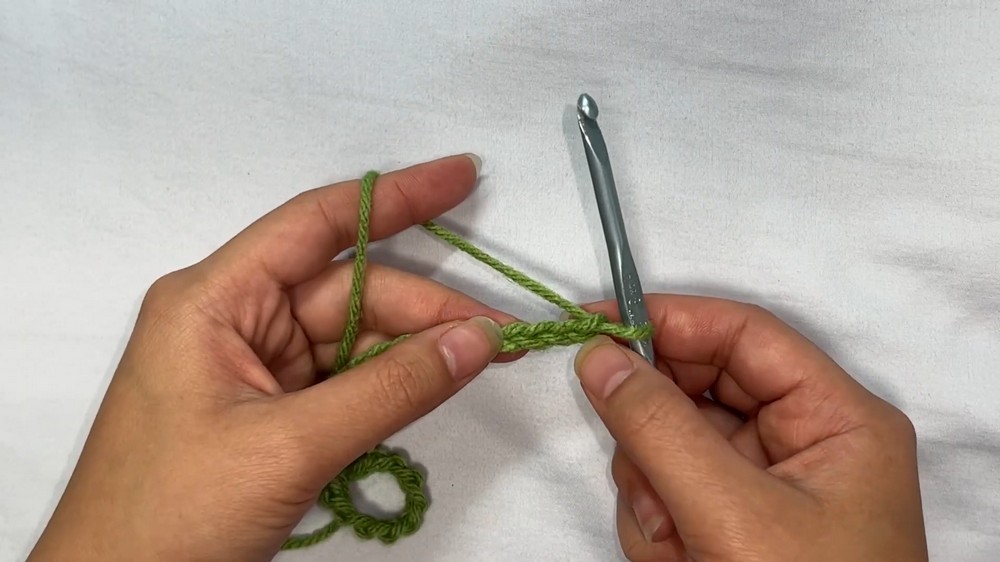
Foundation Row: Work a foundation chain to your calculated length.
-
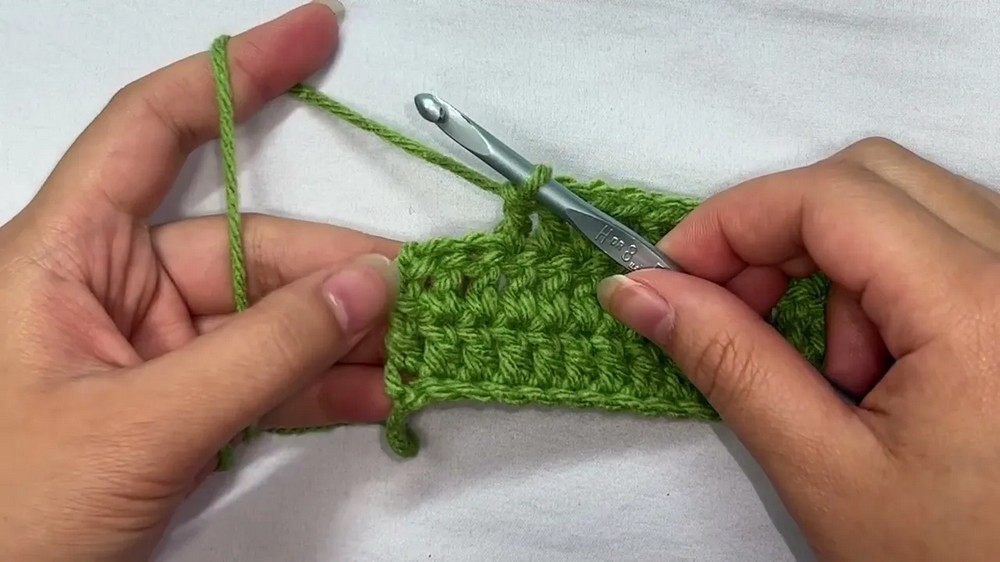
Row 1: Work double crochet (dc) into the 3rd chain from the hook and in every chain across.
-
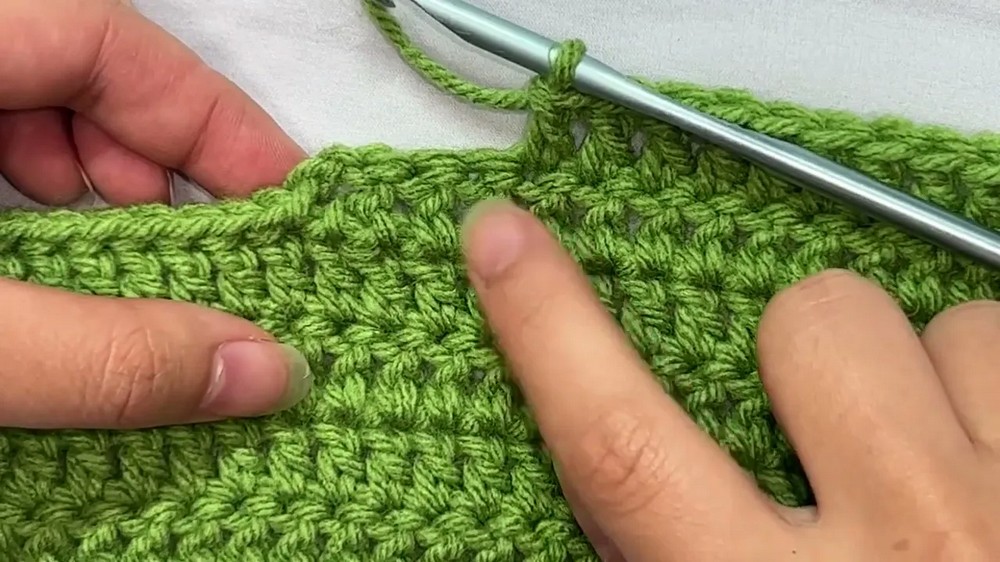
Rows 2–4: Chain 2 (counts as a dc) and turn. Skip the first stitch and dc into the second stitch and every stitch across. Be sure to dc into the top of the turning chain at the end of each row to keep edges straight.
-
Tip: Work more rows here if you prefer a longer top that covers more of the stomach.
-
2: Preparing for the Cups
-
Find the Center: Fold the rectangle in half to find the center stitch. Mark it with a bobby pin. This center stitch will not be worked into.
-
Determine Cup Width: Measure roughly 5 inches (or 18 stitches) from the center toward each side. Place stitch markers at these points.
-
Travel to Start: With your yarn attached to the corner of the rectangle, slip stitch loosely until you reach the first cup marker.
3: The Tapered Cups
Each cup is worked independently. Follow the “Decreasing Rules” below:
-
Inner Edge (Center): Decrease by 1 stitch every row.
-
Outer Edge: Decrease by 1 stitch every other row.
Left Cup
-
Row 1: Ch 2. Work a dc2tog (dc decrease) over the next two stitches. dc across the row until 2 stitches remain before the center marker. dc2tog.
-
Row 2: Ch 2, turn. Work a dc2tog over the first two stitches. dc normal until the end of the row (no decrease on the outer edge this row).
-
Growth: Alternate Row 1 (decrease both sides) and Row 2 (decrease inner side only) until only 3 stitches remain.
Right Cup
-
Mirror the process by reattaching yarn at the center (skipping the middle stitch). Follow the same decrease logic to ensure the cup tapers inward.
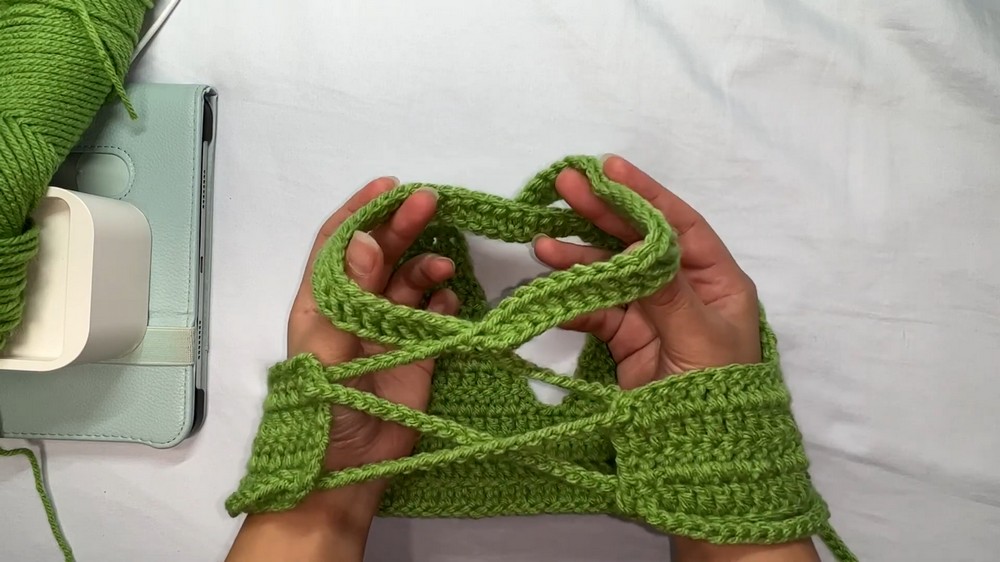
4: The Straps (Multi-Way)
This method uses a “Chainless Foundation” to provide more stretch and strength than a simple chain.
-
Foundation Strap: At the top of the cup (3 stitches remaining), yarn over, insert hook into the 3rd stitch, pull up a loop. Yarn over, pull through 1 loop (creating a base chain). Yarn over, pull through 2, yarn over, pull through 2 (completing the dc).
-
Length: Repeat this until you have 30 foundation double crochets.
-
Extension: Chain an additional 150–200 stitches to create the long tying tail. Finish with a knot at the tip.
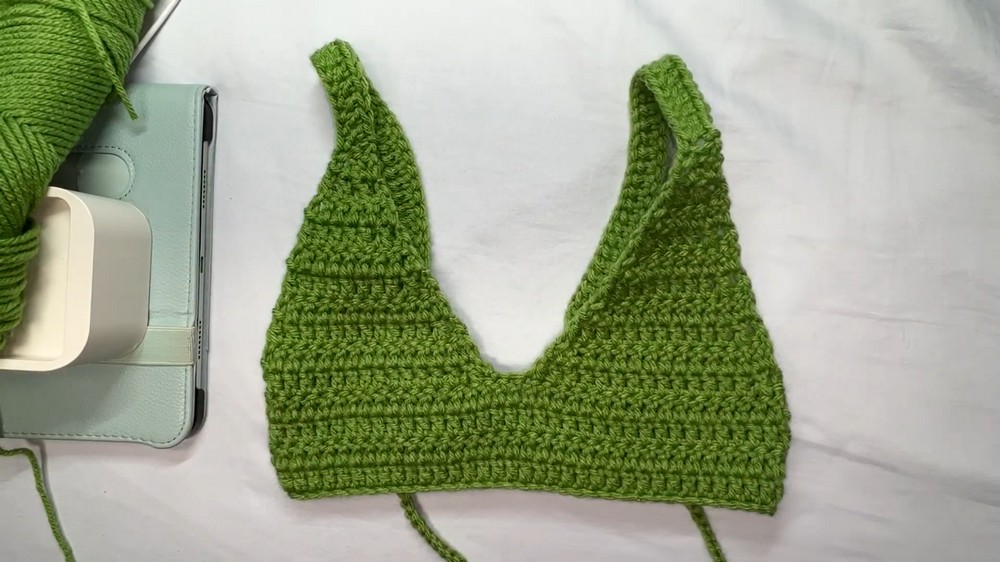
Conclusion
Finishing your halter top provides you with a versatile, high-end summer garment that showcases your ability to customize patterns. By using the “bra size minus 10” rule, you’ve ensured the top remains snug and secure. Once you weave in your ends, your top is ready to be worn in a variety of styles, including the popular criss-cross halter look.
Pro Tip: To wear the criss-cross style, string the left strap through the top left corner of the rectangle base, then cross it over to the bottom right corner. Repeat for the right side to create an “X” that secures the top comfortably.