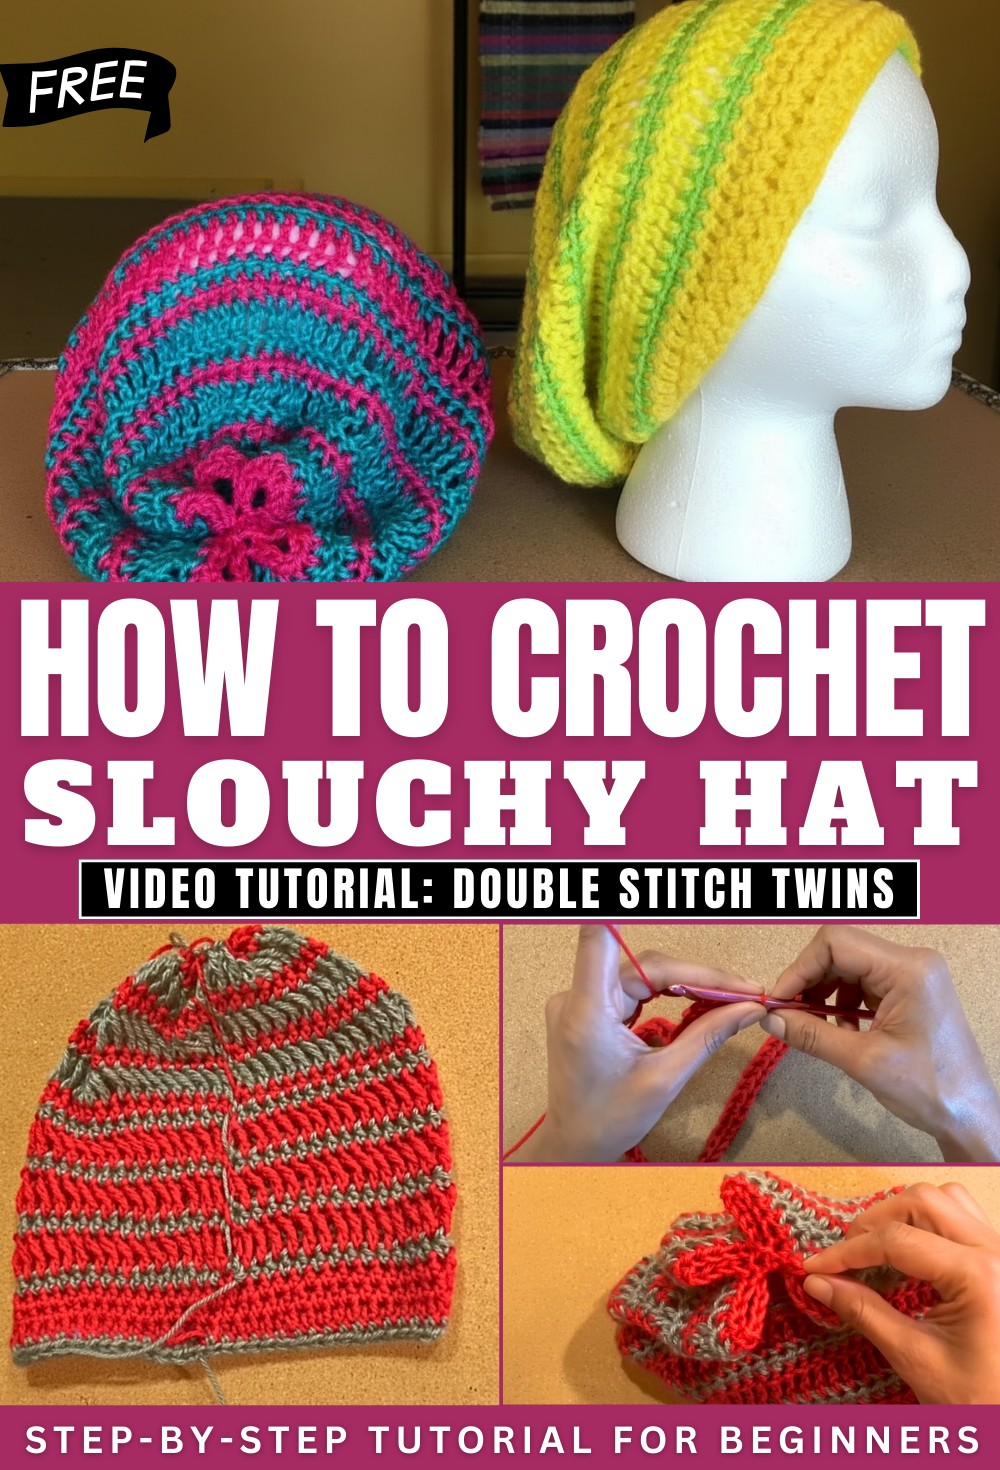
Snug Crochet Slouchy Hat Pattern That Stays Stylish
Top off cool weather style with this Free Crochet Slouchy Hat Pattern for a relaxed fit and cozy feel that works perfectly for everyday wear.
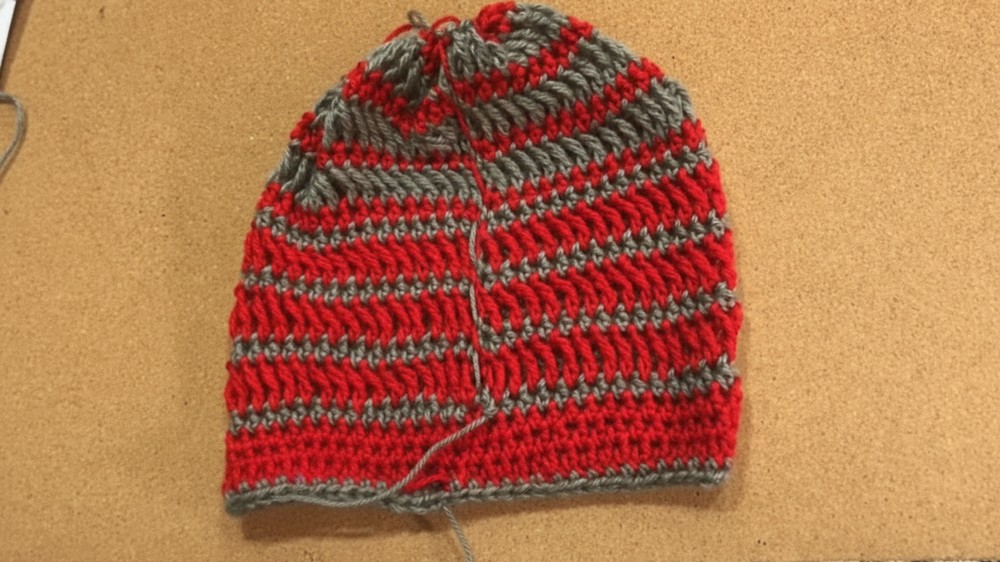
Chunky Crochet Slouchy Hat Pattern With Cozy Appeal
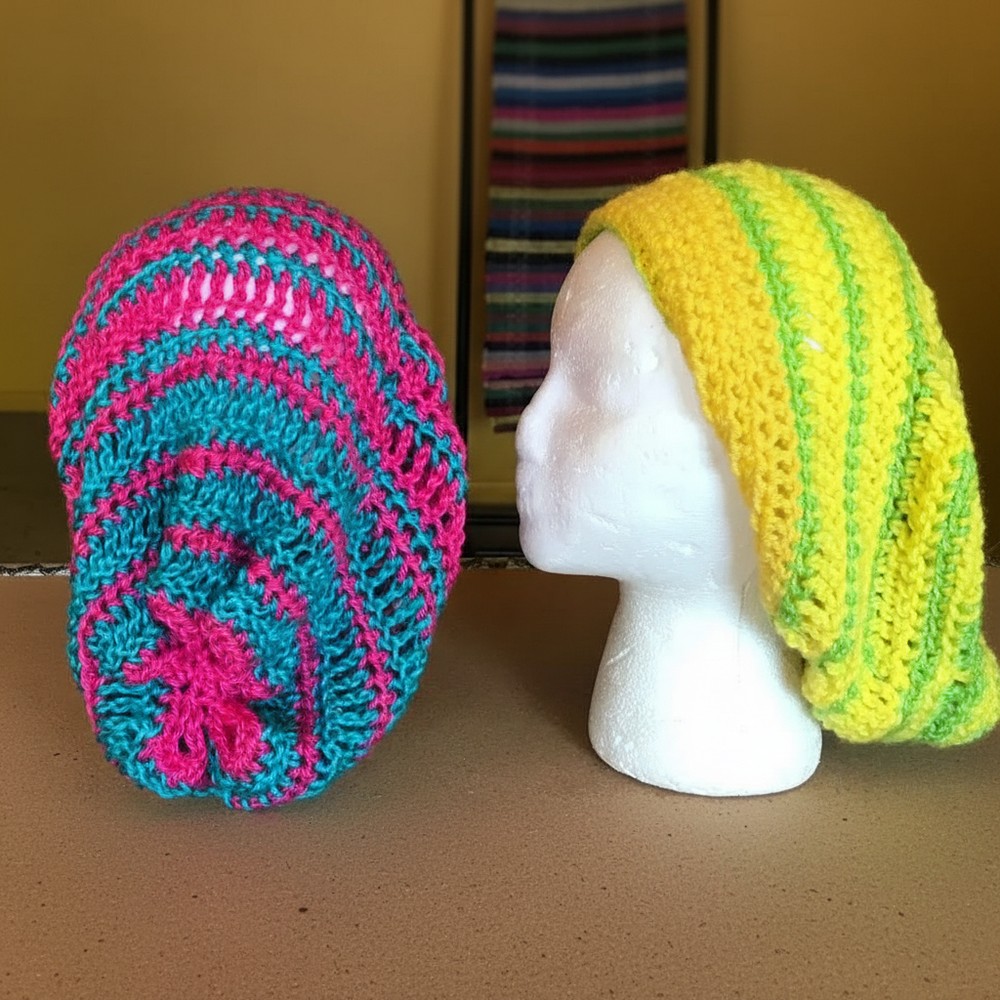
You can easily make a crochet slouchy hat pattern, and it’s a wonderful project for both beginners and those with experience. Using your favorite yarn and colors, you can create a hat that is both warm and stylish. This pattern is loved because it is simple to follow and fits nicely on any head. The loose, gentle shape means the hat is comfortable to wear all day, whether you’re out running errands, taking a walk, or just relaxing at home.
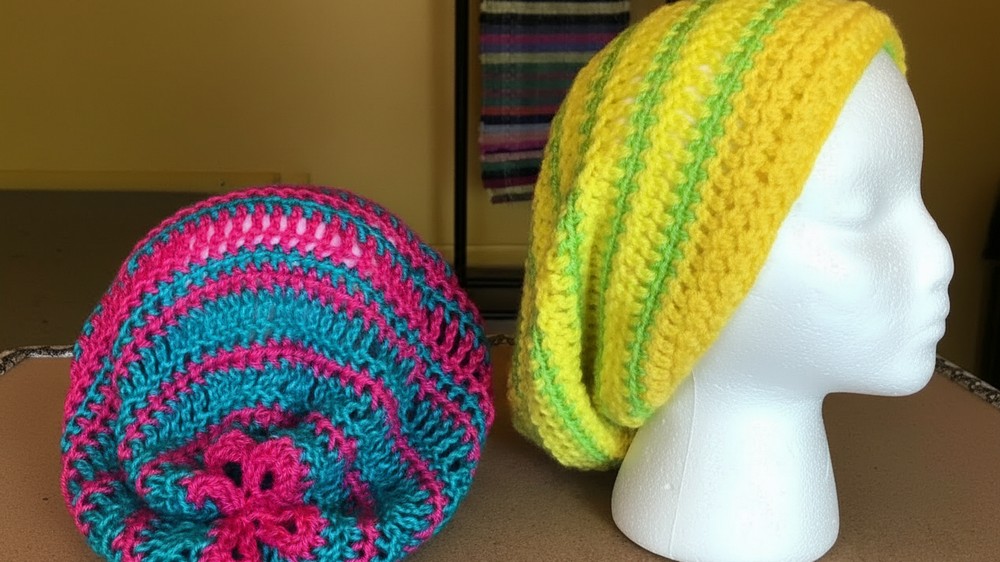
The crochet slouchy hat pattern also matches many outfits, from jeans to sweaters or dresses, so you can wear it with almost anything. It’s easy to wash and will keep its shape, so you can enjoy your hat for a long time. Many people choose this pattern because it’s practical, cozy, and gives you the chance to make something unique with your own hands.
Materials Needed
-
Yarn: Medium weight (Size 4) yarn in two colors (e.g., Red and Gray).
-
Hook: 5.5 mm crochet hook.
-
Tools: Scissors and a tapestry needle.
Pattern Details
-
Skill Level: Easy/Beginner.
-
Stitch Guide:
-
hdc: Half Double Crochet.
-
tr: Treble Crochet (Yarn over twice).
-
sl st: Slip stitch.
-
-
Special Technique: Work into the back bump of the foundation chain for a professional edge.
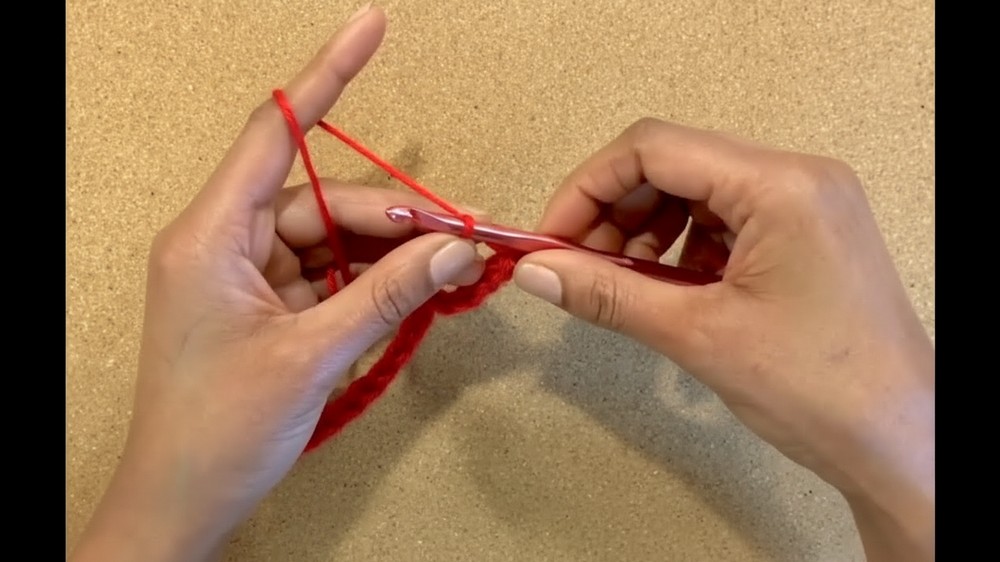
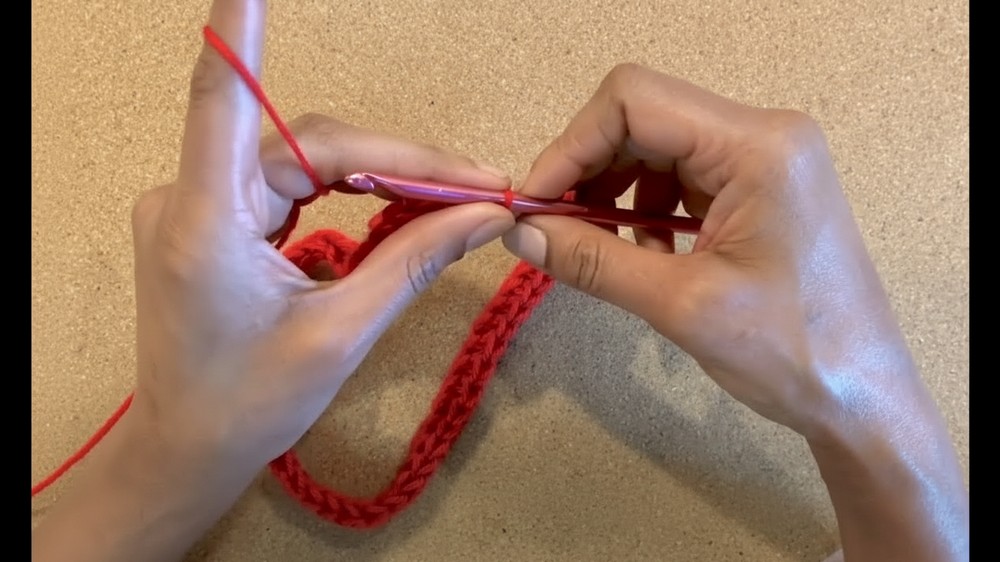
Phase 1: The Foundation and Rim
-
Foundation: Create an adjustable loop and chain 60. Run your fingers along the chain to ensure it isn’t twisted.
-
Join: sl st into the first chain to form a circle.
-
Round 1: Ch 1. hdc into the back bump of each chain around. sl st to the first hdc to close.
-
Rounds 2–3: Ch 2. hdc in each stitch around. Join with a sl st.
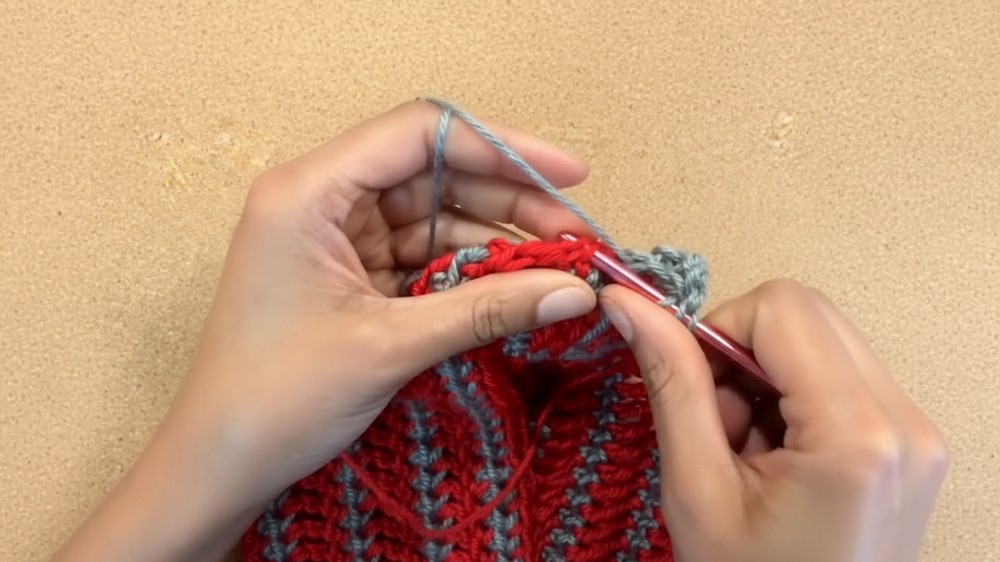
Phase 2: The Textured Body (Part A)
Keep both yarns connected throughout. Leave slack when carrying yarn up the inside to prevent the hat from pulling/puckering.
-
Round 4: Join Yarn B (Gray). hdc in each stitch around. Join with a sl st.
-
Round 5: Switch back to Yarn A (Red). Ch 4. tr in each stitch around. Join with a sl st.
-
Rounds 6–10: * Repeat hdc rounds with Yarn B.
-
Repeat tr rounds with Yarn A.
-
(End Part A after a Round 10 hdc row with Yarn B).
-

Phase 3: The Yin-Yang Color Flip (Part B)
Now, you will reverse which color does which stitch.
-
Round 11: Switch to Yarn A (Red). hdc in each stitch around.
-
Round 12: Switch to Yarn B (Gray). Ch 4. tr in each stitch around.
-
Rounds 13–17: * Continue alternating: hdc rounds in Yarn A and tr rounds in Yarn B.
-
Stop after Round 17 (the final hdc round).
-
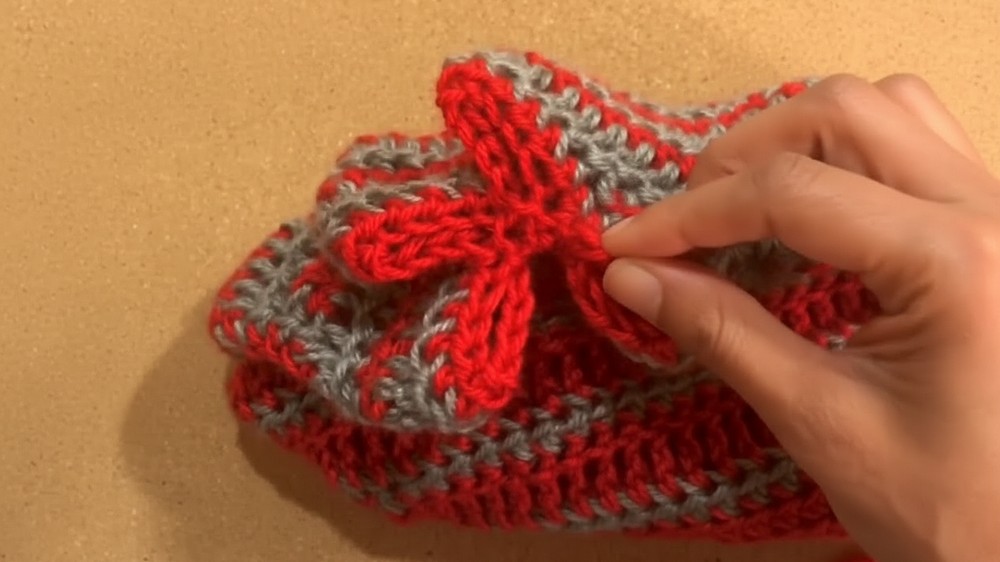
Phase 4: Closing the Hat
-
The Petal Method: Instead of weaving a thread, you will “cinch” the top.
-
Skip 9 stitches, sl st into the 10th.
-
Repeat this around the top opening. This creates 6 “petals.”
-
-
Center Seal: sl st 1 or 2 times across the very center of the hole to close it completely.
-
Finish Top: Fasten off and pull the tail to the inside to weave in.
Phase 5: The Bottom Trimming
-
Attach: Find the tail at your original foundation chain. Attach Yarn B.
-
Final Row: Ch 1. hdc into each foundation chain around. Working into the “leftover” loops from Step 1 creates a clean, professional rim.
-
Finish: sl st to close, fasten off, and weave in all ends.
Conclusion
Your Slouchy Hat is ready! The contrast between the short hdc stitches and the long tr stitches creates a soft, draped silhouette.