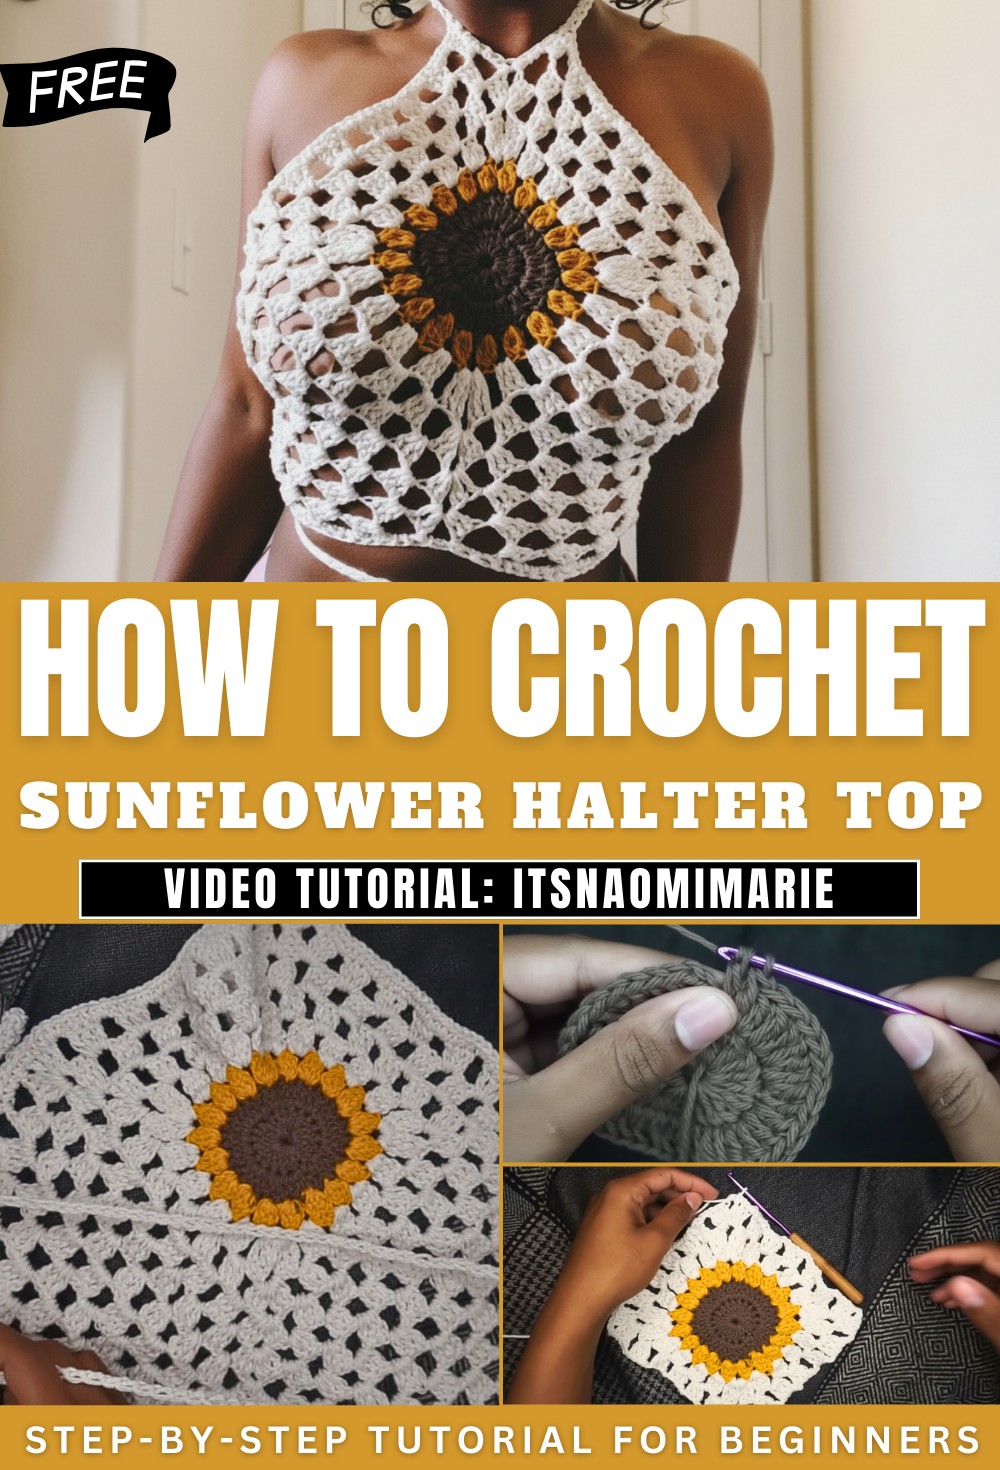
Blooming Crochet Sunflower Halter Top Pattern With Happy Vibes
Show off bold flair using this Free Crochet Sunflower Halter Top Pattern with vibrant petals, secure ties, and a stylish statement look today.
Lively Crochet Sunflower Halter Top Pattern That Feels Uplifting
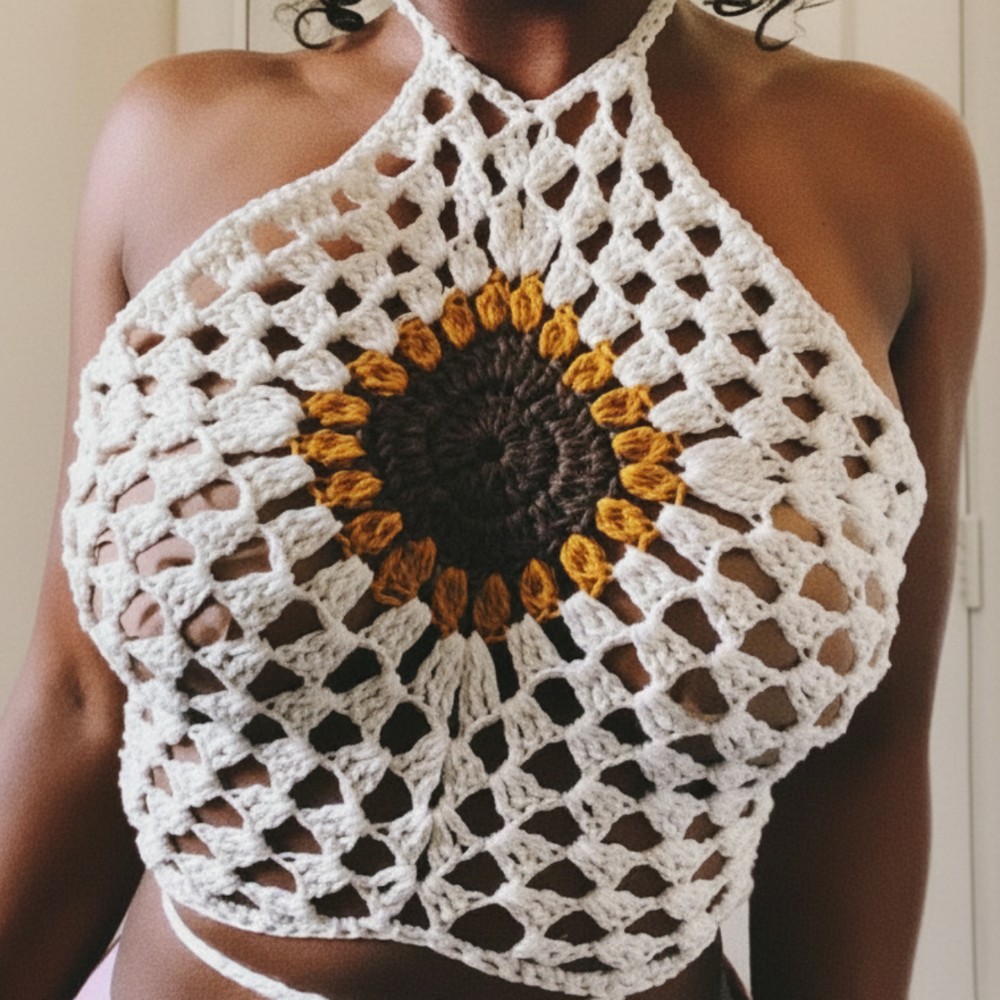
Inspired by sunny blooms, this stylish halter top brings a lively and expressive touch to warm-weather fashion. The sunflower motif creates a natural focal point, adding charm and personality while keeping the overall look balanced and elegant. The Crochet Sunflower Halter Top Pattern features a supportive halter neckline that enhances the shoulders and back, offering a secure yet comfortable fit. Its open and breathable layout makes it suitable for summer days, beach outings, festivals, and casual meet-ups.
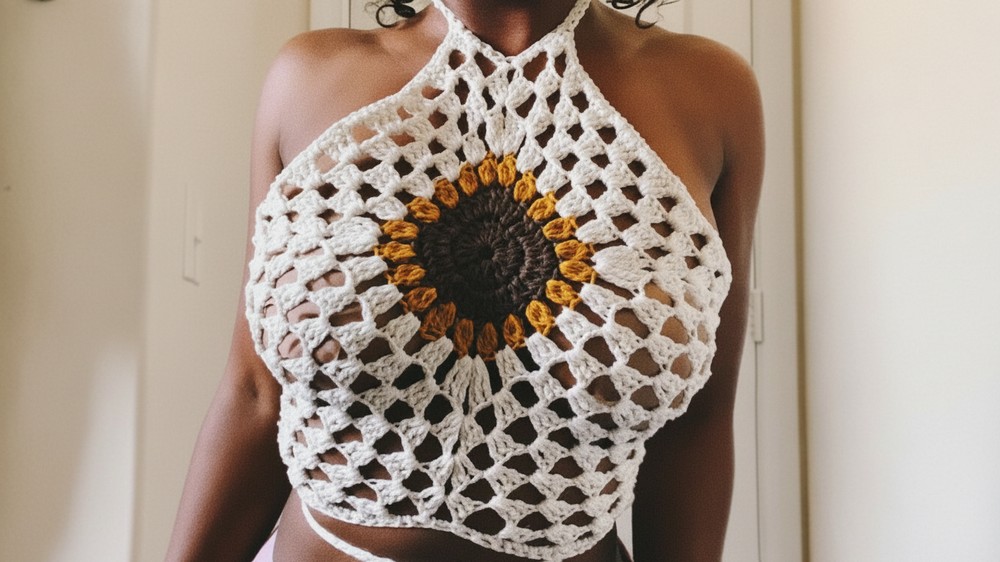
One of its main benefits is versatility, as it pairs effortlessly with denim shorts, skirts, or relaxed trousers for a fresh seasonal look. The floral detail adds visual interest without overpowering the outfit, allowing easy styling with simple accessories. Different color choices allow the design to shift in mood, whether using traditional sunflower hues for a natural look or experimenting with modern shades for a bold statement. In the end, it offers a fresh and expressive style that stands out with confidence, blending playful beauty and seasonal appeal for bright, sunny days.
Materials and Tools
-
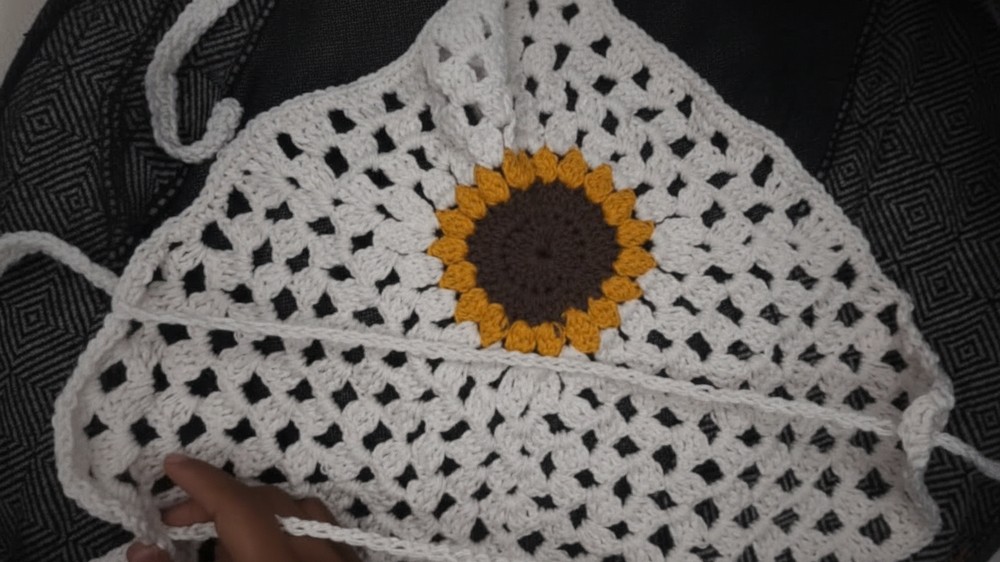
Yarn: Acrylic yarn (highly recommended over cotton for better drape and less stiffness).
-
Colors: Dark Brown (Center), Gold/Yellow (Petals), Green (Border/Square), and a Base color for side panels.
-
-
Crochet Hook: 3.5 mm or 4.0 mm (standard for medium-weight yarn).
-
Tools: Tapestry needle for weaving in ends and scissors.
Pattern Details
-
Skill Level: Intermediate (requires color changes and various stitch heights).
-
Sizing: Adjustable (Tutorial follows a Small/Medium).
Phase 1: The Sunflower Motif
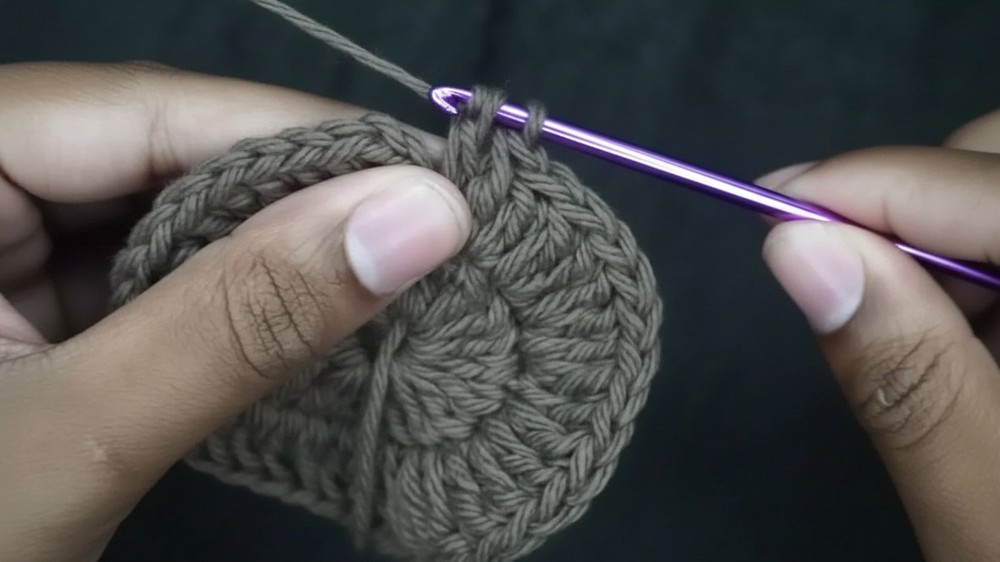
Round 1: The Brown Center
-
Magic Ring: Form a magic circle.
-
Base Stitches: Chain 3 (counts as 1st dc). Work 19 double crochets (dc) into the ring.
-
Close: Pull the ring tight. Join with a slip stitch (sl st) to the 3rd chain. (Total: 20 dc).

Round 2: Center Expansion
-
Increase: Chain 3. Work 1 dc in the same stitch.
-
Pattern: Work 2 dc in every stitch around.
-
Join: sl st to the 3rd chain. (Total: 40 dc).
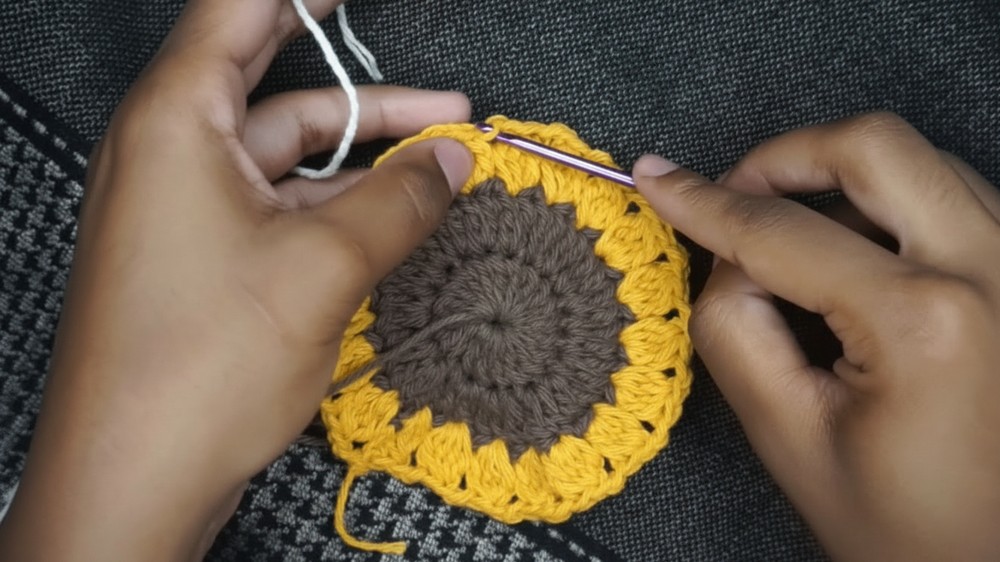
Round 3: The Gold Petals (Puff/Cluster Stitch)
-
Attach Gold: sl st the new color into any stitch.
-
Petal Logic: * Chain 3. Work 1 dc in the same stitch but leave the last loop on the hook. Repeat until you have 4 loops on your hook.
-
Yarn over and pull through all 4 loops.
-
Chain 2, skip 1 stitch.
-
-
Repeat: Repeat the petal cluster in every other stitch around. You should have 20 petals.
Phase 2: Squaring the Flower
Round 4: Creating Corners (Green)
-
Attach Green: Reattach yarn in any ch-2 space.
-
Side: Work 3 dc in each of the first two spaces.
-
Corner: In the next space, work (3 treble crochets (tr), ch 2, 3 tr).
-
Repeat: Work 3 dc in each of the next 4 spaces, then work a corner (3 tr, ch 2, 3 tr) in the 5th space. Repeat around to form a square. Join with sl st.
Round 5: Solid Foundation
-
Work a solid granny row: 3 dc in every space along the sides, and (3 dc, ch 2, 3 dc) in the corner spaces.
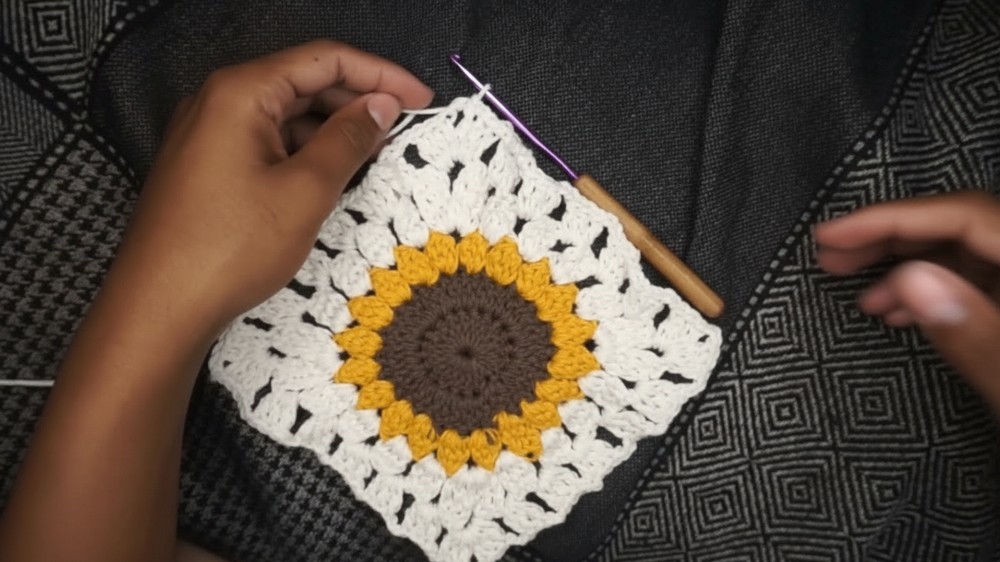
Phase 3: Garment Construction
1. The Neck Portion (Top)
-
Placement: sl st to the top edge of your square.
-
Mesh Growth: * Chain 5, turn. Work 3 dc in the next space.
-
Ch 2, 3 dc across the top side only.
-
Repeat for 2 rows to create the bib height.
-
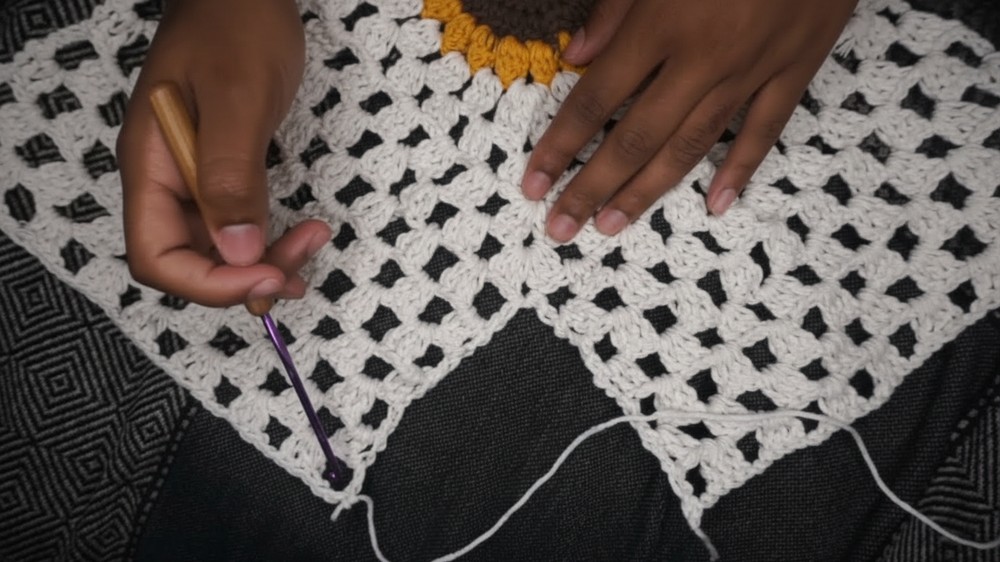
2. Side Panels (Body)
-
Attach Yarn: Reattach to the side edge of the square.
-
Decreasing Panels: * Work 3-dc clusters across the side.
-
Repeat for 7–10 rows (depending on your back width). To taper, end rows with a single dc instead of a cluster.
-
-
Symmetry: Repeat for the opposite side.
3. Straps and Edging
-
Border: Work 2 sc into every space/row-end around the entire garment to level the edges.
-
Halter Ties: At the top corners, chain 100. Work sc back down the chain to make a sturdy, thick strap.
-
Back Closure: Create a long chain (approx. 200+) and lace it through the side panels in a zig-zag pattern.
Conclusion
Finishing this sunflower top provides you with a custom, boutique-style piece that showcases your technical ability to transform a motif into a fitted garment. By choosing acrylic yarn and mastering the corner-squaring technique, you’ve created a piece that is as durable as it is striking. Once you lace up the back and secure your neck ties, your handmade sunflower top is ready for festival season.
Pro Tip: To prevent the halter straps from digging into your neck, ensure the sc stitches on the straps are worked with a slightly looser tension to maintain elasticity.