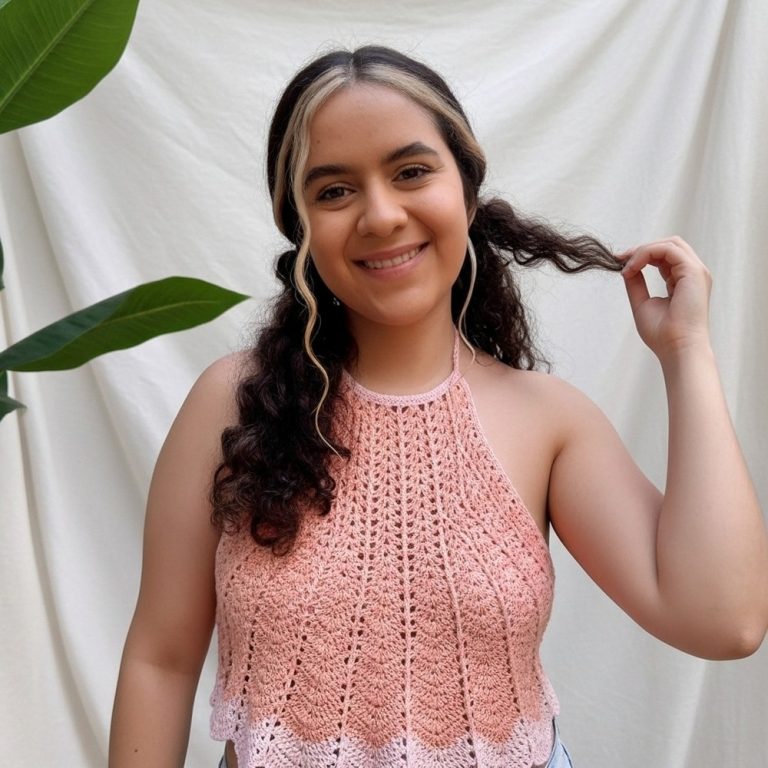
Free Granny Crochet Top Pattern with Step-by-Step Guide

Effortlessly achieve a chic new style with a free crochet top pattern offering modern flair soft comfort and a personal touch to any outfit.
A handmade top is a wonderful way to add a personal and stylish touch to your wardrobe. Using a free crochet top pattern, you can create a beautiful garment that feels unique and comfortable. This kind of project allows you to play with different yarns, textures, and colors to match your own style.
Minimalist Free Crochet Top Pattern with a Fresh Look
The charm of this crochet top comes from its delicate and often openwork design, which makes it perfect for warm weather. The light, airy texture gives it a breezy feel, while the shape usually flatters many body types with options for fitted or loose styles. Whether it has simple stitches or more intricate patterns, the overall look is casual yet elegant, making it suitable for both everyday wear and special occasions.

You can wear such a top at the beach, during spring and summer outings, or layered over other clothing for a stylish touch. Because it’s handmade, it can be customized to fit you perfectly, including choices of size and length. It’s also a great project for crocheters of various skill levels, beginners can start with simpler designs, while more experienced crafters can try patterns with lace details or unique shaping.
Making a crochet top is especially satisfying for those who enjoy creating wearable art. The yarn you pick can greatly affect the comfort and fall of the top; natural fibers like cotton work well to keep it cool and soft. This project also makes a thoughtful gift for friends who love unique fashion pieces. Overall, a free crochet top pattern offers a fun, creative way to craft something beautiful and practical that you can enjoy wearing all season long.

Free Crochet Top Pattern
Materials
- Yarn: Loops & Threads Classic Cotton (Weight 4/medium; or any preferred cotton yarn)
- Hook: 5.0 mm (H-8) crochet hook (or size recommended for your yarn)
- Darning (yarn) needle: For weaving in ends
- Scissors
Key Abbreviations (US Terms)
- ch: chain
- sc: single crochet
- dc: double crochet
- sl st: slip stitch
- st(s): stitch(es)
- rep: repeat
- magic ring: adjustable starting loop
Special Notes
- Suggested Yarn: Cotton is recommended for comfort and breathability.
- Sizing: Cup size is adjustable by the number of rounds made for each cup. Number of rows for the band and strap length can also be customized.
- Strap Lengths: Refer to the video for suggested chain numbers per size if not using Weight 4 yarn and 5mm hook.
- Straps are crossed and woven for a secure and adjustable fit.
Pattern Instructions
1. Granny Triangle Cup (Make 2)
Foundation:
- Create a magic ring.
- Ch 3 (counts as first dc), 2 dc into ring (first cluster of 3 dc).
- Ch 1.
- 3 dc into ring (second cluster), ch 1.
- 3 dc into ring (third cluster), ch 1.
- Pull on the bottom loop of the magic ring to start closing it, then pull the yarn tail tight to fully close the center.
- Join with sl st to the top of the initial ch 3.

Round 2:
- Ch 3 (counts as first dc), 2 dc in first ch-1 sp (to complete a cluster of 3).
- In each remaining ch-1 space, work (3 dc, ch 1, 3 dc) in corners (i.e., where each ch-1 is), and ch 1 between clusters along the side.
- At the end, join with sl st to top of starting ch 3.

Round 3 and Onward:
- Repeat:
- Ch 3 (counts as first dc), work 2 dc into first ch-1 space to form a cluster.
- (For corners): In each ch-1 space at corners, (3 dc, ch 1, 3 dc).
- (For sides): In each ch-1 space along sides, work 3 dc.
- End each round by joining with sl st to the top of starting ch 3, ch 1.
- Repeat until the cup reaches desired coverage (e.g., 5 rounds for size S, more for larger cup sizes).
- Fasten off and weave in end.
2. Second Cup
- Repeat Steps 1–2 to create the second cup identical to the first.
3. Join Cups & Begin Straps
Working up the first cup:
- With right side of first cup facing you, join yarn at top corner ch-1 space with a sc.
- Sc evenly along the side of the cup up to the topmost ch-1 space.
- In the top ch-1 space, sc, then ch desired length for strap (suggested: ch 180 for size S; see video or adjust as needed).
- Slip stitch (sl st) back down the chain (use back bars or back loops for neat appearance).
- At the base, continue sc down the other side of the cup to the bottom corner ch-1 space.
- Fasten off.
Join Cup 2:
- With right sides facing up, join yarn at outer top ch-1 space of second cup.
- Repeat as for first cup: sc up side, create strap by chaining and sl st down, sc down opposite edge to bottom.
- Do not fasten off.

4. Connecting Cups and Creating Underbust Band
- After finishing side of second cup, decide how far apart you want the cups (recommended: ch 8 for separation; adjust to preference/fit).
- Ch the separation number, then sc in corresponding bottom corner ch-1 space of first cup to join them.
- With the same working yarn, sc across the bottom of the first cup, then sc across the chain joining the cups, then sc across the second cup.
- Turn at the end of the row.
5. Crocheting the Underbust Band
- Work even in rows of sc:
- At each end: ch 1, turn, sc in each st across (do not sc into turning chain at row start).
- Continue in sc until the band reaches your desired width (sample: 12 rows).
- At end, fasten off, weave in all ends.
6. Finishing
- With the darning needle, carefully close any small gaps at the cup join or chain join with a few stitches, knotting and weaving in the ends securely.
- To wear: Cross the straps in the back, feed them down to the bottom edge at the opposite cup, and tie at the back for a secure fit.

Conclusion
You have completed a trendy, fully adjustable granny triangle crop top! This design is simple to customize for your fit and comfort, and allows you to feature bold colors, stripes, or alternate fibers as you wish.
Pattern Correction
- Corner Construction: Always (3dc, ch 1, 3dc) in corner ch-1 spaces for crisp triangle shape.
- Row/round transitions: Always sl st to top of starting ch, then ch 3 for a new round.
- Strap Sturdiness: Working slip stitches down the back bars of the chain greatly strengthens and neatens the straps.
Tips
- For best results, try on the cup before moving onto the band to ensure the coverage and separation fit your body.
- Count your chain stitches for straps and band carefully, especially if following suggested measurements for different sizes.
- If your yarn is especially stretchy (e.g., acrylic/cotton blends), consider working straps slightly shorter.
- Block finished top for best fit and appearance.