Free Corn Keychain Crochet Pattern for Amigurumi Lovers

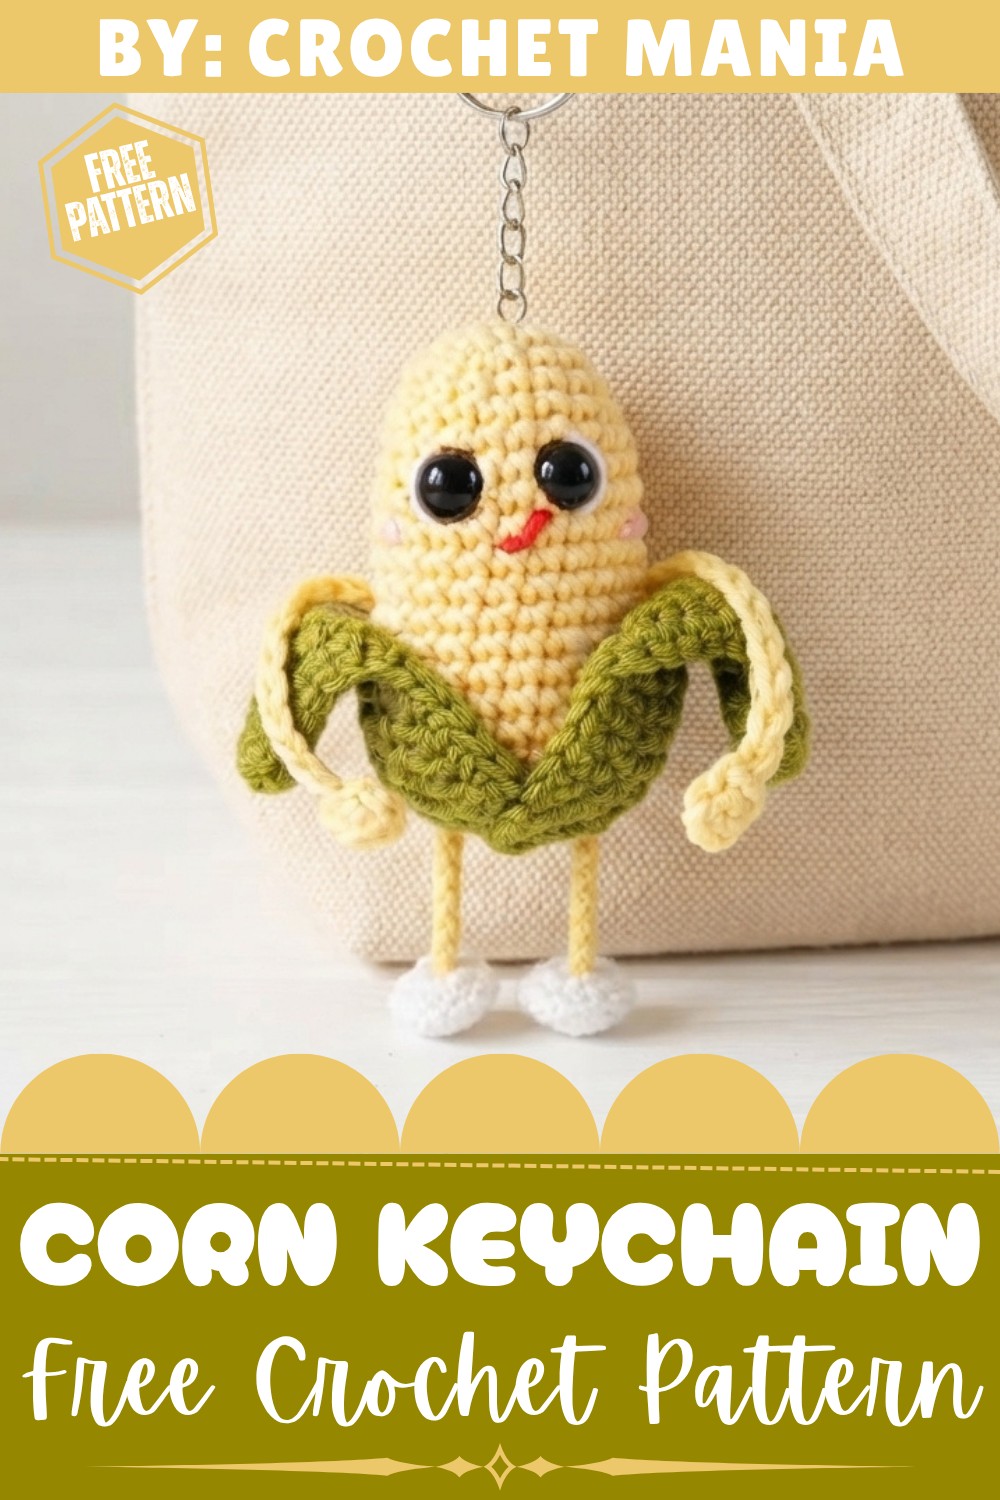
People will love having this corn keychain because it’s a cheerful accessory that makes finding your keys easier and more enjoyable. It’s not just practical — it’s also a great conversation starter and a perfect gift for friends or family who enjoy unique handmade items. Hang it on a backpack, purse, or even use it as a zipper pull to brighten up any everyday item.

If you want to add a special touch of personality to your belongings, trying the free crochet Corn Keychain Pattern is a wonderful choice. It’s quick to make, bright with color, and full of charm. Plus, it’s a joyful way to enjoy crocheting and show off your creativity in a small but impactful way!
Interactive Corn-Themed Keychain Crochet Pattern
This project teaches you how to create a whimsical and interactive Corn-Themed Keychain through crochet. Combining textured leaves, bright yellow appendages, and a cute embroidered face, this pattern employs amigurumi techniques for a compact and charming accessory. The final product is ideal as a gift or fun personal decoration.
Quick Overview Of Pattern
- Create yellow appendages that represent corn arms or legs.
- Crochet white caps that complete the body ends.
- Create detailed green leaves with mixed stitches and shaping.
- Work the main corn body with gradual increases and color details.
- Embroider a facial expression, attach safety eyes, and embroider mouth and cheeks.
- Assemble all components securely with sewing or textile silicone glue.
Notes
- Uses UK crochet terminology (single crochet is the same as US single crochet here).
- Worked mostly in continuous rounds; slip stitches applied as finishing.
- Invisible decreases used to shape smoothly.
- Fiberfill stuffing integral to amigurumi shape—firm stuffing needed but not overstuffed.
- Embroidery and assembly require patience for neat presentation.
- Attach limbs and leaves securely to maintain durability.
Skill Level
Intermediate: Pattern involves advanced shape transitions, combined stitches (half double crochet and single crochet), forming leaves, and embroidery.
Materials
- Worsted weight yarn or suitable cotton in:
- Yellow (for main body and appendages)
- White (for caps)
- Green (for leaves)
- Crochet hook 2.5–3.5 mm (depending on yarn chosen)
- Fiberfill stuffing
- Safety eyes (small size)
- Yarn needle and tapestry needle
- Stitch markers
- Textile silicone glue or hot glue (for attaching leaves)
- Embroidery thread (pink and black) for cheeks and mouth
- Scissors
Measurements / Sizing
- Finished keychain length approximately 10–12 cm (4–5 inches).
- Width around 4–5 cm with leaves attached.
- Proportions designed for typical keychain use, compact yet detailed.
Gauge and Stitch Pattern
- Gauge is approximate and flexible due to shaping needs:
About 18 single crochets (sc) and 20 rows = 10 cm (4 inches) square loosely suggested for consistency. - Basic stitches: single crochet (sc), half double crochet (hdc), increases (inc), and invisible decreases (inv dec).
- Stitches worked tightly to prevent stuffing visibility.
Stitch Abbreviations (UK Terms)
- ch = chain
- sc = single crochet
- hdc = half double crochet
- sl st = slip stitch
- inc = increase (2 sc in one stitch)
- inv dec = invisible decrease
- magic ring = adjustable loop used as the base for rounds
Special Stitches
Magic Ring
Technique to make the initial ring of stitches, adjustable to close the opening tightly.
Invisible Decrease
A decrease method worked by inserting the hook through the front loops of two stitches and crocheting them together to avoid gaps.
The Crochet Pattern
1. Arm (Make 2)
Round 1:
- Work a magic ring with 6 single crochets (sc).
- Slip stitch to close and prepare for chains.

Chain:
- Chain 30 to create the length of the arm or leg.
- Cut yarn leaving a tail for assembly.
2. White Pieces (Make 2)
Round 1:
- Begin with a magic ring, work 6 sc into the ring.
- Slip stitch to join.
Round 2:
- Chain 1.
- Work 6 increases (2 sc in every stitch) (12 sc total).
- Slip stitch to join.
Round 3:
- Chain 1.
- Work 12 sc evenly around.
- Slip stitch to join.
- Fasten off leaving a long tail for sewing to the appendages and body.
3. Green Leaves (Make 2)
Chain:
- Chain 12 to form the leaf base.
Round 1:
- Start in the 2nd chain from the hook.
- Work 10 sc along one side.
- At the last chain, work 3 sc (for round tip).
- Work 9 sc down the opposite side of the chain foundation.
- Work 1 increase in the last stitch to shape the base.
Round 2:
- Work 1 increase in a half double crochet (hdc).
- 6 hdc evenly.
- 4 sc next,
- In the center stitch, work 3 sc,
- Then 4 sc,
- 7 hdc,
- Finish with 1 increase in hdc.
Round 3:
- Make 2 increases in hdc.
- 5 hdc.
- 6 sc,
- 3 sc in the central peak,
- 6 sc,
- 6 hdc,
- End with 2 increases in hdc.
Round 4:
- Work 16 sc.
- In next stitch, crochet 1 sc, chain 2, 1 sc to form a decorative spike.
- Then 17 sc along the edge.
- Fasten off with a false stitch technique to avoid a visible knot.
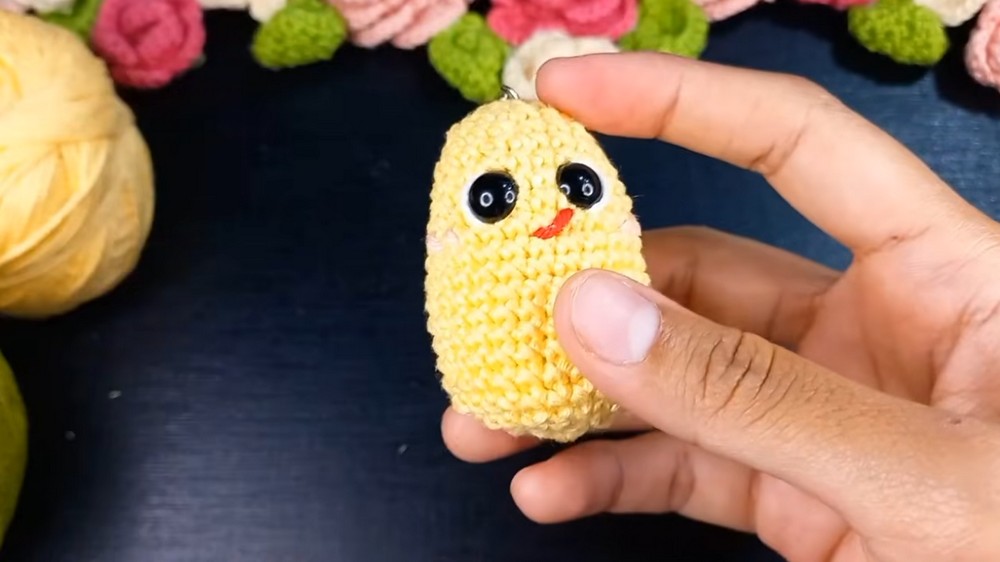
4. Main Corn Body (Yellow)
Round 1:
- Start with a magic ring and crochet 8 sc.
- Join with a slip stitch.
Round 2:
- Chain 1.
- Work 1 sc, 1 inc repeated 4 times (12 sc).
- Join.
Round 3:
- Chain 1.
- Work 2 sc, 1 inc repeated 4 times (16 sc).
- Join.
Round 4:
- Chain 1.
- Work 16 sc evenly.
- Join.
Round 5:
- Chain 1.
- Work 3 sc, 1 inc repeated 4 times (20 sc).
- Join.
Round 6:
- Chain 1.
- Work 20 sc evenly.
- Join.
Round 7:
- Chain 1.
- Work 2 sc, 1 inc, 2 sc repeated 4 times (24 sc).
- Join.

Round 8:
- Chain 1.
- Work 24 sc evenly per round.
- Join.
Round 9:
- Chain 1.
- Work 24 sc evenly per round.
- Join.
Round 10:
- Chain 1.
- Work 24 sc evenly per round.
- Join.
Round 11:
- Chain 1.
- Work 24 sc evenly per round.
- Join.
Round 12:
- Chain 1.
- Work 24 sc evenly per round.
- Join.
Round 13:
- Chain 1.
- Work 24 sc evenly per round.
- Join.
Round 14:
- Chain 1.
- Work 24 sc evenly per round.
- Join.
Round 15:
- Chain 1.
- Work 24 sc evenly per round.
- Join.
Round 16:
- Chain 1.
- Work 24 sc evenly per round.
- Join.
Round 17:
- Chain 1.
- Work 24 sc evenly per round.
- Join.
- Attach keychain ring securely after round 17 using a yarn tail for a loop or metal ring.
Embroider Face:
- Attach safety eyes between rounds 7 and 8, spaced about 3–4 stitches apart.
- Embroider a mouth and cheeks at round 9 with pink and black thread for charming expression.
Round 18:
- Chain 1.
- Work 2 sc, 1 invisible decrease repeated 6 times (18 sc).
- Join.
Round 19:
- Chain 1.
- Work 1 sc, 1 invisible decrease repeated 6 times (12 sc).
- Join.
Closing:
- Stuff the main body fully with fiberfill.
- Close the opening using an inverted magic ring stitch to ensure a tight finish.
Assembly
- Attach the two green leaves to the bottom of the corn body with textile silicone glue for clean positioning and durability.
- Sew or glue the yellow appendages (arms/legs) to the sides of the body using a long tapestry needle.
- Secure limbs internally by tying knots with leftover internal threads to prevent loosening.
- Attach the white caps to the bottoms of the appendages and close with an inverted magic ring for a neat finish.

Finished Size
- Approximate height: 10 to 12 cm (4 to 5 inches).
- Width including leaves: 4 to 5 cm.
- Small but sturdy, perfect as a keychain, bag charm, or small decorative object.

Conclusion
This interactive corn-themed keychain blends classic amigurumi skill with decorative crochet techniques for a vibrant, playful accessory. The combination of leaves, limbs, and a smiling embroidered face brings personality and charm to your crochet projects, perfect for gifting or personal use.