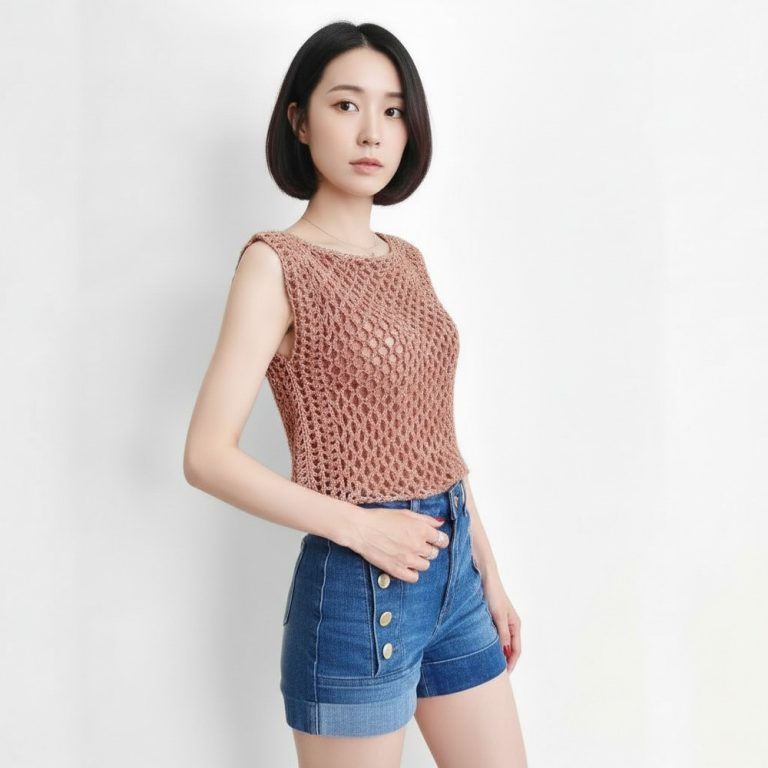
Pretty Crochet Flowery long sleeve Pattern for Calm Style
Layer floral elegance with this Crochet Flowery long sleeve Pattern for soft coverage relaxed fit and charming style suited to casual moments

Whimsical Crochet Flowery long sleeve Pattern That Feels Light
Exuding timeless elegance and creative flair, this design is a favorite among those who appreciate both artistry and versatility in their wardrobe. The Crochet Flowery long sleeve Pattern showcases beautiful floral motifs that dance across each sleeve, offering a unique blend of sophistication and whimsy. Its lightweight construction ensures comfort while the long sleeves provide just the right amount of coverage for breezy days or cool evenings.
This pattern adapts effortlessly to various styles—pair it with jeans for a casual outing or layer it over a dress for a more polished look. The intricate stitches not only add visual depth but also highlight the care and detail of handmade craftsmanship. Personalization through color choices allows for true self-expression, making every completed piece distinct. Offering both warmth and charm, this garment is perfect for those who desire a statement piece that transitions seamlessly through the seasons, elevating everyday ensembles with graceful botanical beauty.
Materials Needed
-
Yarn: Loops and Threads Cream Cotton (Medium Weight 4).
-
Hook: 5.0 mm crochet hook.
-
Tools: Scissors, tapestry needle, and measuring tape.
Stitch Key (US Terms)
-
sc: single crochet
-
tr: treble crochet (wrap yarn twice)
-
ch: chain
-
ch-sp: chain space
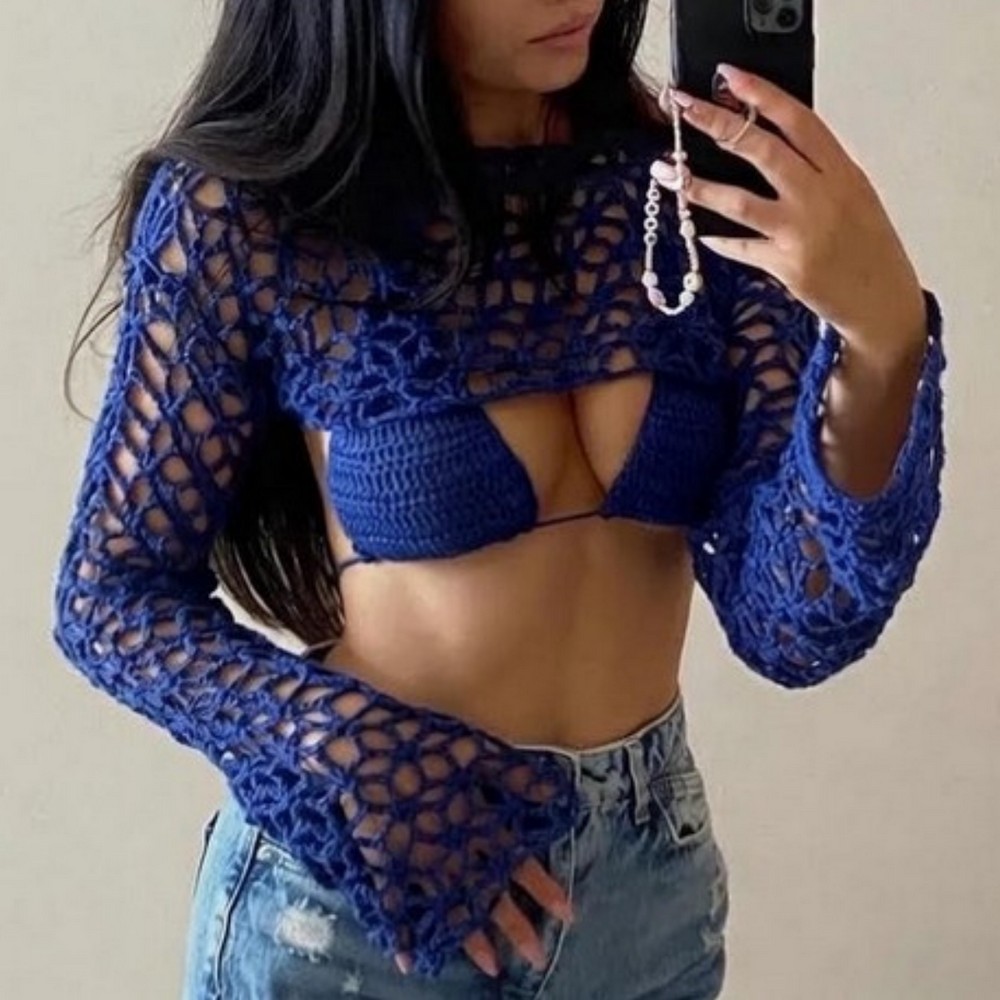
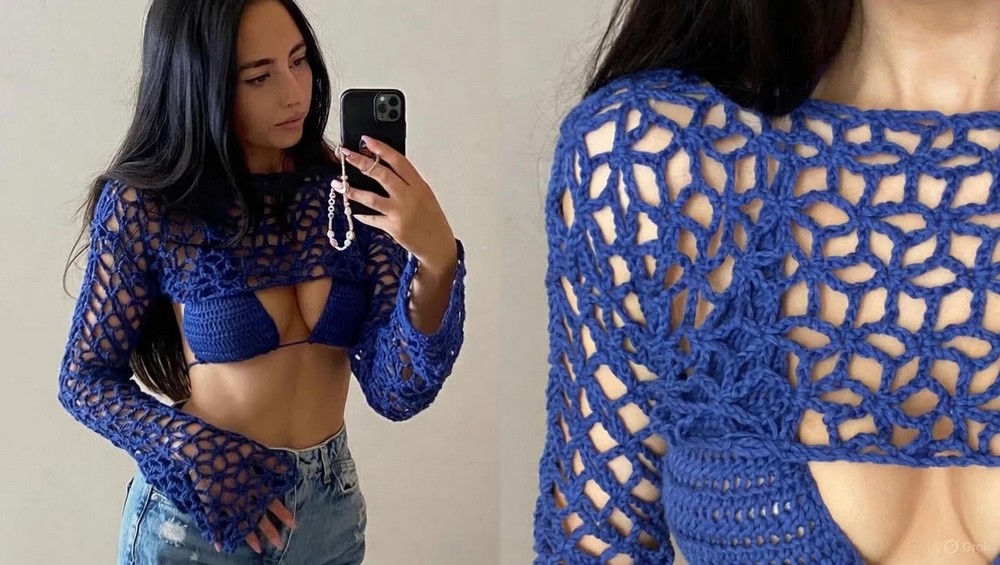
Part 1: The Sleeves (Make 2)
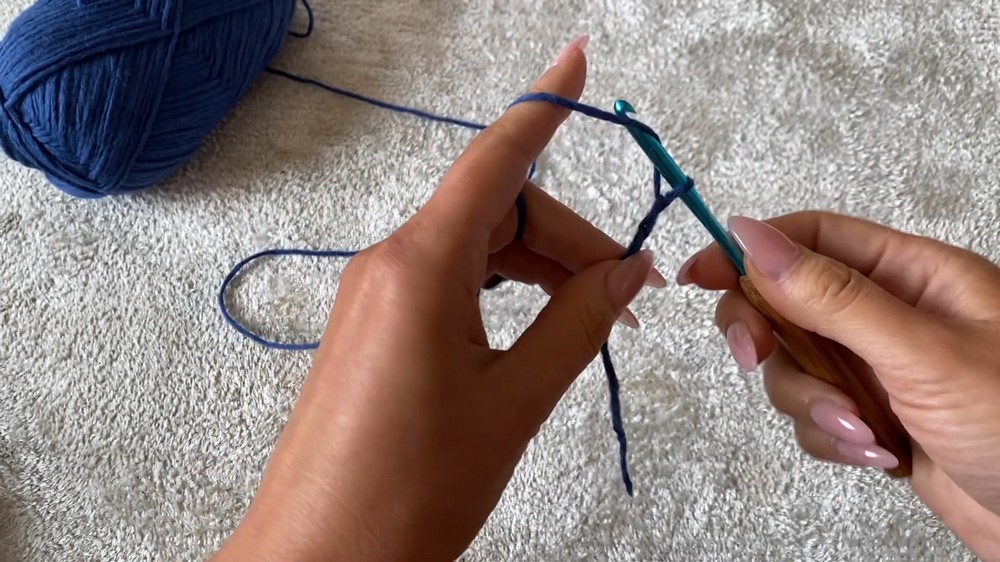
Row 1 (Foundation & Setup)
-
Foundation: Chain 41 (approx. wrist circumference for size Small).
-
Petal 1: Chain an additional 6 (counts as first tr + ch-2). Work 1 tr into the 41st chain.
-
Bridge: Ch 3, skip 4 chains, work 1 sc in the 5th chain.
-
Full Petal Cluster: Ch 3, skip 4 chains, work (1 tr, ch 5, 1 tr) into the 5th chain.
-
Repeat: Ch 3, skip 4 chains, 1 sc in 5th chain. Ch 3, skip 4, full petal cluster into the next 5th chain. 6. Row End: Repeat until the last chain. End with a Small Petal (1 tr, ch 2, 1 tr) in the very last chain.
Row 2 (Alternating Motifs)
-
Start: Ch 1, turn. Work 1 sc into the ch-2 space of the small petal below.
-
Bridge: Ch 3.
-
New Petal Cluster: Work (1 tr, ch 5, 1 tr) directly into the sc from the row below.
-
Repeat Bridge: Ch 3. Work 1 sc into the ch-5 space of the petal cluster below.
-
Row End: Continue alternating sc and petal clusters. End with 1 sc in the turning ch-sp.
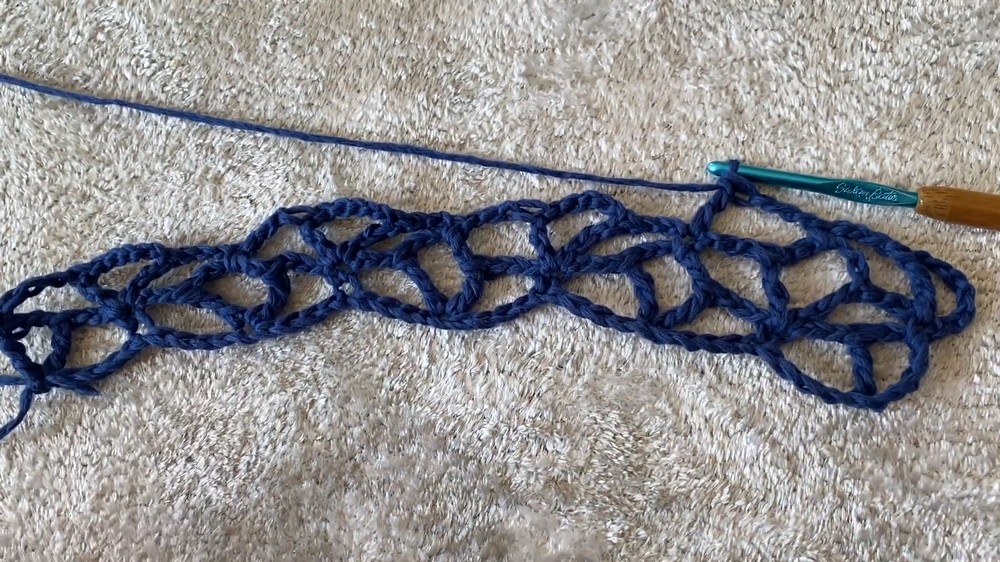
Row 3 (Edge Petal Setup)
-
Start: Ch 6 (counts as 1 tr + ch-2), turn. Work 1 tr in the same stitch.
-
Continue Pattern: Follow the alternating sc and petal cluster logic as established in Row 2.
Growth: Continue alternating Rows 2 and 3 for 30 rows (or until the panel reaches from your wrist to your shoulder).
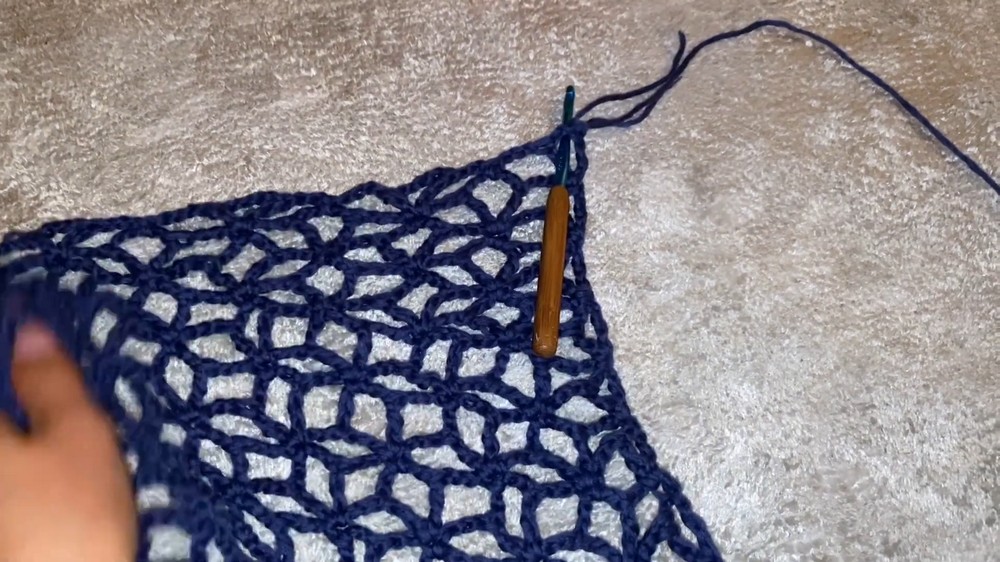
Part 2: Body Panels (Make 2)
Follow the exact pattern used for the sleeves, with the following adjustment:
-
Foundation: Chain 31 (this makes the panel narrower for a cropped look that sits across the chest).
-
Length: Work 24 rows (or as long as you want the shirt to be).
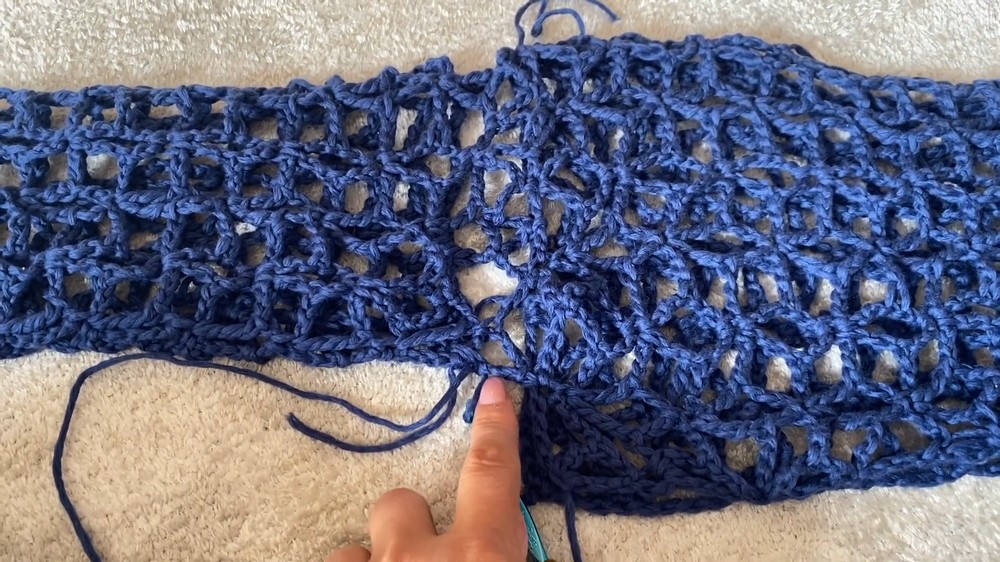
Part 3: Assembly
1. Sleeve Inseam
Fold a sleeve panel in half. To keep the seam “holy” and invisible:
-
Secure yarn at the wrist. Ch 3, then work a single crochet into one side of the panel, ch 3, then work a single crochet into the opposite side.
-
Zig-zag back and forth, attaching the ch-3 bridges to the flower intersection points.
2. Shoulder Seams
-
Lay the front and back body panels together.
-
Join the top corners (shoulders) using the same ch-3 zig-zag method.
-
Leave the center 5-6 inches open for the head/neck.
3. Attaching Sleeves to Body
-
Fold the finished sleeve in half to find the center top.
-
Align the sleeve center with the shoulder seam.
-
Work the ch-3 zig-zag join in a circle around the armhole, connecting the sleeve to the body panels.
4. Side Seams
-
Starting from the bottom of the body panels, zig-zag join the sides together until you reach the underarm.
Conclusion
Finishing this flower motif pullover provides you with a lightweight, high-interest garment that bridges the gap between a bikini cover-up and a boho-chic top. By using the zig-zag joining method, you’ve ensured the garment has a continuous, airy texture without bulky seam lines. Once you weave in your final threads, your unique handmade pullover is ready to style.
Pro Tip: To prevent the neck from stretching, work a single row of single crochet around the head opening after assembly. This acts as a “rib” to maintain the shape.