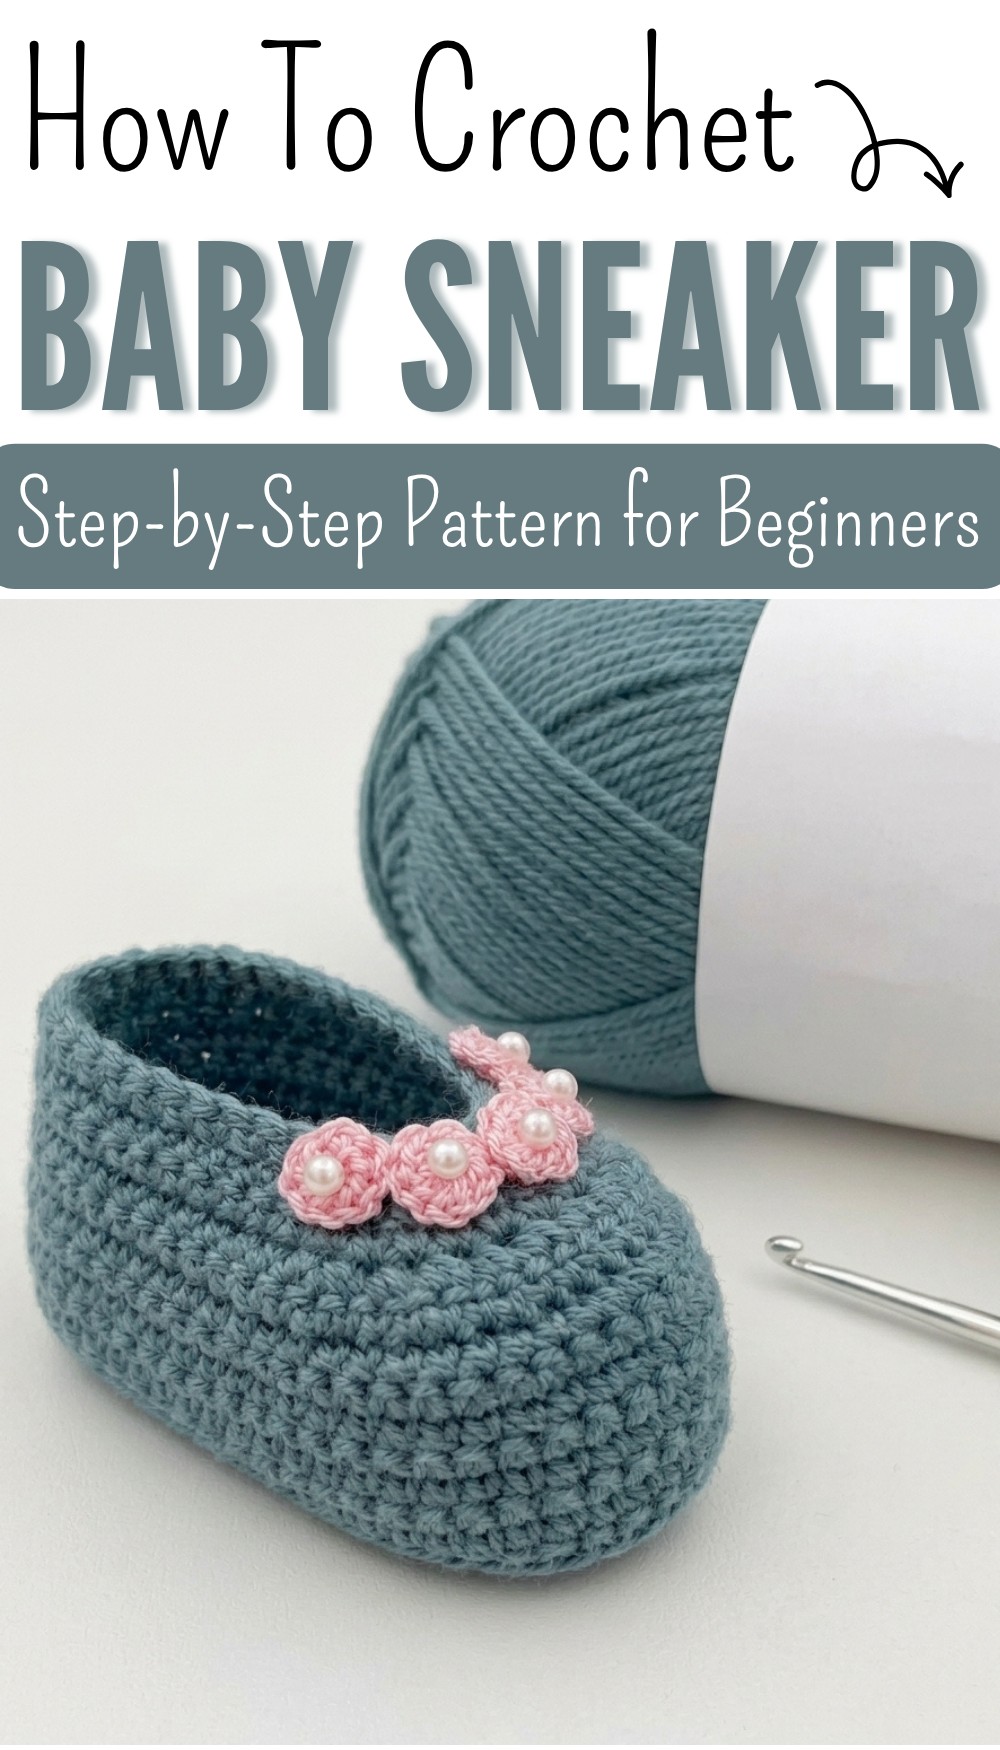
Baby Sneaker Pattern Free Crochet for Little Feet
Create adorable tiny footwear with Free Crochet BABY SNEAKER Pattern that adds charm, warmth, and handmade cuteness to every little step and gift.
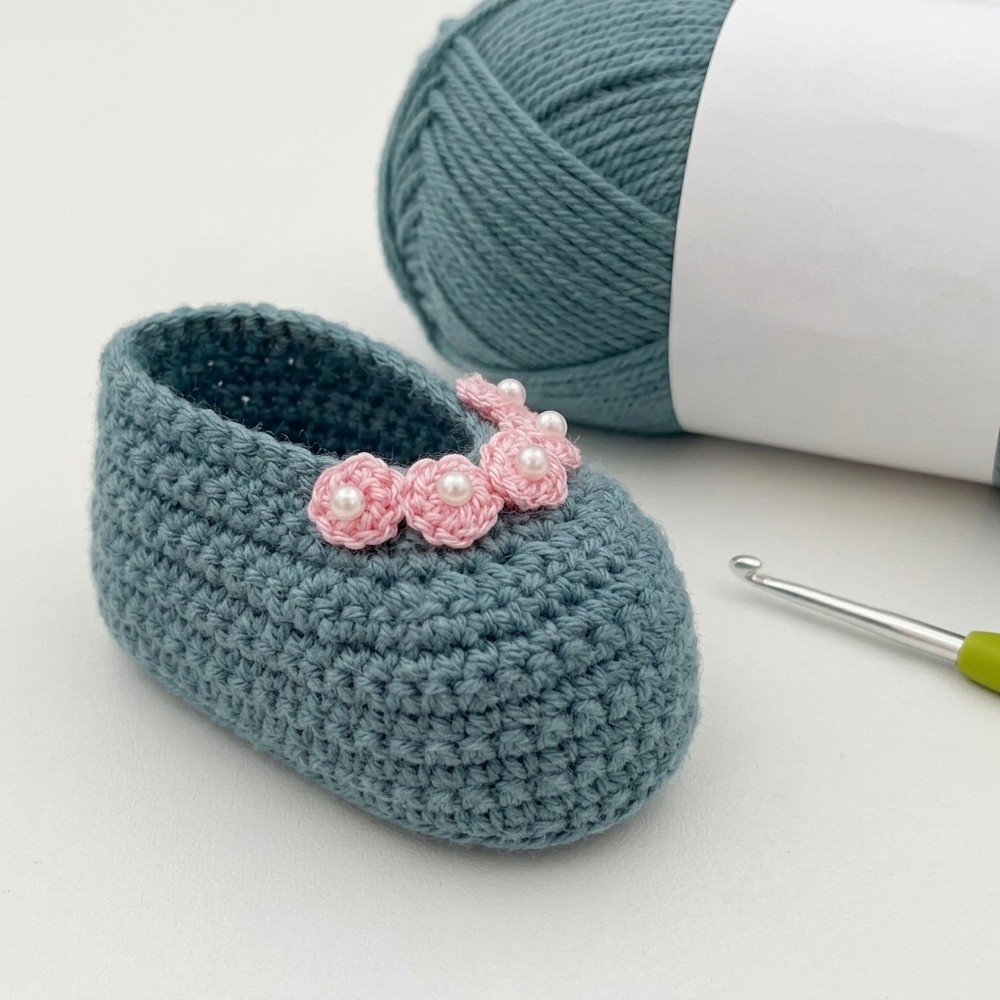
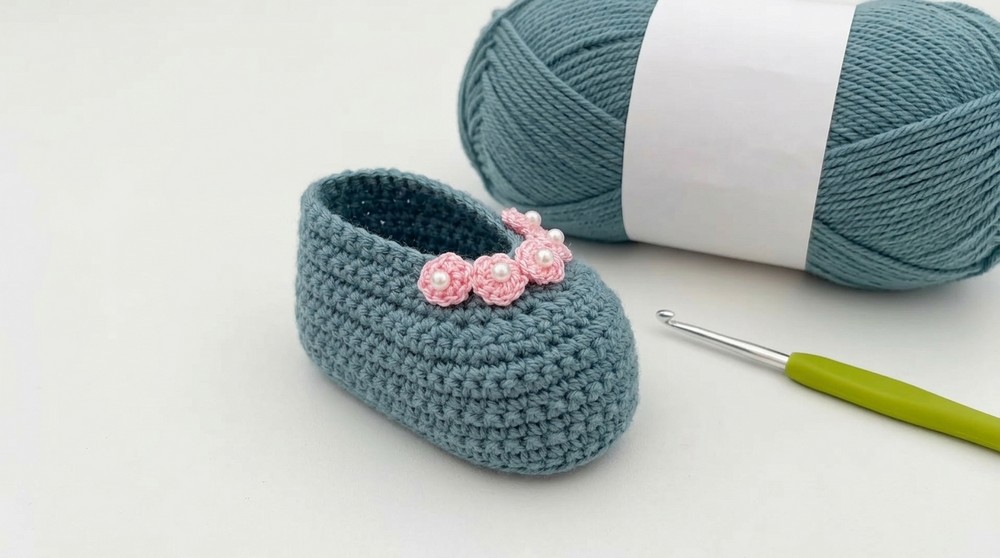
A tiny pair of shoes placed beside a newborn blanket often reflects warmth, care, and love in a very simple way. Soft yarn, gentle colors, and careful shaping come together to form a small item that is both useful and beautiful. The Free Crochet BABY SNEAKER pattern creates a miniature shoe that looks like a real sports sneaker, complete with a rounded base, lace-like detail, and a snug upper part that gently fits a baby’s foot. It is suitable even for beginners because the process follows easy steps and does not require complex techniques.
Free Crochet Baby Sneaker Pattern for Cute Gift for New Parents
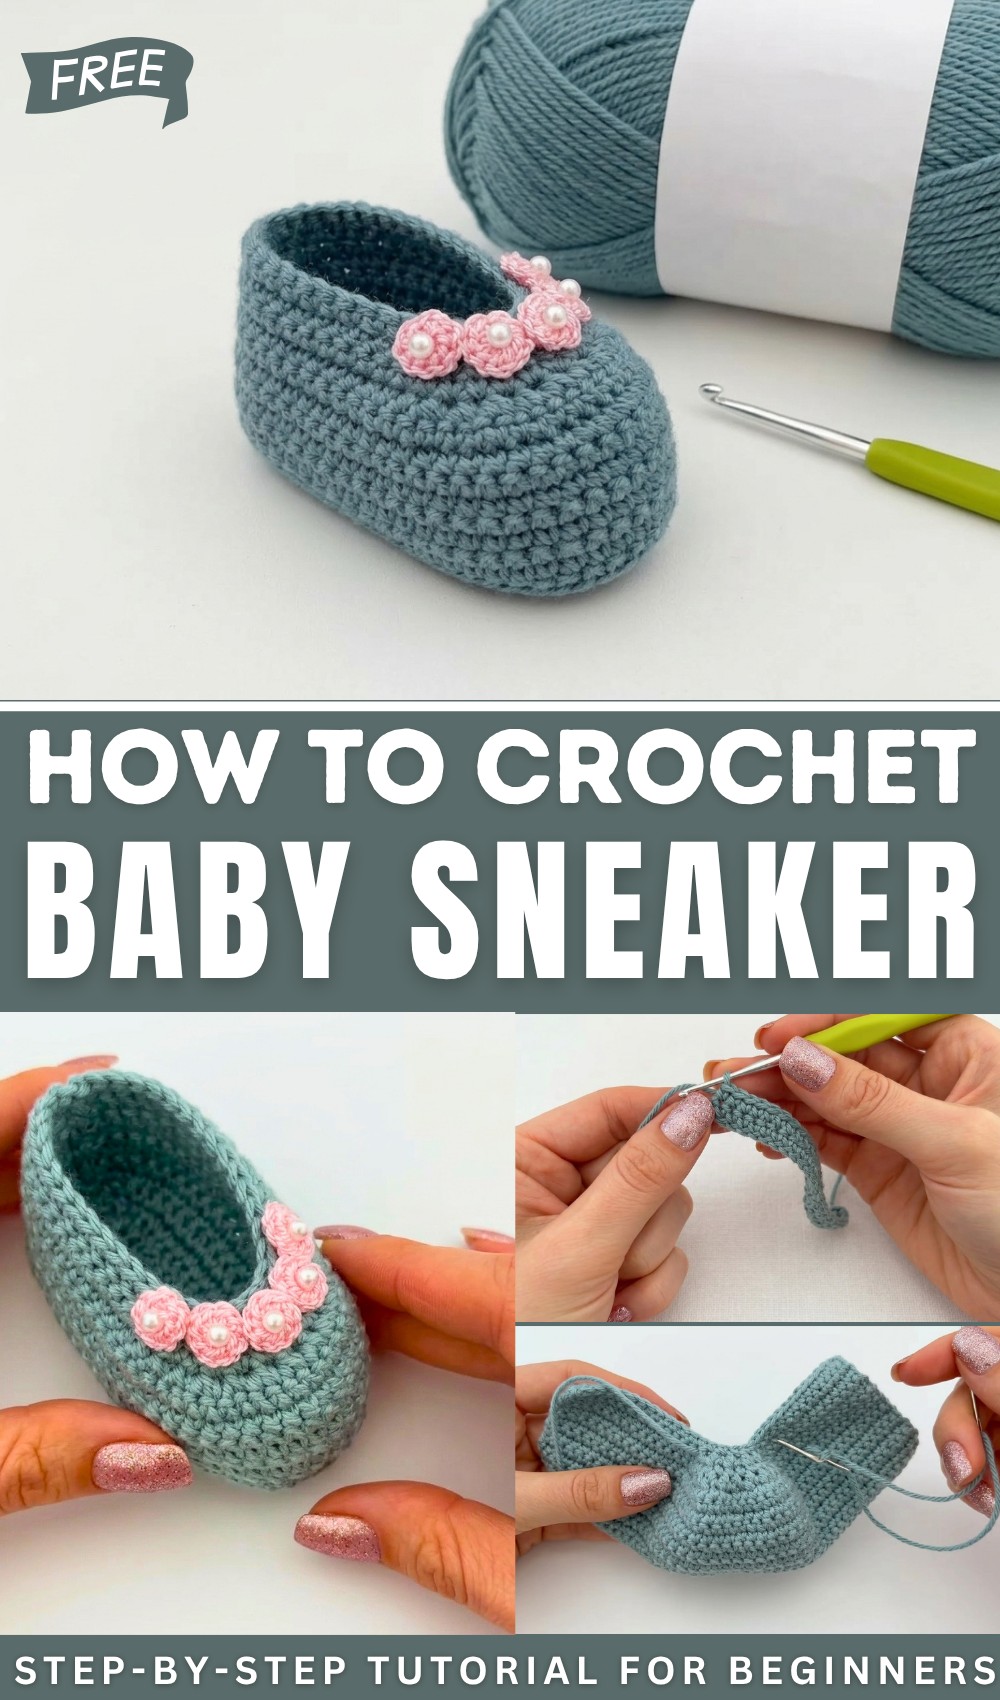
The finished baby sneaker has a neat handmade appearance with smooth curves and a balanced shape that makes it stand out among baby accessories. It is often used for newborn photos, baby showers, and as a heartfelt handmade gift for new parents. It also helps keep a baby’s feet warm, soft, and comfortable without feeling heavy or tight. The choice of soft yarn makes it gentle on delicate skin. Careful shaping of the sole and upper part gives it a clean sporty look, while small lace-like details and soft color combinations add extra charm, making it both practical and visually appealing for everyday use.

Easy Baby Crochet Shoes (0–3 Months) – Step-by-Step Pattern
Skill Level
Beginner
This project requires basic familiarity with foundation chains, single crochet, decreases, and simple seaming techniques.
Materials
- Yarn: Wool or yarn with Tex 214 or a similar weight. You may use your preferred yarn type.
- Hook Size: 2.0 mm crochet hook (or size appropriate for your chosen yarn).
- Notions:
- Tapestry or darning needle (for seaming and weaving in ends)
- Scissors
- Optional: Decorative items for embellishment (ribbons, buttons, or bows).
Special Notes
- Sizing:
The pattern is for 0–3 months, but you can easily size up or down by adjusting your starting chain length. Measure the baby’s foot, multiply the foot’s length by 2, and chain that many centimeters. - Odd Number of Chains:
Always start with odd numbers of chains to ensure the pattern aligns properly. - Symmetry:
Begin and end rows with consistency to maintain straight, clean edges. - Construction:
The shoe is worked flat, folded, sewn, and shaped to complete.
Finished Size
For this pattern, following a foundation chain of 53 chains, the shoe will measure approximately 8 inches (20 cm) laid flat, making it suitable for babies between 0–3 months.
Key Stitches and Techniques (US Terminology)
- ch: Chain
- sc: Single Crochet
- dec: Decrease (single crochet two stitches together)
- st(s): Stitch(es)
- sl st: Slip Stitch
Single Crochet Decrease (sc2tog):
- Insert hook into the next stitch and pull up a loop (2 loops on hook).
- Insert hook into the following stitch and pull up another loop (3 loops on hook).
- Yarn over and pull through all 3 loops on the hook.
Step-by-Step Instructions
Part 1: Crochet the Base
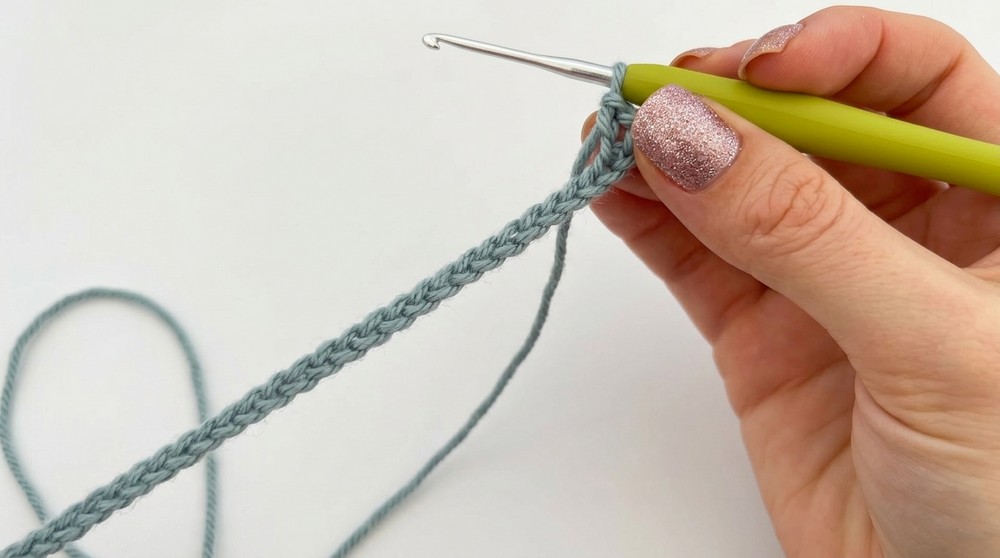
- Foundation Chain:
- Chain 53 (or adjust to the required length, ensuring the chain is an odd number of stitches).
- Your chain should measure twice the length of the baby’s foot.
- Row 1:
- Starting in the 3rd chain from the hook, work 1 sc in each chain across.
- Tip: The first 2 chains skipped count as the first sc.
- Total: 52 sc.
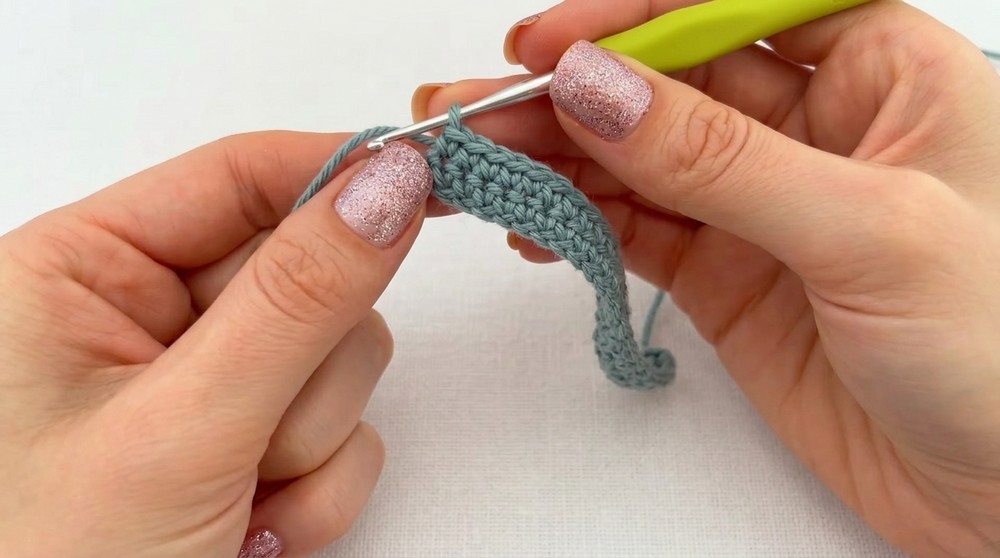
- Row 2 (and Subsequent Rows for Base):
- Ch 1, turn. Work 1 sc in each stitch across.
- Ensure the last sc is worked into the top of the turning chain from the previous row.
- Repeat Row 2 until the base measures approximately 5 cm (2 inches) in height.
- For Tex 214 yarn and a 2.0 mm hook, this example creates 12 rows.
Ensure edges are straight on both sides by always starting and ending in the correct stitches.
Part 2: Start Shaping the Front
- Set up row with decreases – Row 13:
- Ch 1, turn. Work 1 sc in each of the first 16 stitches.
- Now work 10 decreases (sc2tog) across the next 20 stitches.
- Finish the row by working 1 sc in each of the last 16 stitches.
- Row 14 (No decreases):
- Ch 1, turn. Work 1 sc in each stitch across (52 stitches from prior row).
Part 3: Continue Shaping
- Row with additional decreases – Row 15:
- Ch 1, turn. Work 1 sc in each of the first 13 stitches.
- Now work 8 decreases (sc2tog) across the next 16 stitches.
- Finish the row by working 1 sc in each of the last 13 stitches.
- Row 16 (No more decreases):
- Ch 1, turn. Work 1 sc in each stitch across.
Part 4: Seam and Shape the Shoe
- Cut Yarn for Sewing:
- After completing your rows, cut a long enough tail for sewing (approx. 20 inches or 50 cm).
- Thread your yarn tail onto the tapestry needle.
- Sew the Shoe:
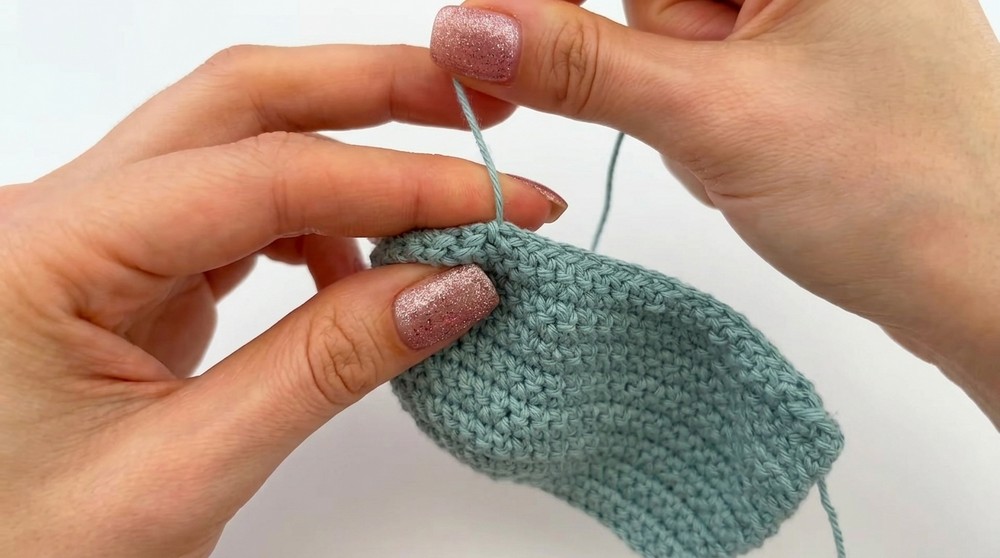
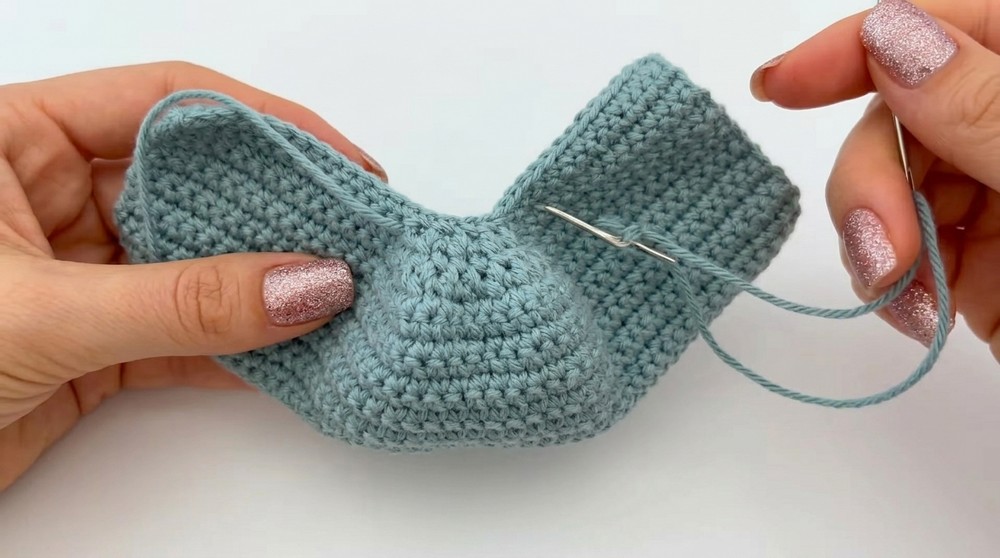
- Step 1: Fold your work in half, choosing one side as the wrong side for sewing.
- Step 2: Insert the needle through 1 stitch from each side. Use precise stitches to ensure the seam lies flat.
- Leave openings for shaping: Seam the back of the shoe up to 1 inch (2.5 cm) from the heel and the front of the shoe, leaving the top-center open for the foot.
- Shape the Toe:
- Work a zigzag seam: Pass the needle alternately between opposite edges to gather the fabric.
- Pull the yarn to round the top section of the shoe and fully shape the toe.
- Secure and Hide Ends:
- Once shaping is complete, tie a knot to secure the thread.
- Weave in hidden ends between the stitches for a neat finish.
- Turn Right Side Out:
- After stitching, turn the shoe inside out to reveal the right side.
Part 5: Repeat for the Second Shoe
- Follow steps 1–4 to create the second shoe.
Optional Embellishments
- Add ribbon, buttons, or small bows to the front of the shoe for extra charm.
- Crochet a tiny flower or applique to attach to the shoe.
- Use contrasting yarn for the edge of the sole or add a ruffled trim.
Finishing Steps
- Final Touch: Steam block the shoes lightly to shape them. Avoid excessive heat, especially for synthetic yarns.
- Check Fit: Make sure the shoe snugly fits the baby’s foot.
Tips for Customization
- Adjust Sizing:
- For larger sizes, increase the foundation chain and stitch count proportionally. Adjust the number of rows to maintain balance.
- For smaller sizes, reduce the foundation chain and width.
- Alternate Materials:
- Use cotton yarn for summer shoes or plush wool for cozy winter footwear.
Conclusion
You’ve now created a beautiful pair of baby shoes, ideal for gifting or your little one’s wardrobe collection. This versatile, simple pattern is easy to customize for different sizes and designs. Don’t hesitate to experiment with other colors, textures, or decorative elements to make your project unique.
Final Words
Thank you for your interest in this baby shoe crochet pattern! These delicate little shoes are a thoughtful, heartfelt project you can whip up quickly. If you enjoyed this guide, be sure to try similar simple accessories. Remember to practice consistency, especially at edges, for clean and professional-looking results.