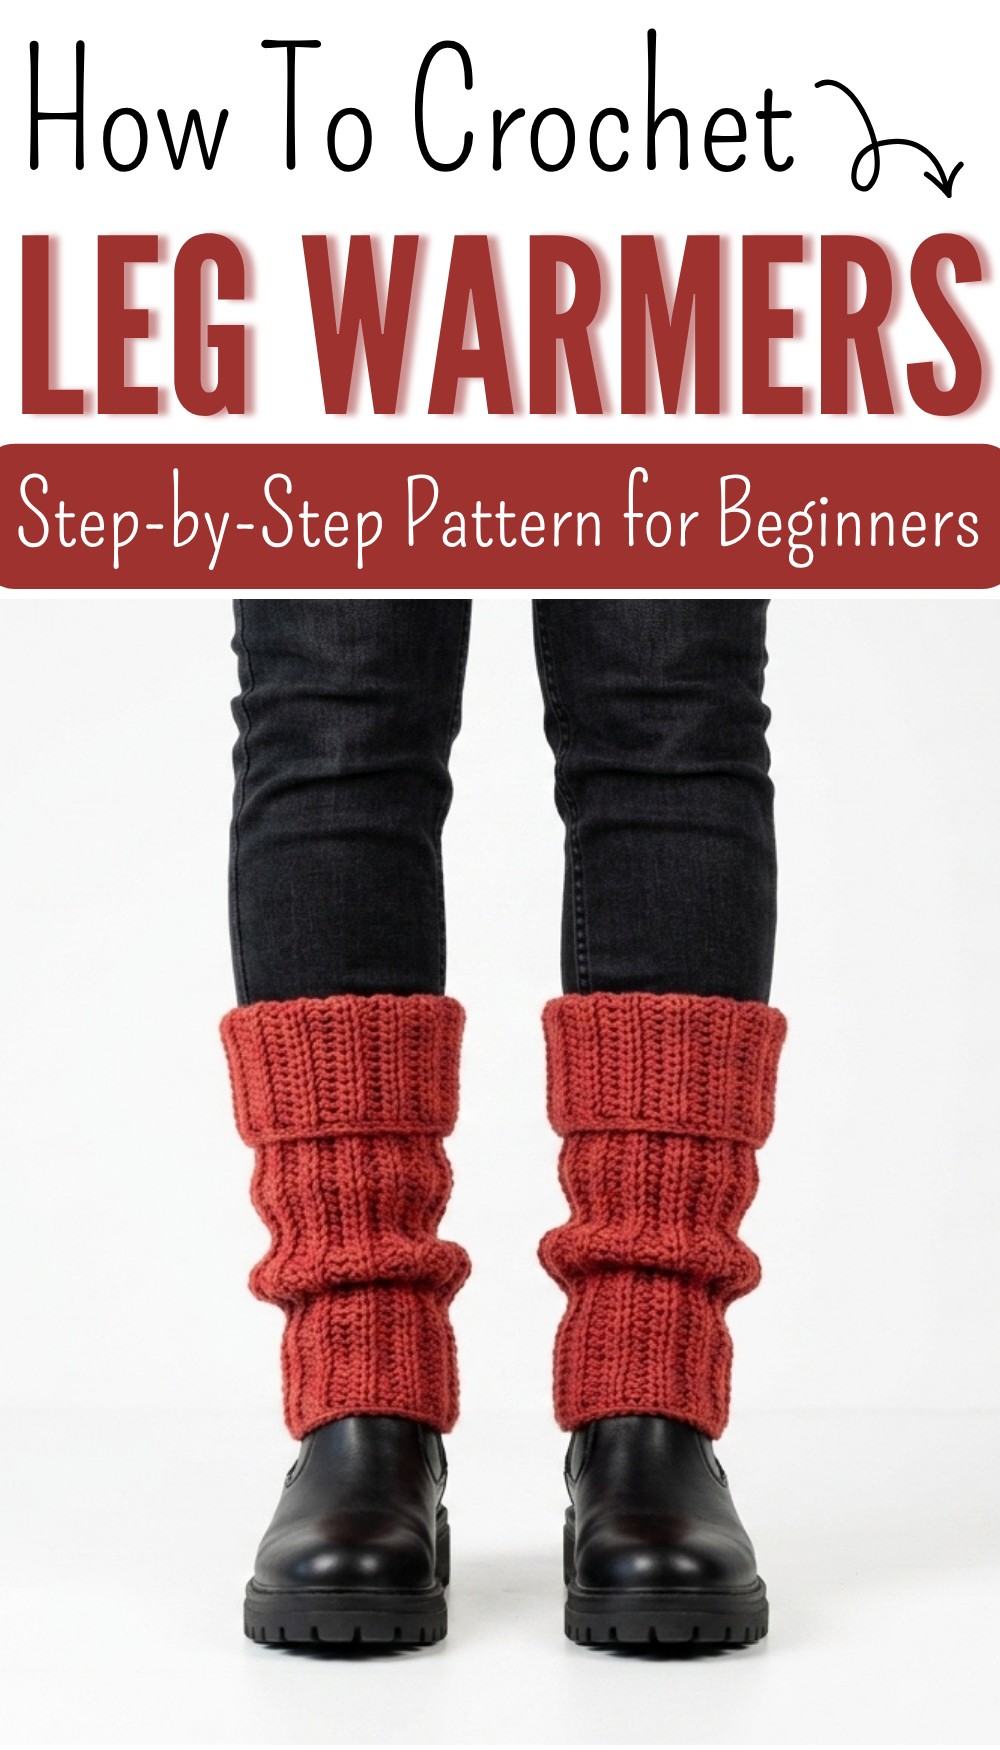
Free Crochet Leg Warmer Pattern for Cozy Winter Days
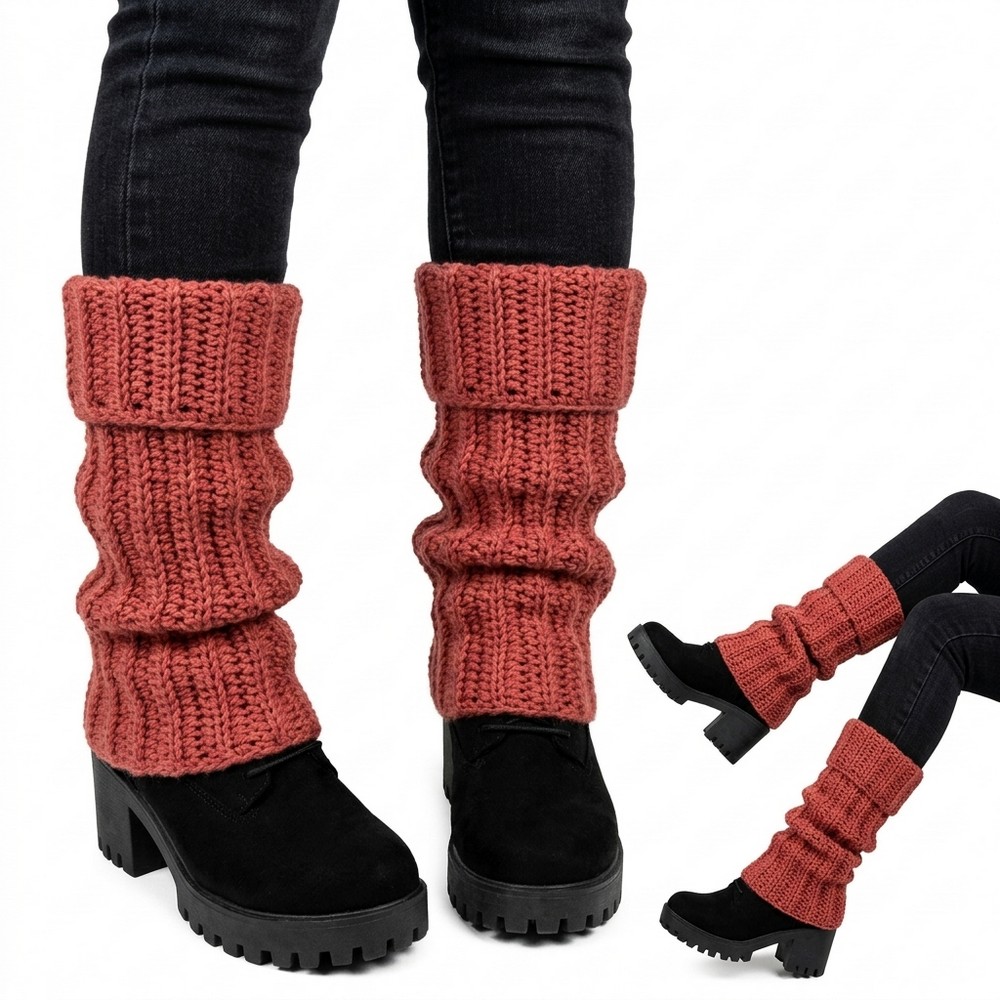
Create cute, cozy leg warmer with a simple crochet pattern that’ll keep you warm, stylish, and ready to dance through chilly days in your favorite outfits.
Imagine having something cozy and stylish to keep your legs warm in chilly weather. A leg warmer is soft, cute, and easy to wear, making it great for adding extra comfort to your outfits. It comes with a simple and beautiful design, making it not just practical but also a fun accessory to match with different looks. Whether you wear it over leggings, with boots, or around the house, it can make you feel warm and look fashionable at the same time.
Free Crochet Leg Warmer Pattern for Beginners to Enjoy
The unique pattern lets you enjoy a handmade touch in your wardrobe while staying comfortable during colder seasons. A leg warmer is lightweight yet snug enough to protect your legs from the cold. It’s also great for customizing with your favorite colors to suit your personal style. Perfect for both beginners and experts, the easy-to-follow pattern lets anyone create something useful and stylish with very little effort.

Crochet Leg Warmers – Detailed Pattern
Finished Size
- Length: Approximately 47 cm (from above the knee to the bone of the foot)
- Circumference: About 28–30 cm (fits snugly around the calf due to the elastic stitch)
- Note: These sizes can be adjusted for a custom fit. Refer to the Customization Ideas section for more details.
Necessary Materials
- Yarn: A medium-weight yarn (such as worsted weight, #4) in your chosen color. Approximately 150–200g depending on the size.
- Crochet Hook: Size 5.0 mm
- Tapestry Needle: For weaving in ends and seaming.
- Stitch Markers: Optional, to secure edges while seaming.
- Scissors
- Measuring Tape: For customizing length and width.
Gauge
- 10 cm (4 inches): Approximately 14 half double crochets (hdc) x 10 rows in elastic (back loop) stitch.
- Adjust your hook size if your gauge differs significantly.
Pattern Instructions
Step 1: Take Measurements
- Length: Measure from just above your knee to the bone of your foot. Standard length = 47 cm.
- Width: Measure the circumference of your calf. Standard circumference = 34 cm. Due to the elastic nature of the stitch, create the piece slightly smaller (approx. 28–30 cm) for a snug fit.
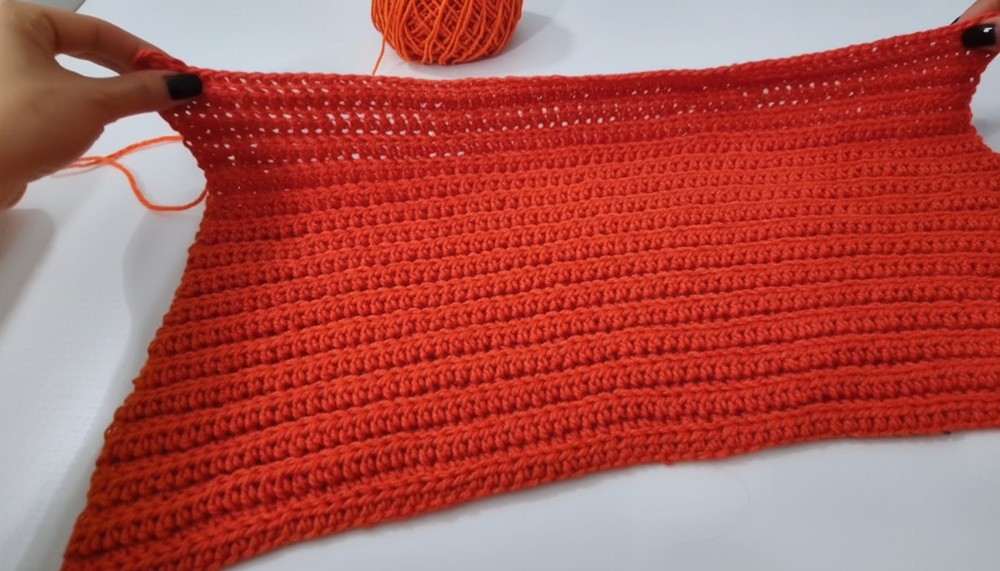
Step 2: Begin the Foundation Chain
- Create a Slip Knot: Use the 5 mm crochet hook.
- Chain 80: This creates the foundation row for your leg warmer. (Adjust the chain count in multiples of 2 if customizing width.)
- Foundation length = Desired circumference of the leg warmer (approx. 28–30 cm).
Step 3: Stitch Pattern (Elastic Ribbing Technique)
Repeat the following steps to form the ribbed texture:
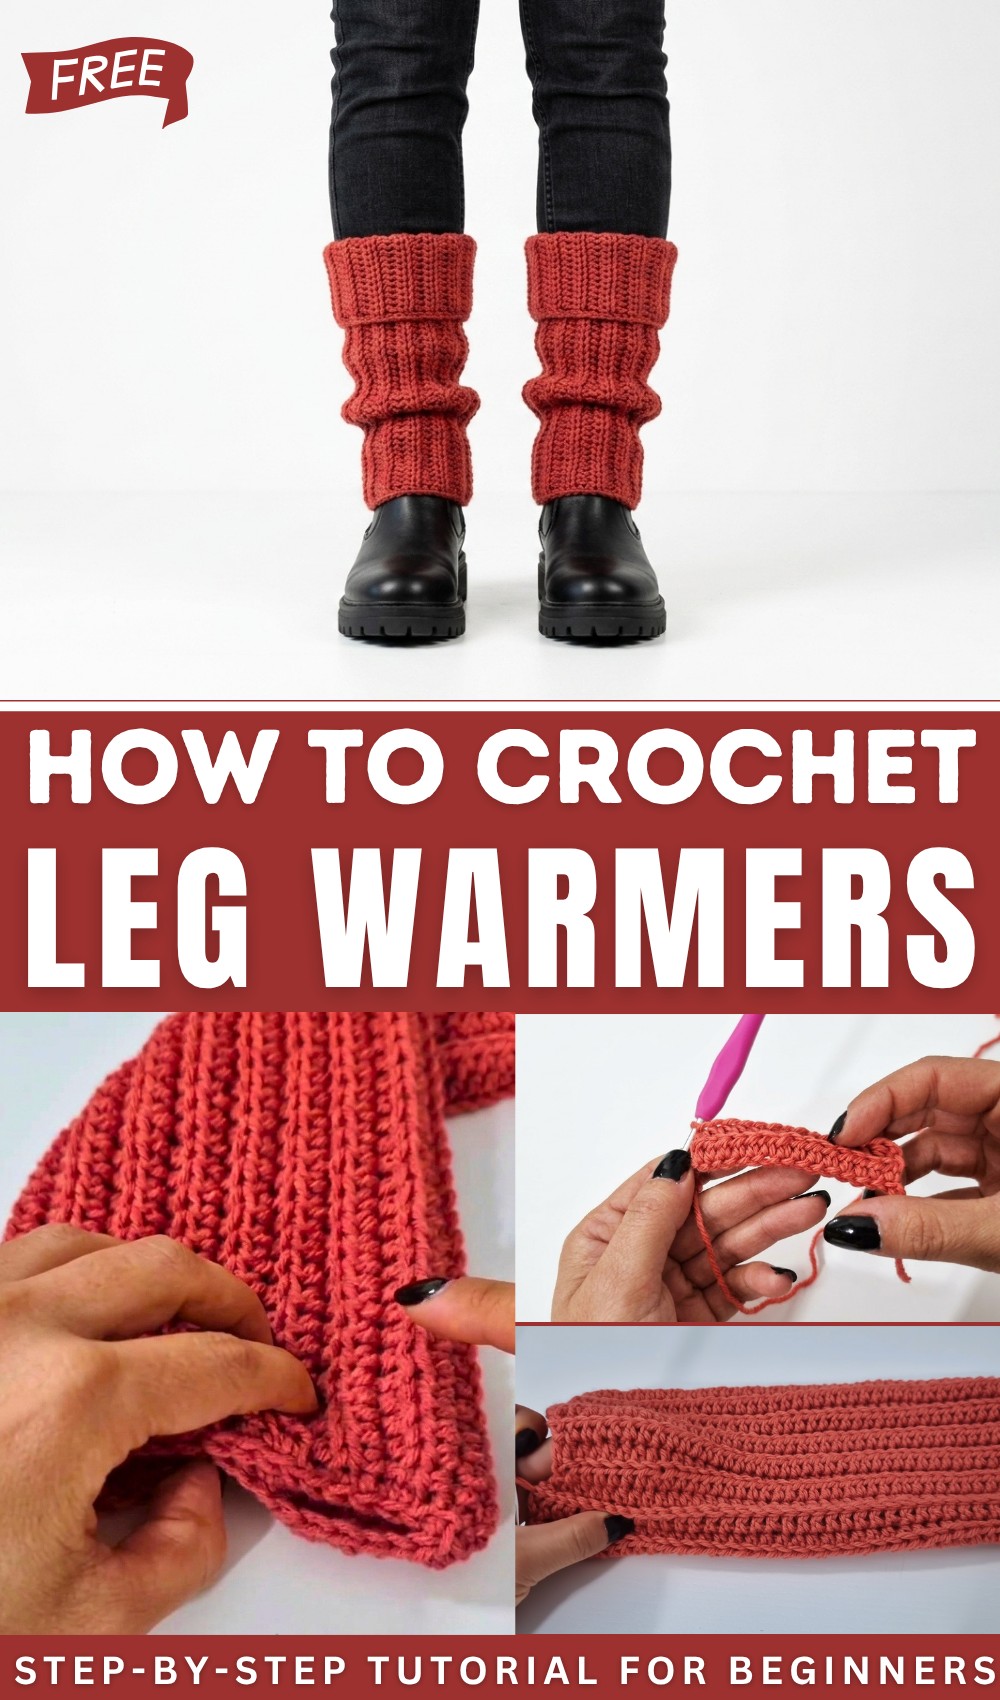
Row 1: Half Double Crochet (hdc)
- Yarn over (yo): Insert the hook into the 3rd chain from the hook.
- Pull up a loop: Yo and pull through all three loops on the hook. This completes one half double crochet.
- Continue working 1 hdc into each chain along the row.
- You should now have 79 hdc at the end of Row 1 (since the first 2 chains count as a turning chain).
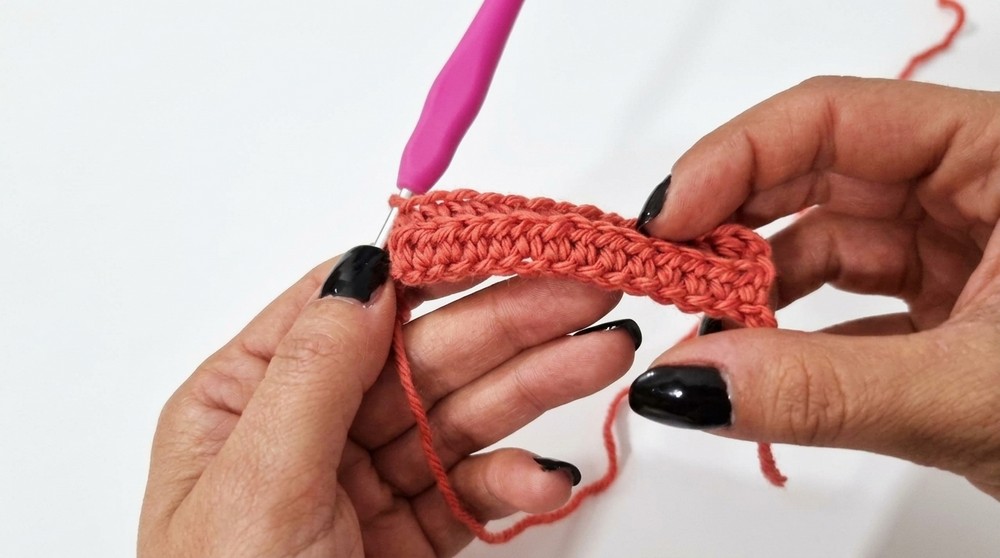
Row 2: Back Loop Only (Elastic Ribbing)
- Chain 2 (ch 2): This serves as your turning chain.
- Turn your work.
- Hdc in the back loop only: Insert the hook into the back loop of the next hdc from the previous row (instead of under both loops). Yo and complete the hdc.
- Continue working hdc in the back loop only across the row.
- At the end of the row, you’ll have 79 back-loop hdc.
Row 3 Onwards:
- Repeat the instructions for Row 2 (hdc in the back loop only).
- Continue for a total of 32 rows (or until you reach your desired height of 47 cm).
Tip: The ribbed texture will begin to form as you alternate rows in back loops.
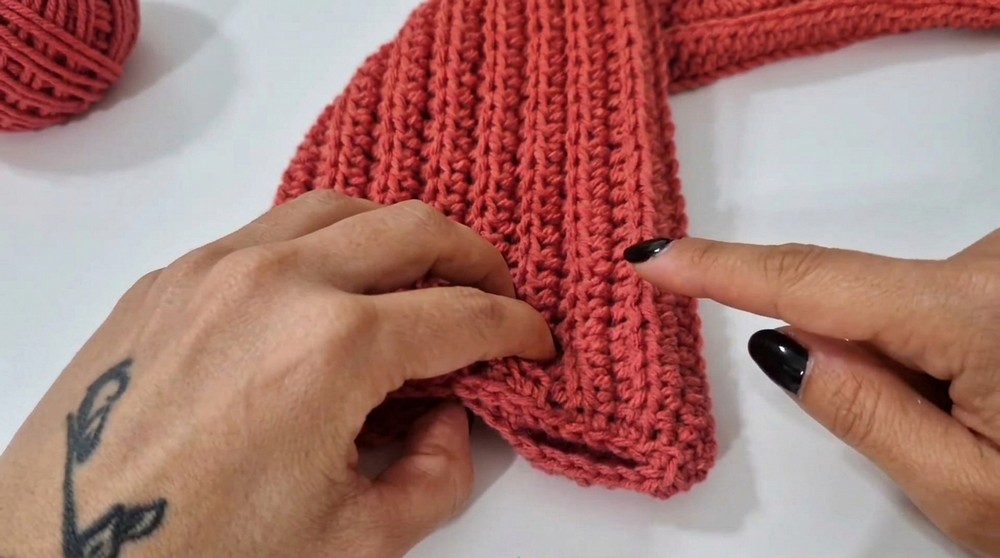
Step 4: Seaming the Leg Warmer
Once your rectangular panel is complete:
- Fold in Half: Bring the long sides of the rectangle together with the wrong side facing out.
- Secure with Stitch Markers (Optional): Pinch the edges together and secure with stitch markers if needed.
- Seam Using Slip Stitch:
- Insert your hook into the outer loop of one side and the inner loop of the opposite side (this creates an invisible seam).
- Pull up a loop and complete a slip stitch.
- Continue slip-stitching along the seam until the entire length is closed.
- Finish Off: Once seamed, fasten off and weave in the ends with a tapestry needle.
Your first leg warmer is complete! Repeat Steps 1–4 to create the second leg warmer.
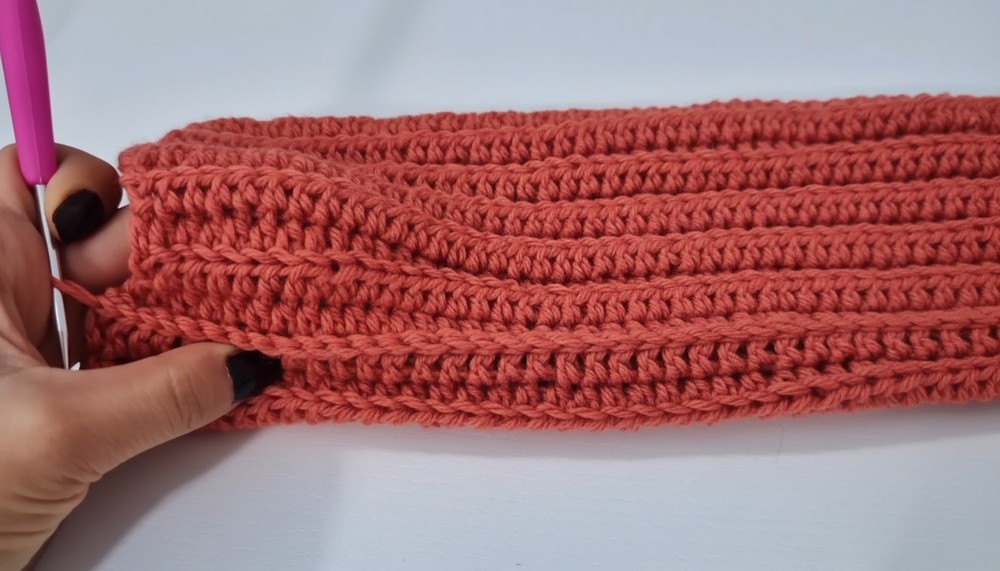
Step 5: Adding a Border
- Top Border:
- Attach the yarn to the first stitch at the top of the leg warmer.
- Work 1 single crochet (sc) into each stitch around the opening.
- Join the round with a slip stitch into the first sc. Fasten off and weave in the ends.
- Bottom Border:
- Repeat the same process along the bottom edge of the leg warmer as done for the top border.
Optional: You can add multiple rows of single crochets to make the borders thicker and more decorative.
Special Techniques
- Elastic Ribbing (Back Loop Only): Working in the back loop creates a stretchy and textured ribbing. Ensure you consistently grab the correct loop.
- Invisible Seaming: Matching the outer and inner loops of the edges ensures the seam blends seamlessly with the ribbing.
Customization Ideas
- Adjust the Length or Width:
- Add or reduce the number of foundation chains to change the circumference.
- Increase or decrease the number of rows for a longer or shorter piece.
- Experiment with Colors:
- Use gradient or self-striping yarns for a colorful touch.
- Create stripes by swapping yarn colors every few rows.
- Add Decorative Borders:
- Incorporate picots, scallops, or puff stitches on the edges for a unique detail.
Tips for Success
- Test your gauge prior to starting to ensure a good fit.
- Use stitch markers when seaming to prevent uneven edges.
- If working with wool or an elastic fiber, block the finished piece to relax the stitches.
Conclusion
Your crochet leg warmer is now ready to wear! This leg warmer is perfect for keeping cozy during chilly walks or outings. It also offer a versatile accessory to pair with different outfits, such as heels or skirts. Whether crocheted in bold colors like orange or subtle hues, they are both practical and stylish.