Free Crochet Mesh Cardigan Pattern for Effortless Style

Wear a light and stylish layer every day with Free Crochet Mesh Cardigan Pattern that’s simple to follow & perfect for any season or outfit.
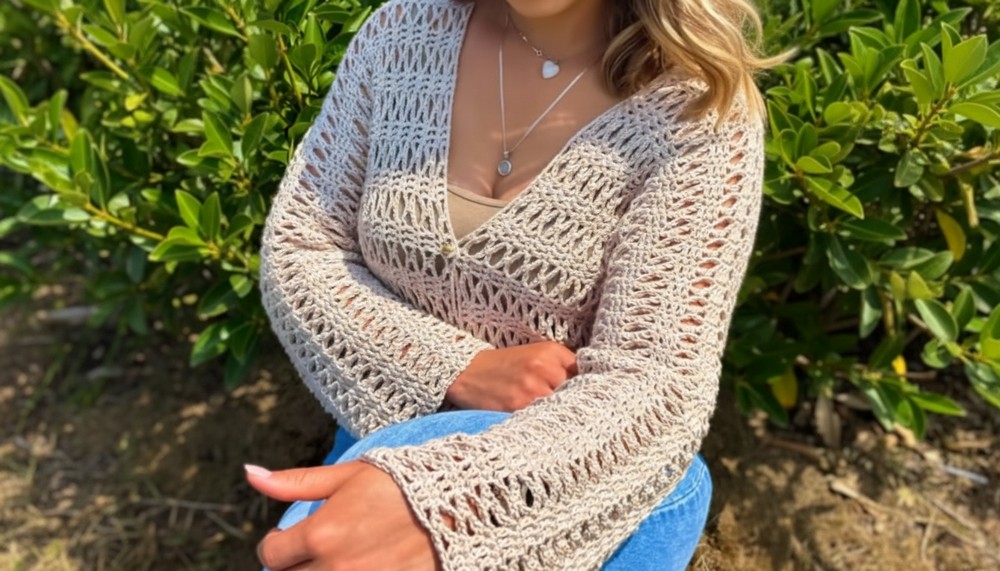
Light and airy wear make you feel comfortable all day and night. The mesh style gives you a cardigan that is easy to slip on and lets your skin breathe. Many people notice the lovely open pattern that looks like small windows across the whole garment. With a crochet Mesh Cardigan pattern you can make a piece that shows off color and coolness that fits with any look. It feels soft to the touch and keeps you warm just enough without feeling heavy.
Free Crochet Mesh Cardigan Pattern—Perfect for Any Season

You can take this cardigan anywhere use it for daily wear or special gatherings because it matches well with many types of clothes. Easy folds and gentle drape make it look neat and stylish on anybody. Enjoy the way it adds beauty and charm while keeping you comfortable. Wearing one makes you feel fresh and proud to have something crocheted just for you.
Branny Cardigan Crochet Pattern (US Terminology)
Materials
- Yarn: 50% cotton, 50% bamboo viscose, category 4 medium weight (or similar)
- Hook: 5 mm crochet hook
- Tapestry needle: for seaming and weaving in ends
- Scissors
- Stitch markers or safety pins (helpful for marking sleeves and matching seams)
- Buttons (optional): Large enough to fit between double crochet groups
Note: Substitute yarn type and fiber as preferred; choose buttons that fit through the spaces created by double crochets.
Key Abbreviations
| Abbreviation | Meaning |
|---|---|
| ch | chain |
| dc | double crochet |
| sc | single crochet |
| sl st | slip stitch |
| rep | repeat |
| st(s) | stitch(es) |
Special Notes
- Pattern uses US crochet terminology.
- Base chain is a multiple of 8 + 5.
- To adjust the length or width, modify the beginning chain or number of rows.
- Add about 10 cm to the desired length to account for pattern shrinkage.
- For sleeves, adjust foundation space based on individual arm/shoulder width.
Pattern Instructions
1. Foundation Rectangles
a. Make Two Rectangles
- Chain 165 (for size M; adjust in multiples of 8, plus 5 extra chains).
- Tip: If you want a different size, measure the desired cardigan length (from neck to bottom hem, plus 10 cm), and adjust the starting chain accordingly.

b. Foundation Row
- Row 1:
- Starting in the 4th chain from the hook:
- Dc in each of the next 3 chains (counts as first group of double crochets; the turning chain counts as first dc).
- Ch 3, skip next 2 ch, sc in next ch, ch 3, skip next 2 ch, dc in next 3 ch.
- Repeat the sequence (ch 3, skip 2 ch, sc in next ch, ch 3, skip 2 ch, dc in next 3 ch) to the end.
- The row should end with 3 dc.
- Starting in the 4th chain from the hook:
- Check: If final 3 sts do not allow for 3 dcs, recount and ensure the base chain was correct (multiple of 8 + 5).

2. Body Pattern
The stitch pattern alternates between two rows:
a. Row A (Single Crochet & Chain-5 Row)
- Ch 1, turn.
- Sc in each of next 3 dc.
- Ch 5, skip over all chains to next group of three dc, sc in each dc.
- Repeat ch 5, skip, sc in each next 3 dc across the row.
- End with sc in each of last 3 dc.
b. Row B (Double Crochet & Chain-3 Row)
- Ch 3, turn (counts as first dc).
- Dc in each of next 2 sts (3 dc in total at row start).
- Ch 3, insert sc in the center of the next ch-5 loop (best practice: in the 3rd ch of the loop).
- Ch 3, dc in each of next 3 sc.
- Repeat ch 3, sc in ch-5 sp (3rd ch), ch 3, dc in each of next 3 sc to end.
- Finish row with dc in each of last 3 sc.

Special Note:
For a solid fabric, always place sc in the third chain of ch-5 spaces to keep alignment.
c. Pattern Sequence
- After foundation, alternate Row A and Row B until desired width (for sample: 27 total pattern rows, ending with a Row A repeat).
- Rectangle Dimensions (for size M, as shown):
- 23 cm wide
- 27 rows per rectangle
- Make two rectangles the same.
3. Assembly & Seaming
a. Lay Both Pieces Flat
- Fold each rectangle in half lengthwise.
- Align so that both first rows are centered (front and back).
- Use markers or pins along the center back and sides.
b. Seam the Back
- Seam from hem up the center back, for about 40 cm, or as desired (leave open space for neck).
- Sew from bottom up only–never from top down–for neater alignment.
c. Mark and Seam Sides
- Try on piece to decide sleeve width and body fit.
- Mark underarm points for sleeve opening: Always finish at the center of a group of three dcs or scs, using the second st in the trio as end point.
- Seam side seams from hem up to marker on each side, leaving shoulder/arm opening as planned.

4. Sleeves
a. Start Sleeves
- At marked armhole opening, attach yarn at side seam (marker point) with sl st.
b. Sleeve Pattern Adaptation
- For the sleeve rounds, adjust the pattern as follows:
- Instead of ch-3 between dc groups, use ch-2 (to reduce sleeve flare).
- Otherwise, follow Row B and Row A alternation, working in rounds.
Round 1 (Sleeve start):
- Ch 2, sc in the 3rd chain of the ch-5 space, ch 2,
- Dc in each of next 3 sc/dc,
- Continue around armhole, ending with sl st to first dc group.
Round 2:
- Turn after every round for a seamless, woven look.
- Work as per Row A (sc in each dc group, ch 5, etc.).
Alternate these two rounds (Row A, Row B), turning work after every completed round.
- Tip: Place markers at round joins and to keep count.
- Continue until sleeve is desired length.
- End on a round with dc groups, as for the main body.
c. Fasten Off & Seam
- Close seam invisibly: Use yarn needle to join last round neatly, simulating a chain.
- Weave in all ends.
- Repeat for second sleeve.
5. Finishing & Buttons (Optional)
- Add buttons along edge using spaces between double crochet groups as buttonholes.
- Choose buttons wide enough to fit through spaces.
- Attach securely.

Pattern Corrections & Tips
- Sleeve Opening Placement: Always finish side seam at the second st in any group of three dcs/scs; this keeps the sleeve symmetrical and avoids twisting.
- Blocking: For best results, block pieces before final back seam; leave seamed only with markers until after blocking.
- Customization:
- Adjust initial chain for length, number of rows for width (or vice versa).
- For longer or shorter sleeves, add or subtract rounds.
- Tip: Turning the work after each round on the sleeves eliminates any noticeable seam.
Conclusion
The Branny Cardigan offers approachable construction using only rectangles with simple, beautiful stitch repeats. Assembly is straightforward, and customizing size is easy – just modify your stitch count and rectangle dimensions. Turning the work each round on the sleeves gives an even, handwoven appearance. Remember to double-check placement of sleeve opening, and don’t be afraid to personalize with unique buttons or fibers.