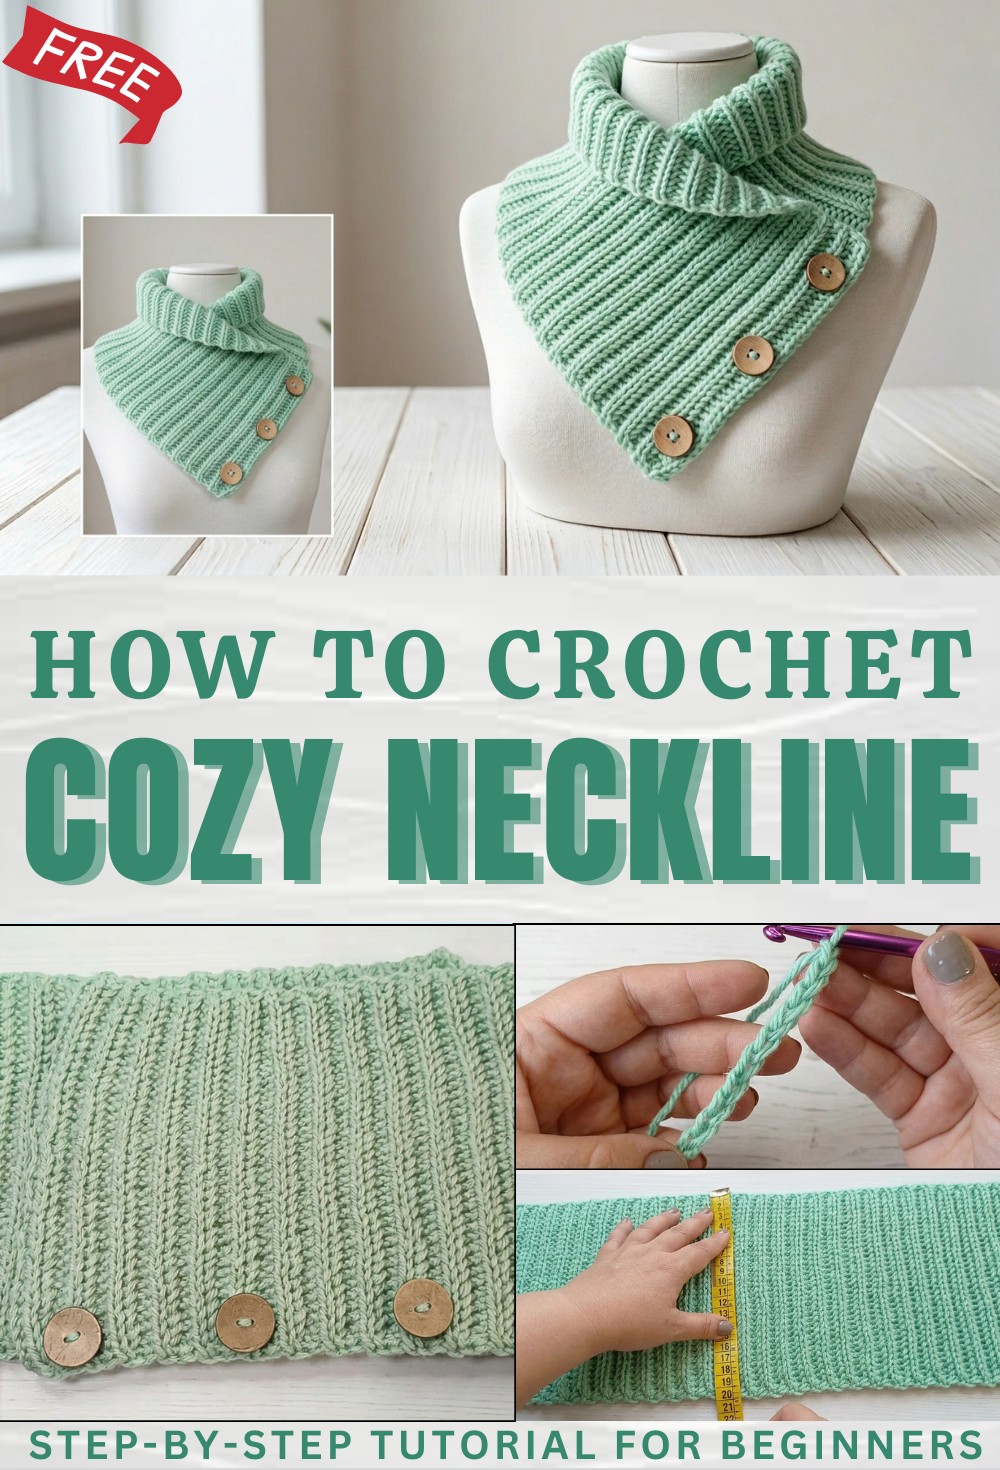
Quick Free Crochet Neckline Pattern to Refresh Your Style
Personalize your tops and dresses using this free crochet neckline pattern for a touch of charm that makes every outfit look fresh & unique.
A simple piece of thread changes the look of your shirt or dress in a beautiful way as it forms a neat design around your neck making you feel special and bright. This decoration are eye catching and can be soft or bold depending on what you want. Using a Crochet Neckline pattern you can make this beautiful shape in many colors so your clothes look new and exciting each time you wear them.
Minimalist Free Crochet Neckline Pattern for Simple Charm
The nice thing about this style is that it works well for old clothes too and can give them a fresh look that makes people notice you. The stitches feel smooth on your skin and do not bother you when you move or play. You will enjoy having something that looks very fancy but is easy to wear every day. Share this art with your friends and family so everyone can have wonderful clothes that show off great style with little effort.
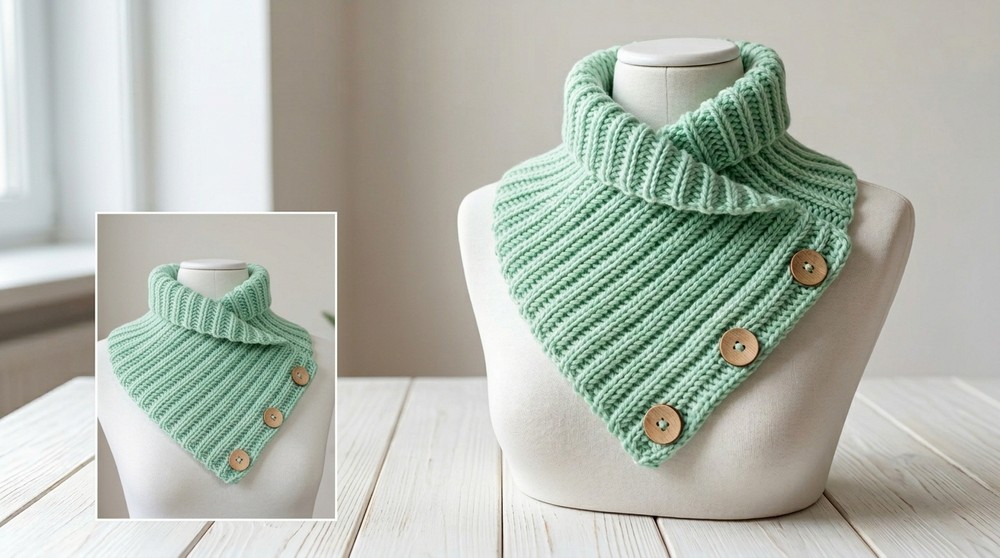
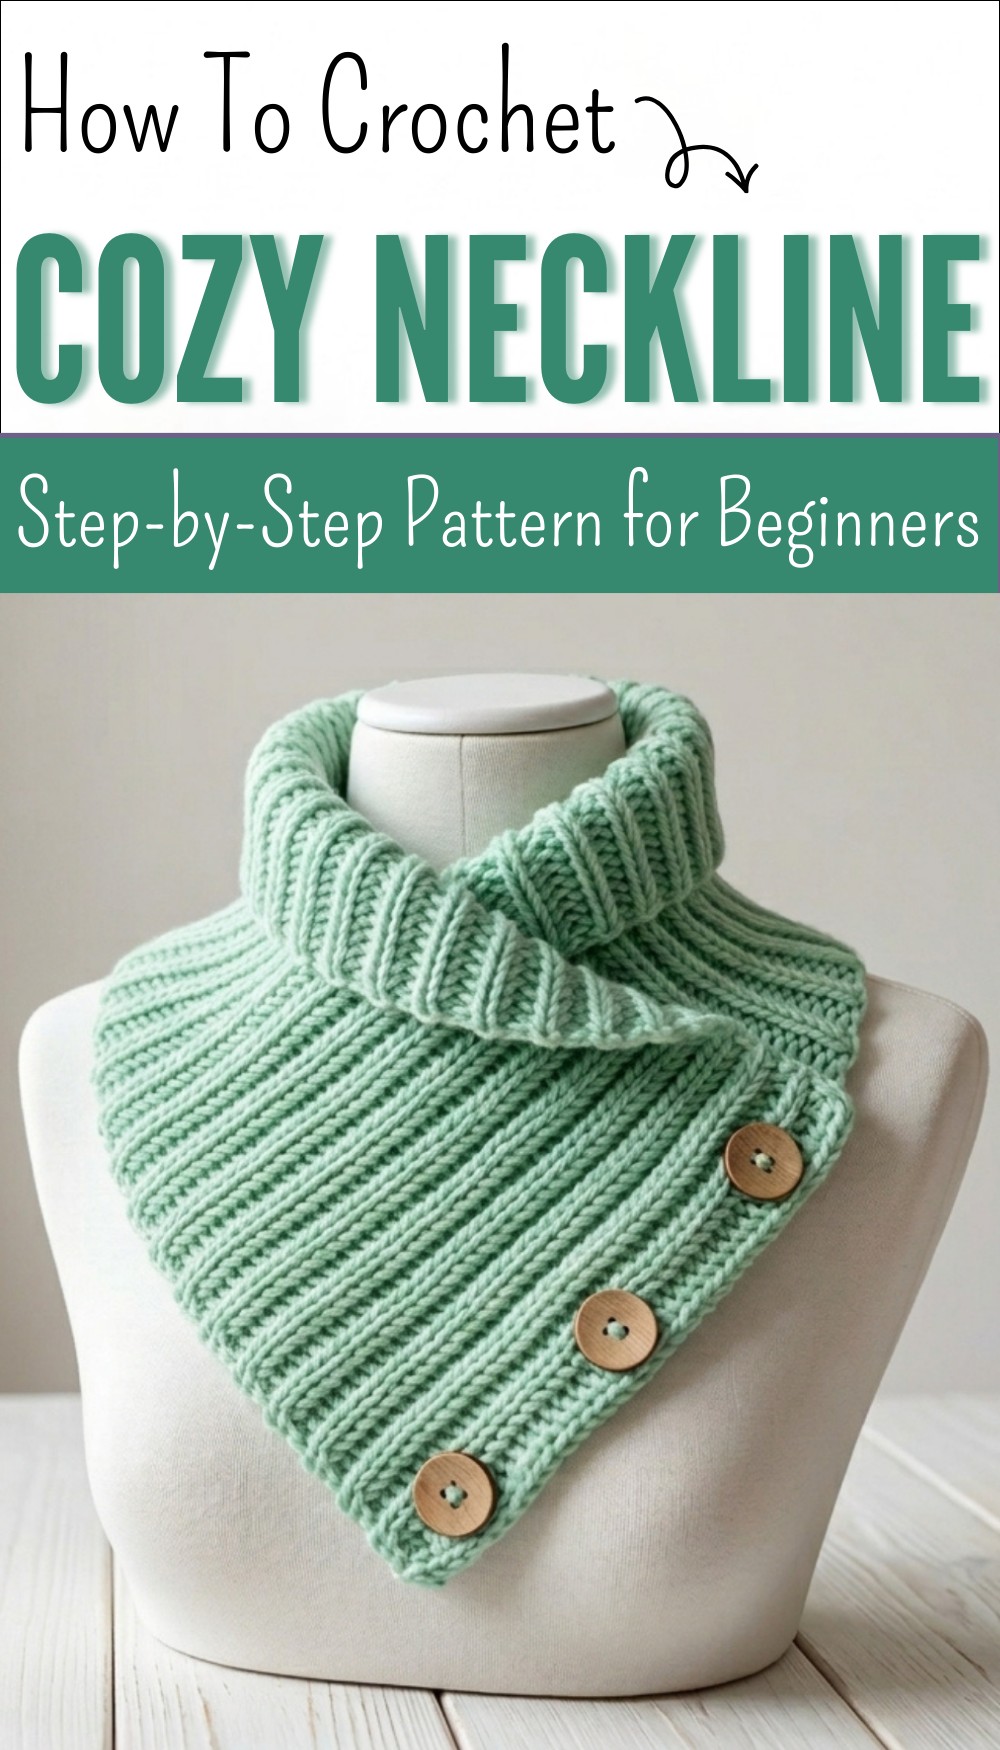
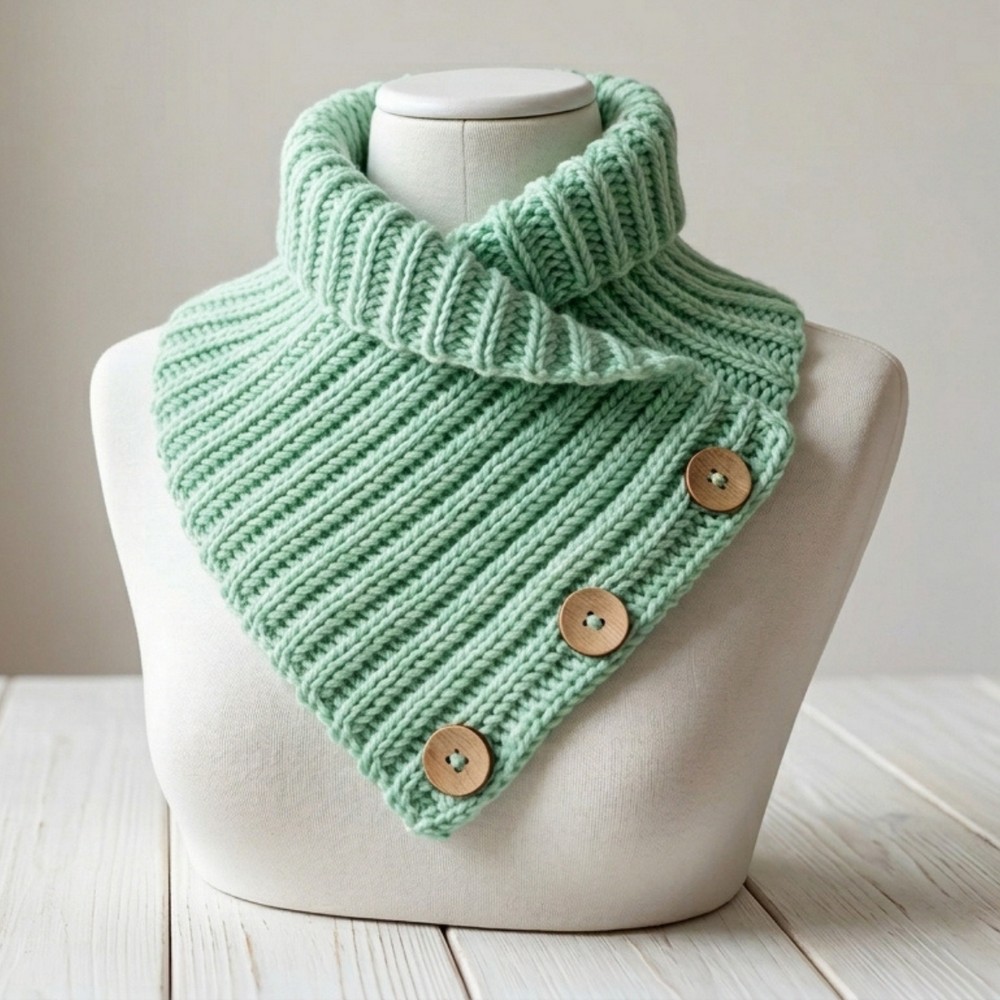
Textured Knit-Look Crochet Cowl with Button Closure
Materials
- Yarn: 135g acrylic yarn, approx. 2mm thickness
- Hook: 6mm crochet hook
- Notions: Scissors, tapestry needle, measuring tape
- Stitch markers: At least 6 (for marking buttonhole placement)
- Buttons: 3 (or as many as desired; size to fit your taste)
Finished Measurements
- Longest diagonal (vertex to edge): 33 cm (folded), up to 25 cm at deepest point
- Short side (folded): 17 cm
- Flat width (before assembling): ~20 cm
- Flat length (before assembling): ~80 cm
Abbreviations (US Terms)
- ch – chain
- hdc – half double crochet
- sl st – slip stitch
- st(s) – stitch(es)
- rep – repeat
- RS/WS – right/wrong side
Special Notes
- The cowl is worked flat, in rows, and sewn or buttoned into shape.
- The special knit-look “rib” pattern is achieved by working hdc in the back loop, while picking up an extra ‘side’ leg before each hdc.
- Sample uses an even number of starting chains (here: 38), but multiples work.
- Adjust starting ch count/number of rows to your preferred size.
- Buttonholes are custom-fit to your buttons.
- Edges are squared and neat by working the ‘side’ bar/chain at the end of each row.
Pattern
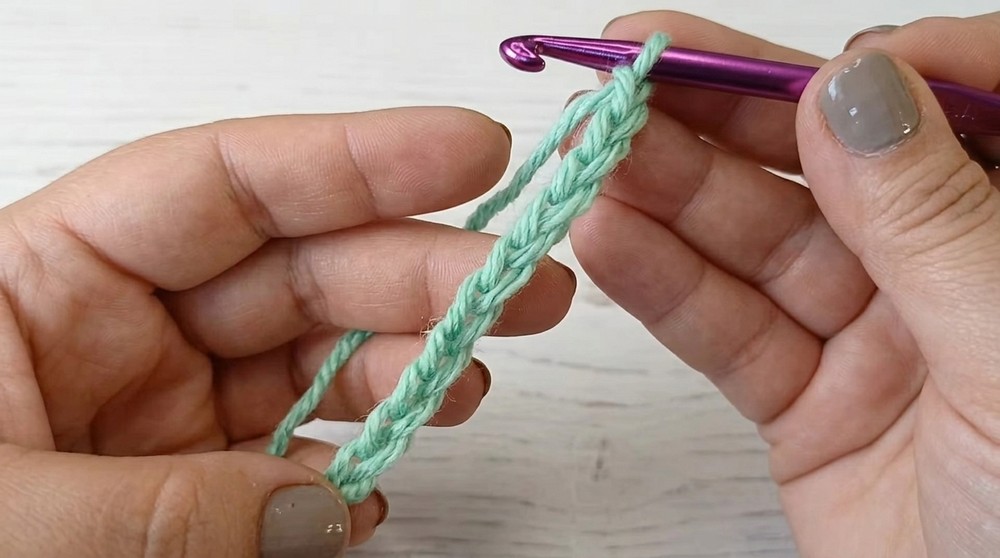
Step 1: Foundation Chain
- With your 6mm hook, ch 38 (or any number to reach ~20 cm/8 in. when slightly stretched—make a sample in pattern to check!).
- Ensure your chains are evenly tensioned.
Step 2: Row 1 (Foundation Row)
- Ch 1 (does not count as a st),
hdc into 2nd ch from hook—insert hook in the back bump (“belly”) of the chain for a neater edge, yarn over, pull up a loop, yarn over and pull through all loops. - For each hdc across:
Before inserting hook into the next chain, pick up the left bar (leg) of the previous hdc, then work hdc in the next chain as above. - Continue across, always picking up that visible left leg/bar from the previous row and the back bump of the chain.
- At row’s end: 38 hdc.
Step 3: Row 2 and All Following Rows
- Turn. Ch 1 (loosely, not a st; keep it tall/loose so you can work into it at row-ends).
- First st: Insert hook into the back loop only of the first hdc, work hdc.
- For all remaining sts: For each hdc, pick up the left leg/bar of the hdc just made, then into the back loop only of the next st, hdc. (See Special Notes)
- At the row’s end, always pick up the left leg of the penultimate hdc, insert into the back loop of the final st AND under the turning chain, hdc.
- This maintains the straight edge.
Step 4: Repeat Rows
- Repeat Step 3 until the rectangle is approx. 80 cm (about 31–32 in.) long, or your desired length. Try on as you go for custom fit.

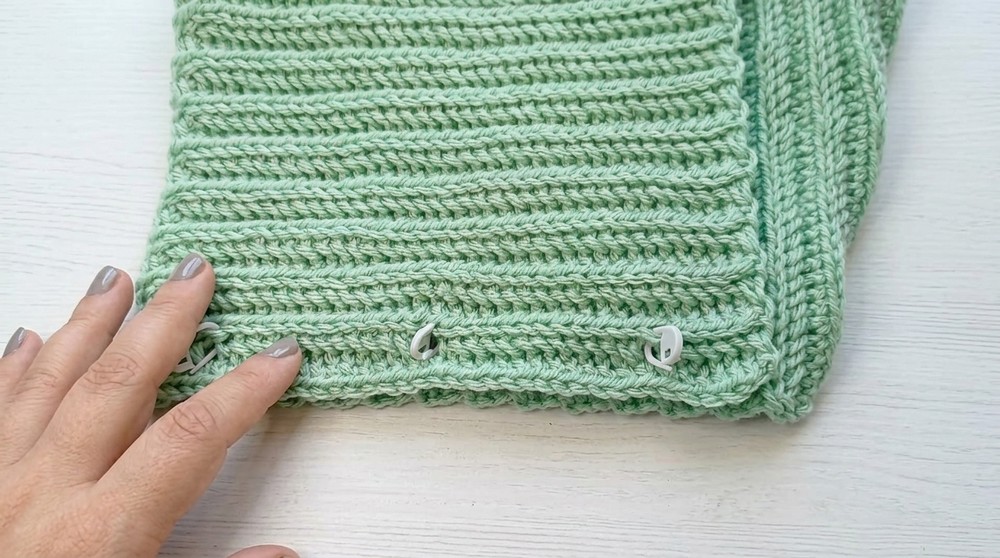
Step 5: Buttonhole Placement
- Decide which short edge will have the buttonholes.
- Lay cowl flat with edges aligned as they will be when worn.
- Place markers for three buttonholes along the length, spaced as desired (sample has ~6 sts from each edge to first/last buttonhole, evenly placed).
Step 6: Buttonhole Row
- Row A: Work in pattern to first marker.
- When you reach a marker,
- Ch 1, skip 1 st (for small buttons; ch 2 and skip 2 for larger; match your button), hdc in next st as per pattern (still picking up the leg).
- Continue to next marker, repeat.
- Work to end of row as in pattern.
- Tip: Test buttonhole with your chosen button to confirm fit.
Step 7: Buttonhole Reinforcement Row
- Row B: Work across as before.
- At each ch-1 space, hdc into the ch space (not a stitch).
- Work remaining stitches in pattern.
- This closes the buttonhole neatly and creates a reinforced edge.
Step 8: Optional: Additional Border Rows
- For a sturdy edge, work 1–2 more rows in pattern.
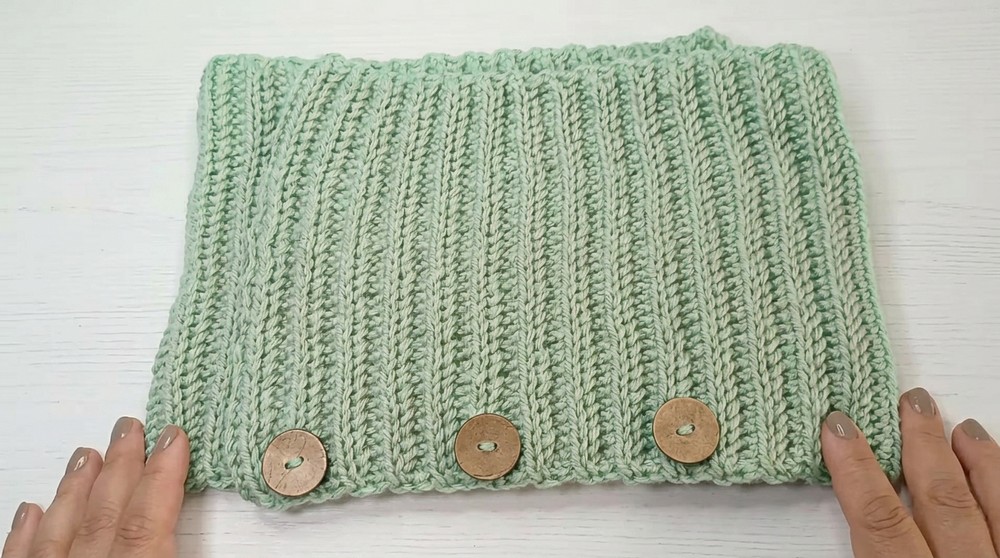
Step 9: Sew on Buttons
- With rectangle flat, realign as it will be fastened.
- On opposite edge (from buttonholes), use stitch markers/needle to mark where buttonholes align.
- Sew buttons neatly at these points using matching yarn and a tapestry needle.
- Knot and hide ends on WS.

Step 10: Weaving in Ends & Finishing
- Weave in yarn tails on the wrong side, passing first vertically, then horizontally for security.
- Trim excess; stretch and block gently if desired.
Step 11: Assembly
- Fold cowl as shown:
- Align vertex to vertex.
- Edges with buttonholes and buttons overlap; fasten closed.
- Optional: For a permanent join, seam inside the points with a few stitches; otherwise, you may leave as fully buttoned for versatility.
Conclusion
You now have a textured, elegant cowl that looks hand-knitted! The simple stitch and neat joining give a professional finish and the custom buttonholes ensure a perfect fit for your favorite buttons. Elasticity makes it easy to slip on/off, and you can adjust size and button details to preference.
Pattern Correction & Tips
- Correction: If edge is wavy, always work the last st of each row through both the back loop and the side of the turning chain.
- Tips:
- Mark buttonhole placement accurately for even closure.
- Always ensure chains are loose for a neat edge.
- Test one buttonhole before doing all, adjusting chain count if needed.
- For best results, block finished cowl gently.
- For even more structure, add a final round of sc or sl st around both edges.