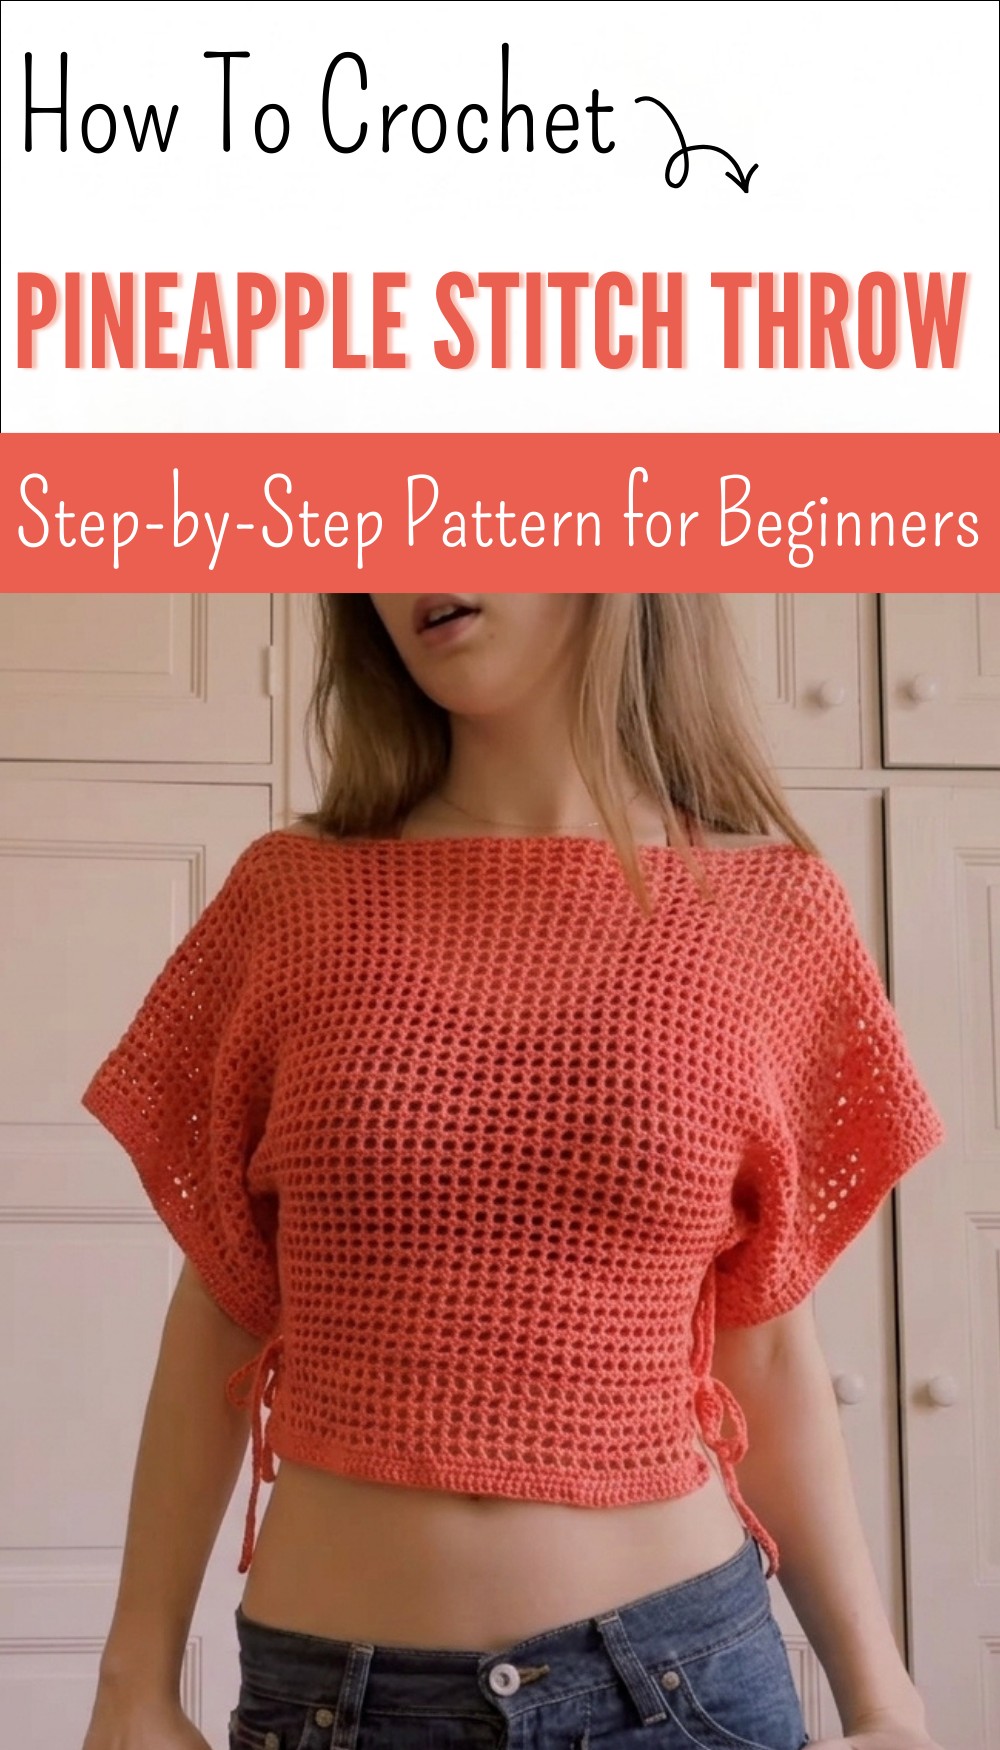
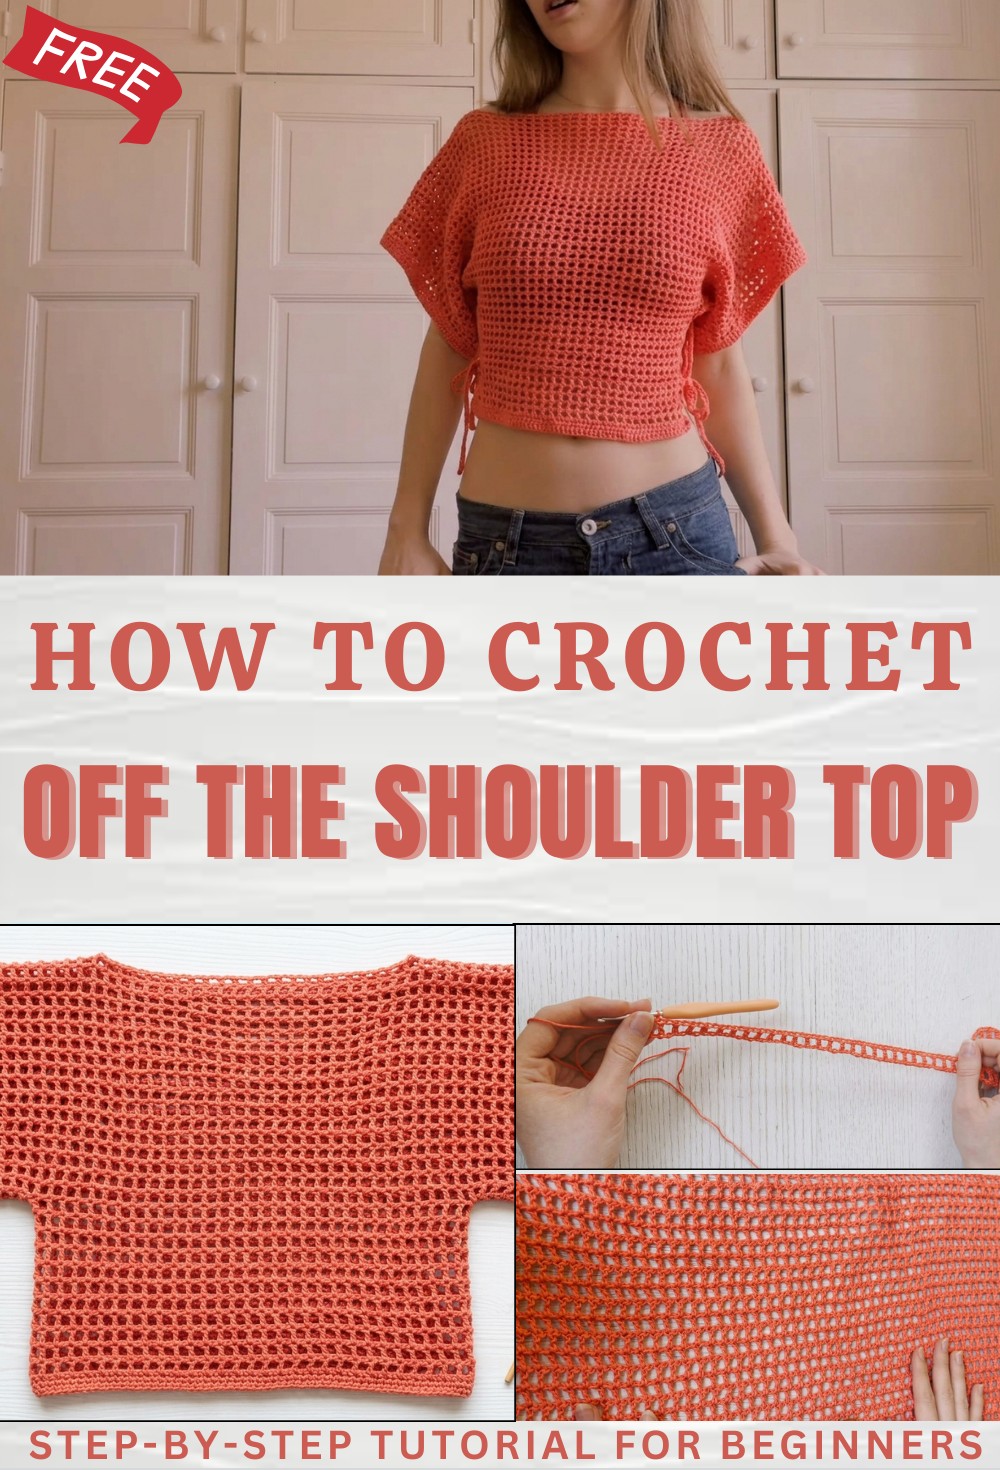
Airy Free Crochet Off Shoulder Top Pattern for Breezy Looks
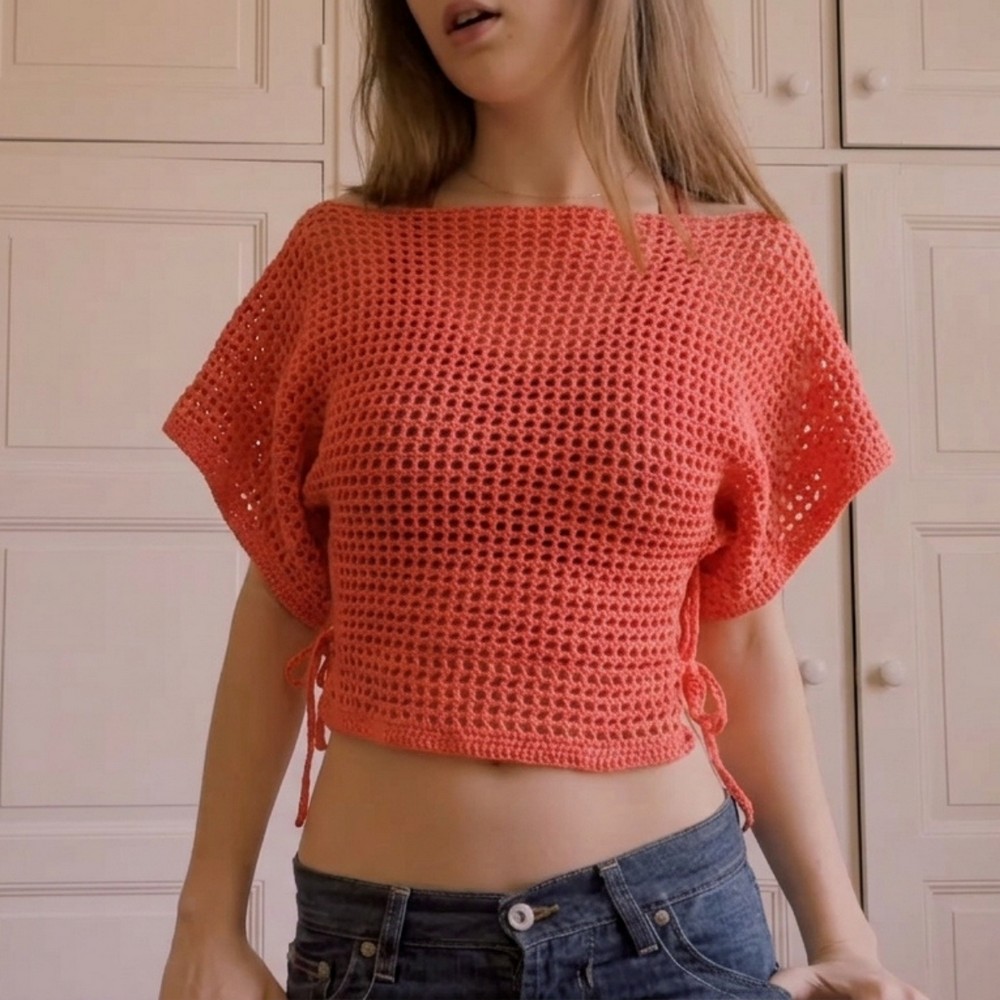
Refresh your summer style with this free crochet off shoulder top pattern and enjoy feeling confident and cool wherever your sunny days.
Do you want to look stylish and feel cool at the same time Imagine a soft and pretty top that gently sits off your shoulders giving you a fresh and happy look perfect for warm days and fun moments with friends. Its lovely open shapes let your skin stay fresh and the bright colors make every top unique and beautiful. With a Crochet Off Shoulder Top pattern you can make your own special piece that hugs your body softly and stretches so you can move freely and stay comfy all day long.
Sultry Free Crochet Off Shoulder Top Pattern for Trend Lovers
People around you will see your beautiful top and wonder where you got it because it stands out and brings charm to any outfit. You can wear it to parties or with simple jeans for a regular day and it can also be a lovely handmade gift for someone special who enjoys both comfort and style.
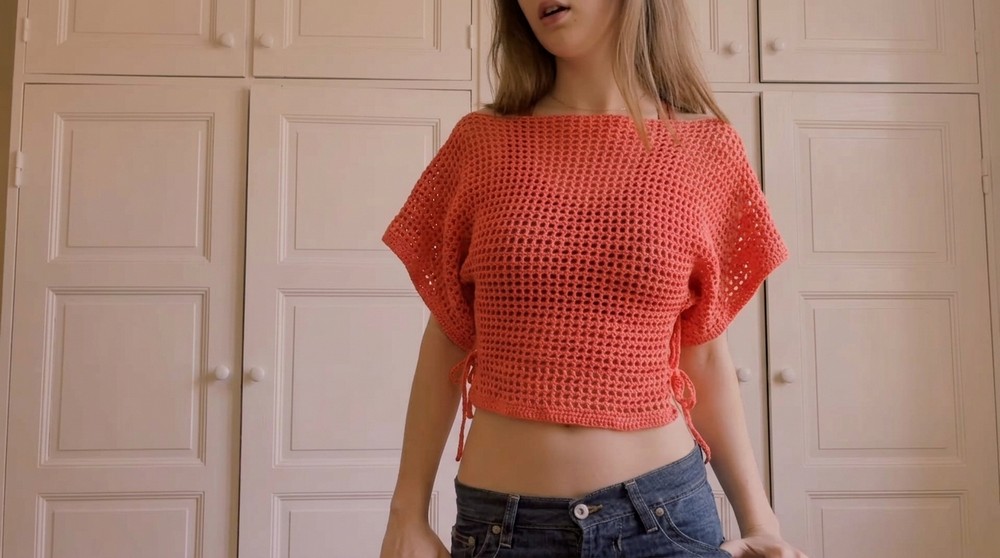
Crochet Off-the-Shoulder Top Pattern
Materials
- Yarn: 100% cotton, approximately 230g (5 x 50g skeins)
- Hook: 3.0mm crochet hook
- Notions:
- Stitch markers
- Scissors
- Tapestry needle
Key Abbreviations (US Terminology)
- ch — chain
- dc — double crochet
- sl st — slip stitch
- st(s) — stitch(es)
- rep — repeat
Special Notes
- The top is constructed from two identical panels: each forms the bust, sleeves, and body.
- Adjust the length and number of rows to fit your measurements.
- The mesh is made with dc, ch 1, skip one stitch.
- Side ties are crocheted directly onto the top.
- Borders are worked as 2 rounds of dc at the base and sleeves.
- Sample numbers are for a size small/medium—adjust foundation chain and panel widths for other sizes.
Pattern
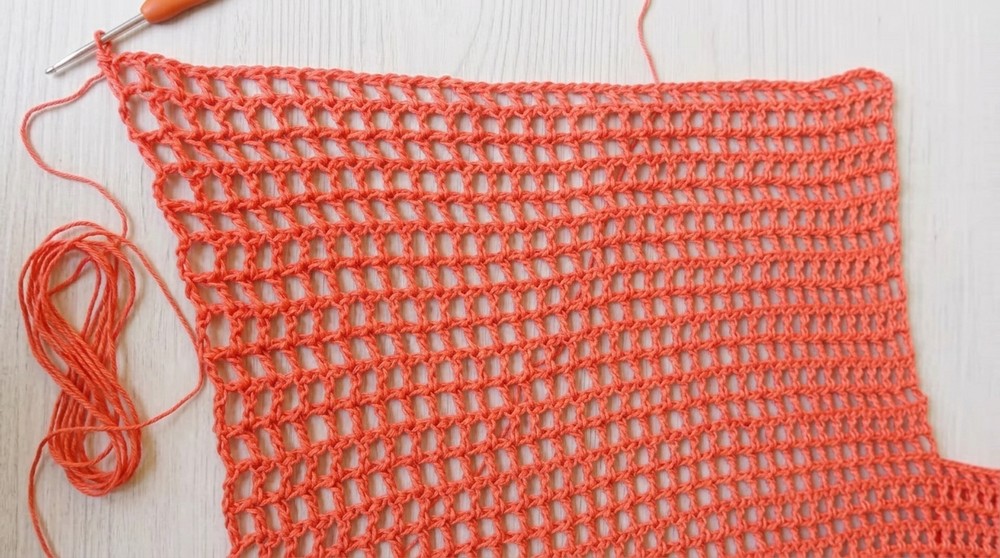
1. Bust & Sleeve Panel
Foundation Chain:
- Make a slipknot.
- Ch 137 (or a length: sleeve end across bust to other sleeve end). Formula: Ch an uneven number to desired width, plus 4.
(Sample: 133 + 4 = 137.)
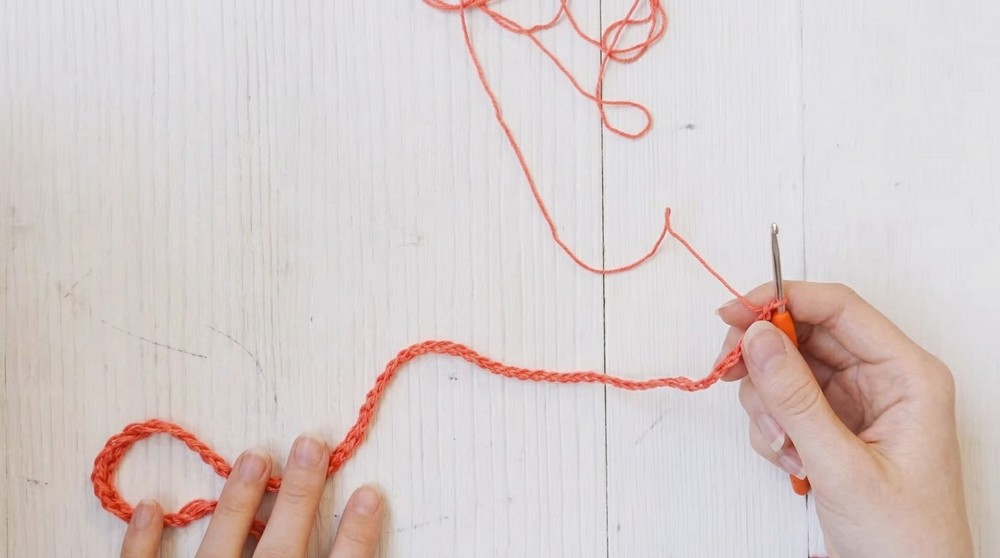
Row 1:
- Dc in 7th ch from hook (skipping first 6 ch).
(The 3 skipped ch count as first dc, and the next 3 as first ch-1 sp.) - Ch 1, skip next ch, dc in next ch.
- Rep from * to end.
- At end: ch 1, dc in last ch.
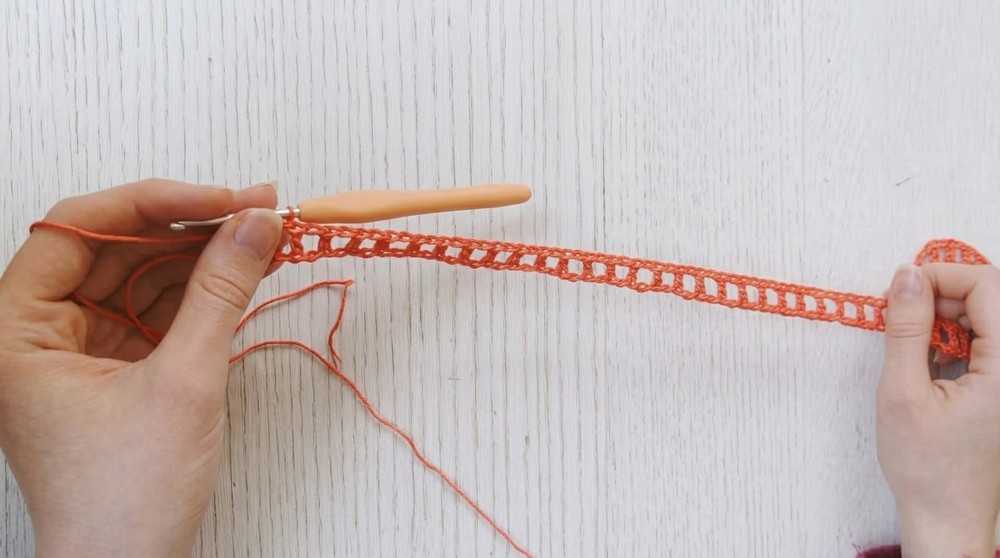
Row 2:
- Turn, ch 4 (counts as dc + ch-1 sp).
- Dc in next dc (from previous row).
- Ch 1, skip ch-sp, dc in next dc.
- Rep from * to end.
- At end: ch 1, dc in 3rd ch of turning ch.
Repeat Row 2
- Continue until panel is desired measurement (shoulder to below bust, or until you have 28 rows as per sample).
- Fasten off.
2. Body Panel
- Measure across your body, under the arms (side to side).
- Count how many stitches wide your body panel should be. (E.g. Sample: 65 sts.)
- On one completed bust panel, skip sleeve stitches on each side (e.g., 34 sts per sleeve, see calculation below).
- Rejoin yarn at the start of the body panel section.
Row 1:
- Attach yarn at the starting st of the body panel.
- Ch 4 (counts as dc + ch-1 sp), dc in next dc.
- Ch 1, skip ch-sp, dc in next dc.
- Rep to body panel end (e.g., for 65 sts).
- At end: ch 1, dc in last st.
Row 2 and Onward:
- Turn, ch 4, dc in first dc.
- Ch 1, dc in next dc.
- Repeat for same number of body stitches.
- Continue for 15 rows or desired length.
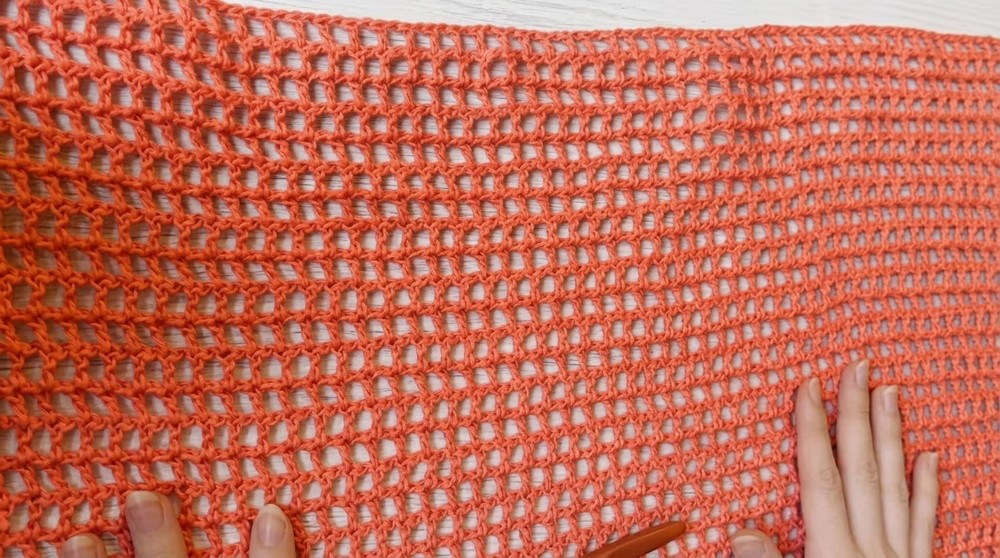
3. Body Panel Border
- Turn, ch 2 (does NOT count as dc).
- Dc in each st and ch-sp across.
- At row’s end: ch 2, dc in all across again (total 2 rows).
- Fasten off.
4. Make the Second Panel
- Repeat all steps above for a second, identical panel.
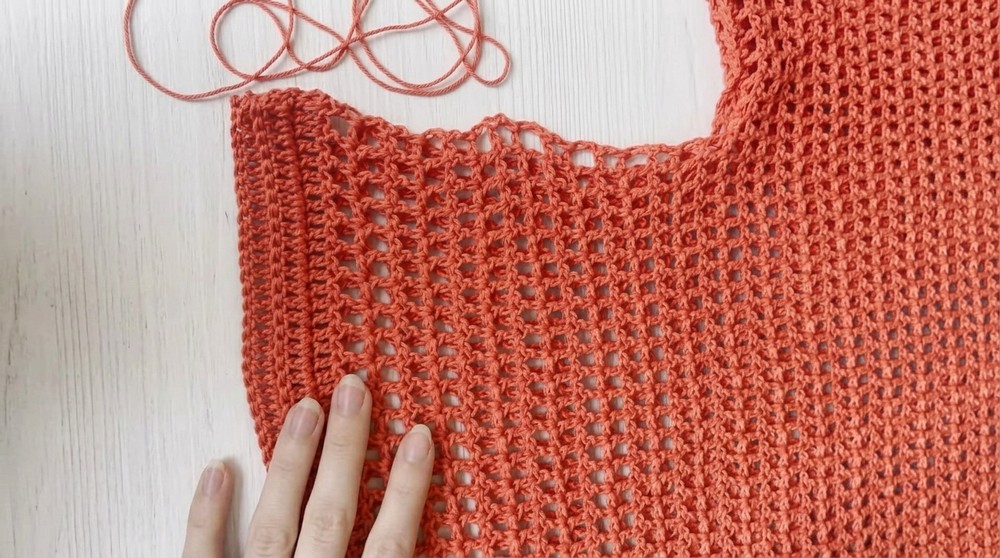
5. Joining Panels (Seaming Sleeves and Shoulders)
- Place panels, RS together, matching sides.
- Slip stitch UNDER each sleeve:
- Join yarn at sleeve’s edge, sl st through corresponding stitches on both panels for 35 sts (or the same number used for sleeves).
- Fasten off and repeat on the other sleeve.
- Slip stitch OVER the sleeves (shoulders):
- Mark shoulder edge with a stitch marker, leaving a central gap for the neckline.
- Sl st together 35 stitches per side (or match previous count).
- Repeat for other sleeve. Leave the center unjoined for the neck opening.
6. Side Ties
- Try on the top to mark underarm and waist area.
- At side seam, join yarn to midpoint of body section, ch 25 + 1 (or desired length).
- Sl st in each ch back down to the top.
- Join with a sl st in same st.
- Fasten off.
- Repeat for all four tying points (two per side).
7. Borders for Sleeves and Waist
For each sleeve and the waist:
- Join yarn at seam,
- Ch 2, dc in same st.
- Dc in every st and ch-sp around, working in the round.
- At round’s end, sl st to top of first dc.
- Repeat for 2 rounds.
- Fasten off.
8. Finishing
- Weave in all ends with tapestry needle.
- Turn garment RS out and try it on.
- Tie sides for fit.
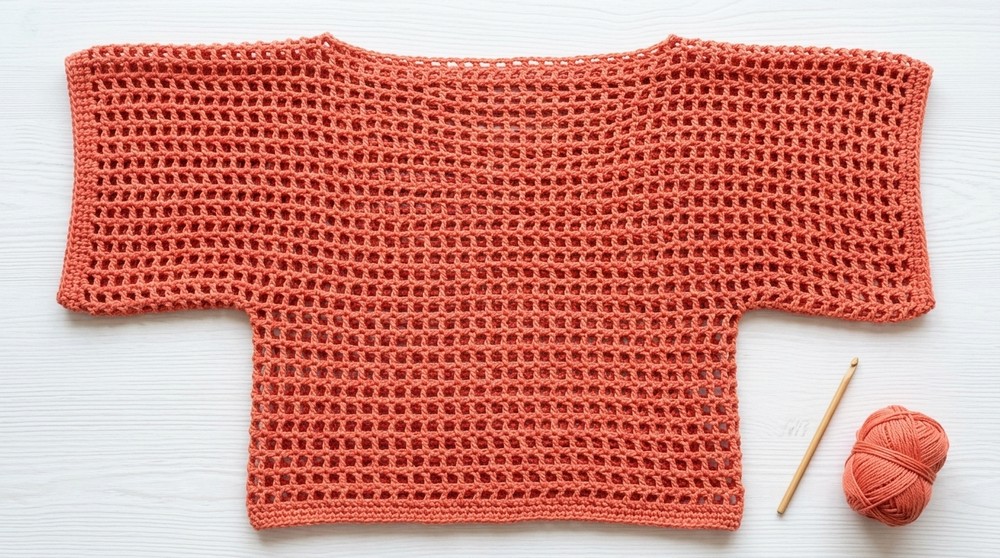
Conclusion
You have completed a modern and comfortable off-the-shoulder crochet top! Its unique construction makes it both stylish and practical for spring and summer. Adjust the size, sleeve width, and total rows as needed for your fit and style.
Pattern Corrections & Tips
- Correction: If numbers do not fit your size, measure as you go, using your body for reference.
- Tip:
- Always finish double crochets in the last stitch/chain for straight edges.
- Use stitch markers to keep your place for ties or shoulder joining.
- Work borders with a slightly larger hook if your edging feels tight.
- Block finished top for best draping and shape.
- Add more rows to sleeves for longer coverage.