Fresh Crochet Butterfly Top Pattern With a Trendy Shape

Hook a breezy wing-inspired piece using this Crochet Butterfly Top Pattern with airy stitches, stylish shape, and outfit-ready charm today.
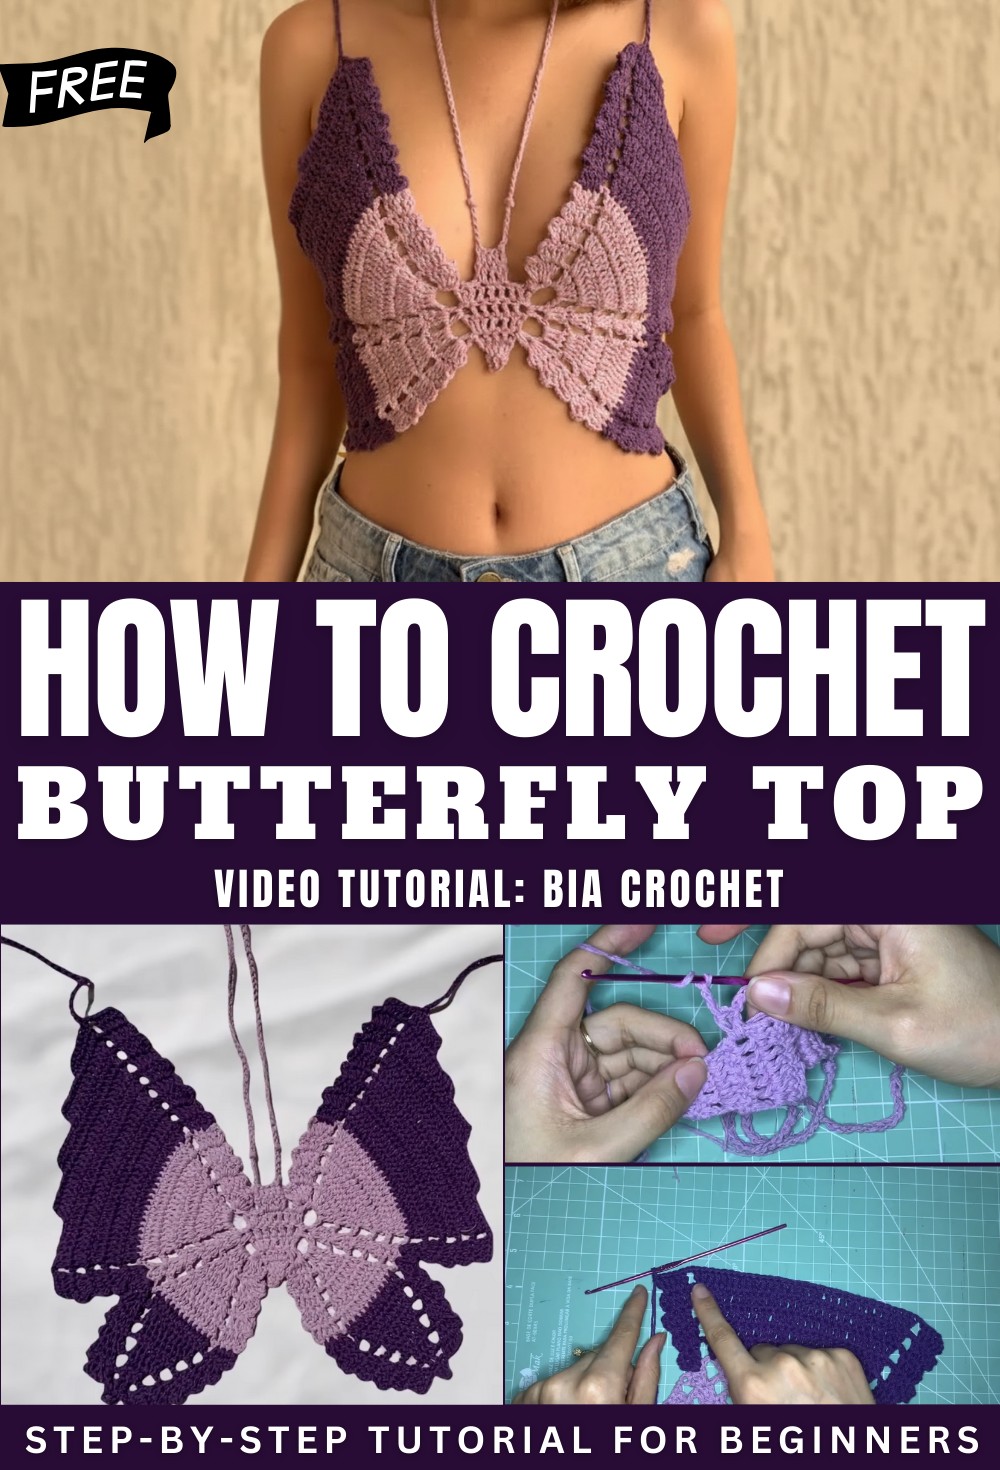
Chic Crochet Butterfly Top Pattern With a Boutique Look
Modern style meets artistic detail in a garment that feels both expressive and wearable. The Crochet Butterfly Top Pattern delivers a visually striking shape inspired by wing-like symmetry, offering a flattering fit that draws attention to the shoulders and neckline. Its airy structure provides comfort while maintaining an elegant silhouette, making it suitable for casual wear, vacations, or layered styling. The design supports customization through color choices and yarn textures, allowing each finished piece to reflect personal taste.
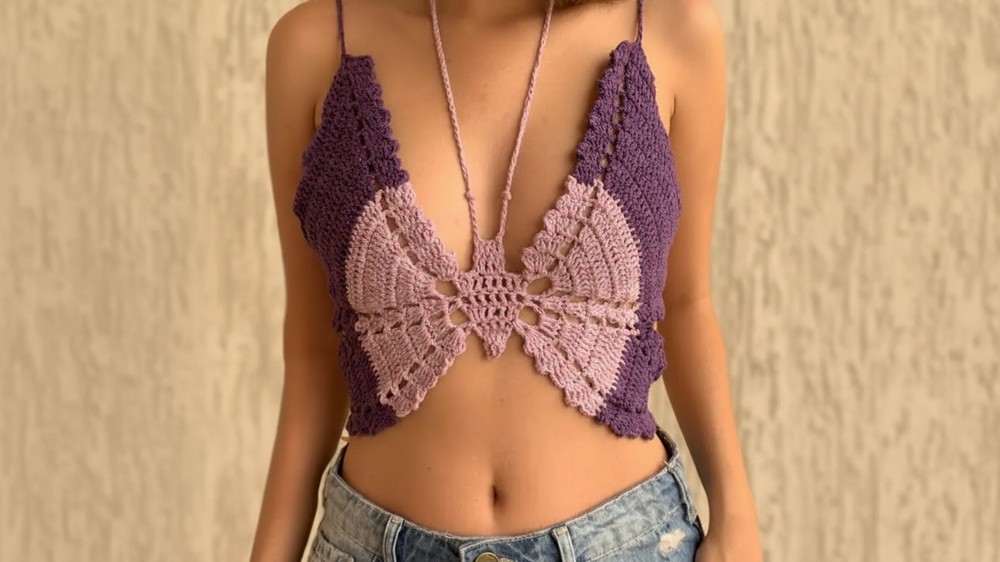
Lightweight construction ensures ease of movement, while the defined form adds a touch of sophistication to everyday outfits. This pattern also encourages mindful making, offering a relaxing and satisfying process with a beautiful wearable result. The overall look feels fresh, graceful, and confident, appealing to those who enjoy stylish garments with artistic influence. It stands as a versatile option that blends beauty, comfort, and individuality in one refined top.
Required Materials
-
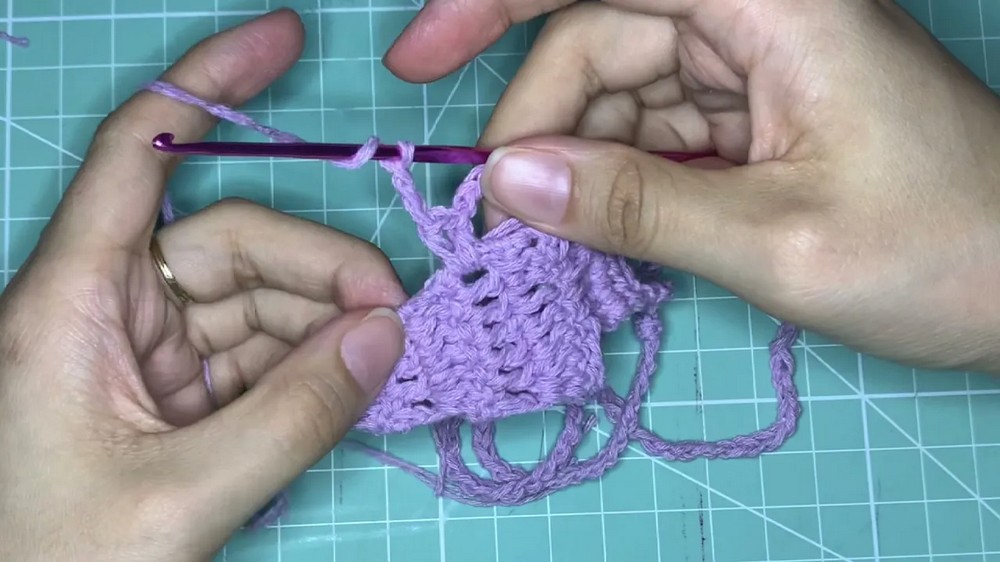
Yarn: Fiori Line (Tex 295). The video uses the yarn “double-stranded” (using two strands together) to achieve the desired thickness [00:35].
-
Crochet Hook: 2.5 mm [00:41].
-
Optional: Pearls or beads for the ends of the ties [39:01].
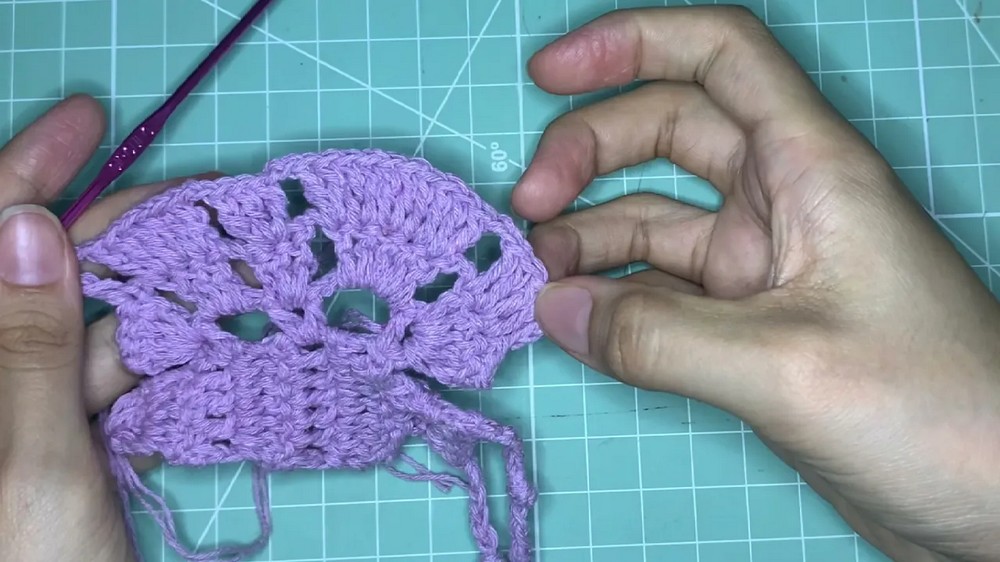
Butterfly Body (Center)
-
Initial Base: Chain 4. Work 2 double crochets (dc) into the first chain to have a total of 3 dc [01:03].
-
Increases:
-
Row 2: Increase in the first and second stitches (2 dc in each). Work 1 dc in the last stitch (Total: 5 dc) [01:34].
-
Row 3: Work 1 dc in each stitch across (Total: 5 dc) [02:18].
-
Row 4: Increase in the first and penult (next-to-last) stitches. Work 1 dc in the last stitch (Total: 7 dc) [03:13].
-
Row 5: Work 1 dc in each stitch across (Total: 7 dc) [03:49].
-
Row 6: Increase in the first and penult stitches. Work 1 dc in the last stitch (Total: 9 dc) [05:18].
-
-
Head & Antennae:
-
Slip stitch to the 4th stitch. Work a cluster (2 dc in one, 1 dc, 2 dc in one) [06:16].
-
For the next row, work half double crochets (hdc) across to form the head shape [07:06].
-
Chain a long length from each side of the head to create neck ties, finishing with a simple knot at the tips to represent antennae [08:42].
-
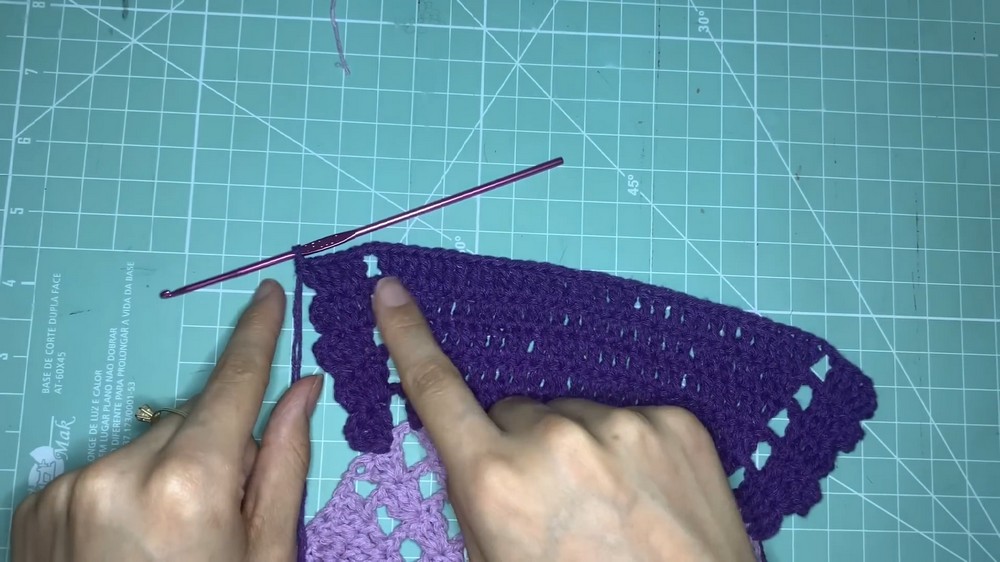
Butterfly Wings (Laterals)
The wings are worked by attaching yarn to the side of the body. One side features a larger wing (top) and a smaller wing (bottom).
-
Foundation for Wings:
-
Wing Growth (Size P/Small):
-
Large Wing (Top): Fill the chain-5 space with 5 dc. In subsequent rows, increase by working 2 dc in the first two and last two stitches of the block to expand for the bust [14:14].
-
Small Wing (Bottom): Fill the chain-3 space with 3 dc. Increase more slowly by working 2 dc only in the first and last stitches [15:56].
-
Separation: As the wings grow, separate the top and bottom sections by working a cluster of 3-4 dc in the center “bridge” stitch [15:28].
-
-
Sizing Adjustments:
Finishing the Wings
-
Staircase Decrease: To create the butterfly wing shape, “walk” over 7 stitches using slip stitches at the beginning of the row, then stop 7 stitches early at the end [35:34].
-
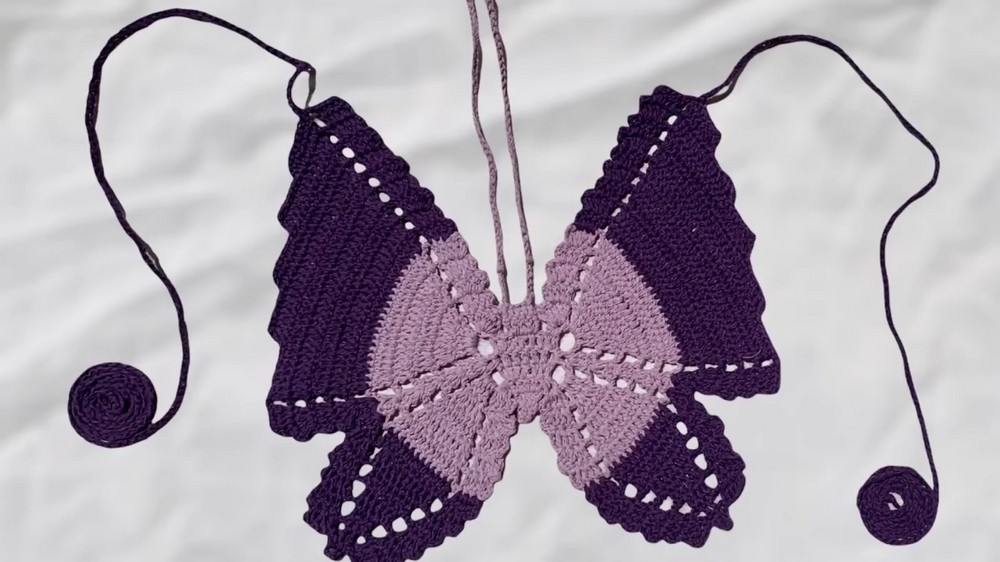
Back Ties: On the final row of the top wings, chain a long cord (approx. 100+ chains) to create the criss-cross lacing for the back [38:32].
-
Edge Detail: Finish the bottom wing tip with a “picot-like” detail (ch 3 and slip stitch back into the base) for a pointed look [44:52].
Special Features
-
Simplified Design: Unlike previous versions, this pattern eliminates complex relief stitches to help beginners succeed.
-
Adjustable Fit: The design includes long neck ties and back straps that crisscross, allowing for a custom fit on various body types.
-
Anatomical Shaping: The pattern uses specific increase sequences for the upper wings to provide better coverage and shape for the bust.
-
Trendy Aesthetic: It replicates the famous butterfly top seen on influencers like Jade Picon, featuring a “staircase” edge finish .
Level of Difficulty
The tutor classifies this project as Easy / Beginner-Friendly [00:17]. By removing the textured relief points that caused difficulty in earlier versions, the tutor ensures that even those new to crochet can follow the rhythm of the increases and decreases.
Tutor’s Suggestions
-
Consistent Counting: Always count your stitches during the increase phases (like the jump from 5 to 10 stitches) to maintain symmetry between the left and right wing.
-
Custom Sizing: Follow the base pattern for size Small (P). For size Medium (M), add two extra rows of the increase pattern, and for size Large (G), add three extra rows.
-
Symmetry Check: Match the wing placement on the second side by referencing the exact row heights used on the first side.
Uses:
Perfect as a summer top, festival outfit, or beach cover-up.
Tip: When finishing the straps, tie a simple decorative knot at the base of the neck ties to simulate butterfly antennae for an extra touch of charm.
Conclusion
This butterfly cropped top combines ease of construction with a high-fashion look. By following the systematic wing increases and the “staircase” decrease method, you create a professional-grade garment that is both stylish and comfortable. Enjoy your new handmade piece!