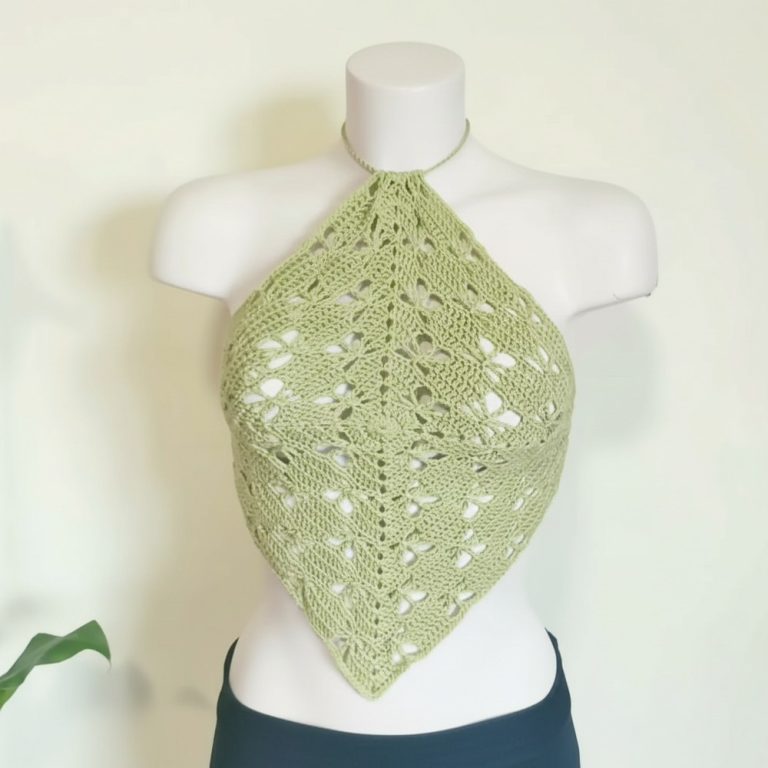
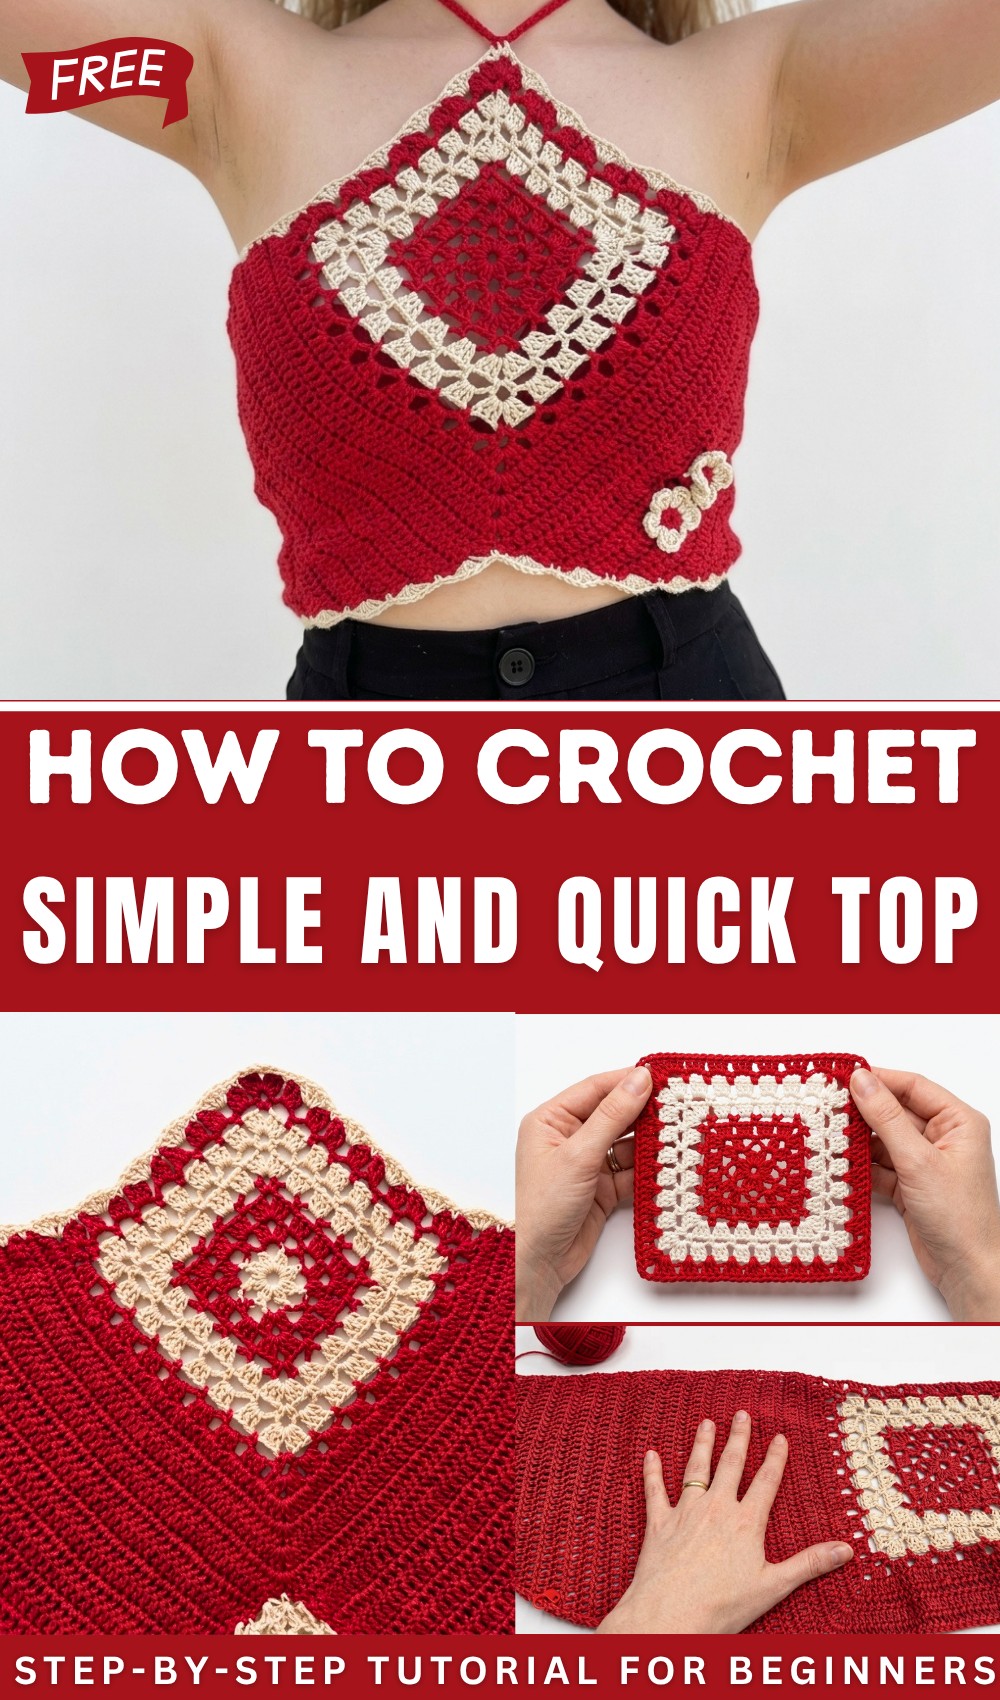
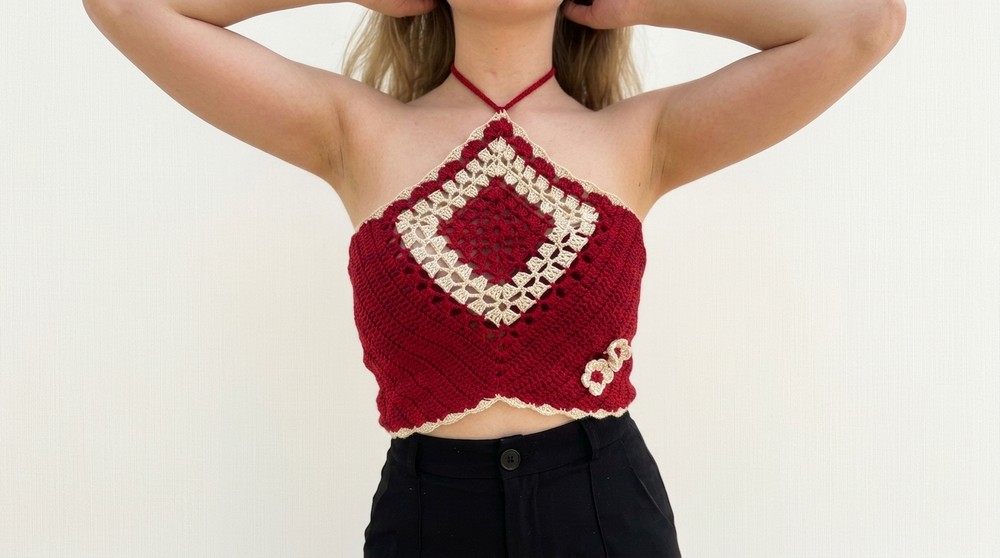
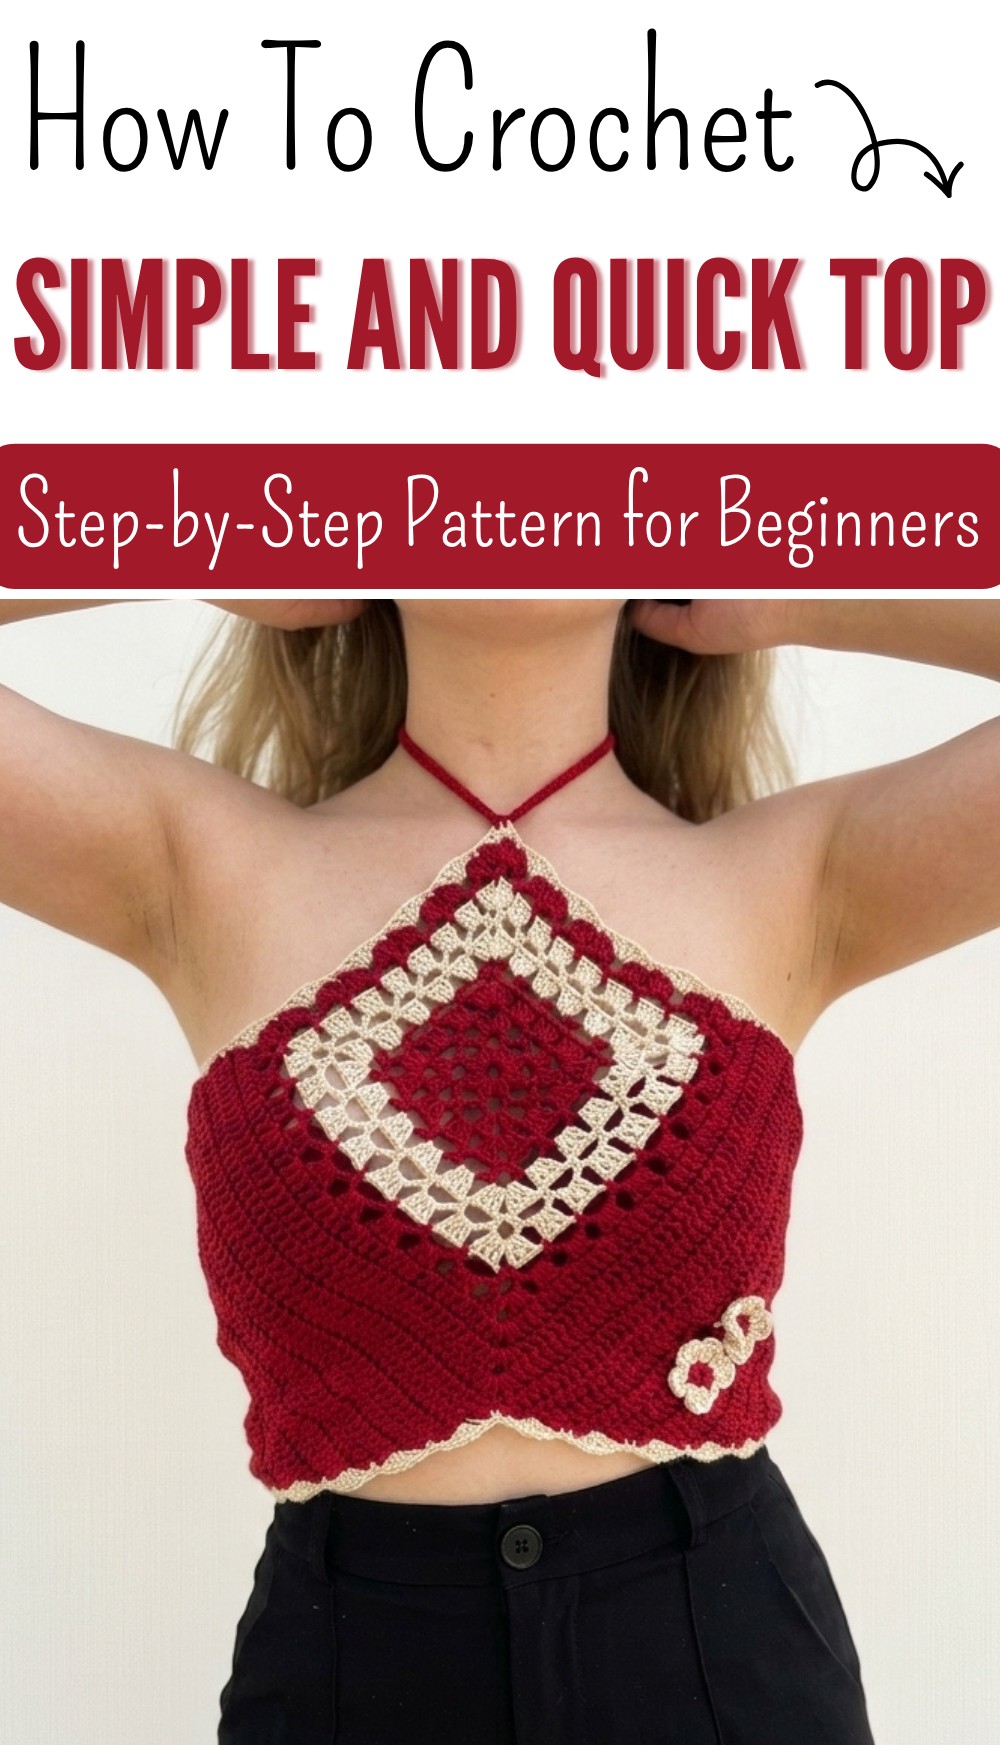
Crochet Alba Top Free Pattern
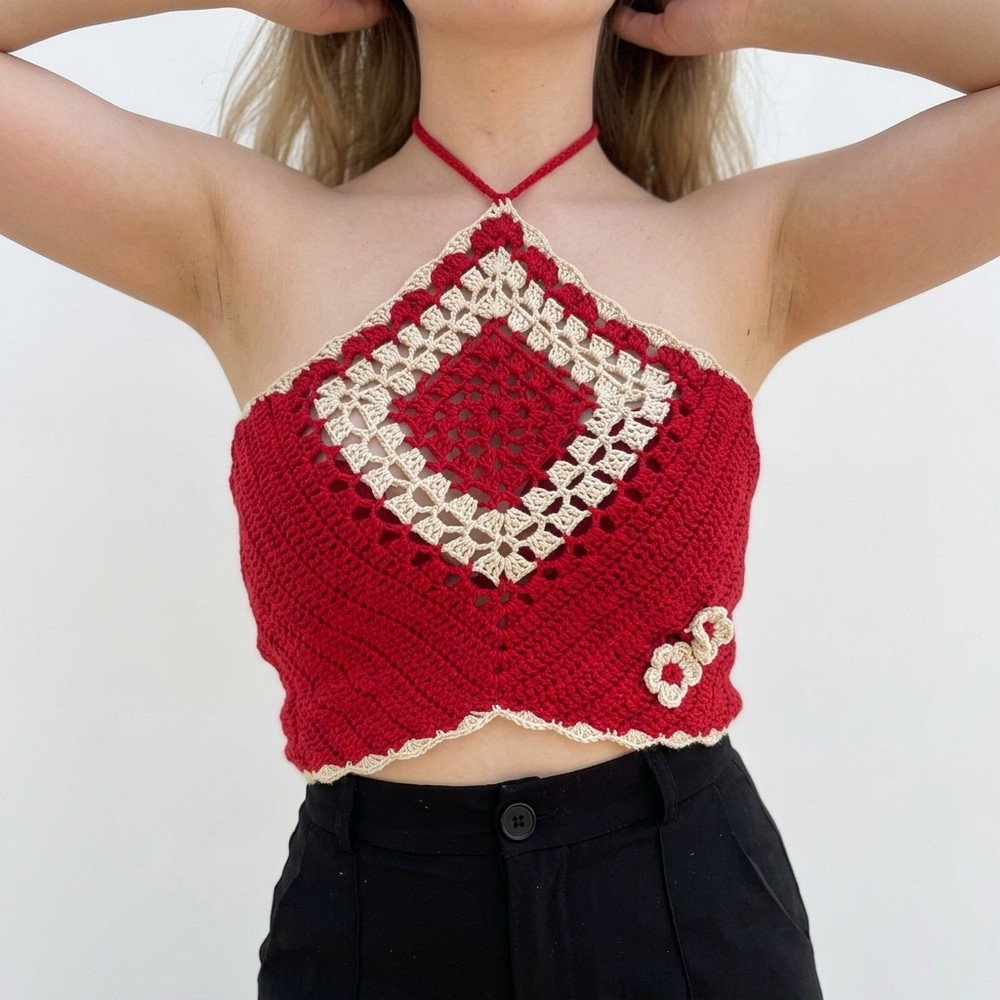
Learn how to crochet a comfy and stylish Alba top with this free guide, easy to follow for making a beautiful outfit that’s perfect for any casual day.
With its elegant design and breathable texture, this top is a perfect addition to any wardrobe. Featuring a light and airy feel, it’s ideal for warm weather or adding a stylish layer during cooler seasons. The detailed stitchwork gives it a charming look, while the comfortable fit makes it suitable for all-day wear. It’s a piece that pairs beautifully with jeans, skirts, or any casual outfit, making it both versatile and practical.
Easy Free Crochet Alba Top Pattern – Perfect for Casual Outfits
This top isn’t just about style—it’s also designed to suit different body shapes, ensuring you feel confident and comfortable. Whether you’re dressing up for an outing, relaxing at home, or packing for a sunny getaway, the Alba Top offers timeless beauty and ease for every occasion.
Crochet Top Pattern: Step-by-Step Guide
Skill Level
Intermediate to Advanced
Materials List
- Yarn: Approx. 80g of lightweight cotton or DK weight yarn (Recommended: Tessiland Yarn or similar)
- Crochet Hook: Size 2.5mm
- Scissors
- Tapestry Needle: For weaving in ends and sewing pieces
- Stitch Markers (optional): For keeping track of corners and important stitches.
Key Abbreviations
- ch: Chain
- sc: Single Crochet
- dc: Double Crochet
- sl st: Slip Stitch
- sp: Space
- yo: Yarn Over
- st(s): Stitch(es)
- rep: Repeat
Special Notes
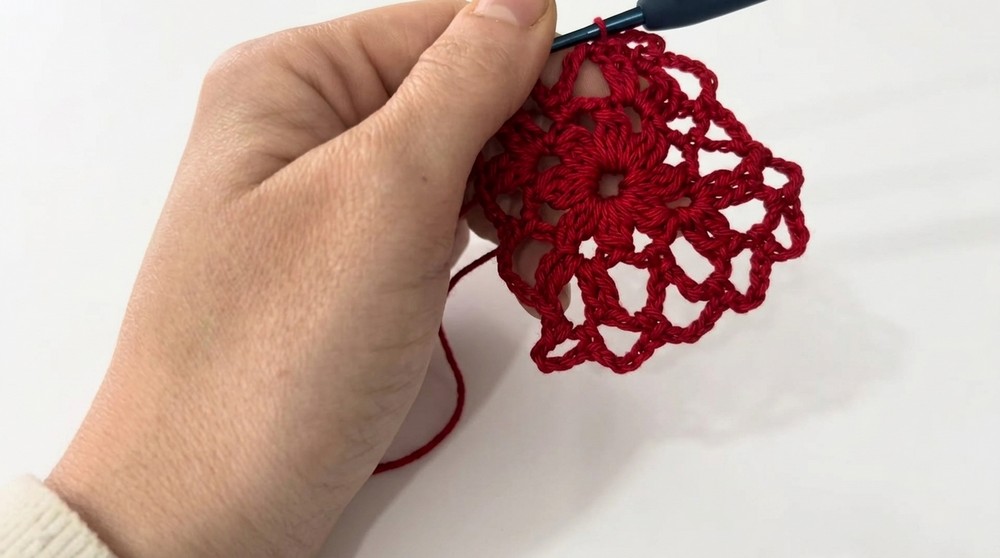
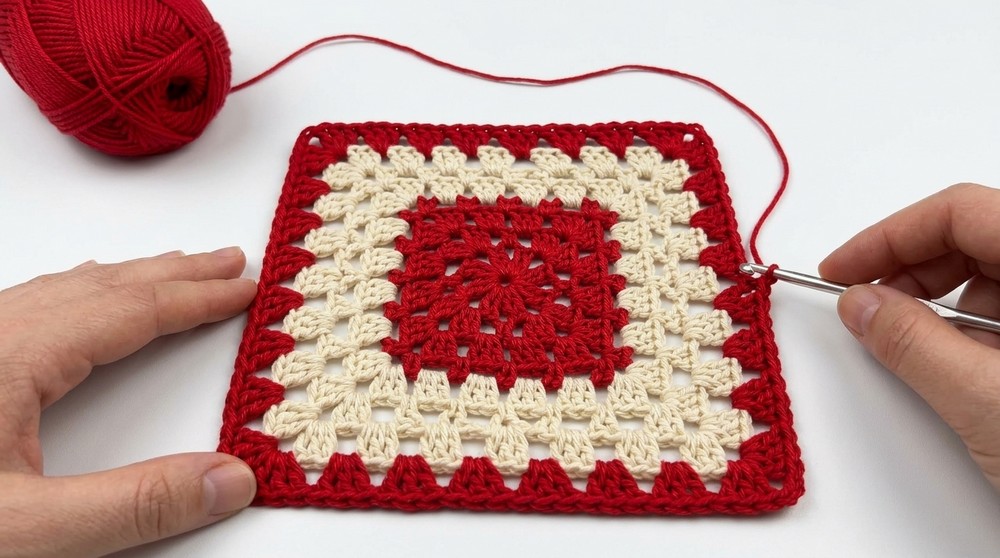
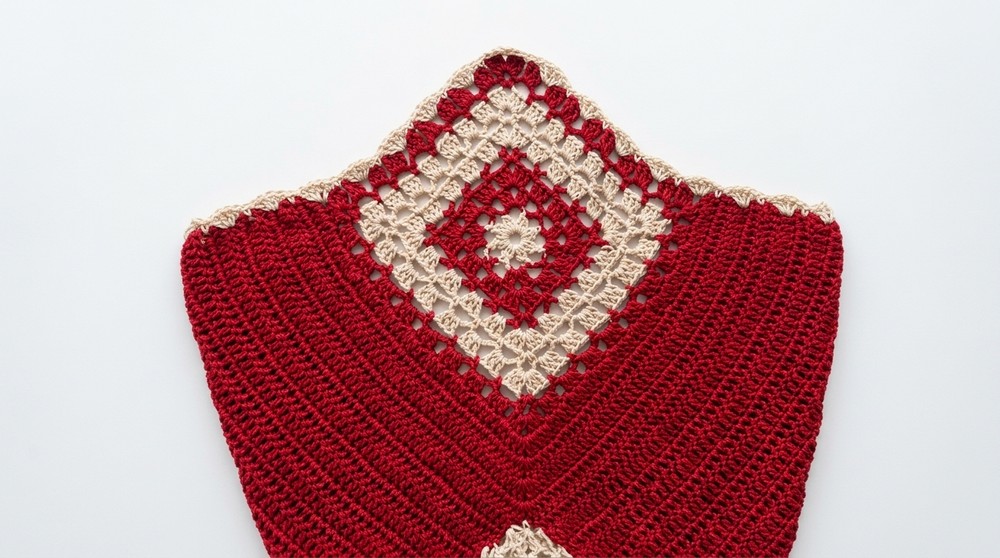
- Gauge: Ensure your gauge matches the pattern for accurate sizing. A single tile should measure 17 cm x 17 cm.
- This top is made by first building individual tiles, which are then joined and extended to form the top.
- You can customize the size using the tips provided under customization.
Pattern Instructions
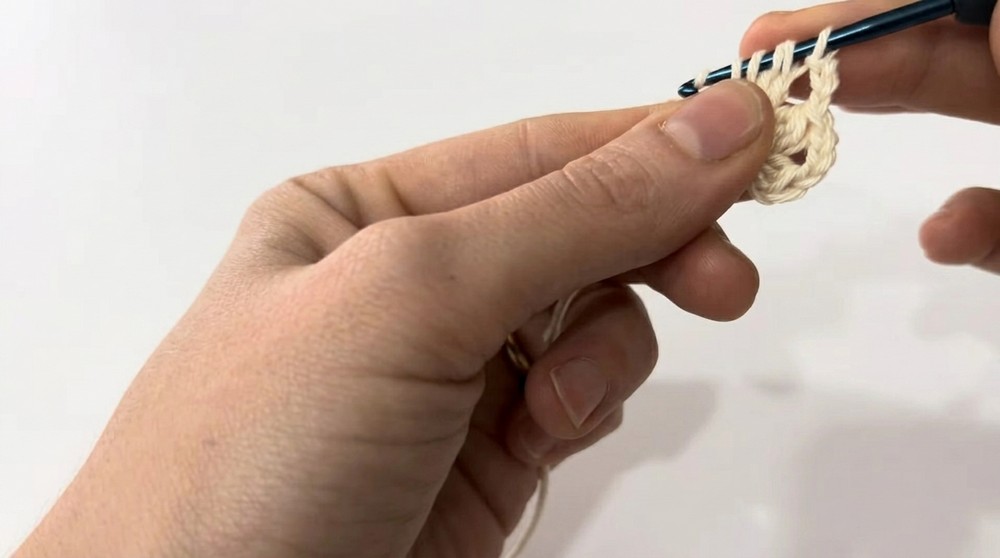
Step 1: Tile Base
First Round
- Create a magic ring and work into the ring:
- Chain 2 (does not count as a dc).
- Work 3 dc closed together (cluster stitch).
- Chain 3 for separation.
- Repeat the sequence (3 dc closed together, ch 3) until you have 8 clusters total.
- Tighten the magic ring and sl st into the top of the first cluster to close the round.
Second Round – Define the Corners
- Sl st into the first ch-3 space.
- Work the following in the space:
- Ch 3, dc, ch 4, and 2 dc (this forms a corner).
- Ch 5, sc in the next ch-3 sp.
- Repeat: (2 dc, ch 4, 2 dc) in next ch-3 sp, ch 5, sc in the next ch-3 sp.
- Continue the sequence around and join with a sl st to the initial chain.
Third Round – Arches
- Ch 1, sc in the corner space.
- Work:
- Ch 5, sc into the next ch-5 space.
- Repeat (ch 5, sc in ch-sp) until you reach a corner.
- At each corner:
- Sc, ch 5, sc in the corner ch-4 space.
- Continue this pattern around, and join with a sl st to the first sc.
Step 2: Alternating Rows of Double Crochet and Arches
Fourth Round (dc Rows)
- Sl st into the first ch-5 space.
- In each corner: (3 dc, ch 4, 3 dc).
- In each ch-5 space along the sides:
- Work 3 dc, followed by ch 1.
- Continue this pattern (corners: (3 dc, ch 4, 3 dc); sides: (3 dc, ch 1)) around the tile.
- Join with a sl st to the top of the first dc.
Fifth Round (Arches)
- Ch 1, sc into the corner ch-4 space.
- Work: Ch 5, sc into each ch-1 sp and ch-5 sp along the sides.
- At each corner: Sc, ch 5, sc into corner ch-4 space.
- Continue around, and join with a sl st.
Step 3: Expand the Tile to 17 cm
- Alternate dc rows and arch rows until your tile measures 17 cm x 17 cm.
- The specific number of rounds may vary depending on yarn and hook size. For the example, 7 rounds were used.
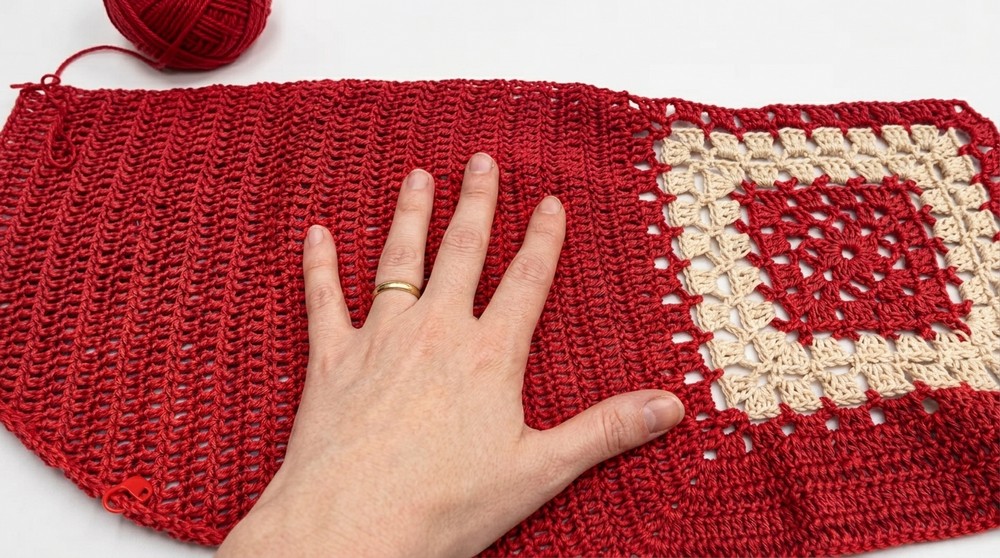
Step 4: Assemble the Top
- Place the tile diagonally to form a diamond shape.
- Work along opposite edges of the diamond (the two sides of the diamond forming the top and bottom). These rows will form the structure of the top.
Work the Double Crochet Rows
- Start at one side of the diamond:
- Attach yarn to the corner space.
- Chain 3 (counts as a dc), and work dc in each st and dc in each chain space across.
- At the corner: Work (2 dc, ch 1, 2 dc) into the corner space.
- Turn and work rows of dc back and forth until desired coverage for the bodice is achieved.
Step 5: Back Shaping with Decreases
- Begin working 1 decrease at the start and end of every even row.
- Alternate rows: Work even rows with decreases and odd rows without decreases, repeating this pattern.
- Continue this alternating pattern of rows for 16 rows. Then, reduce stitches at the end of every single row for 10 rows until the back is complete.
Step 6: Edging
Bottom Edging and Top Edging:
- Attach yarn at the bottom edge.
- Work:
- Sc in first st, 4 dc in the next st, sc in the following st.
- Repeat the scallop pattern across the bottom edge.
- Repeat for the top opening of the top.
Step 7: Straps
- Attach yarn at the center of the top edge.
- Chain 70 (or desired strap length).
- Turn and sc back along the chain to thicken the strap. Join with a slip stitch.
- Repeat on the opposite side of the top edge for the second strap.
Finishing Touches
- Weave in all loose ends carefully.
- Attach buttons on the back panel for closure.
Final Considerations
Conclusion
You have now completed your crochet top! This beautiful, lightweight top is perfect for summer or spring and can be tailored to different sizes by adjusting the starting tile size and the number of rows for shaping.
Pattern Corrections
- Ensure that all corners throughout the tile and shaping create clean, symmetrical edges.
- Double-check stitch counts for every row to avoid uneven shaping.
Tips
- Blocking: Block your completed top to make edges neat and achieve the final measurements.
- Custom Fit: Customize the strap and bodice length for the perfect fit.
- Yarn Choice: Use lightweight yarn for a breezy feel, or experiment with variegated or gradient yarn for a colorful effect.