Unique Crochet Butterfly Top Pattern for Bold Looks
Boost your wardrobe with this Free Crochet Butterfly Top Pattern offering fluttery shape, comfy fit, and eye catching appeal for casual days.

Elegant Crochet Butterfly Top Pattern With a Feminine Shape
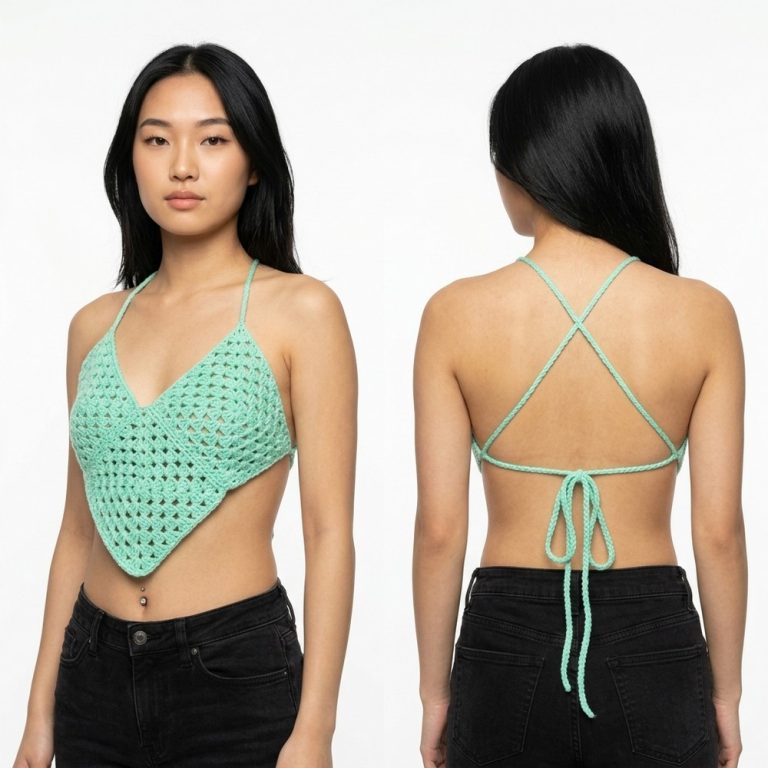
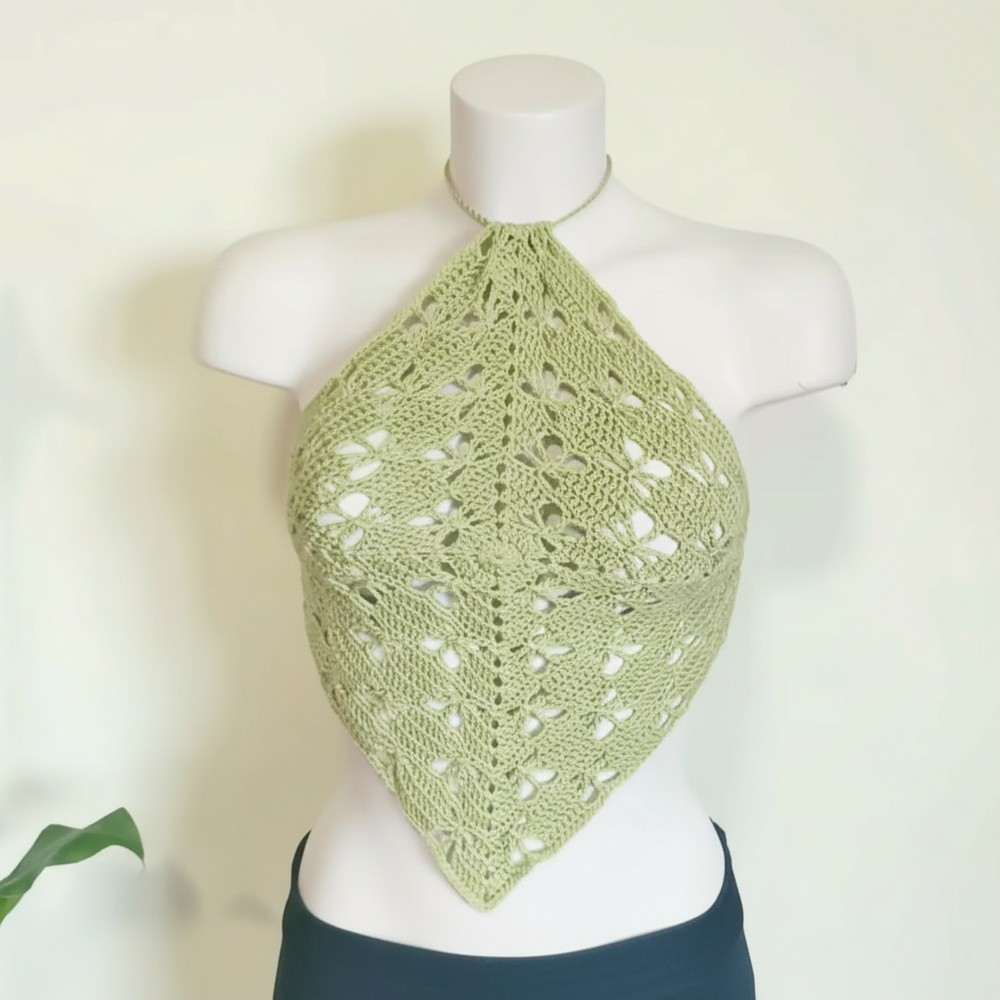
A burst of playful charm and feminine allure elevates summer wardrobes with this distinctive wardrobe choice. The crochet butterfly top pattern features bold lines that mimic delicate wings, bringing whimsical elegance to warm-weather outfits and making it ideal for music festivals, beach outings, or casual get-togethers. Light, airy yarns and supportive shapes ensure all-day comfort, while the striking butterfly motif draws the eye and celebrates individuality.
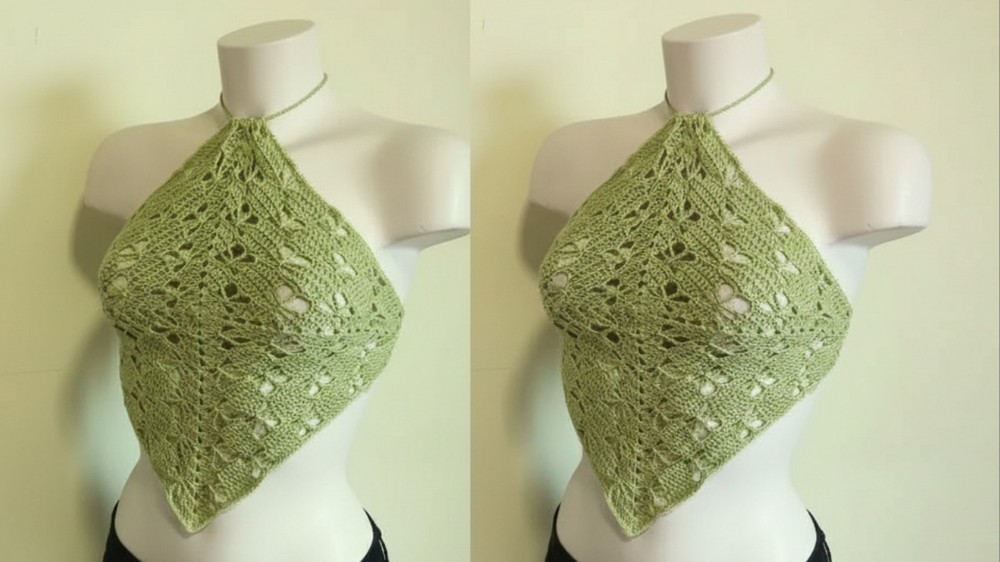
This pattern gives plenty of room for customization, offering adjustments in size, color palette, and strap style to create a piece that suits any personality or occasion. Its openwork detailing adds an element of sophistication and showcases personal flair far beyond basic tops. Presently, it enjoys popularity among those who love adding unique, handmade accents to their ensembles, perfectly capturing both modern trends and a sense of carefree summer spirit. This pattern beautifully balances expressive style with everyday versatility.
Required Materials
-
Yarn: Category 2 (Fine) Acrylic yarn.
-
Featured Color: Vibrant Green [01:13].
-
-
Hook: 2.5mm crochet hook [01:30].
-
Notions: Stitch markers (optional), tapestry needle, and scissors [01:21].
Pattern Instructions
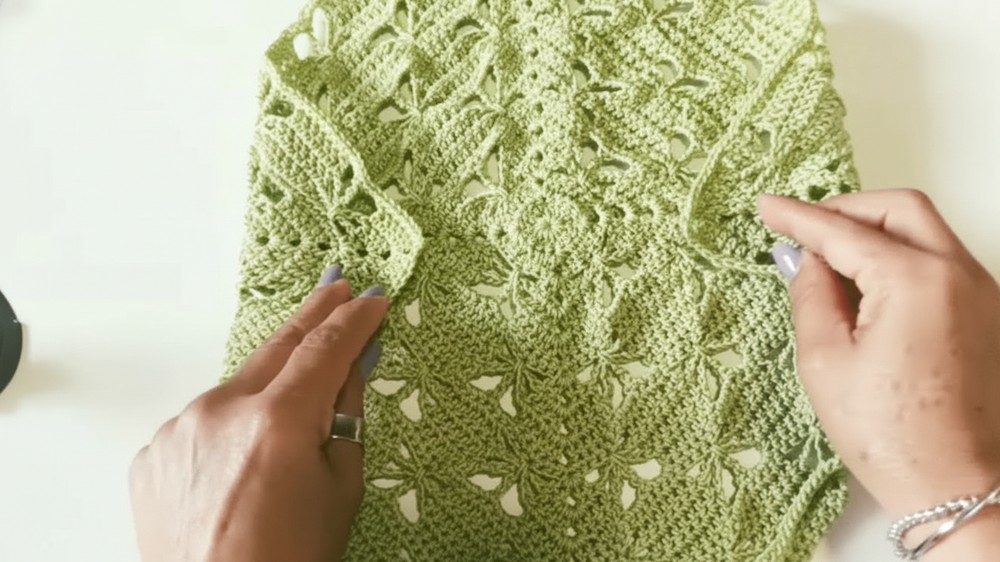
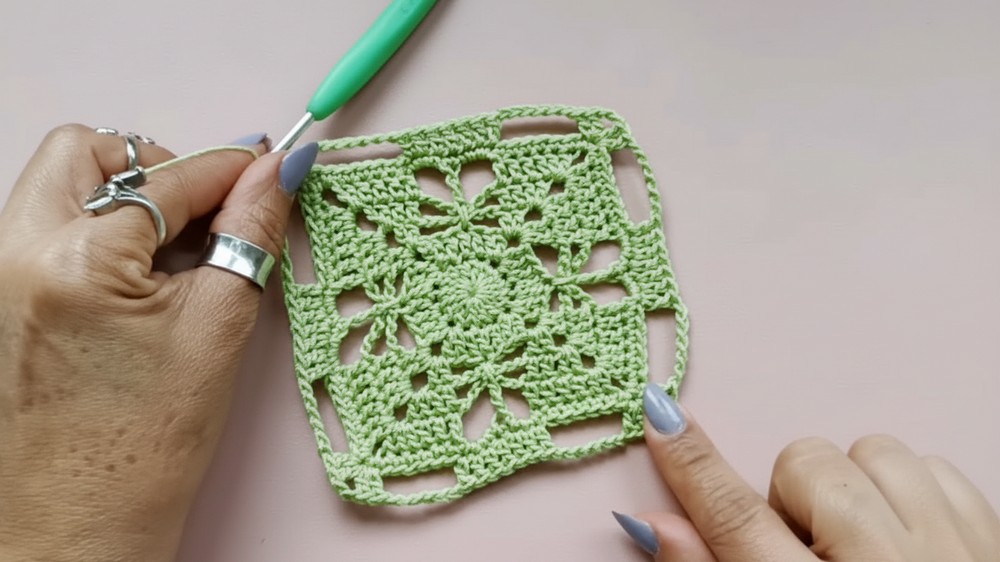
1. Foundation and Central Square
-
Round 1: Start with a magic ring. Ch 3 (counts as dc), then work 15 double crochets (dc) into the ring (16 dc total). Pull the ring closed and join with a slip stitch (sl st) [01:31].
-
Round 2 (Establishing Corners): Ch 5 (counts as dc + ch-2). In the same space, work 2 dc. Work 1 dc in each of next 3 st. In next st, work (2 dc, ch 2, 2 dc) for the corner. Repeat around. Join with a sl st [03:20].

2. The Butterfly Stitch Sequence (Rounds 3–5)
This pattern relies on a repeating 3-round sequence to expand the square and form the butterflies [17:26].
-
Round 3 (Establishing Gaps): sl st into the corner. Ch 5 (dc + ch-2), 2 dc in same space. Ch 6, skip the side stitches, and work (2 dc, ch 2, 2 dc) in the next corner. Repeat around [06:24].
-
Round 4 (Expanding Gaps): Repeat Round 3, but work dc into the top of the Round 2 side stitches to start filling the gaps (4 dc per side) [08:36].
-
Round 5 (The Butterfly): * Step 1: Work dc along the side.

3. Expanding the Top
-
The Transition Round: After every butterfly round, work a solid round of single crochet (sc) around the entire square. Work 3 sc into every ch-3 space and 1 sc on top of each butterfly body [18:34].
-
Growth: Repeat the 3-round butterfly sequence (Rounds 3–5) and the transition sc round until the square reaches your desired size. The featured top uses 17 rounds (approx. 33cm wide) [29:13].
Final Assembly
- Shoulder Casing: Fold one corner of the square down (wrong sides together) to form a triangle. Sew the edges of this folded corner together to create a small “tunnel” or casing [32:00].
-
The Drawstring: Create a long cord (approx. 400 chains) using two strands of yarn held together for thickness [30:09].
-
Tying: Thread the cord through the shoulder casing to create a neck tie. Criss-cross the remaining ends of the cord through the side corners of the square to tie the top at your back [33:45].