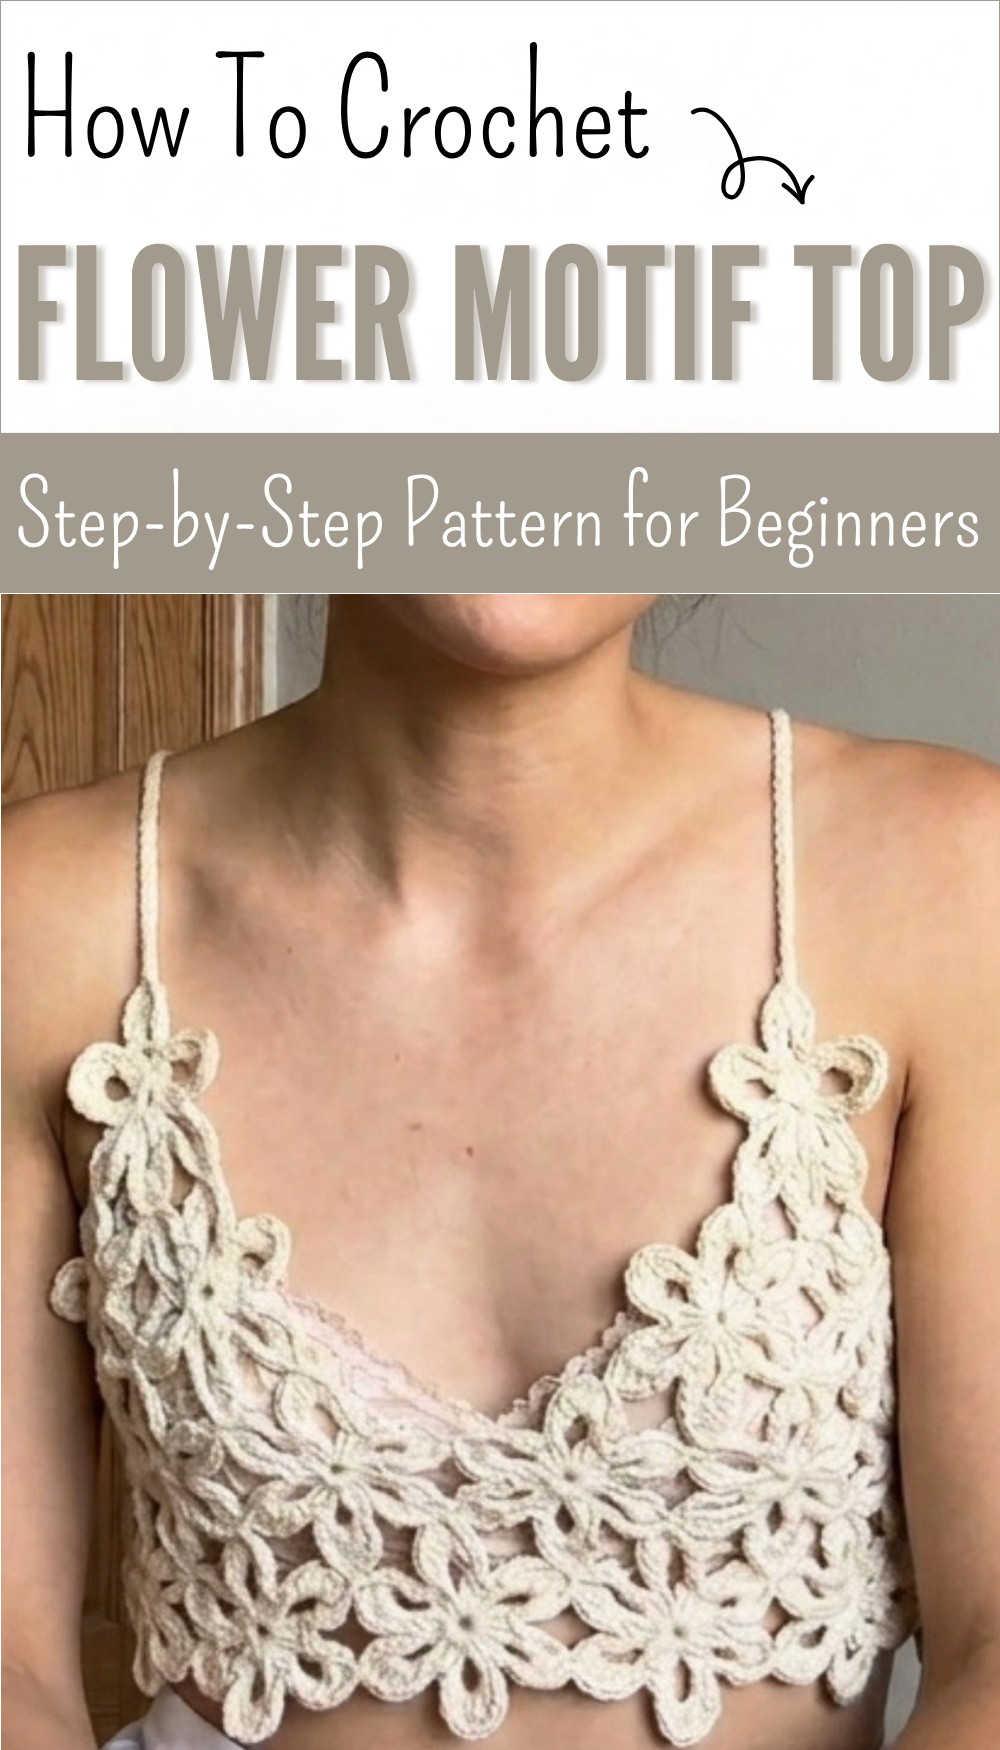
Cool Free Crochet Flower Motif Top Pattern for Festival Vibes
Refresh your wardrobe with Free Crochet Flower Motif Top Pattern featuring simple instructions for creating a beautiful and breathable top.
Lightweight and breezy with a touch of summer magic this top are crocheted from cheerful flower shapes that interlock to make a fabric as pretty as a garden in bloom. Bright or pastel colors can be mixed together making each one totally unique and sure to catch every eye. The design is simple to make—step by step you join flower pieces until you have a length that fits your body then add ties for the shoulders and back making the fit easy and comfy for anyone.
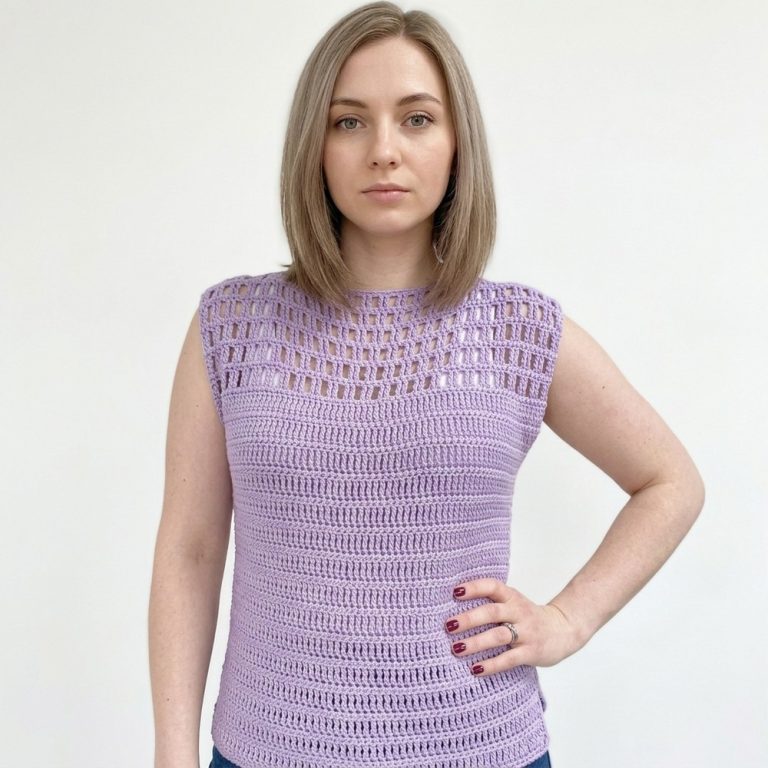
Airy Free Crochet Flower Motif Top Pattern for Hot Days

With a Crochet Flower Motif Top pattern you create not only beautiful clothing but also a soft and airy layer great for beaches festivals or sunny days. Even if you have never tried crocheting before this pattern is your gateway to learning—each finished piece is a celebration of hands-on creativity. The joyful look uplifts your spirit and gives you a handmade treasure to wear with pride.

free Crochet Flower Motif Top Pattern
Materials
- Yarn: Fine weight (2) cotton or cotton blend yarn is recommended (any light or fingering weight can be used)
- Hook: 2.25 mm crochet hook (or size needed for gauge/desired drape)
- Notions:
- Yarn needle (for weaving in ends & joining motifs)
- Scissors
- Blocking pins and mat (optional for shaping)
- Optional: Stitch markers
Key Abbreviations & Special Notes
| Abbreviation | Meaning |
|---|---|
| ch | chain |
| sl st | slip stitch |
| sc | single crochet |
| hdc | half double crochet |
| dc | double crochet |
| st(s) | stitch(es) |
| rep | repeat |
| RS/WS | Right/ Wrong Side |
Special Notes:
- All instructions use US terminology.
- The flower motif makes up the entire fabric of the top. It is sized by making more or fewer motif rows/columns.
- Motifs are joined as you go. Custom fitting is highly encouraged.
- For best results, block motifs after assembly.
Pattern
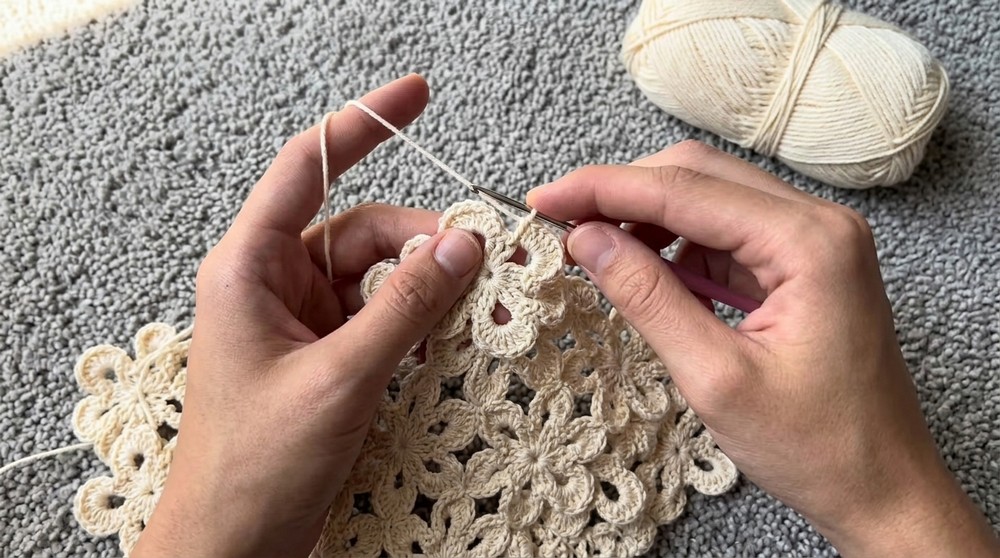
1. Flower Motif (Make as Many as Needed)
Round 1:
- Make a slip knot, then ch 4.
- Sl st into the 1st ch to form a ring.

Round 2 (Petals Foundation):
- Ch 3 (counts as 1st dc).
- Dc in ring (now you have 2 dc).
- Ch 6 (first petal space).
- Into ring, work 3 dc.
- Ch 6.
- Rep [3 dc, ch 6] into ring 4 more times (for a total of 6 petals).
- After last set: Dc once more into ring (to complete the final petal).
- Sl st into the top of initial ch-3 to close the round.
(You should have six 3-dc clusters with 6 ch-6 petal arches.)

Round 3 (Petal Rounding):
Working into each petal’s ch-6 loop:
- Ch 1, sc into the petal loop.
- Hdc into the same loop.
- 7 dc into the same petal loop.
- Hdc into same petal loop.
- Sc into same petal loop.
- Ch 1.
- Sl st into the 2nd dc of the 3-dc group (from prior round base).
- Rep steps 1–7 in each petal’s ch-6 loop around.

At the end of the final petal, join with a sl st to the base of the starting single crochet.
Fasten off if making a standalone motif. Weave in ends.

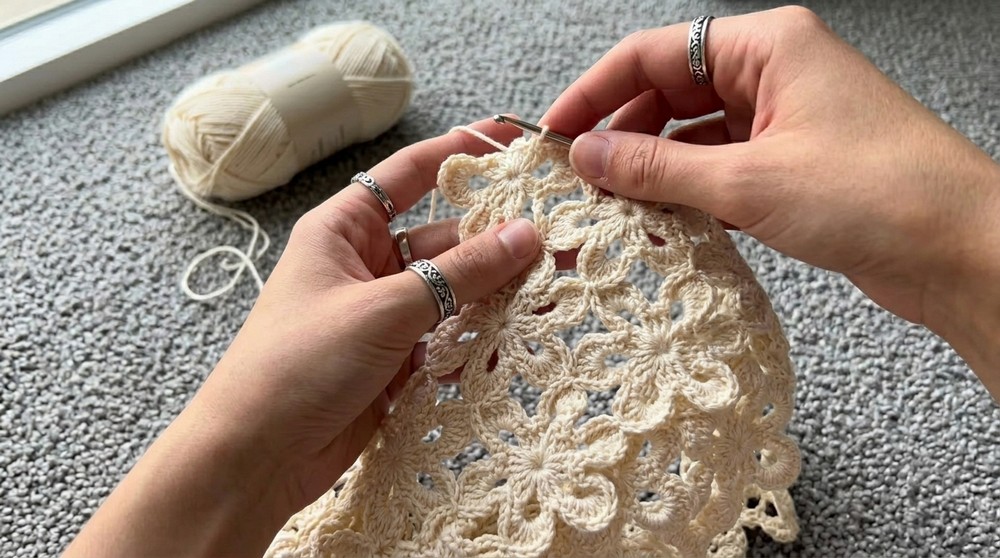
2. Joining Motifs (As You Go for Fabric Construction)
- Join at 2 points (side by side): When making a new flower to connect beside an existing one, on the 2 petals that will touch, work first 4 dc of the petal, then stop.
- With the loop on your hook, insert into the center dc of the adjacent finished motif’s target petal. Pull through (sl st join).
- Continue with final 3 dc, hdc, sc for your petal in progress.
- Repeat for the second joining petal.
- For corners or additional rows, join at 4 points as needed, always matching up petal positions.
- Last motifs in the row: join both start and end petals to create a loop (for top’s base row).
Note: The construction is modular; adjust the number of motifs and rows for width (bust) and depth (length) as needed.
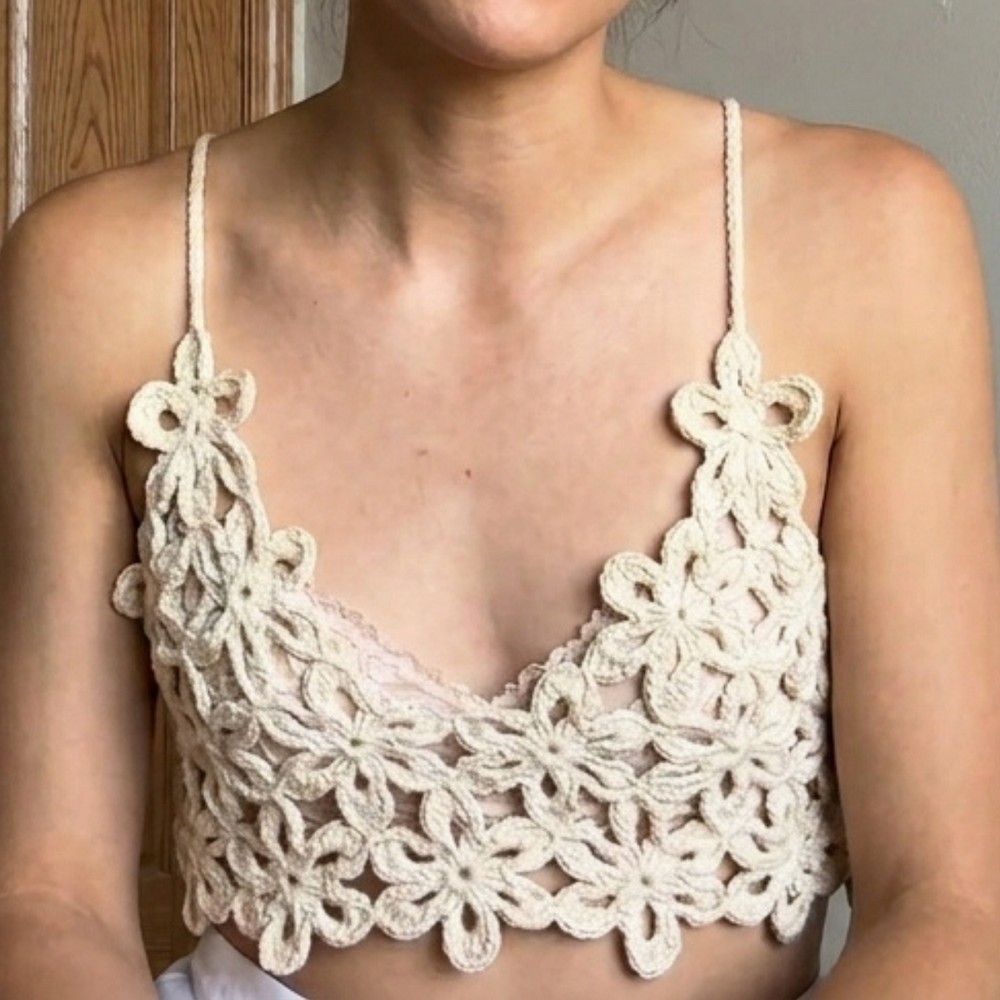
3. Bra/Cup Shaping (Top Section)
- After main body (base of top), stack and join motifs in the shape of two side-by-side triangles.
- For each cup: Use two motifs joined vertically, then one at the top middle, forming a triangle (three motifs per cup).
- Attach cups to the upper flower band at the desired positions.
4. Straps & Edging
- Straps:
Attach yarn to the upper corner of each triangle (flower cup).
Ch 80 (or desired strap length). Fasten off and weave in ends.
Repeat for each strap (halter and back). - Edging (Optional): Work single crochet or slip stitch edging around the top for neatness.
5. Finishing & Blocking
- Weave in all ends as you go using a yarn needle.
- Pro Tip: Weaving as you go is much easier than doing it all at the end.
- To prevent flower motifs from curling:
- Soak your finished top in lukewarm water with mild detergent for ~20 mins.
- Roll in towel to damp-dry.
- Lay on a flat surface, pin out each flower’s petals and edges into shape.
- Allow to dry fully (may take up to one day).
- This helps flatten motifs and improve the drape and fit of your top!
Sizing Guidance
- Top is highly customizable! To size:
- Measure bust; construct enough motifs to fit your measurement.
- Adjust motif rows and cup placement for desired coverage and fit.
- Adjust strap/chains for your frame.
Conclusion
This cheerful, lacy flower motif top is ideal for summer and completely size-adaptable. Modular motif construction means you can easily tailor width, length, and cup size to your preference. Simple assembly and joining techniques make this project approachable for advanced beginners and above.
Pattern Corrections & Tips
Corrections
- Joining: Be sure to always join petals in the corresponding position to avoid twisting the motifs.
- Curling: Light cotton blends are less likely to curl than acrylic; blocking makes a significant difference for petal shape.
- Ends: Weave as you go—don’t wait until the end for all motifs!
Tips
- As you add rows or go around the top, lay the piece flat to check shaping/fit.
- Try alternate color motifs or contrast edging for a personalized look.
- If you want a longer top, simply add more rows of motifs before creating the cups.