Easy Free Crochet Turtleneck Poncho Pattern for Cozy Fashion
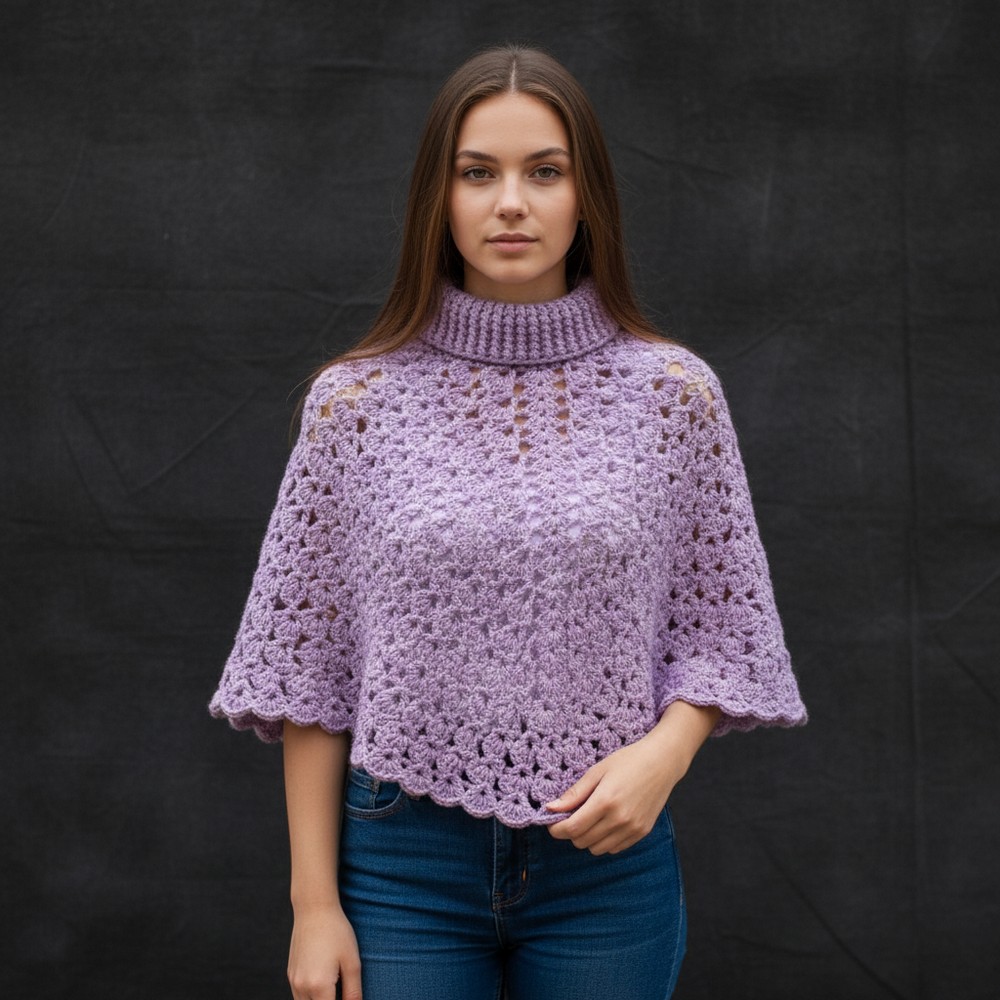
Embrace warmth and style with free crochet turtleneck poncho pattern that offers comfort & elegance perfect for cozy outfits all year round.
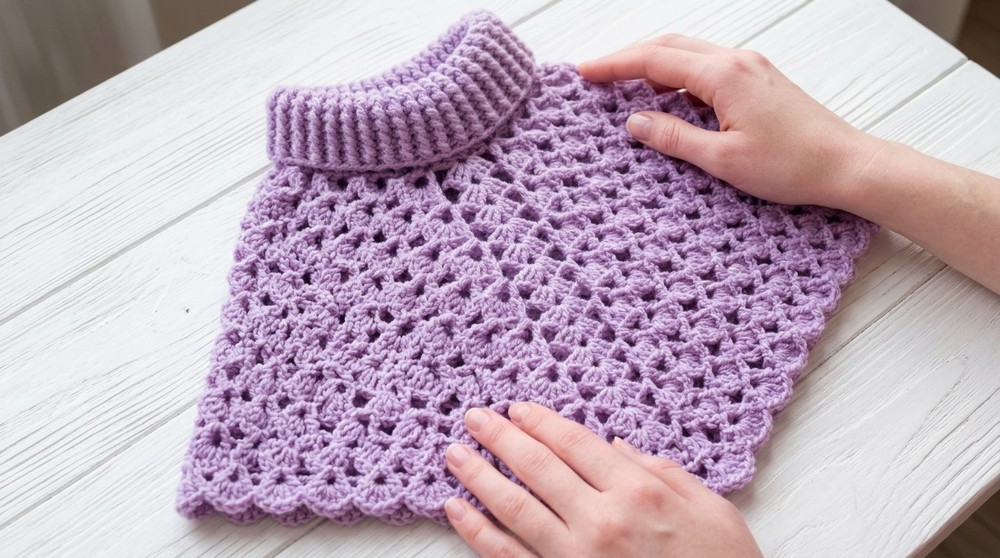
Soft and warm like a gentle hug this poncho wraps your shoulders and neck in cozy comfort while letting your arms move freely. The crochet turtleneck poncho pattern brings out a beautiful texture that feels both stylish and practical. Its high neck keeps you shielded from chilly winds and makes you look trendy every day. You can wear it over a simple dress or your favorite shirt and add a touch of elegance to any look.
Cozy Free Crochet Turtleneck Poncho Pattern Perfect for Chilly Days
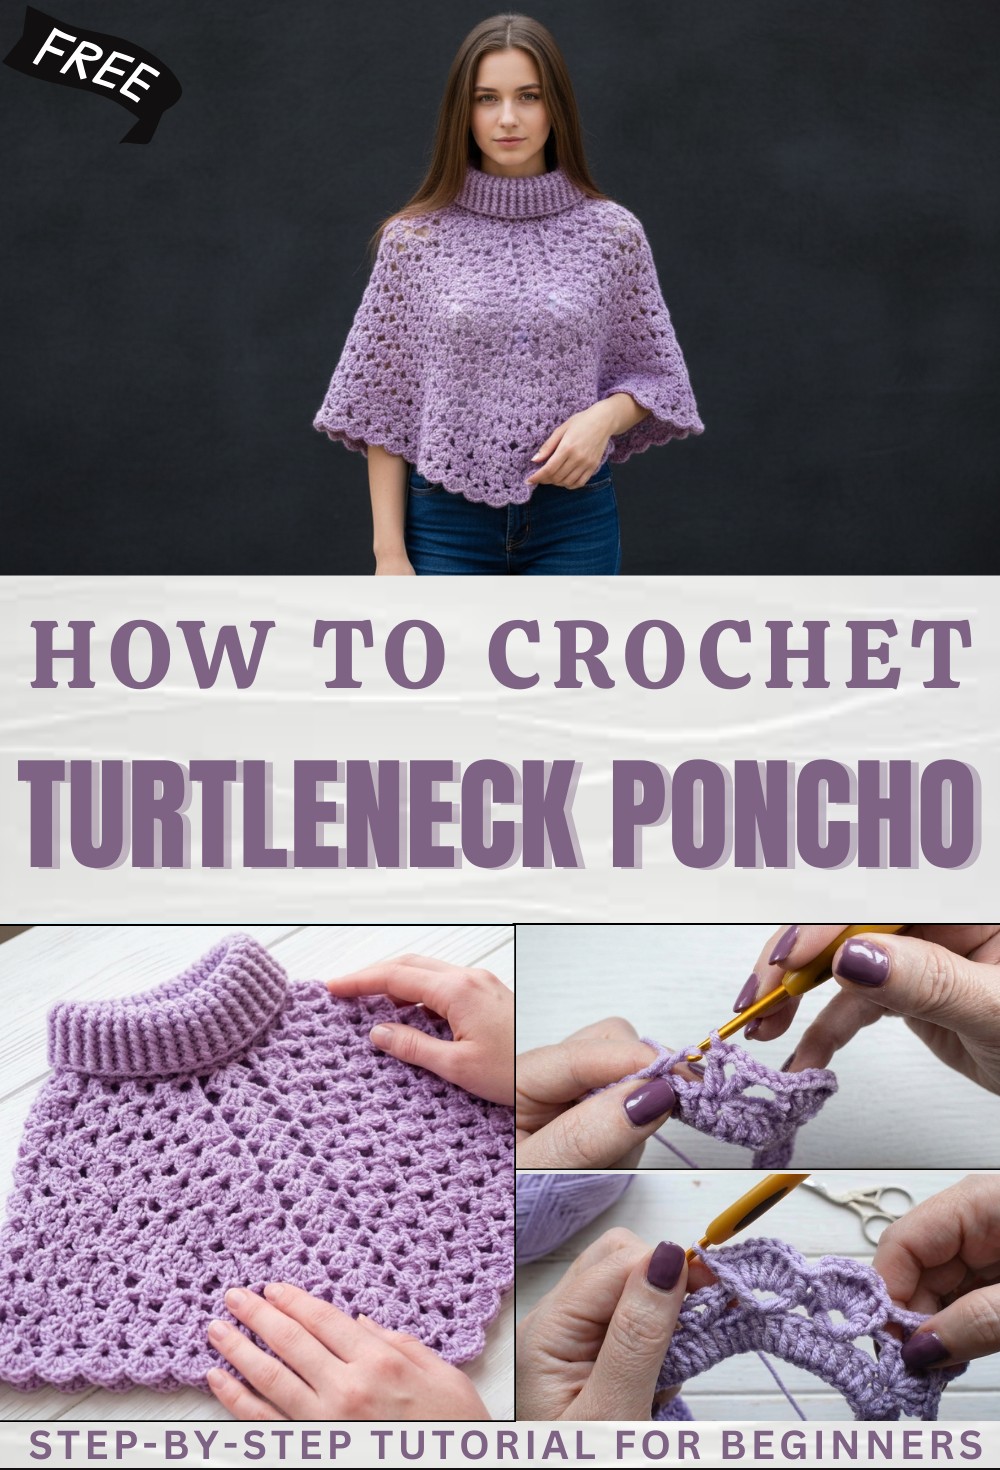
Perfect for cool weather this piece fits many body types and is simple to slip on and off with no zippers or buttons to worry about. The lovely stitches catch the eye and the draped design falls gracefully for a flattering shape. With the crochet turtleneck poncho pattern you get a wonderful layering piece that’s easy to care for and ideal for wearing indoors or out during any season.

Easy Free Crochet Poncho Pattern
MATERIALS
- Yarn: Worsted/Aran weight yarn (Size 4); approx. 200 grams
- Recommended for 2Y child; adjust quantity for larger sizes.
- Hook: 4 mm crochet hook (US G/6)
- Optional: Stitch markers, measuring tape, tapestry needle, scissors
ABBREVIATIONS (US Terms)
| Abbreviation | Definition |
|---|---|
| ch | chain |
| sl st | slip stitch |
| dc | double crochet |
| fpdc | front post double crochet |
| bpdc | back post double crochet |
| st(s) | stitch(es) |
| sk | skip |
| rep | repeat |
SPECIAL NOTES
- Foundation chain is a multiple of 4 (e.g., 80 ch for toddler size).
- The pattern is a 2-row repeat: “V row” & “Fan row.”
- You may adjust size by altering your starting chain (neck opening) and making more/less rows (length).
- Corners are increased on every round, giving the poncho its square V-shape.
PATTERN INSTRUCTIONS
A. Foundation
- Measure around the head plus a little extra for comfort.
- Ch a multiple of 4 to reach the measured length. (Sample: 80 ch = 44 cm / 17.5” for 2-year size)
- Join to first ch with a sl st to form a ring. Be careful not to twist!
B. Setup Round – Body Base
- Ch 3 (counts as 1st dc), dc in each ch around.
You should have your original number of chains in double crochet when finished. - When you reach halfway (e.g., 40 sts), mark this st with a piece of yarn. This is the first corner.
- Continue dc to the end of round. Mark the last st as the second corner.
- Join with a sl st to the 3rd ch at start.
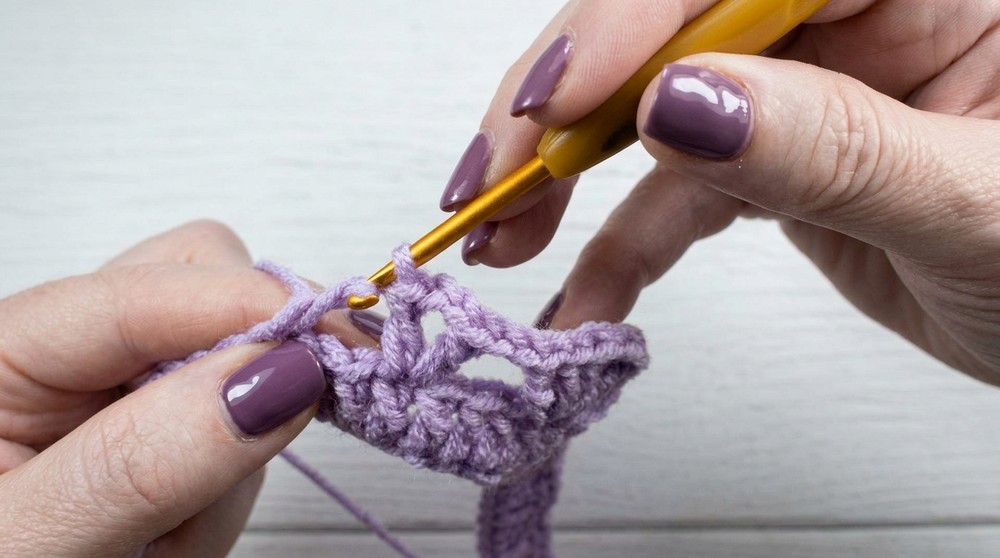
C. PATTERN ROWS
ROW 1: FAN CORNER & V ROW
- Ch 3 (counts as dc), 2 dc in same st (first corner fan made).
- 2 ch.
- 3 dc in same st (complete corner fan).
- 2 ch.
- Sk 3 sts. In next st: (V-stitch) [dc, 2 ch, dc] all in same st.
- Sk 3 sts, rep V-stitch in next st.
- Work V-Sts in this way to the marked corner.
- At each marked corner:
- [3 dc in same st, 2 ch, 3 dc in same st] (corner fan).
- 2 ch.
- Continue with V-stitch groups, separated by 2 ch, between corners.
- End row with a sl st to top of beginning ch-3.
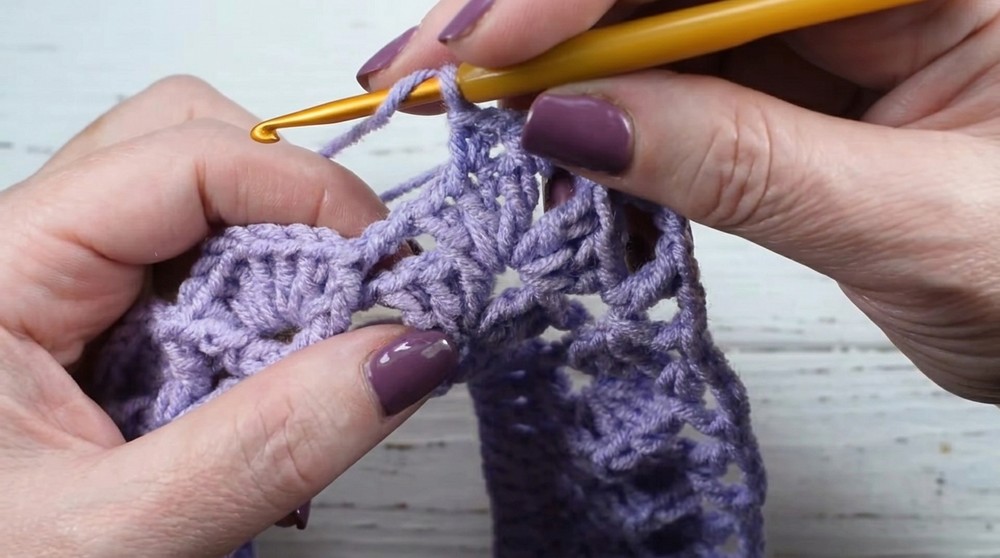
ROW 2: V ROW & FAN ROW (Row Repeats Begin)
- Ch 3 (counts as dc), 2 dc in same st.
- 2 ch.
- 3 dc in same st (corner fan).
- 2 ch.
- Work 1 fpdc around next dc (from previous row) after the corner.
- In next V-stitch space: (Fan stitch in V) [3 dc, 1 ch, 3 dc] in same space.
- Work 1 fpdc around next dc.
- Continue: fpdc, Fan in V, fpdc, Fan in V, to corner.
- In corners: [3 dc in same st, 2 ch, 3 dc in same st].
- Continue around.
- End row with a sl st to top of beginning ch-3.
ROW 3: Repeat Row 1
- Rep Row 1 directions, working V-stitches in the 2-ch spaces from the previous (fan) row, and corners as above.
ROW 4: Repeat Row 2
- Rep Row 2 directions, continuing the established pattern, making sure to create a new “fan” cluster in each V-st, and fpdc around the post as established.

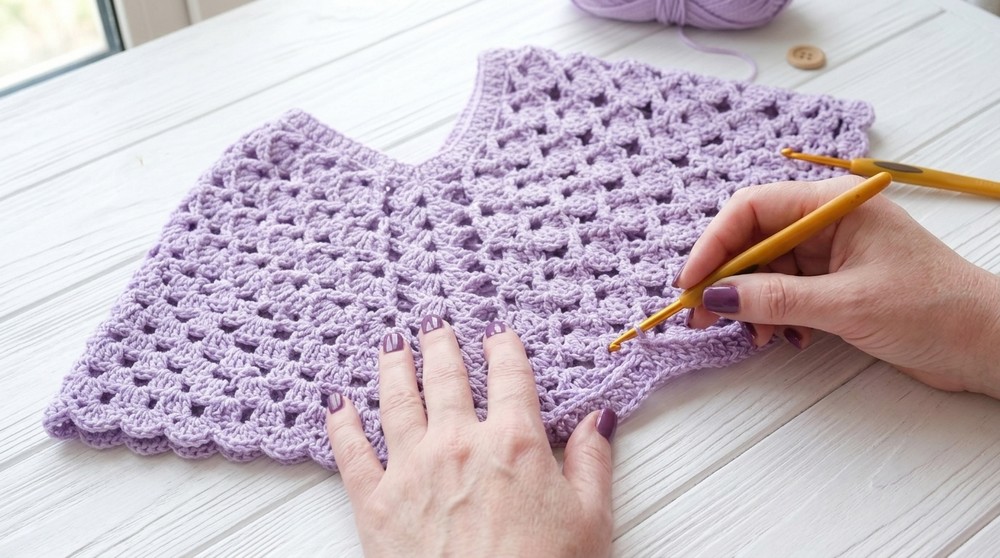
CONTINUE TO DESIRED LENGTH
- Repeat Rows 3 & 4 for a total of about 18 rounds or until reaching 23 cm (9″) long, or as long as desired.
- Always make sure each corner is: [3 dc, 2 ch, 3 dc] to preserve the shaping.
- More repeats = longer poncho.
- For larger sizes, add more foundation chains and rounds.
D. NECKBAND (Optional but Recommended)
- Join yarn at the neck edge.
- Ch 3; alternate fpdc and bpdc around (front post and back post double crochet), for elastic ribbing.
- E.g., [1 fpdc, 1 bpdc] repeating around the neck opening.
- Join with sl st.
- Rep ribbing row for a total of 4.5” (11 cm) or as wide as you like.
E. FINISHING
- Fasten off.
- Weave in all ends.
- (Optional) Add fringe, pom-poms, or buttons, as desired.
PATTERN CORRECTION
- The stitch count for the starting chain must be a multiple of 4.
- Always increase in corners: [3 dc, 2 ch, 3 dc] on both “Fan” and “V” rows.
- On V-rows, place V-stitch only in chain-2 spaces between fan groups.
TIPS
- Use stitch markers at each corner to prevent losing track of increases.
- Count your stitches at intervals to ensure symmetry between the front and back.
- For best results, lightly block the poncho after finishing to even out the stitches and corners.
CONCLUSION
This versatile poncho pattern fits all sizes—simply customize the neck circumference and rows. The alternating V and Fan stitches provide both beauty and structure, and the post-stitch ribbing at the neck ensures a neat finish.