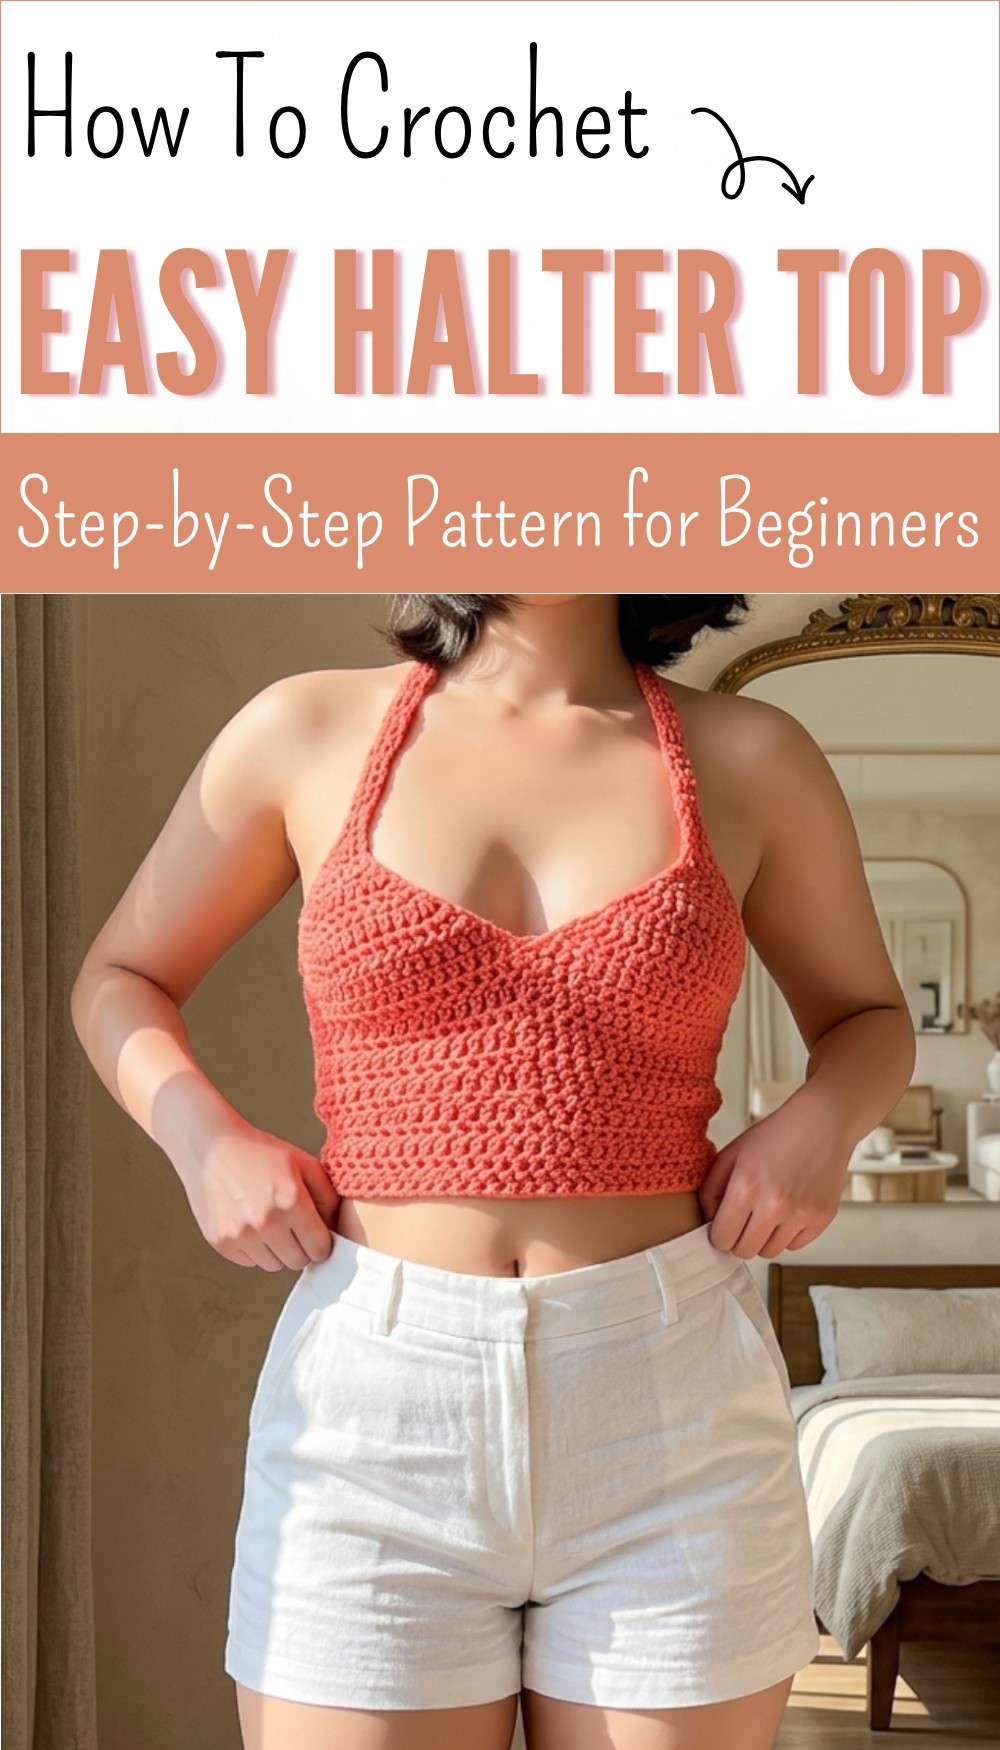
Trendy Free Crochet Halter Top Pattern You’ll Love to Wear
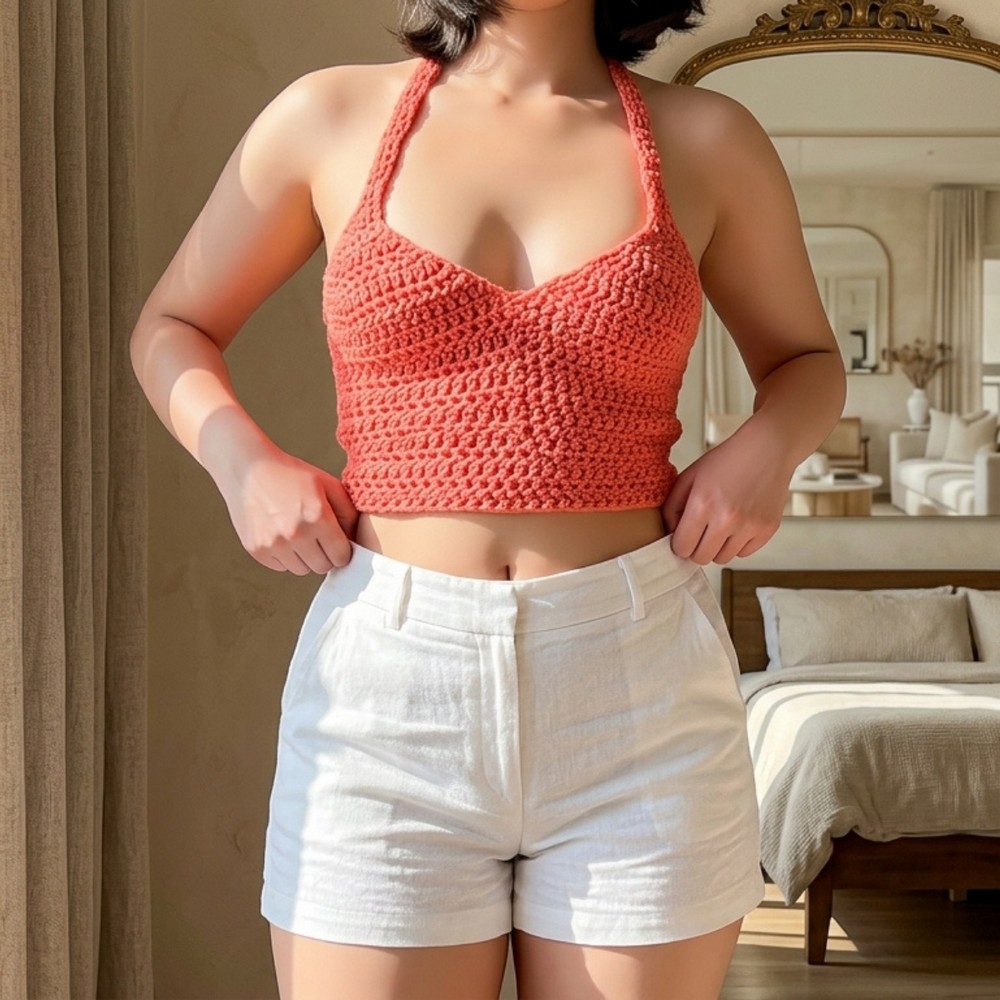
Dress up your summer with free crochet halter top pattern that is beginner-friendly stylish and perfect for sunny days and casual fun events.
Nothing brightens up a warm day like a stunning top designed with delicate stitches and vibrant colors that catch every eye and bring a smile to your face. Imagine wearing a piece that not only feels soft against your skin but also keeps you cool and comfortable under the sun—the magic comes alive with a crochet halter top pattern. This creative design lets you bring your style to life by choosing any shade you want, from bold reds to calm blues, making it truly one-of-a-kind.
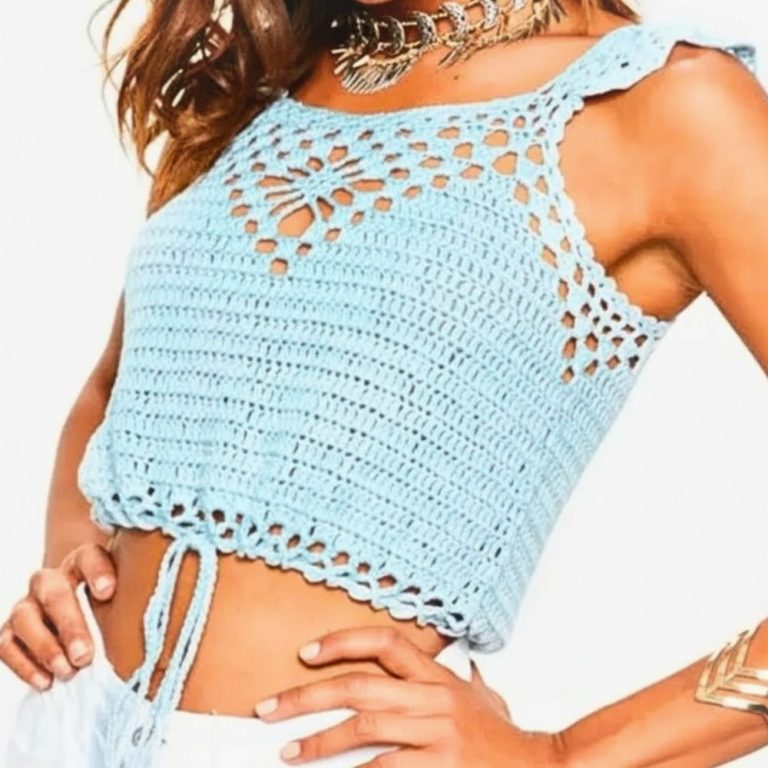
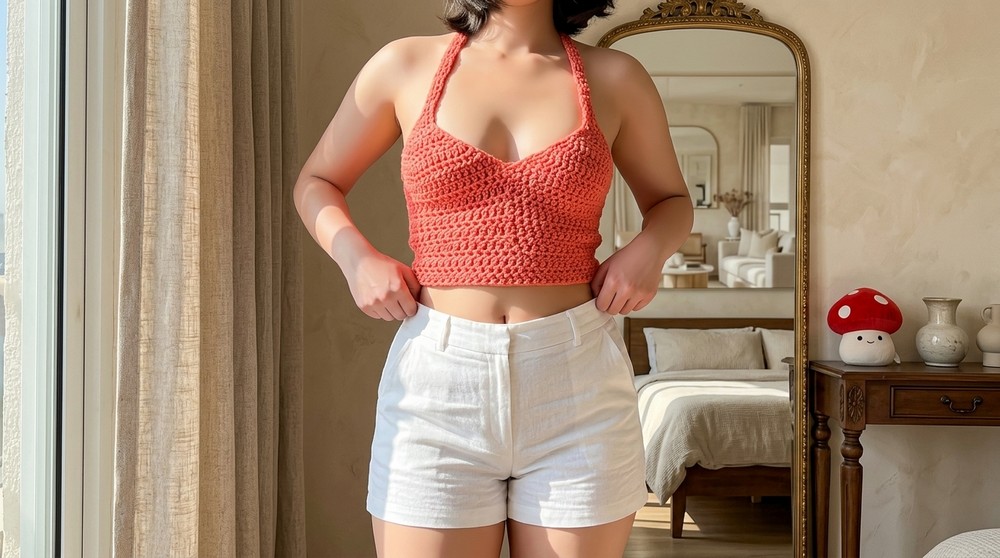
Boho-Chic Free Crochet Halter Top Pattern with Simple Steps

Easy to wear and perfect for any occasion, this top drapes beautifully, showing off a lovely neckline and tying neatly around your neck and back. Ideal for beach trips, festivals, or just relaxing at home, it gives you confidence and a sense of achievement when you say, “I made it myself.” Feel the joy and freedom as each stitch comes together, turning simple yarn into wearable art.
Viral Crochet Halter Top Pattern
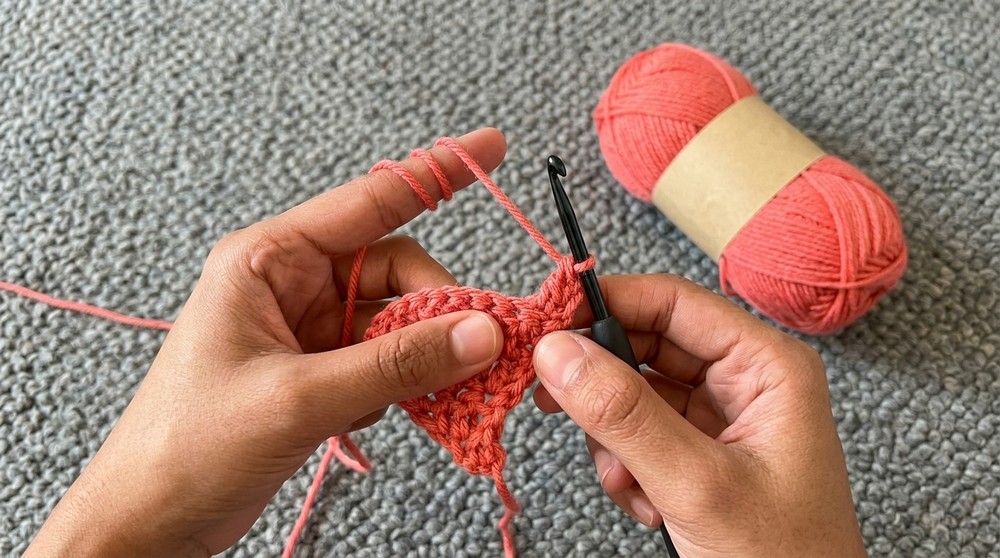
Materials
- Yarn: Medium Weight/Category 4 yarn (any fiber, sample uses acrylic)
- Hook: 4 mm crochet hook
- Scissors
- Tapestry needle (for weaving in ends)
Key Abbreviations (US Terms)
| Abbreviation | Definition |
|---|---|
| ch | chain |
| st(s) | stitch(es) |
| dc | double crochet |
| sl st | slip stitch |
| rep | repeat |
| dec | decrease (explained below) |
Special Notes
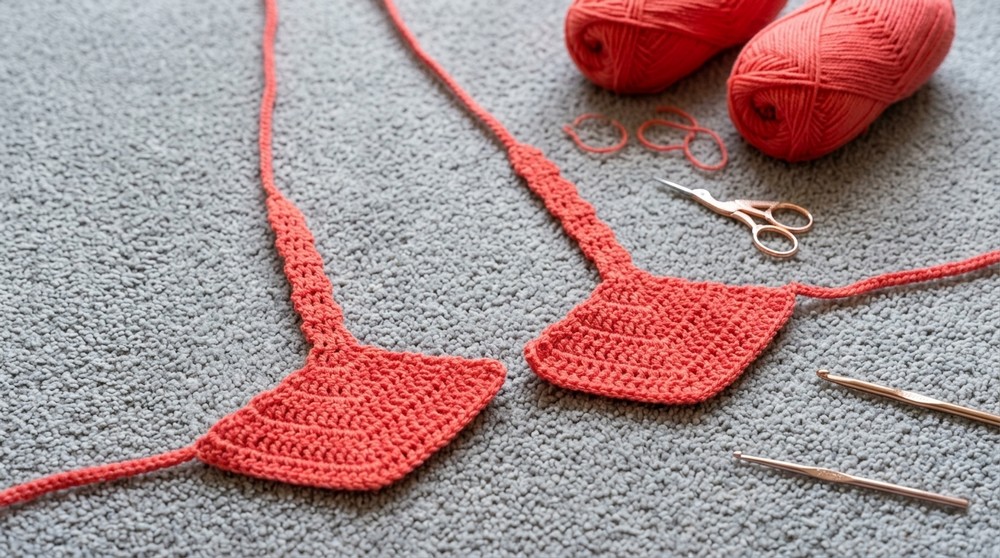
- The top is made in two panels, seamed together at the center.
- The bust is shaped with increases; the underbust and torso are shaped with decreases.
- Straps are created by attaching chains and optionally slip stitching back for thickness.
- For a thicker strap, sl st back along the chain.
Pattern
1. Panel (Make 2)
Foundation Chain
- Ch 44 (adjust for desired width; this is for average adult).
- Ch 3 more (turning chain).
Row 1
- Dc in 4th ch from hook (this first ch-3 counts as 1st dc).
- Dc in same ch (so you now have 3 dc in the first worked st).
- You now have your foundation for the cup.
Rows 2–12 (Panel Base, Straight Rows)
- Ch 2, turn.
- Dc in first st and each st across (always 3 dc in these rows).
- Repeat for 12 rows total (Row 1 + 11 more).
Row 13: First Increase Row
- Ch 2, turn.
- Dc in first st.
- In next st, work 3 dc (all in same st; this creates your first increase).
- Dc in last st.
Row 14: Shaping Row
- Ch 2, turn.
- Dc in 1st st.
- 2 dc in next st (increase).
- In center st, work 3 dc (all in same st).
- 2 dc in next st (increase).
- Dc in last st.
Row 15 and Onward: Continuing Shaping
- Ch 2, turn.
- Dc in first st.
- 2 dc in second st (increase at side).
- Dc in each st up to central 3-dc cluster.
- In the center st, work 3 dc (all in same st).
- Dc in each st until 2nd last.
- 2 dc in 2nd last st (increase at side).
- Dc in last st.
- Continue as above, working increases in 2nd and 2nd last st and 3 dc in the middle st.
- Work until your bust cup triangle reaches the center of your bust or desired depth (typically, 19 rows including previous rows).
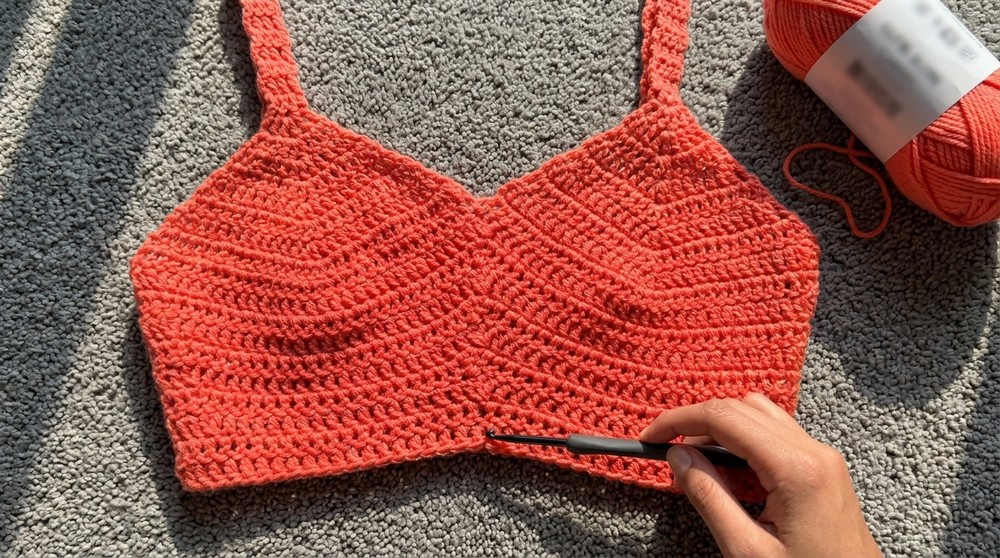
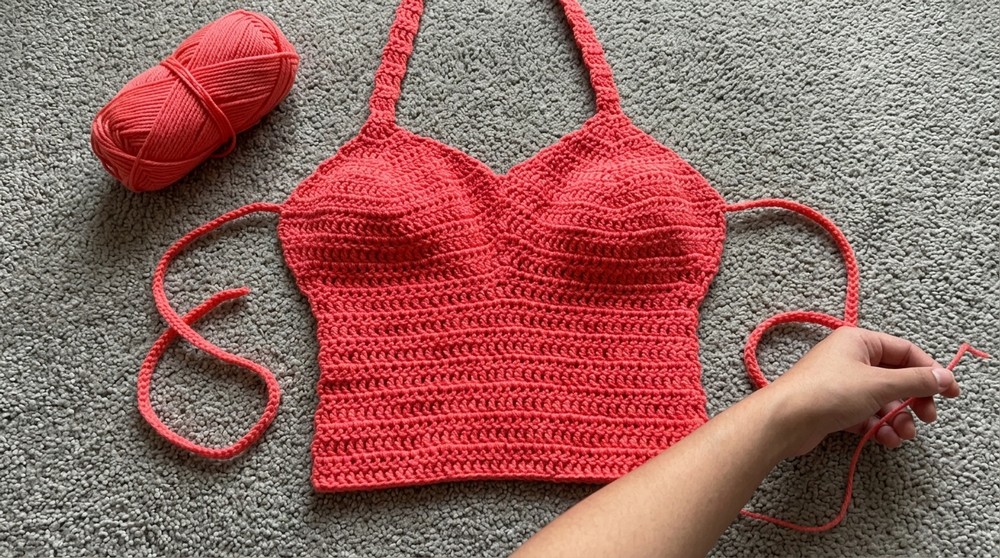
Strap
- From the last st at the top, ch 120 (or longer for tie-back straps).
- Optional: For a thicker strap, sl st in each ch back to the base.
- Fasten off and weave in ends.
2. Make Second Panel
- Repeat as above, but do not fasten off at strap.
- Leave last st live—you will join & work the body below bust next.
3. Joining Center Panels & Working Underbust
Join Panels
- Place panels with right sides facing up, straps at top.
- Insert hook into last st of first panel, then into first st of second panel.
First Underbust Row
- Dc evenly across both panels (working into the base of each panel, no increases), joining at center.
- At join, use a dc2tog (dc decrease) to join the two panels at the bottom center:
- Yarn over, insert hook in end st of panel 1, pull up loop, yarn over, pull through 2 (2 loops left).
- Yarn over, insert hook into end st of panel 2, pull up loop, yarn over, pull through 2 (3 loops left).
- Yarn over, pull through all three loops (one shared decrease at center).
- Continue working evenly across both panels for the rest of the row.
4. Waist Decreases & Lengthening the Body
Decrease Rows (Torso Shaping)
For the following rows (example: next 7 rows):
- Ch 2, turn.
- Dc dec in first two sts (decrease at side).
- Dc across to central 3-dc cluster.
- In center: dc3tog to shape the center (work a 3-stitch dc decrease).
- Continue dc until last two sts.
- Dc dec in last two sts (decrease at side).
Repeat this decrease row for 7 rows or until the waist shaping fits just under the bust and tapers to your ribline.
- After the desired number of decrease rows, work a few more rows straight (no more decreases) for additional length, if desired.
5. Finishing
- Weave in all ends with a tapestry needle.
- Try on the top. The triangle cups should fully cover your bust; the underbust and waist section should be comfortably snug.
- Tie straps at the back or lace as you wish.
Conclusion
You have completed your viral bustier-style crochet crop top! This design is flexible and can easily be customized with color changes, leftover yarn, or decorative edging.
Pattern Corrections & Tips
- Correction: Always check stitch counts after each row, especially after increases and decreases.
- Tip 1: Try the top on as you go for a custom fit—adjust depth or width as necessary.
- Tip 2: For sturdier straps, slip stitch back down the chain or make a second chain and sc them together.
- Tip 3: For a more supportive bust cup, increase rows before joining the panels.
- Tip 4: Add a row of sc or hdc along the underbust for a clean finish.
- Tip 5: For size adjustments, alter your starting foundation chain.