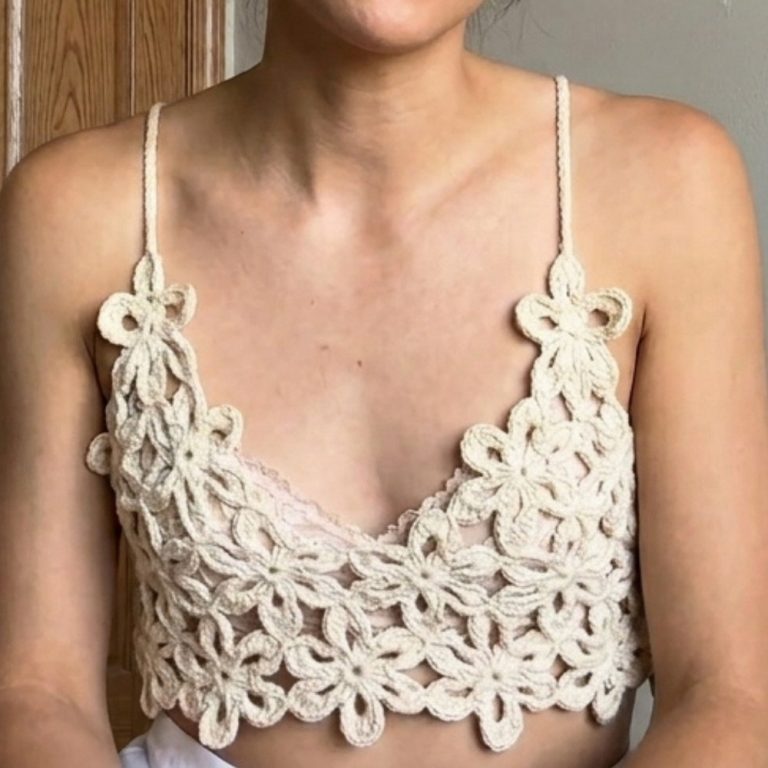
Free Crochet Tulip Bralette Pattern You’ll Want to Wear
Style summer wardrobe with this Crochet Tulip Bralette Pattern that feels playful, flattering, and perfect for warm days and casual outfits.
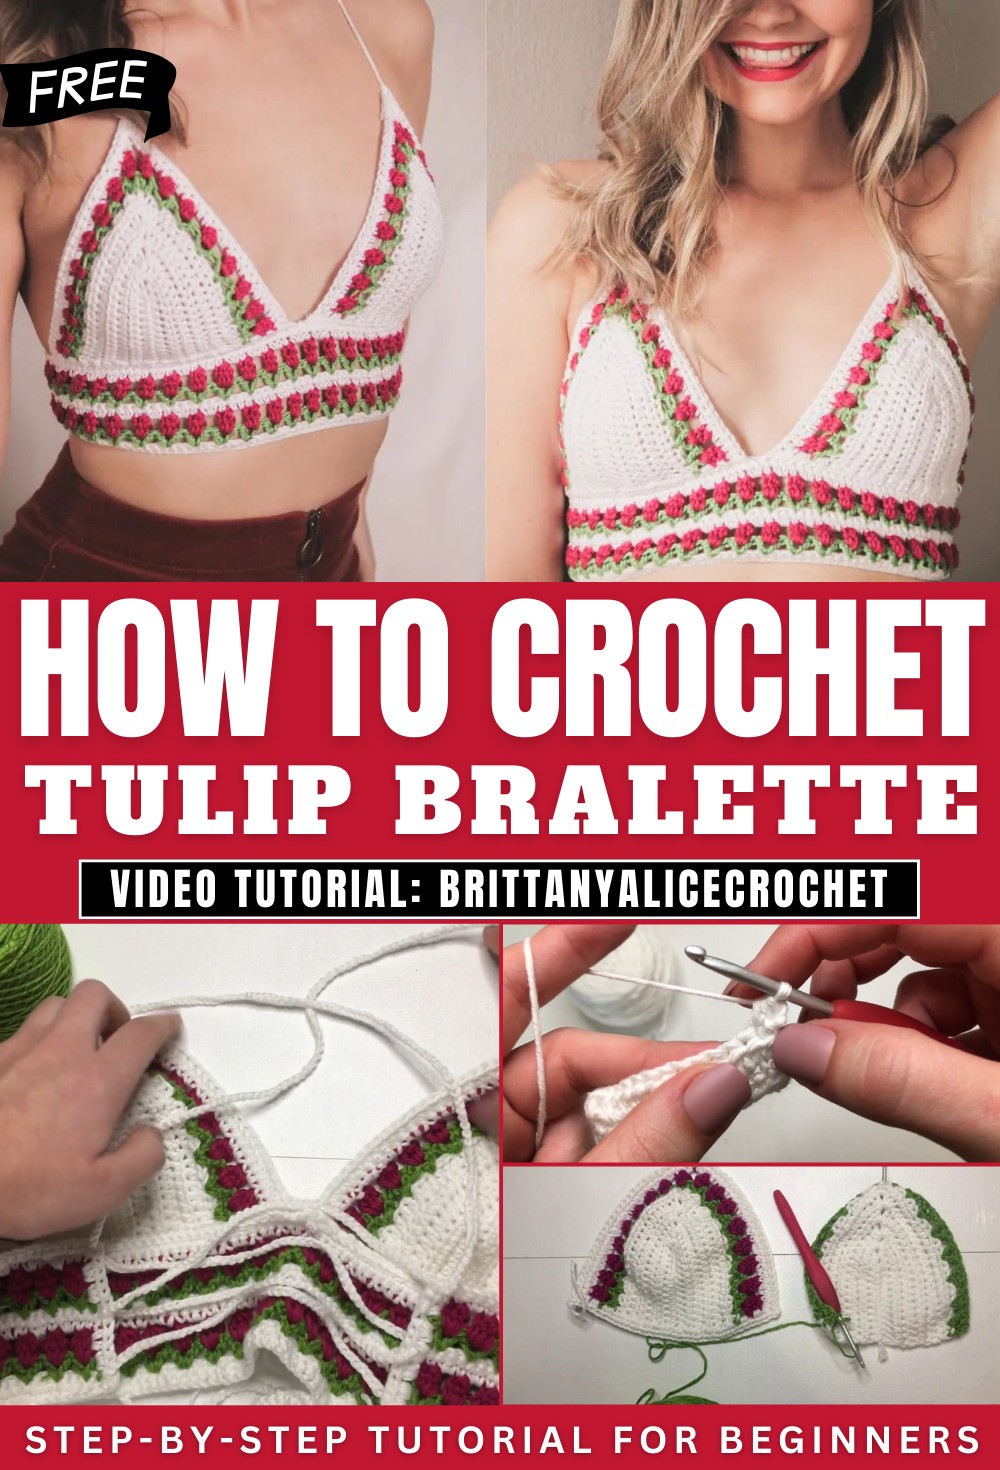
Aesthetic Crochet Tulip Bralette Pattern for Soft Feminine Style
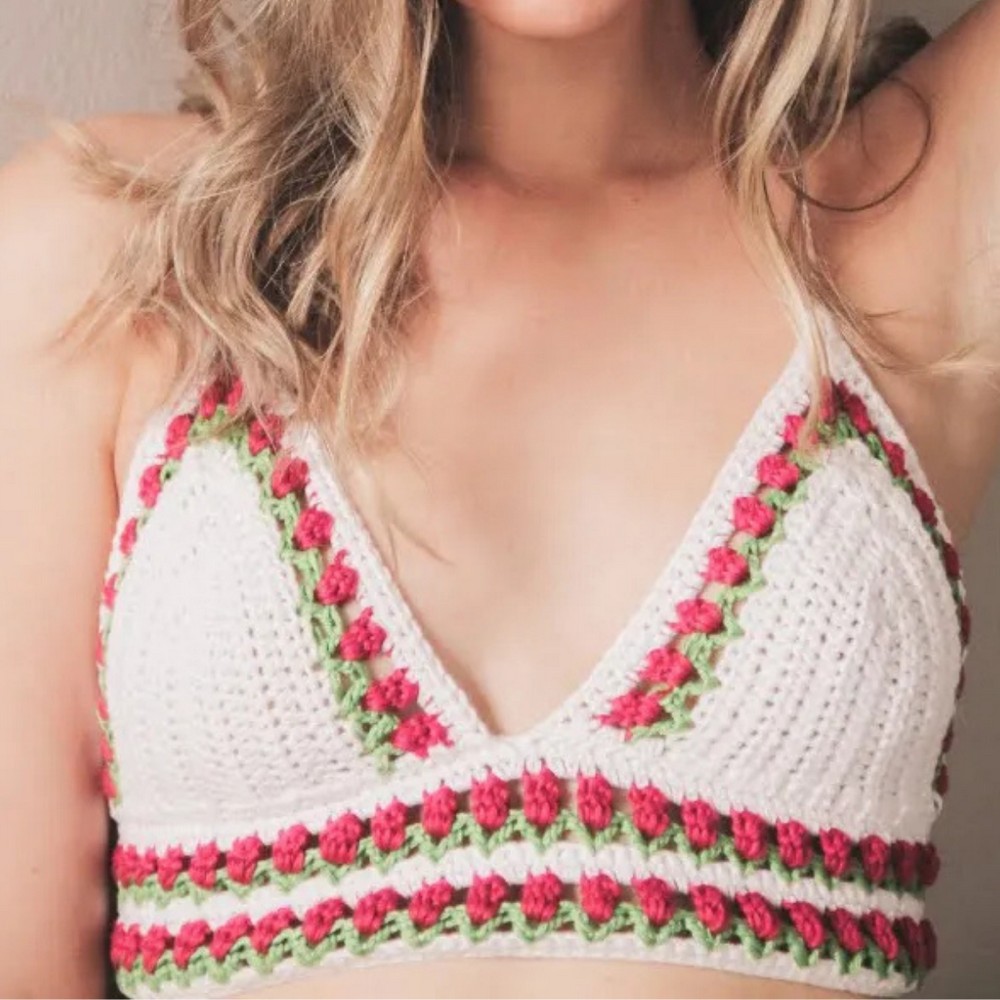
Graceful floral inspiration shapes a wearable piece that blends softness with confident style. The Crochet Tulip Bralette Pattern features a gentle, petal-like form that enhances the natural silhouette while offering a balanced mix of comfort and visual appeal. Its delicate structure works well for relaxed daily wear, lounging, or layering under lightweight tops and cardigans. The tulip-inspired cups provide subtle definition and support, making the design both functional and flattering.
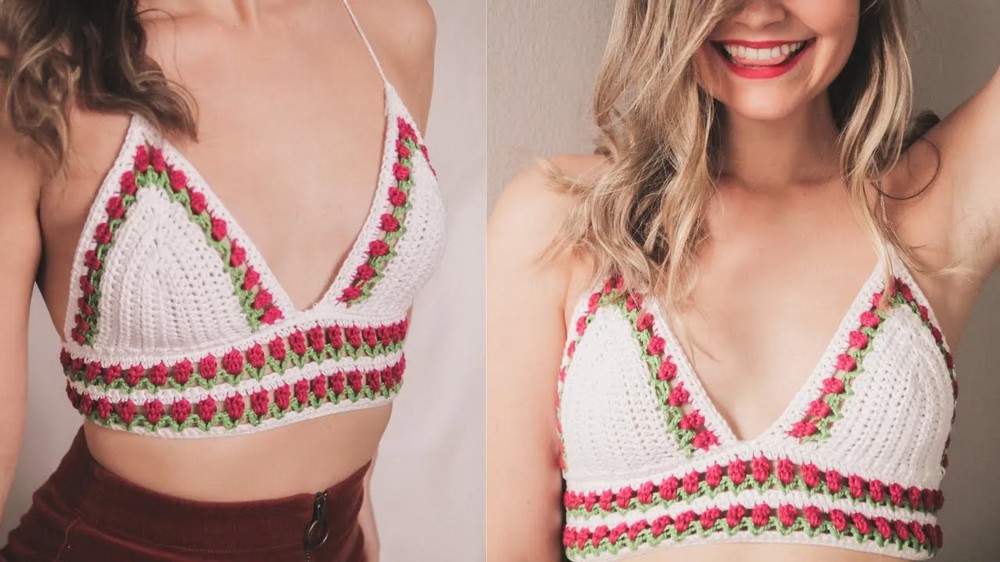
Adjustable elements allow a more personalized fit, increasing comfort for extended wear. This pattern suits warm-weather wardrobes especially well, as it feels light and breathable against the skin. Color variations add expressive character, ranging from soft neutrals to bold, statement tones. The overall look feels feminine, modern, and effortlessly stylish. As a wardrobe staple, it combines beauty and practicality, offering a refined option for those who appreciate artistic detail in everyday fashion.
Part 1: The Bra Cups
1. Measurements and Foundation
-
Measure: Determine the distance from the bottom of your breast to the middle of your nipple.
-
Foundation Chain: Subtract 0.25 inches from your measurement to create the foundation chain. For example, if your measurement is 2.5 inches, chain until the piece is 2.25 inches long (about 13 chains).
2. Row 1: Establishing the Cup Shape
-
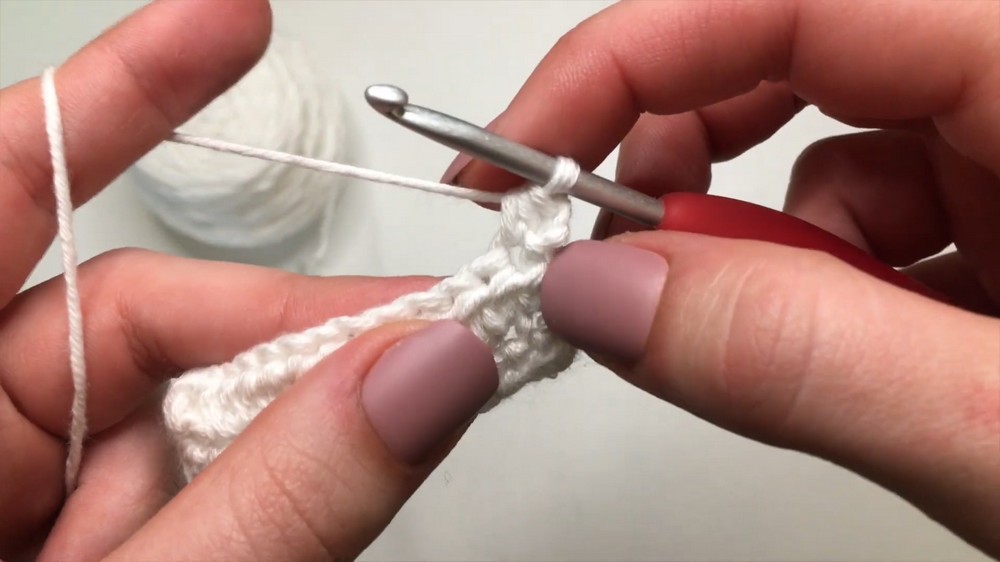
Half Double Crochet (HDC): Chain 2 (does not count as a stitch). Work one HDC into the third chain from the hook and in each chain across.
-
The Peak: In the very last chain, work (1 HDC, chain 1, 2 HDC) all in the same space to create the turn.
-
Opposite Side: Work one HDC in each stitch down the other side of the foundation chain.
3. Row 2 & Following Rows: Building Width
-
Standard Row: Chain 2, turn. Work one HDC in each stitch until you reach the chain-1 peak.
-
Increase at Peak: In the chain-1 space, work (2 HDC, chain 1, 2 HDC).
-
Repeat: Continue this pattern until the cup reaches your “Measurement B” (Total breast width minus 2.5 inches for the tulip border).
4. The Tulip Stem Row (Green)
-
Color Change: On the last stitch of your white row, pull through the green yarn to finish the stitch.
-
V-Stitches: Chain 3 (counts as a stitch), turn. In the second stitch, work a V-stitch (1 Double Crochet (DC), chain 1, 1 DC).
-
Repeat: Skip 2 stitches, then work a V-stitch in the third. Repeat this until the peak. Skip the peak’s chain-1 space and continue the V-stitch pattern down the other side.
5. The Tulip Flower Row (Pink)
-
Cluster Stitches: Change to pink yarn and chain 3.
-
Flower Detail: In each green V-stitch’s chain-1 space, work a 3-DC cluster stitch. Chain 2 between each cluster. Finish the row with one DC in the last stitch.
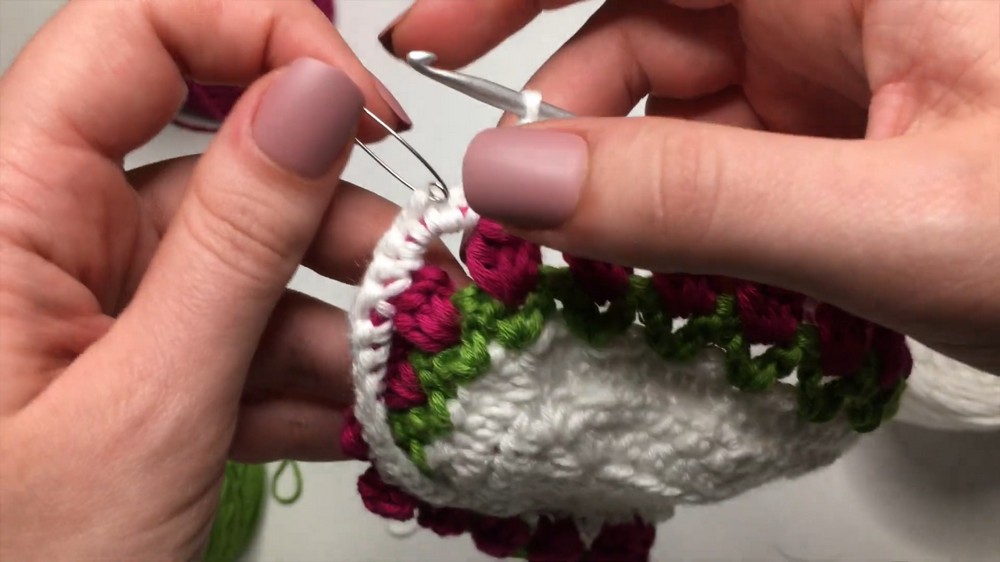
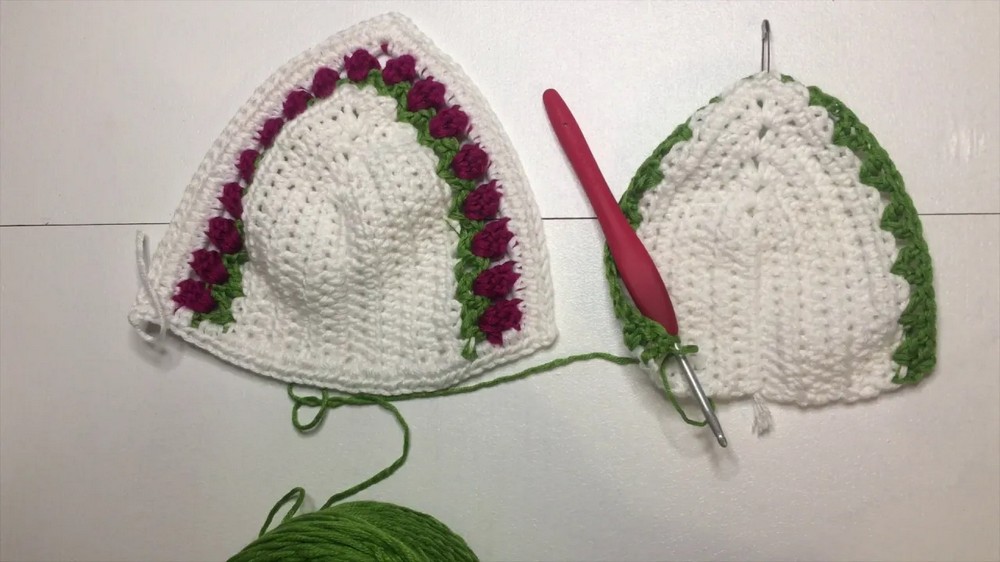
6. Final Cup Borders
-
Single Crochet (SC) Row: Switch back to white. Work one SC on top of each cluster and two SC in each chain-2 space. At the peak, work (2 SC, chain 1, 2 SC).
-
HDC Row: Chain 2, turn. Work one HDC in every SC stitch, maintaining the (2 HDC, chain 1, 2 HDC) increase at the peak.
-
Bottom Border: Work a row of HDC along the flat bottom edge of the cup, placing two HDC in each DC/HDC side space.
Part 2: Body and Assembly
1. Body Foundation
-
Measurement: Measure your ribcage and subtract 6 inches.
-
Chain: Create a foundation chain in multiples of 3 + 1 that stretches to your calculated measurement.
-
Base Rows: Work two rows of single crochet in white.
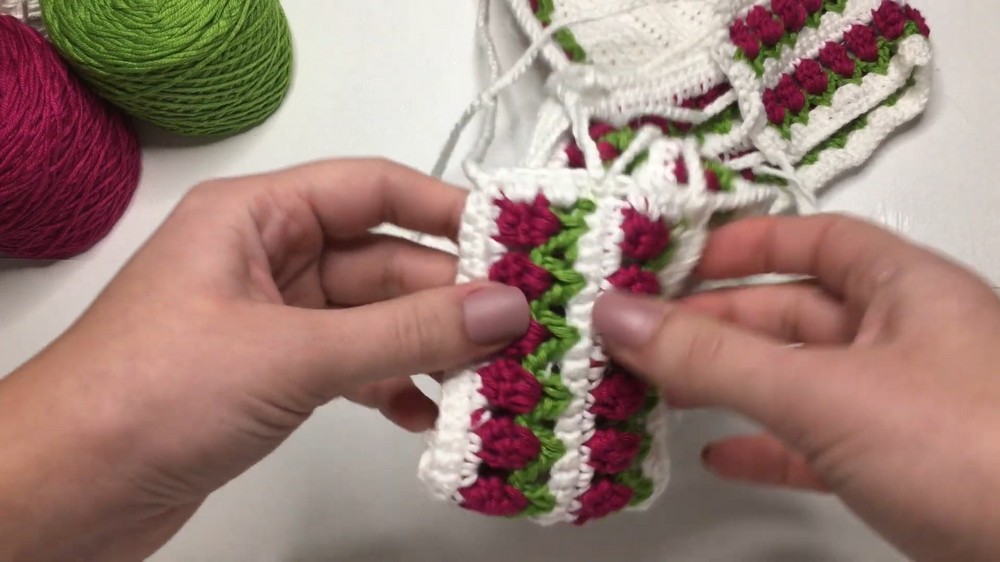
2. Body Tulip Pattern
-
Stem Row: Change to green and work V-stitches (DC, ch 1, DC) by skipping every 2 stitches.
-
Flower Row: Change to pink and work 3-DC clusters into the green V-stitches with chain-2 spaces between them.
-
Transition Rows: Change to white. Row 1: SC on clusters, 2 SC in chain spaces. Row 2: SC in every stitch across.
-
Repeat: Repeat these rows until you reach your desired body length.
3. Side Borders
-
Work a vertical border of HDC along the short ends of the body piece to create a clean edge for the lacing.
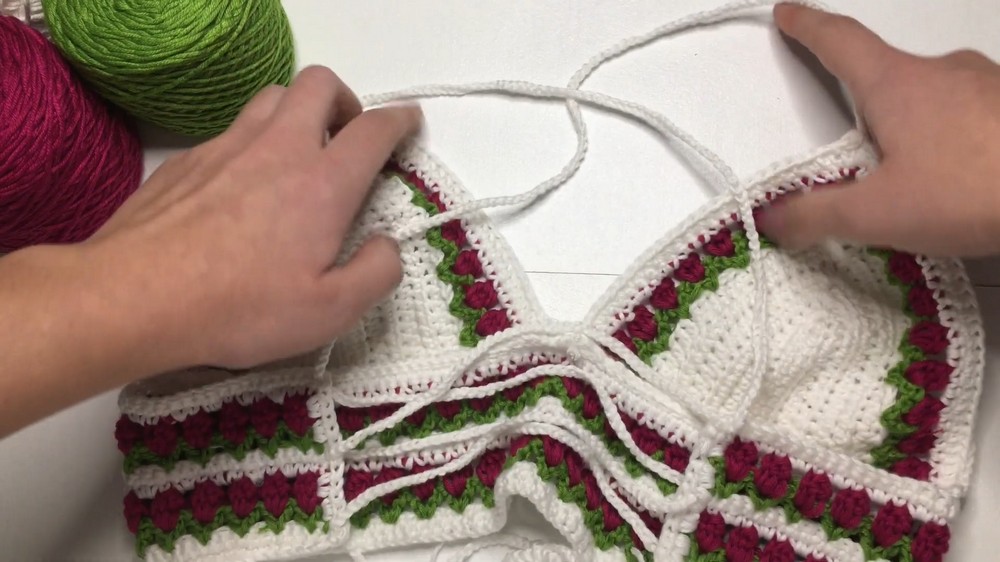
4. Attaching Cups to Body
-
Alignment: Lay the body and cups with the inside facing up.
-
Calculate Placement: Subtract the total number of stitches on the bottom of both cups from the total number of stitches on the top of the body. Divide the remainder by 2 to find your starting point on the body.
-
Slip Stitch Join: Join the cups to the body using slip stitches through both layers.
5. Straps and Finishing
-
Neck Straps: Join white yarn to the peak of each cup. Chain approximately 250 (or your preferred length), keeping the tension very tight.
-
Lacing: Crisscross the long neck straps across the back and lace them through the HDC spaces on the side borders of the body piece.
Project Details
-
Special Features: Features a stunning “Relief” (3D) texture on the wings and a customizable split-wing design.
-
Level of Difficulty: Intermediate. Knowledge of double crochet is required, and patience is needed to master the front and back post relief stitches.
-
Tutor’s Suggestions: Count your stitches carefully on both sides to ensure the wings are symmetrical. If making a size Small, stick to 2-double crochet clusters instead of 3 to prevent the top from becoming too large.
-
Uses: Perfect as a summer festival top, beach cover-up, or a statement piece for warm weather.
-
Materials: * Fiori or Anne yarn (used double-stranded).
-
2.5mm crochet hook.
-
Scissors and a measuring tape.
-
Conclusion
Finish your project with confidence, knowing you have captured the delicate essence of a butterfly in a wearable form. This trendy top combines traditional techniques with a modern silhouette, resulting in a piece that is as fun to wear as it is to make.
Pro Tip:
To ensure the relief texture remains prominent after washing, hand wash your top and lay it flat to dry, gently smoothing out the wing sections while damp.