Adorable Free Crochet Rattan Bag Pattern With Easy Detail
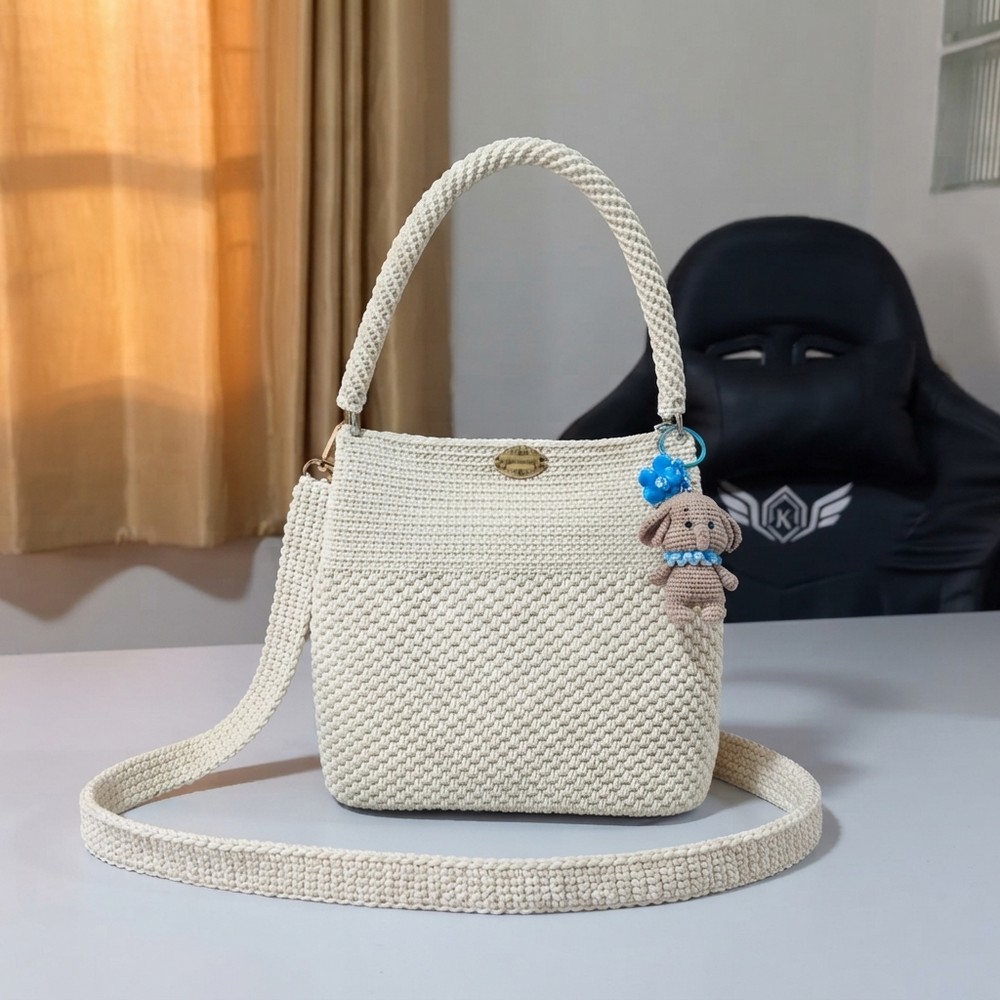
Go for a woven look with the Free Crochet Rattan Bag Pattern and pair the cream finish and rounded handle with a light dress for an easy weekend outfit.
Plain cream accessories can look surprisingly detailed when the stitches change partway up. The Free Crochet Rattan Bag Pattern shows this with diagonal texture across the lower body and flatter rows around the opening. The two sections meet in the same shade, so the difference comes from the stitch direction and the way each surface catches the light.
Woven Details on a Free Crochet Rattan Bag Pattern
About the Creator
On Chaweewan Crochet, viewers can find bag ideas built around the look of the stitches themselves. Here, the lower section has a rattan-like finish and the upper band stays smooth. The sample keeps both areas in cream, so anyone studying the design can follow where one texture meets the other.
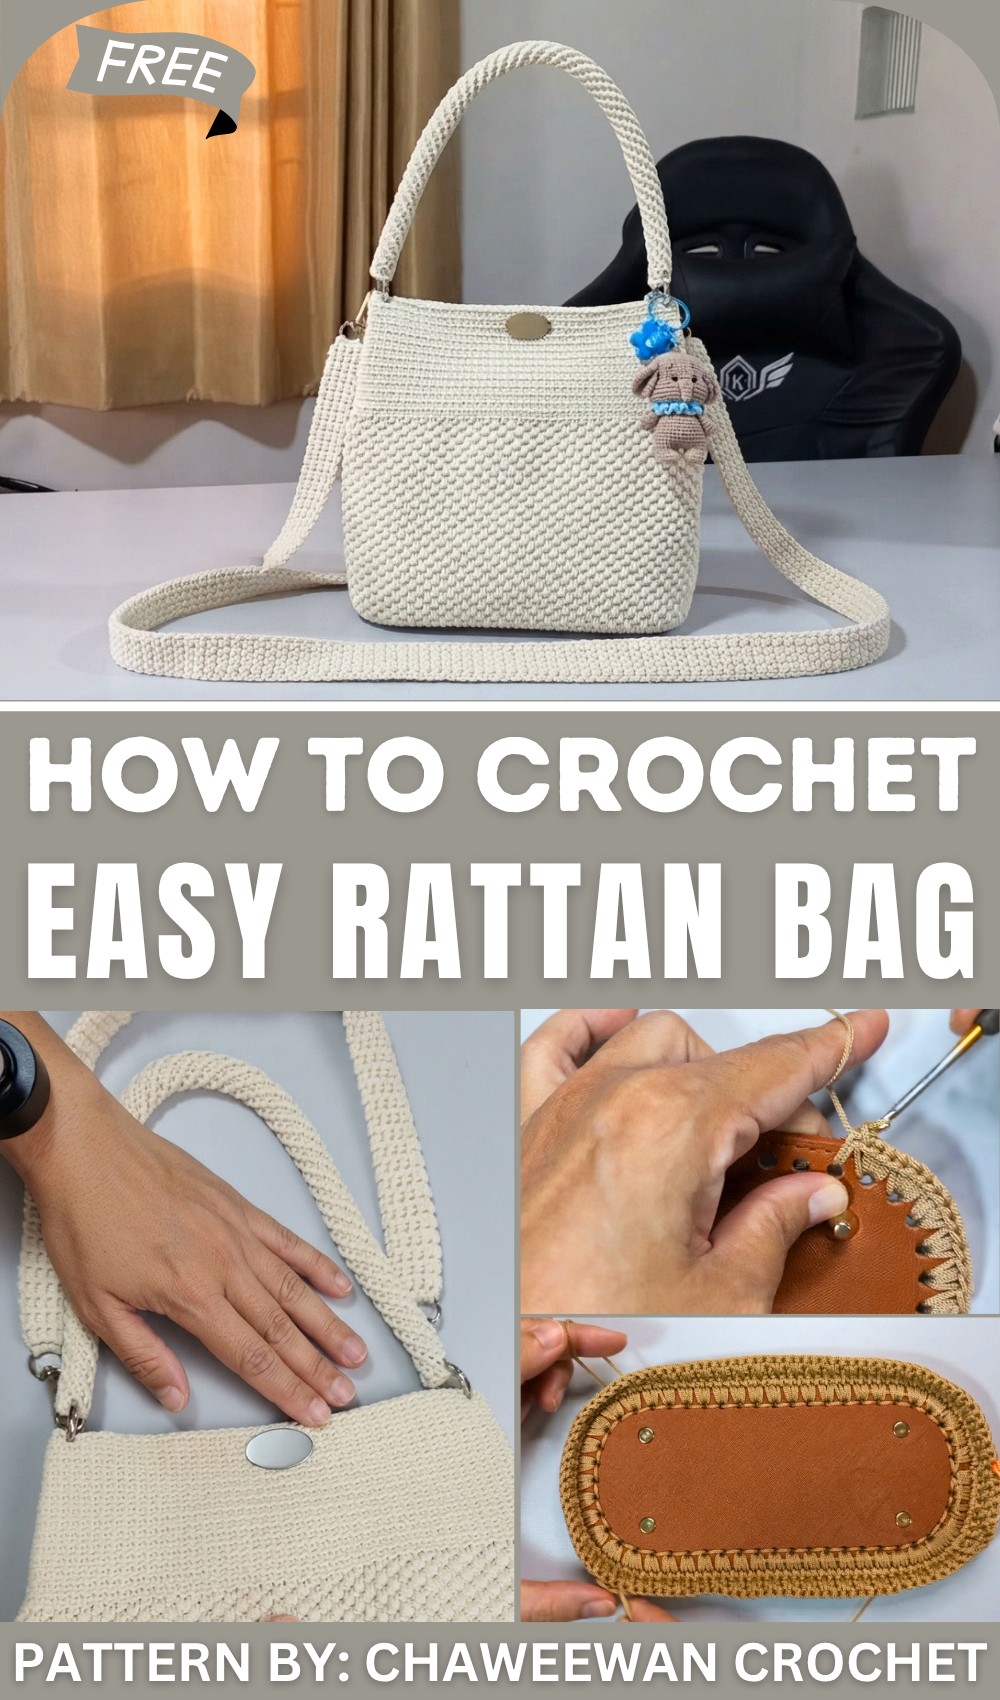
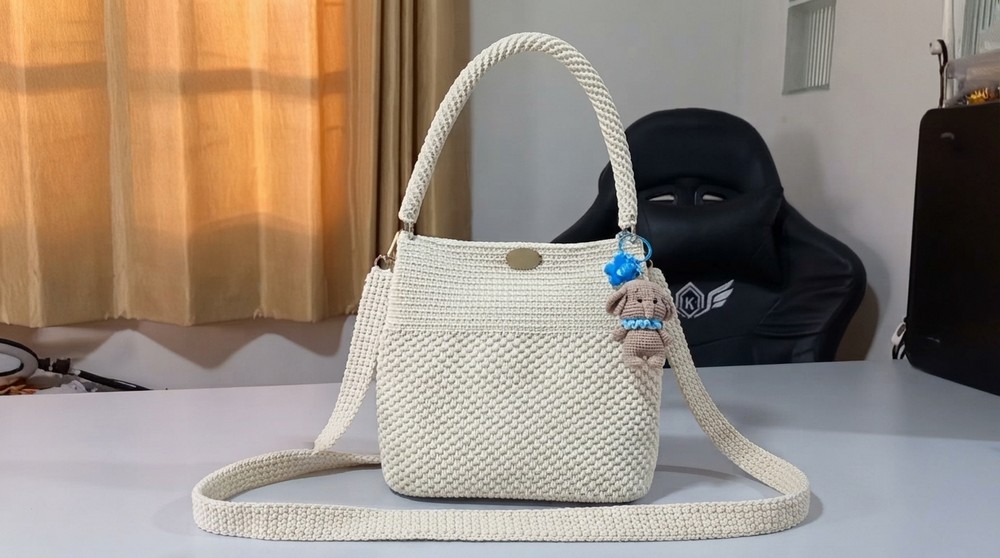
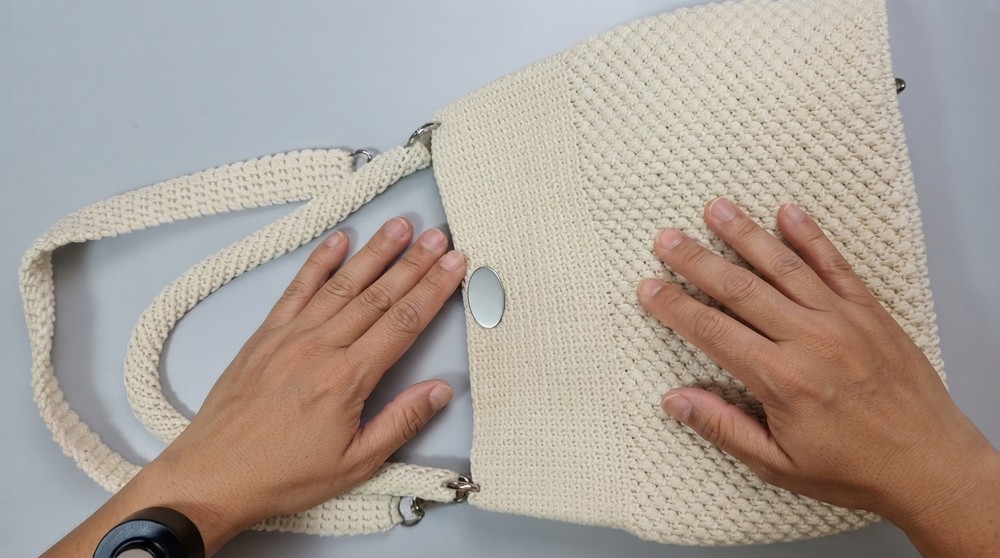
At the bottom, the small ridges sit close together and give the bag a woven look. Higher up, the rows are finer and run straight across. Follow the curve of the short handle and you can see another change, with stitches wrapping around it to give a rounded finish. The long, flat strap and the small clip-on dog charm are easy to spot against the cream body. Those details give the bag its own look while leaving the stitchwork visible.
For a walk through a weekend market, wear it with a linen shirt and loose trousers. It would sit just as nicely next to a soft print dress, where the plain color leaves the print room to show. The body has a clean outline, so it still looks neat when you set it down beside you. Up close, it’s the slant of those lower stitches that gives the piece most of its character.

Crochet Bag Pattern – Two-Strap Design
This crochet bag pattern features a firm base, a textured body, and two optional straps — one long strap for over-the-shoulder wear and one shorter strap for handheld use. This project uses durable 1.8 mm paracord, making the bag functional and stylish with added structure from a base insert and metallic accents like D-rings and magnetic closures.
Skill Level
Intermediate – This pattern requires familiarity with working in rounds, alternating stitch patterns, shaping, and assembly techniques.
Materials
- Cord: 1.8 mm paracord.
- Hooks:
- Size 5/0 crochet hook (for the bag base).
- Size 4/0 crochet hook (for the bag body and components).
- Notions:
- Base Insert: 10 cm wide x 22 cm long.
- 2 D-rings (inner diameter of 2 cm).
- Magnetic button closure (1.5 mm size).
- Safety pins or stitch markers (for point marking).
- Handmade tags (oval-shaped, 3 cm).
- Scissors.
- Needle (to secure ends).
Stitch Abbreviations
- Ch: Chain
- SC: Single Crochet
- SL St (C): Slip Stitch
- Short x: Standard single crochet worked into the current row.
- Long x: Single crochet worked into the stitch below the current row (creates a textured effect).
Useful Tips
- Durability: Heat-seal the ends of paracord with a lighter to prevent fraying.
- Tension Control: Maintain consistent tension for clean stitches and a structured bag body.
- Alignment: Measure and mark evenly for components like straps and closures to achieve symmetry in assembly.
- Customization: The height and strap length can be adjusted according to preference.
Pattern Instructions
I. Bag Base
Round 1 – Foundation
- Hook Size: 5/0.
- Pattern: Begin the oval base as follows:
- Ch 2 (counts as first SC stitch).
- Crochet 2 SC in the same stitch x3.
- Crochet 3 SC in the same stitch x3.
- Crochet 2 SC in each stitch x15.
- Repeat the above sequence a second time to form the base.
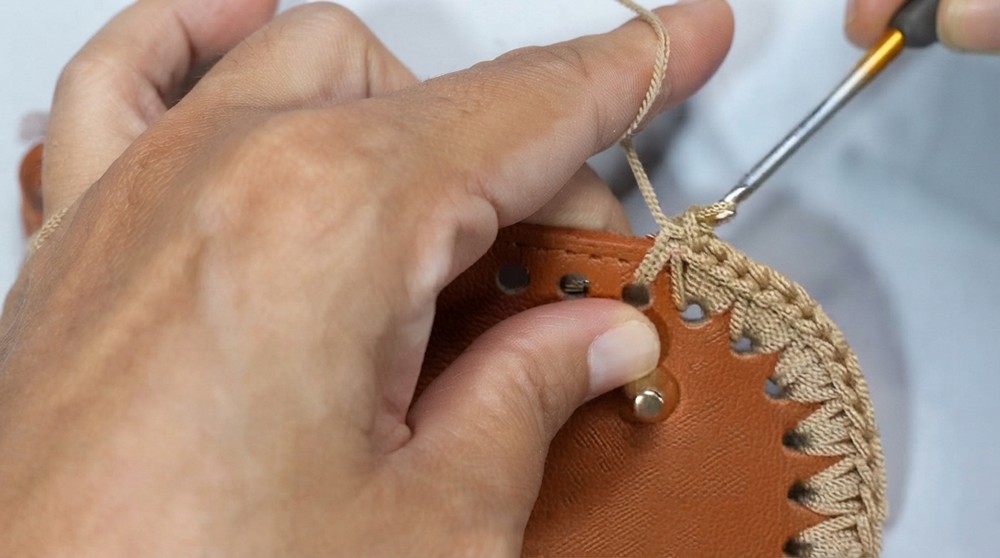
- Insert the cord, and loop the base to a total of 15 sets.
Round 2: Slip Stitch Edging
- Pattern:
- Work SL St (C) into each slot around the base edge.
- Hook and pull smoothly through each stitch to clean up the base edge.
II. Bag Body
Switch to size 4/0 hook for the body.
Rounds 1–3: Single Crochet Foundation
- Pattern:
- Round 1: Ch 1 and work SC into the edge of the base, evenly distributing 116 SC stitches.
- Round 2: Continue working SC evenly.
- Round 3: Follow the same foundation instructions to maintain the stitch pattern and size.

Rounds 4–6: Textured Alternating Pattern
- Pattern:
- Round 4: Begin alternating stitching: Short x, Long x, Short x, Long x in sequence.
- Round 5–6: Crochet in rounds, continuing the textured pattern. Alternate stitches to create a woven effect resembling rattan.

Rounds 7 and Beyond: Adjust Height
- Pattern:
- Repeat Rounds 5 and 6, maintaining the established textured crochet pattern.
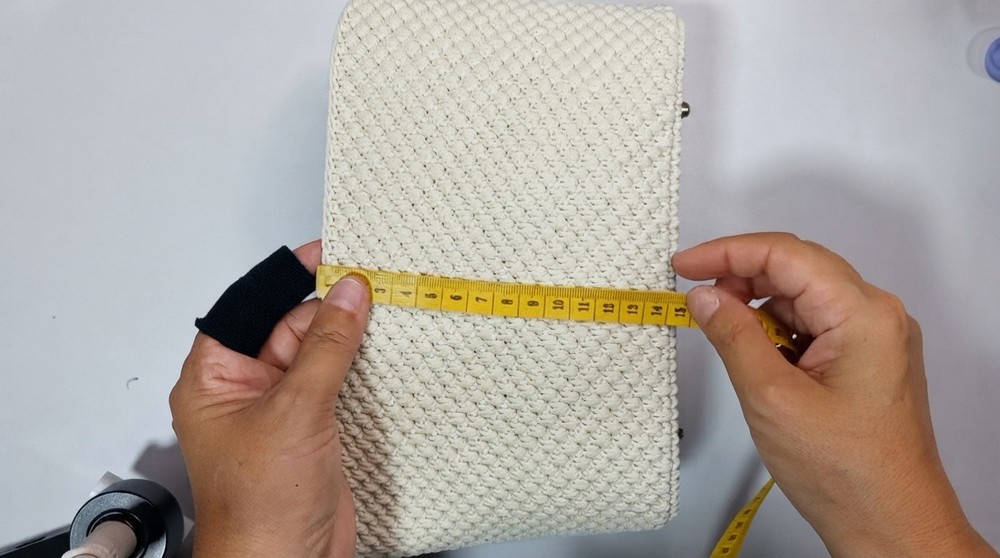
- Add rows until the bag reaches the desired height (22 cm total), including an additional 8 cm for straps on the body.
III. Magnetic Button Closure
Placement
- Measure Center Point: Divide the bag opening evenly into half. Use safety pins to mark the centerline on both long edges.
- Attach Backing Panels:
- Secure the magnetic button backing using SC stitches through the slots.
- Ensure equal placement on both sides of the bag opening.
IV. D-Rings and Strap Attachments
D-Ring Attachments
- Attach D-rings to the bag sides by crocheting 5 SC stitches tightly around each D-ring to ensure a secure connection.
- Align placement equally on both bag sides using measurements or markings.
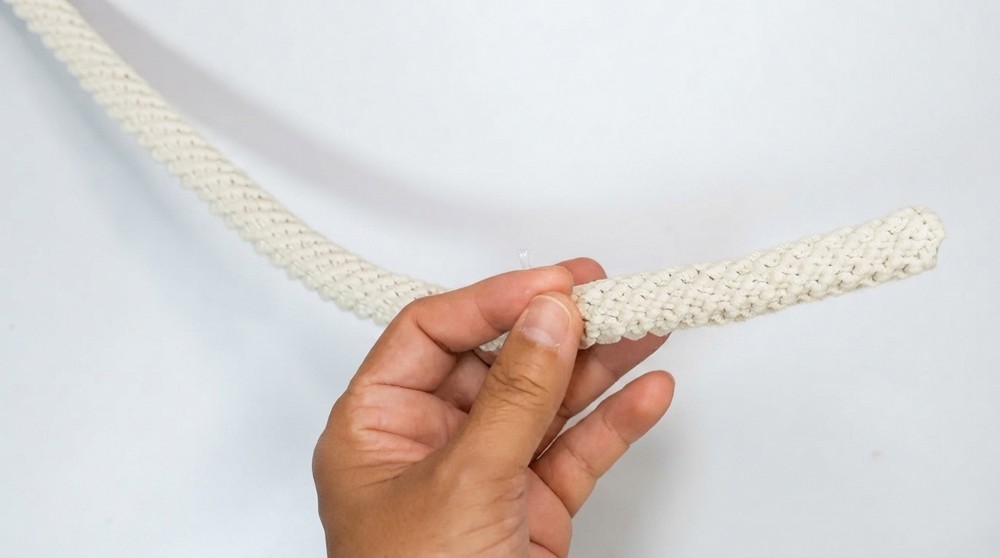
V. Handle and Shoulder Strap Construction
Handle Strap
- Instructions:
- Ch 40: Form the base of the strap using even tension.
- Work SC across the chain for 2 rows to form a sturdy strap.
- Attach both ends to the marked points on the bag sides, reinforcing with tight stitches or securing with a needle and matching thread.
Shoulder Strap
- Instructions:
- Ch 1: Begin working SC across 4 stitches, turning at the end of each row.
- Continue crocheting back and forth until the strap reaches 80–90 cm length or the desired length.
- Attach the ends of the strap to the D-rings using clasps for versatility.
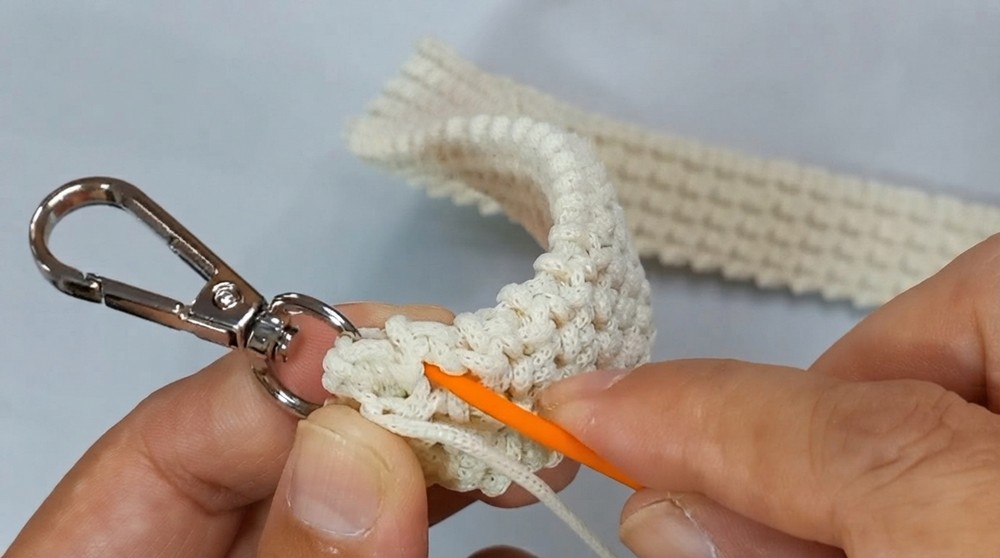
VI. Final Edging
- Edging Instructions:
- Work 4 rows of SL St (C) around the bag opening to create polished, reinforced edges.
- Ensure the stitches are evenly distributed for uniformity and durability.
Assembly
- Attach Handles and Shoulder Strap: Secure handles and straps as per measurements using tight stitches or sewing. Adjust strap length before attaching.
- Finish Bag Body: Secure any loose ends by weaving them into the bag using a needle, and heat-seal for durability.
- Magnetic Closure Fit: Ensure the magnetic buttons snap securely into place and line up with the top opening of the bag.
Conclusion
This crochet bag effortlessly combines versatility with functionality. The two-strapped design allows it to be carried by hand or worn over the shoulder using an adjustable strap. With customizable heights and strap lengths, this project can suit any lifestyle. The rattan-inspired stitching adds elegance, enhancing its use as both a practical and decorative accessory.