Bold Free Crochet Bleached Rope Bag Pattern With Easy Tutorial
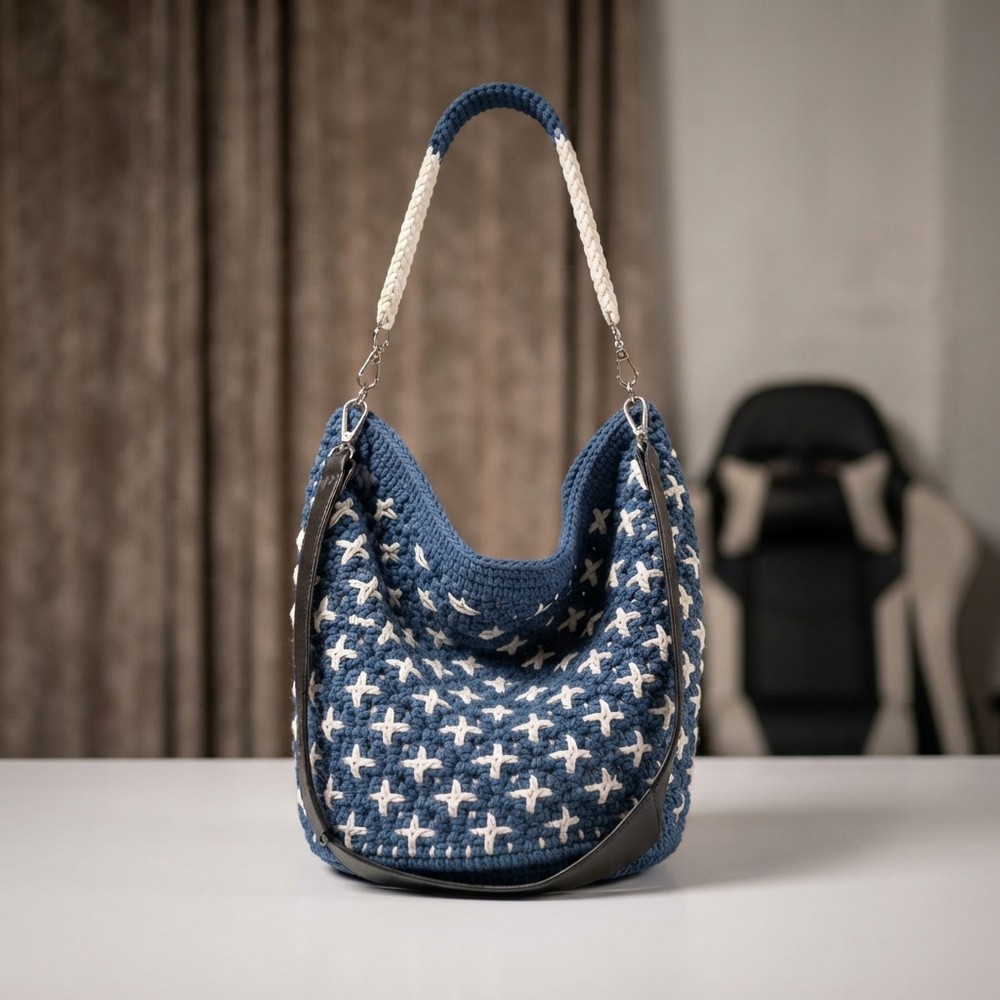
Put a fresh spin on your daily look with the Free Crochet Bleached Rope Bag Pattern featuring white crosses on navy cord and a softly dipped top edge.
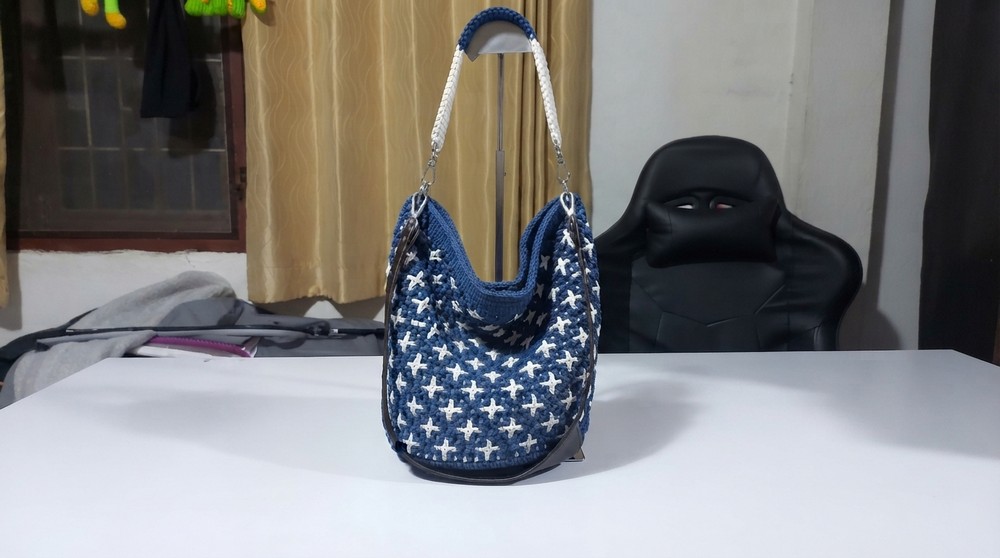
White crosses dot the navy surface in tidy rows, just far enough apart for each shape to show. The Free Crochet Bleached Rope Bag Pattern takes that simple two-color idea and gives it a relaxed shape, with high sides and a deep curve in the middle of the opening. It has the easy feel of a slouchy shoulder bag, with a dark edge that follows the dip across the top.
Free Crochet Bleached Rope Bag Pattern With a Curved Top
The crosses have a soft outline because they’re formed by stitches, and the navy cord shows between every mark. Near the top, the solid band gives the eye somewhere to rest before the pattern starts again. The sample has metal clips at the sides and a short shoulder strap in blue and white. That little echo of the body colors pulls the whole piece together.
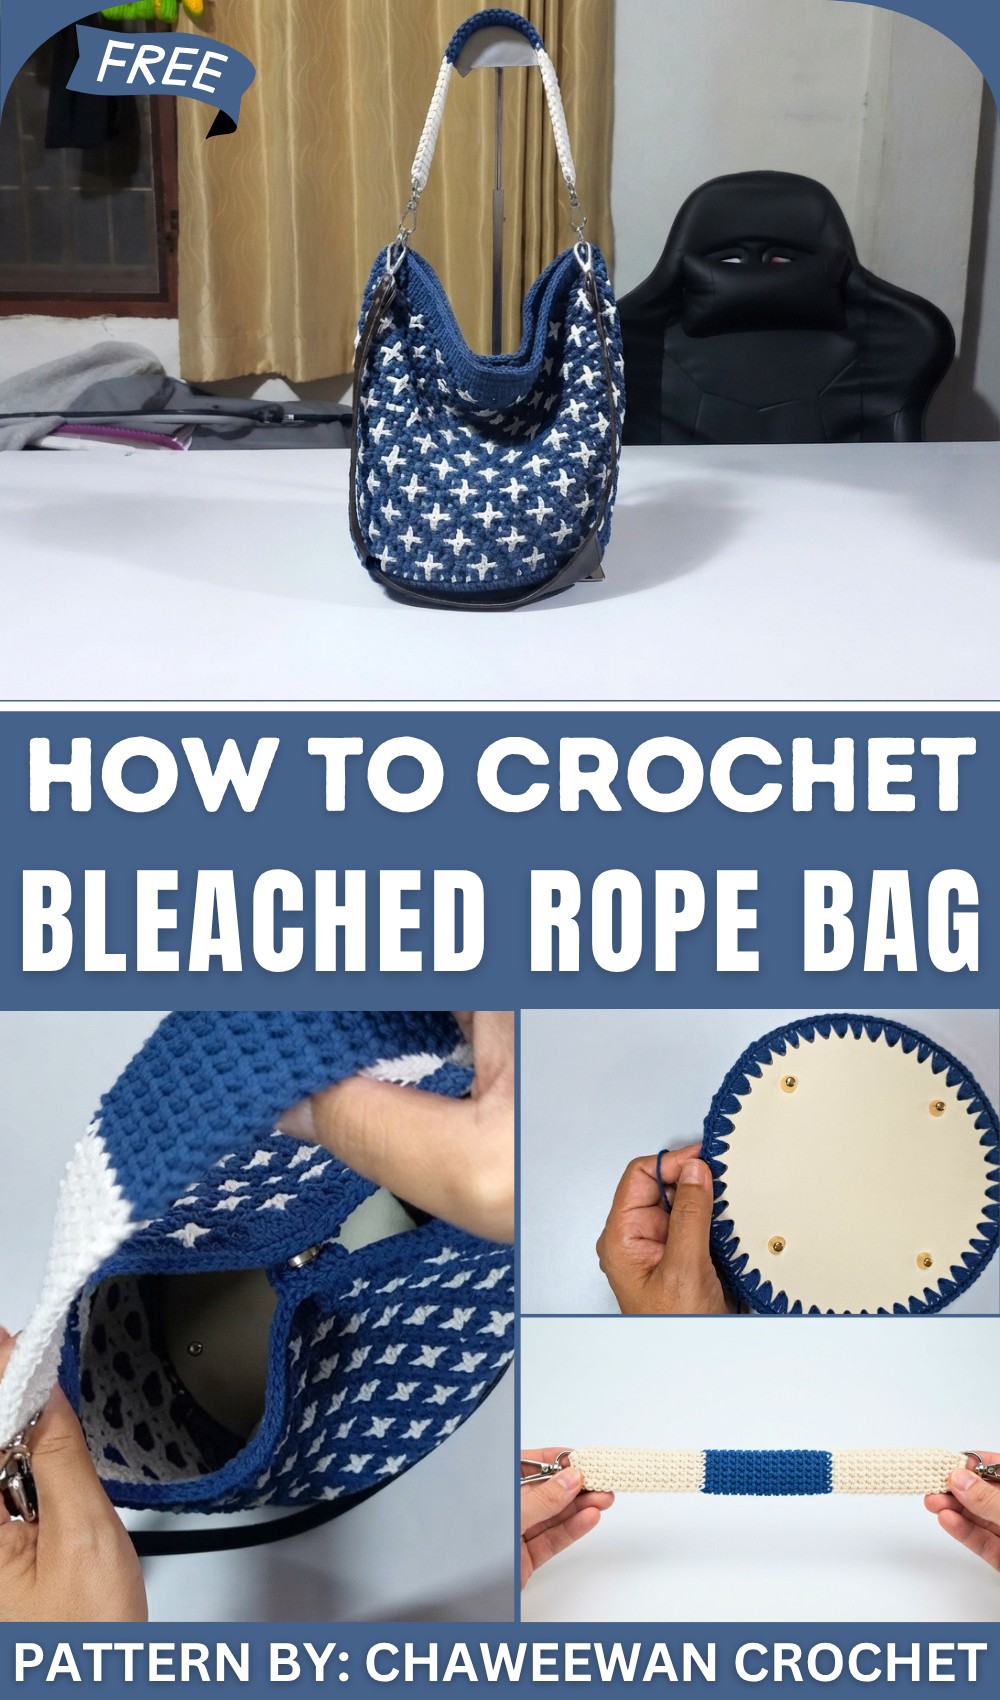
Wear it with a denim jacket and a plain white shirt for an outfit that picks up both shades, or pair it with a solid gray sweater so the small crosses stand out. It has the kind of shape that feels right on a long walk with a few personal items tucked inside. The color contrast is easy to see even from a distance, giving an otherwise quiet outfit a clear point of interest.
Meet the Maker
Contrasting colors stand out in the bag collection at Chaweewan Crochet. For the bleached rope design, the channel places pale crosses against a navy background and carries both tones into the shoulder strap. It’s one example of how the channel uses a repeated mark to give a bag its look.

Lightweight Crochet Shoulder Bag Pattern
This crochet bag is both practical and stylish. Made with durable bleached cotton rope, this bag features a sturdy base, decorative magnetic button closures, and dual strap options for carrying versatility. The pattern combines simple stitches, textured layers, and clean finishing techniques, making it a durable everyday accessory.
Skill Level
Intermediate – This project involves working in rounds, building textured layers, and attaching hardware components, making it ideal for crocheters comfortable with basic stitches and assembly work.
Materials
- Cord: 2mm diameter bleached cotton rope (dark brown or off-white).
- Hook: Size 5/0 crochet hook.
- Notions:
- 2 snap-type circular rings (1″ inner diameter).
- 2 equestrian hooks (length: 2.5″).
- Magnetic button closure (1 set).
- Safety pins or stitch markers (for marking placement points).
- Bag base insert: 7.5″ wide.
- Scissors and needle (for securing ends).
Stitch Abbreviations
- Ch: Chain
- SC: Single Crochet
- SL St (C): Slip Stitch
- DC: Double Crochet
Useful Tips
- Tension Consistency: Maintain consistent tension while crocheting to ensure uniform texture and a professional finish.
- Marker Placement: Use safety pins to mark key points for straps, closures, and details.
- Rope Finishing: Seal the cut ends of the cotton rope carefully using a lighter to prevent unraveling.
- Assembly Precision: Ensure hardware components like circular rings and magnetic closures are evenly aligned during attachment for both functionality and symmetry.
Pattern Instructions
I. Bag Base
Round 1 – Foundation
- Pattern:
- Ch 2 (counts as 1 stitch).
- Crochet 3 SC into the same slot.
- Repeat this step 3 times (3 sets total).
- Crochet 2 SC into each slot across for 11 sets total.
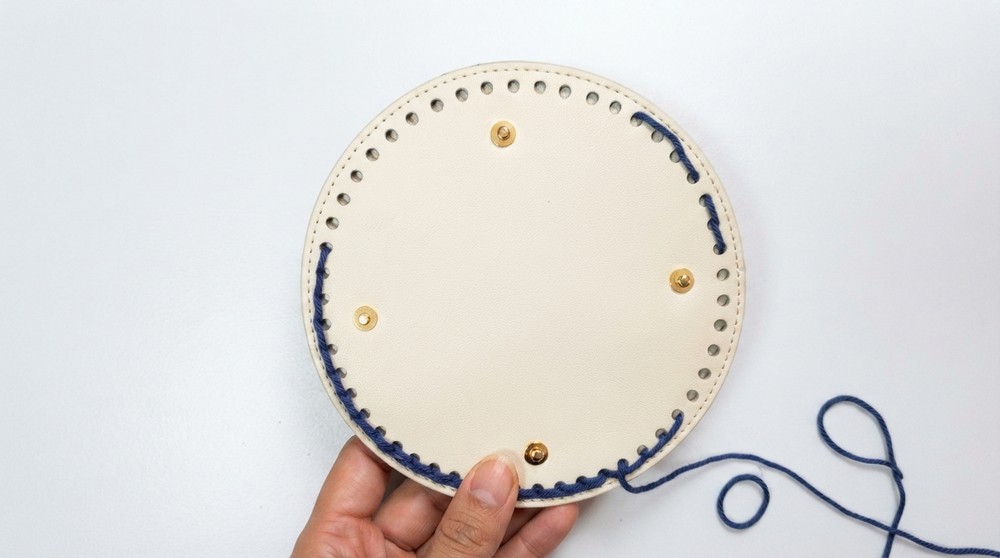

This round creates a structured oval base.
Round 2 – Reinforce the Base
- Pattern:
- Work SL St (C) around the base edge.
- Insert your hook into each stitch and pull through smoothly to form an even perimeter.
II. Bag Body
Switch to size 4/0 hook for this section.
Rounds 3–13 – Building the Bag Body
- Round 3:
- Crochet 136 SC stitches around the base, ensuring even distribution for a circular shape.
- Round 4:
- Alternate DC stitches with Ch 1, skipping 1 space between each double crochet.
- Repeat around, maintaining the row alignment with even tension.
- Rounds 5–13:
- Repeat Round 4 for alternating textures while steadily increasing the height.
- Add rows until the bag body reaches 10–13 inches tall, depending on your preference.


III. Magnetic Button Closure
Placement
- Marking Points: Use safety pins to divide the bag opening into two halves and mark the center points for the magnetic button placement.
- Attachment:
- Align a magnetic button backing to the marked points and crochet SC stitches through its slots for secure fastening.
- Bend the snap-on legs to hold the magnetic button properly.
IV. Decorative Components and Straps
Circular Snap Rings
- Attachment:
- Identify key points along both sides of the bag opening.
- Secure each ring firmly by crocheting SC around the circumference of the ring while attaching it to the bag.
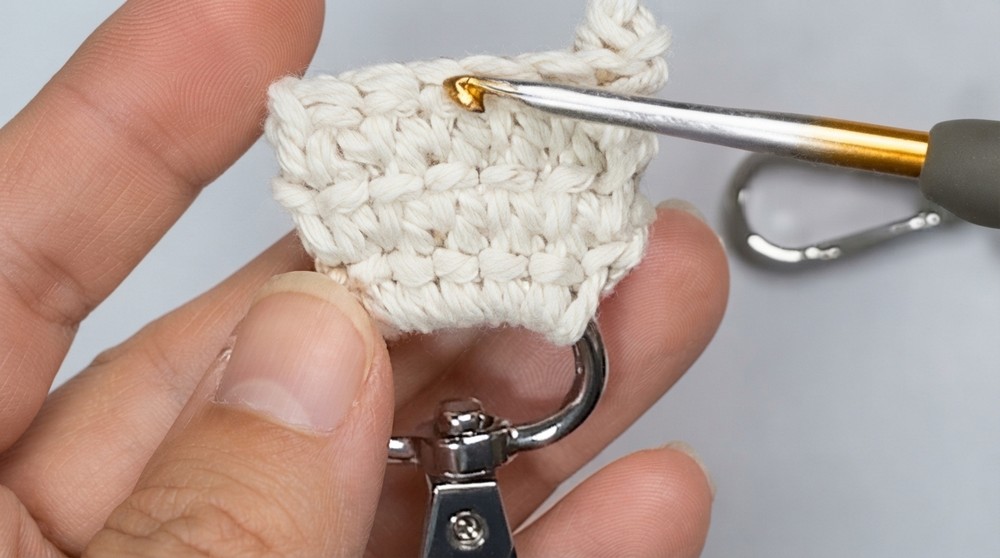
Equestrian Hooks
- Placement: Attach equestrian hooks securely to the edge of the strap, ensuring they can clip onto the circular snap rings.
V. Strap Construction
Short Handles
- Foundation for Strap: Ch 6.
- Work SC into each stitch, flipping the work at the end of each row.
- Continue until you have 15 rows.
- Attach the handles to the marked points on the bag using tight stitches or stitching with a needle.
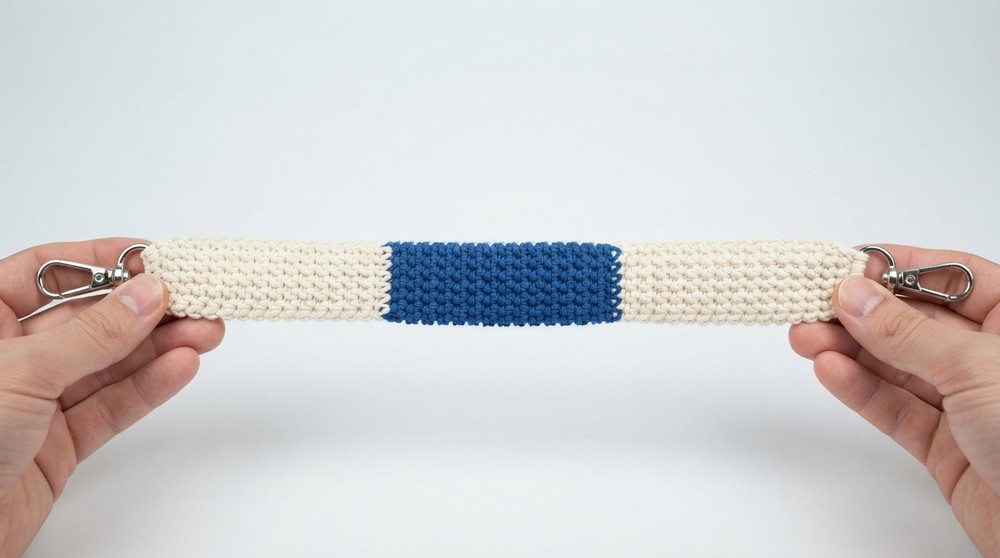
Long Shoulder Strap
- Foundation: Ch 6 and repeat SC into each stitch, flipping at each row.
- Create rows alternating between colors (e.g., off-white and brown).
- Crochet 15 rows of off-white, 15 rows of brown, and repeat this sequence for 3 total sets of 15 rows each.
- Attach strap ends securely to equestrian hooks.
VI. Final Steps
Edging for a Clean Finish
- Work SL St (C) across the bag top to reinforce the edge and give it a polished finish.
- Add 4 rows of slip stitch around the top opening to create a professional, clean appearance.
Assembly
- Attaching Straps:
- Use the equestrian hooks to connect the long strap to the circular snap rings fastened to the bag body.
- Attach the short straps by sewing or crocheting securely to the bag edges.
- Magnetic Button Check: Ensure the magnetic button snaps properly at the opening for a secure closure.
- Final Details: Cut any remaining loose threads, seal rope ends, and add a handmade tag for a personal touch if desired.
Measurements
- Height: 10 inches.
- Width: 13 inches.
- Base Dimensions: 8 inches round.
- Shoulder Strap Length: 12 inches.
Conclusion
This dual-strap crochet bag combines style and practical design. The alternating colors and textured stitches highlight the beauty of cotton rope, while the durable hardware makes it functional for everyday use. With thoughtful customization and decorative features, this bag is perfect as a multi-purpose accessory for any occasion.