Free Crochet Rectangle Rug Pattern For Floor Decor
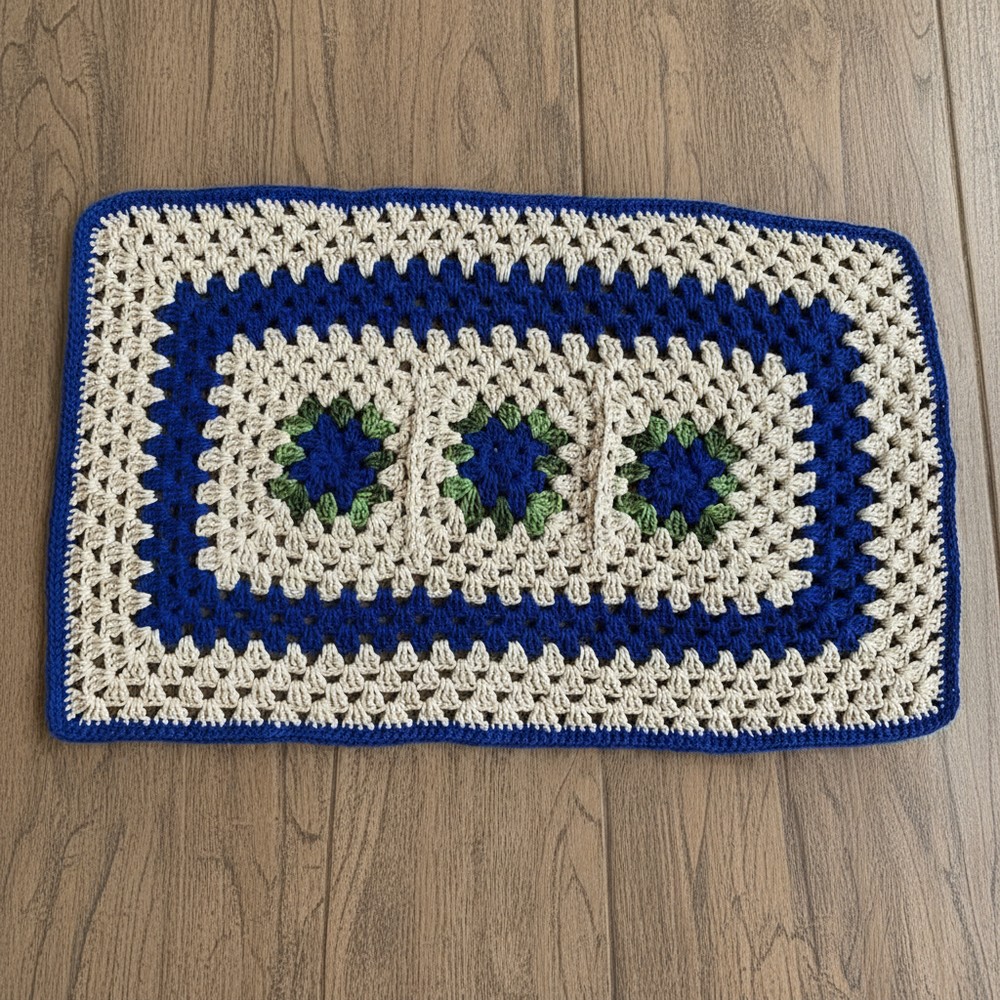
Adorn your space with this chic crochet rectangular rug pattern, providing a sleek touch and a comfy texture that feels totally superb for any home.
Stepping onto a plush, handmade surface provides an instant sense of warmth and relaxation to any living area in your home. This Crochet Rectangular Rug Pattern serves as a clever way to design a floor covering that fits your specific dimensions much better than standard mass-produced options. It is a superior choice for us because the dense, repetitive stitches create a sturdy barrier against cold floors while offering a soft landing for your feet after a long day.

Chic Crochet Rectangle Rug Pattern for Your Bathroom
You gain the benefit of a fully washable and long-lasting piece that stays fresh even in busy households with pets or children. The beauty of this Rectangular Rug lies in its clean, classic lines and the rhythmic texture that brings a calm, modern feel to your interior decor. You can place this versatile rug in a long hallway, under a kitchen sink, or right at your front door to greet guests with a cozy vibe. Completing a Crochet Rectangular Rug Pattern project turns simple, heavy-duty yarn into a practical work of art that grounds your room with style.

Materials
-
Yarn: Barbante (cotton twine) number 6 in:
-
Hook: 3.5 mm crochet hook.
-
Accessories: Tapestry needle for assembly and scissors [11:41].
Step-by-Step Pattern
1. The Flat Flower Square (Make 3)
-
Center (Blue): Start with a magic ring.
-
Leaves (Green): Attach green yarn to any corner. Work a shell: (3 dc, ch 2, 3 dc). In the side spaces, work 3 dc. Separate all blocks with ch 1 [03:11].

2. Main Body and Joining
-
Base (White): Attach white yarn. Work the same shell and block pattern as the green round [05:05]. Complete two full rounds for the first square [05:40].
-
Joining: As you work the second white round for the next two squares, join them to the previous square.
-
Transition Round: Once all three squares are joined, work one continuous round of shells in the corners and 3-dc blocks in every side space. At the joining points, work 1 dc in each corner and 1 dc in the center join to keep the row straight [08:43].

3. Growing the Rug
-
Body Rows: Continue working rounds in the established pattern (shells in 4 corners, 3-dc blocks on sides).
-
Color Sequence: The tutor uses:

4. The Border
-
Finishing (Purple/Pink): Work a round of single crochet around the entire rug [09:55].
-
Corner Increase: In each corner chain space, work: (1 sc, ch 1, 1 sc) to prevent the rug from curling inward [10:34].
-
Stability: Work a second round of sc directly over the first to add thickness and stability to the edge [11:16].

Project Information
-
Special Features: The “flat flower” design ensures the rug stays level and comfortable underfoot, unlike raised 3D flowers. It is highly modular—you can make it longer by adding more squares [04:35].
-
Level of Difficulty: Beginner. It focuses on the “Granny Stitch” (blocks of 3 dc) which is the most fundamental building block in crochet [04:35].
-
Tutor’s Suggestions: This rug is extremely fast to make; the tutor notes you can finish a piece while watching a movie or relaxing [10:03].
-
Uses: Ideal as a kitchen sink mat, bathroom rug, or entryway runner.
Conclusion
The Super Economical Rectangular Rug is a high-reward project for beginners. It provides a solid introduction to joining motifs and working in rounds to create a larger garment. Its clean lines and sturdy construction make it a practical yet beautiful addition to any home.
Tip: When joining the squares, always place the pieces back-to-back (wrong sides together). This ensures your single crochet joins are on the back of the work, keeping the front surface of the rug perfectly smooth [06:04].