Free Crochet Square Tablecloth Pattern with Classy Look
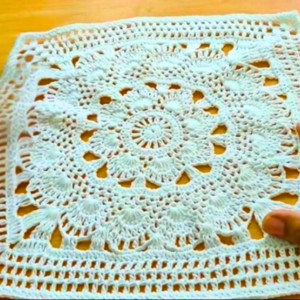
Beautify your dining area effortlessly with this free crochet square tablecloth pattern that’s offering elegant texture and classic charm for any occasion.
A pretty table can make a room feel warm and welcoming. The Free Crochet Square Tablecloth Pattern is a lovely choice for anyone who wants to add a handmade touch to a dining table, coffee table, or small side table. The project is shared by Rajutan Whita, a YouTube channel with simple and creative crochet ideas.
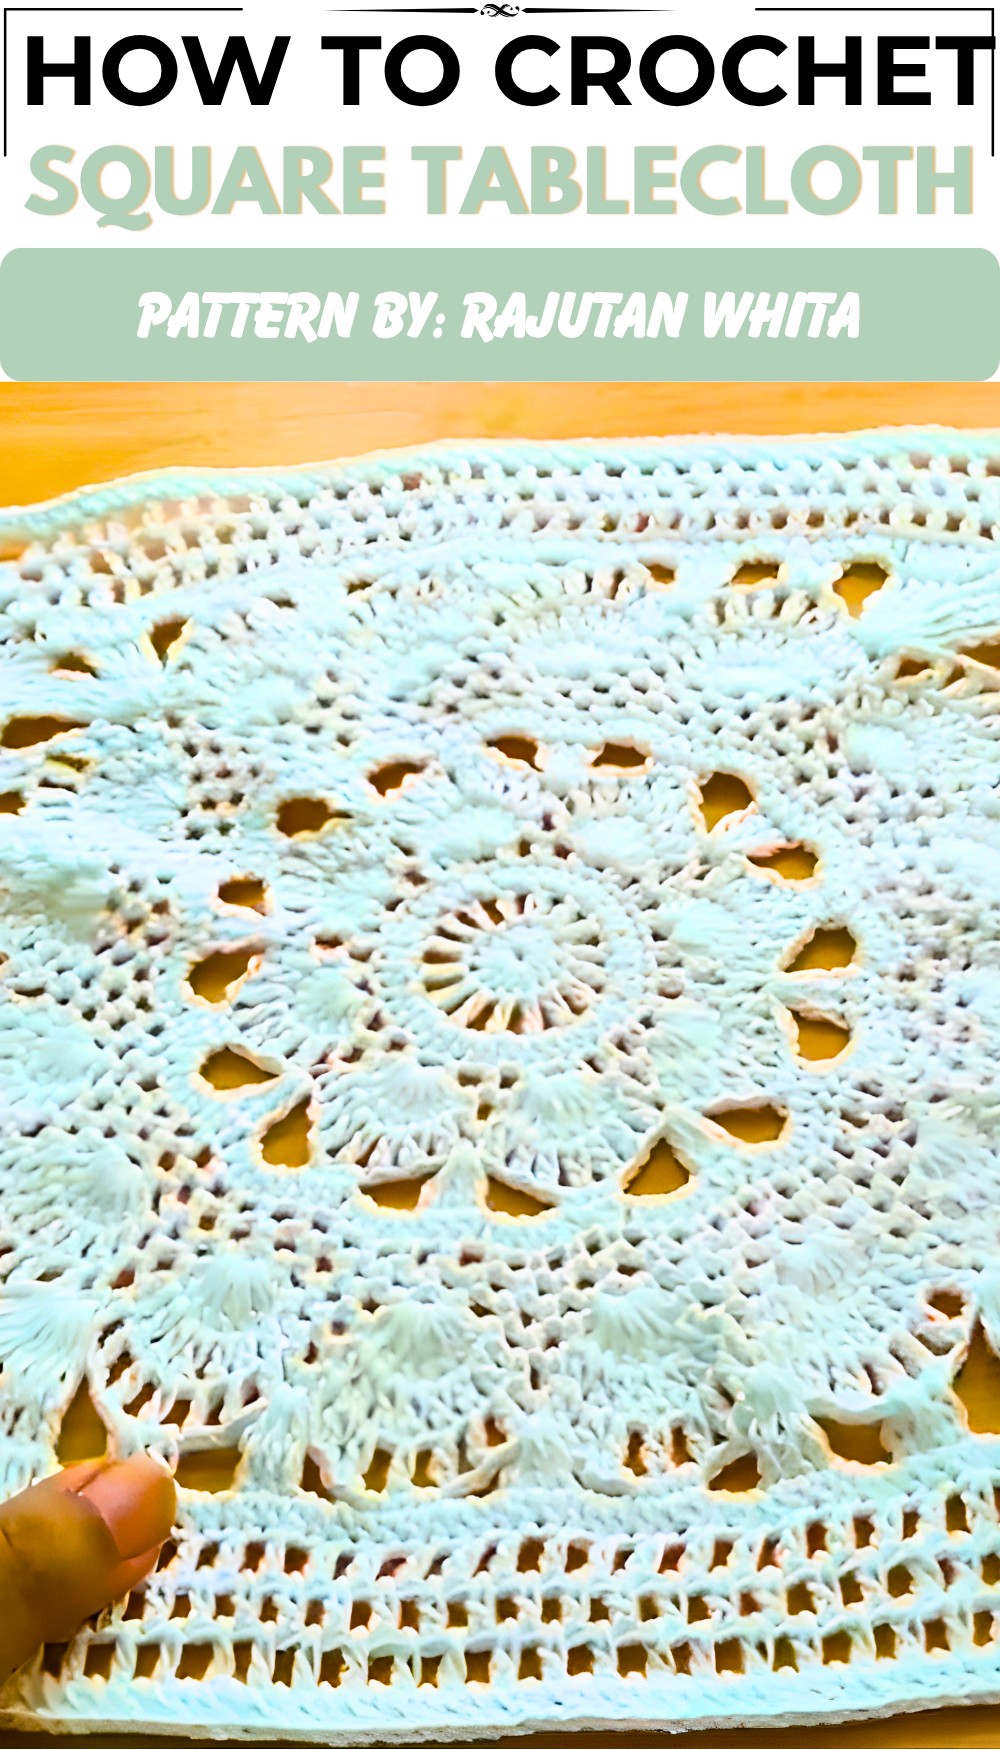
The finished tablecloth has a clean square shape that sits nicely over a table. Its crochet texture gives the surface a soft and detailed look. The open spaces and repeated design make it look light instead of heavy. Its simple style can work well with both modern and classic home decor.
Free Square Tablecloth Pattern for Crochet Lovers
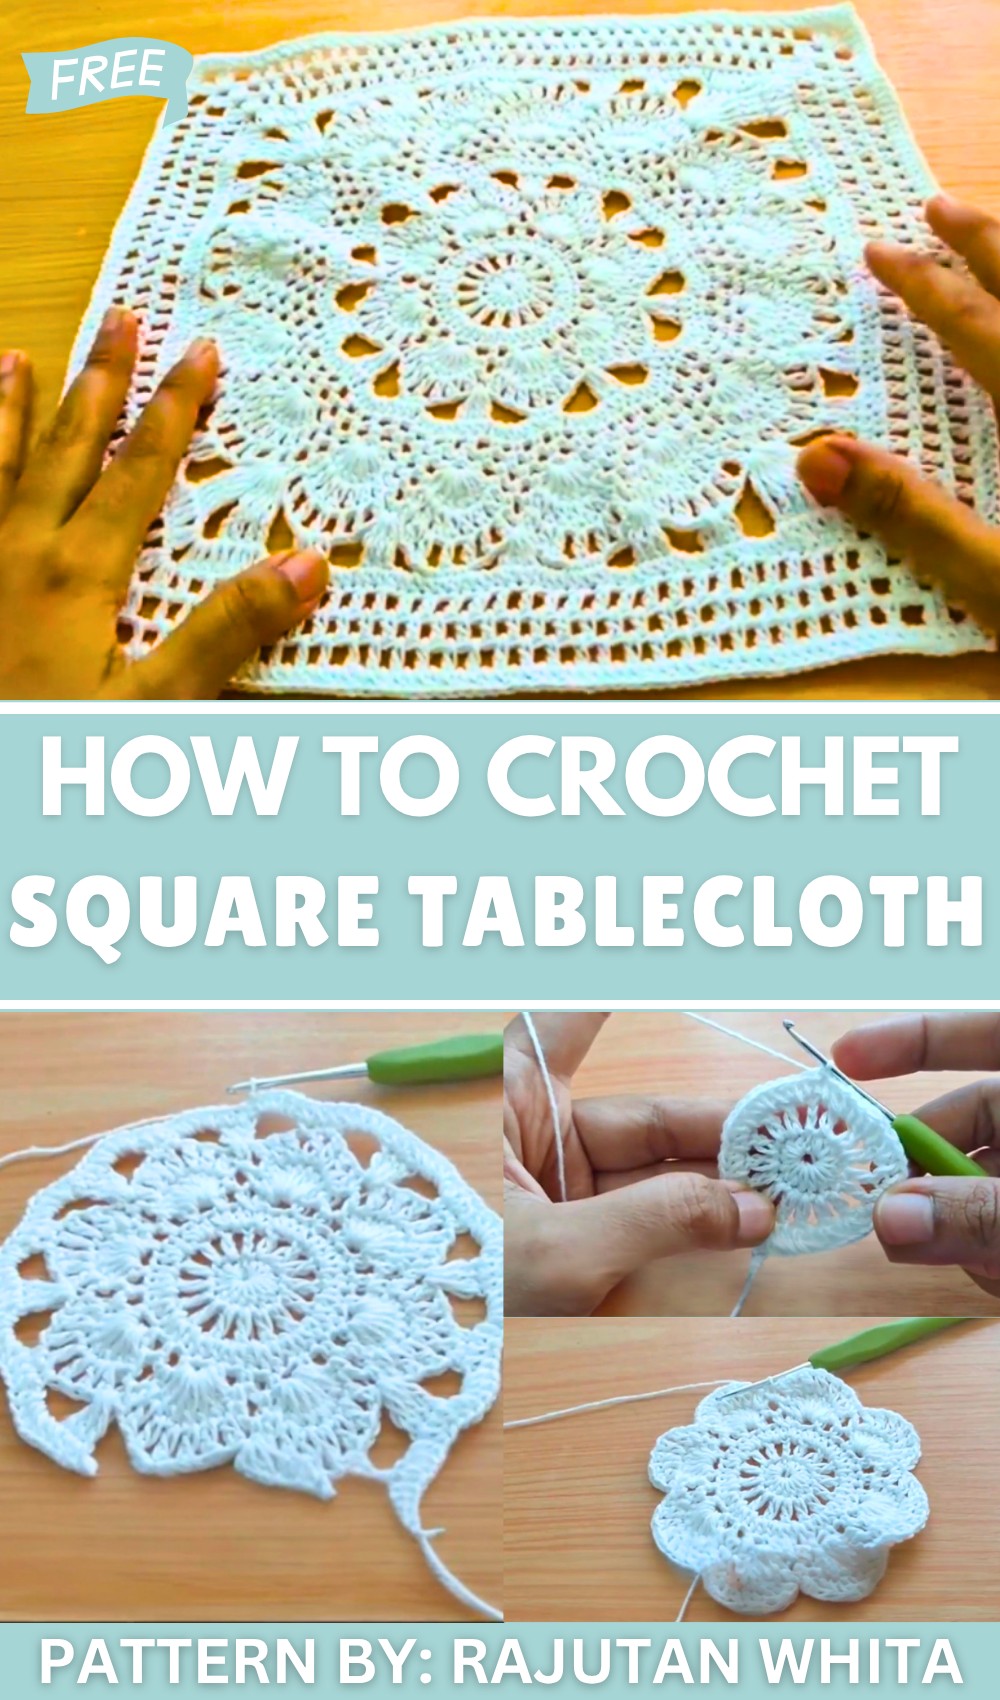
This crochet tablecloth can bring extra beauty to everyday meals and family gatherings. Place it under plates, cups, flowers, candles, or a small center piece to make the table look more special. It can also protect the table from small marks while adding a cozy handmade feel. The square shape makes it easy to place in the center or spread across the table.
Different colors can give the piece a new look. White or cream can create a clean and calm style, while bright shades can make the room feel more cheerful. The detailed crochet surface is also a standout feature, giving the tablecloth a pretty look that catches the eye without being too bold.
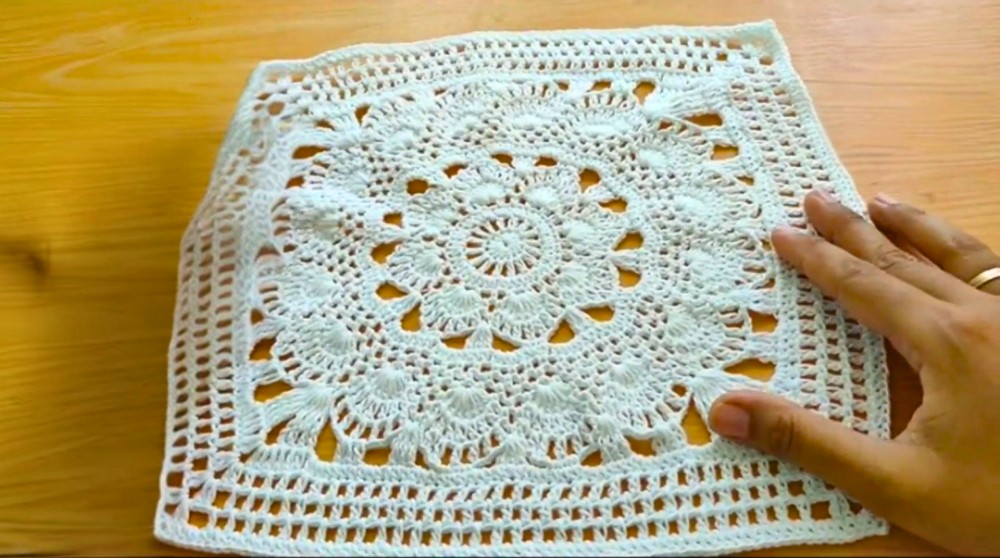
A handmade tablecloth can also make a thoughtful gift for a mother, grandmother, friend, or someone who enjoys home decor. It is useful for daily meals, tea time, family events, and special gatherings. The Free Crochet Square Tablecloth Pattern is a simple way to bring beauty and comfort into a home. Its neat shape, soft texture, and handmade style can make an ordinary table feel more inviting and cared for.
Square Tablecloth Motif Crochet Pattern
This crochet pattern guides you through creating a beautiful square motif designed for assembling into a charming tablecloth. Nine of these squares, once joined, create a 1m by 1m tablecloth perfect for adorning your dining space or living area with intricate handmade elegance. The motif features a combination of classic stitches and eye-catching textured petal designs, balanced by geometric edges that transition into a square shape for seamless joining.
Quick Overview of the Pattern
- The motif starts with a magic ring foundation worked up into a circular base using Half Double Crochet (HDC) stitches.
- It progresses into layered rounds alternating double crochets, single crochets, and chain spaces to form a floral petal motif.
- Decorative arches and petals are built using cluster stitches with double crochets and chain loops.
- The rounds incorporate transitions from a circular to square motif using double treble crochet (DTR) and tailored corner stitches.
- Final rounds solidify the motif with textured HDC and DC grids, finished with a sturdy border.
- Multiple squares are joined together via sewing or crocheting, finishing with a blocking process to ensure a smooth, flat tablecloth.
Notes
- Consistency in gauge and tension is important to ensure all squares are uniform for perfect joining.
- The motif includes basic to intermediate stitches familiar to crocheters with some experience working combination rounds.
- Blocking is strongly recommended to open lace patterns and maintain flatness.
- Joining method (sewing or crochet slip stitch join) can be selected per personal preference.
Skill Level
This project suits intermediate crocheters comfortable with:
- Working in rounds starting with a magical ring
- Half double crochet (HDC), single crochet (SC), and double crochet (DC) stitches
- Chaining to create decorative loops and arches
- Working double treble crochet (DTR) stitches
- Using stitch increases and clusters to form petals
- Transitioning from circular to square motifs using specific corner stitches
- Joining motifs neatly and finishing with blocking
Materials
- Cotton yarn suitable for fine crochet, such as Bali Small Ply cotton yarn or similar weight
- Crochet hook size 2.0 mm (size 3) for precise lace detail
- Scissors for cutting yarn ends and trimming
- Needle or crochet hook for joining motifs
- Blocking mats and pins (optional, but recommended)
Measurements / Sizing
- Each completed motif measures approximately 29 cm (11.4 inches) square.
- The full tablecloth, joined from 9 motifs (3 rows x 3 columns), measures close to 1 m x 1 m (39 x 39 inches).
- Size will vary slightly depending on tension and blocking.
Gauge and Stitch Pattern
- Gauge is not rigid but maintaining even tension ensures uniform motif size.
- The pattern uses:
- Half Double Crochet (HDC) for base rounds and final border
- Double Crochet (DC) for petals and arches
- Single Crochet (SC) for structural connections and decorative edges
- Double Treble Crochet (DTR) for square corner formation
- Chain stitches to create lace spaces and petals
Stitch Abbreviations
| Abbreviation | Meaning |
|---|---|
| ch | Chain |
| sc | Single Crochet |
| hdc | Half Double Crochet |
| dc | Double Crochet |
| dtr | Double Treble Crochet |
| sl st | Slip Stitch |
| MR | Magic Ring (adjustable ring) |
Special Stitches
- Magic Ring (MR): An adjustable closed loop foundation start allowing tight center closure of the motif.
- Double Treble Crochet (DTR): A taller stitch than treble crochet, made by yarn over twice before inserting hook into stitch, used for angular corner shaping.
- Petal Formation: Groups of 7 double crochets worked within chain arches to create raised petal shapes.
- Chain Loops: Series of chains forming arches and spaces for lacy appearance.
- Transition Corners: Combination of DTR, chains, and DC stitches used to convert motif from circular to square shape for joining.
The Crochet Pattern!
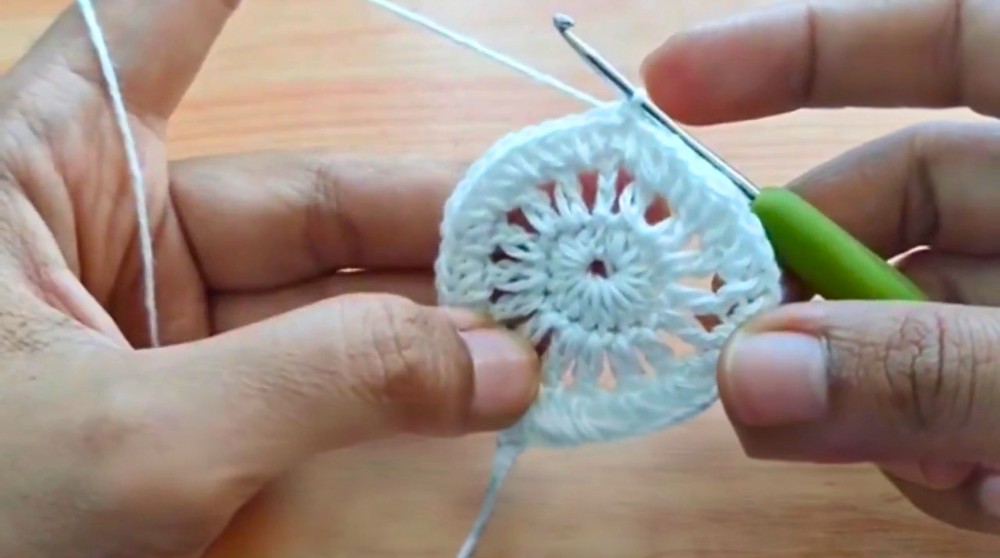
Round 1: Foundation and Base Stitches
- Make a Magic Ring (MR).
- Work 16 Half Double Crochet (HDC) stitches into the MR.
- Join with a slip stitch (sl st) to the first HDC to close the round.
Round 2: Creating Chain Spaces Between Double Crochets
- Chain 4 (counts as 1 Double Crochet (DC) plus 1 chain space).
- In the next stitch, work 1 Double Crochet (DC).
- Chain 1, repeat this sequence (DC, ch 1) 16 times around.
- Close by slip stitching into the 3rd chain of the initial chain 4.
Round 3: Half Double Crochet Increases
- Chain 2, counts as first HDC.
- Work 1 HDC in the same stitch.
- Then HDC into each chain-1 space from previous round.
- Work 2 HDC increases in the top of each DC stitch.
- Repeat around and join with slip stitch.
Round 4: Creating Arches
- Chain 1, work 1 Single Crochet (SC) into the same stitch.
- Chain 3, skip 1 stitch, SC in the next stitch.
- Repeat around to create 24 arches formed by chain-3 spaces.
Round 5: Building Petal Bases
- Move to the first arch, work SC,
- Chain 3, SC in the following arch.
- In the next arch, work 7 Double Crochets (DC) to form the base of a petal.
- Continue this pattern around to create 8 petals.
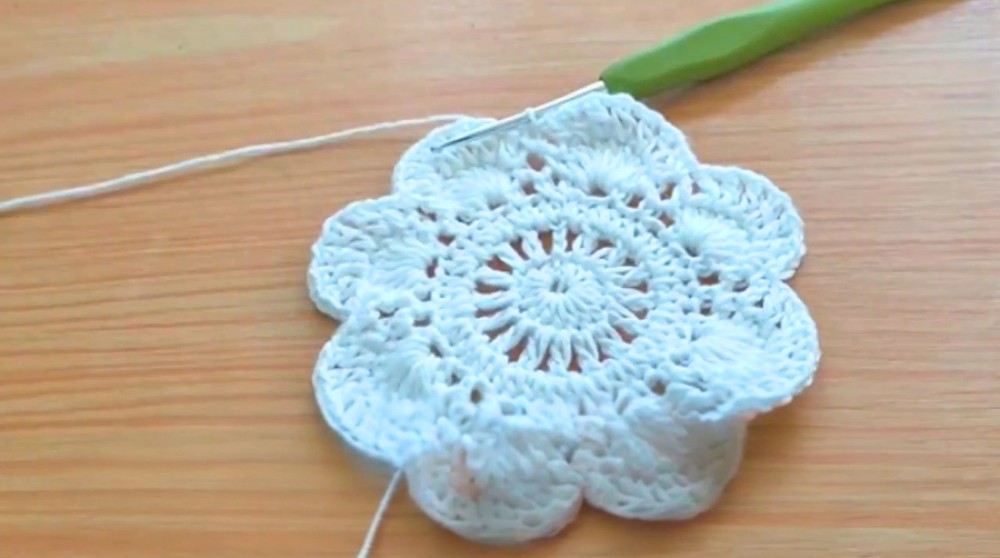
Round 6: Outlining the Petals
- Work SC inside each chain-3 space between petals.
- Work DC, ch 1 in each of the 7 DCs within each petal.
- Repeat for all petals to outline and space them.
Round 7: Petal Edging and Chain Loops
- Chain 3 (counts as 1 DC).
- Work 2 DC in the same stitch to begin petal edging.
- Chain 5, work SC in the 3rd chain space of the petal (mid peak).
- Work SC in the peak DC of the petal, then SC in the next chain space.
- Repeat around all petals.
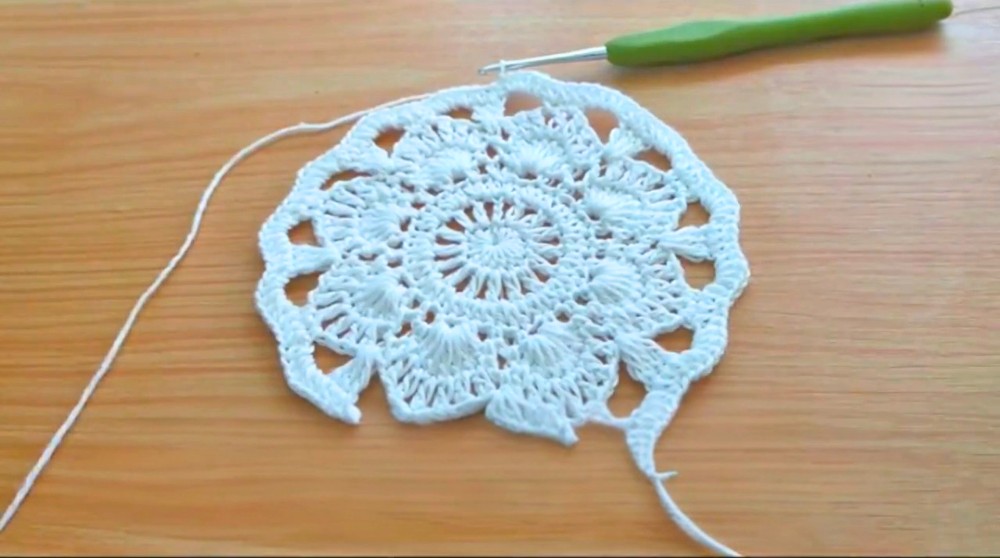
Round 8: Filling the Perimeter
- Work 128 Half Double Crochets (HDC) evenly spaced, filling around the total motif perimeter.
Round 9: Creating More Chain Arches
- Single Crochet (SC), chain 3, skip 1 stitch, repeat around to make 64 arches.
Rounds 10-11: Continuing Arch Pattern
- Repeat the arch pattern of SC and ch 3 for two more rounds to extend lace texture.
Round 12: Corner Foundation Formation
- Work 2 arch spaces as usual.
- Into the following arch, work 7 DC to form corner bases.
- Repeat this around all 4 corners to prepare for squared edges.
Round 13: Connecting Arches and Clusters
- Work SC into arches between corners.
- Work DC, ch 1 stitches along each 7-DC corner cluster to continue shaping.
Round 14: Increasing Corner Chain Spaces
- Work DC, ch 2 across the corner clusters similar to Round 13, slightly increasing chain length for squaring.
Round 15: Shaping Corners with Double Treble Crochet (DTR)
- Begin transitioning circular form to square by working:
- DTR, chain 4, DTR in the same stitch to create sharp corners.
- Along sides, work a combination of DC, SC, and Treble Crochet (TR) stitches to shape edges squarely.
Round 16: Solidifying Edges
- Work DC and HDC stitches evenly around, marking corners with DC, ch 3, DC groups for squared corners.
Rounds 17-19: Forming Square Grid
- Work rounds of DC with ch 1 spaces to form a grid pattern on the sides.
- Continue to reinforce corners with 2 DC, ch 3, 2 DC groups.
Round 20: Final Solid Border
- Work a round of HDC stitches all around to create a firm, solid finishing border for the motif.
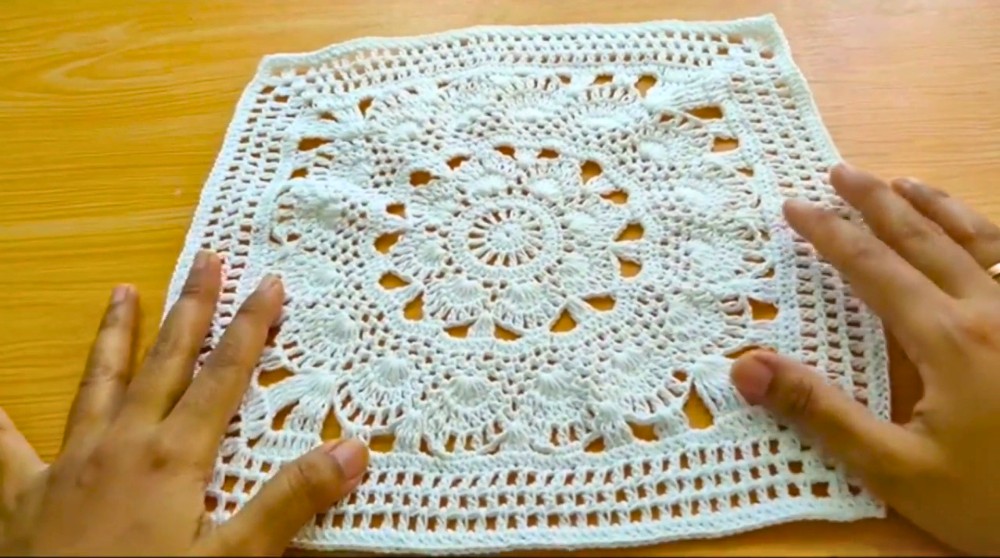
Assembly & Finished Size
- Complete 9 squares (3 x 3) to assemble for approximately 1m x 1m tablecloth size.
- Join squares by sewing with yarn needle or crocheting the edges together using a method suited to your preference.
- It is recommended to block the finished squares before and after joining to smooth and shape the fabric, preventing waviness or distortion.
Conclusion
This square tablecloth motif offers a perfect balance of decorative lacework and practical construction through well-planned stitch sequences and thoughtful shaping. Through a combination of classic stitches, petal motifs, and geometric corner shaping with double treble crochet, the motif evolves from a delicate circle into a beautiful square suitable for joining.
Crocheters following this pattern will develop intermediate skills while creating a versatile motif ideal for combining into festive home décor. Blocking and careful assembly complete the project ensuring a flat, elegant finish, worthy of display or gifting.