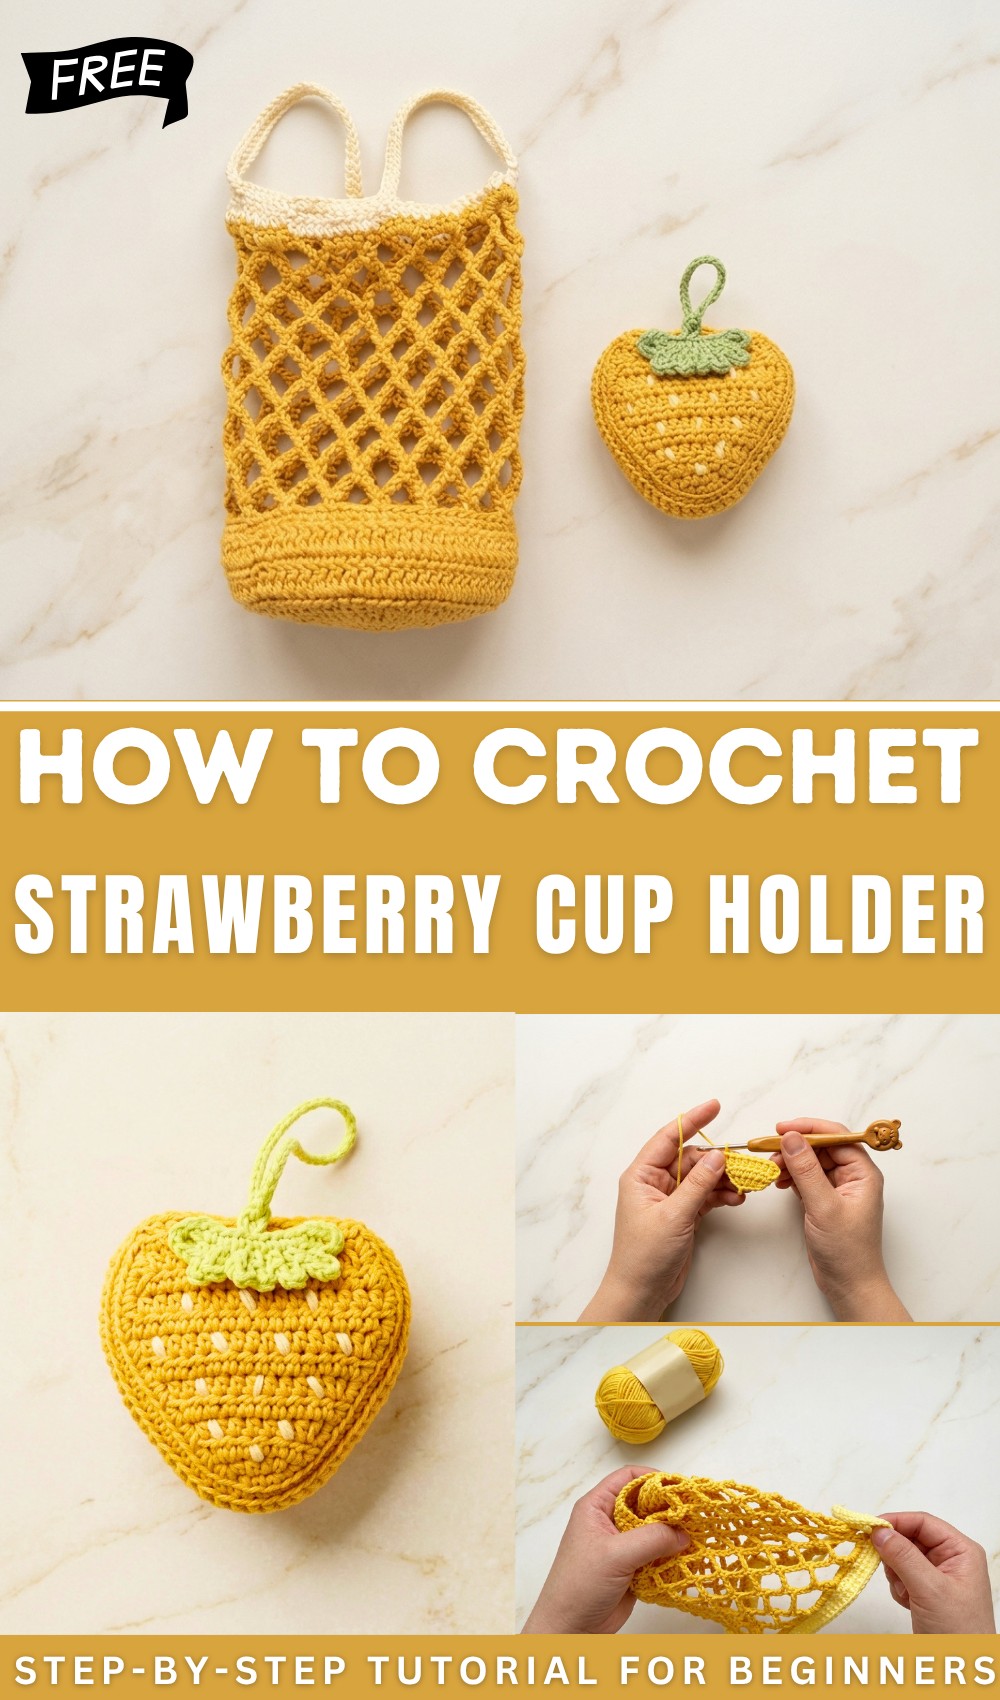
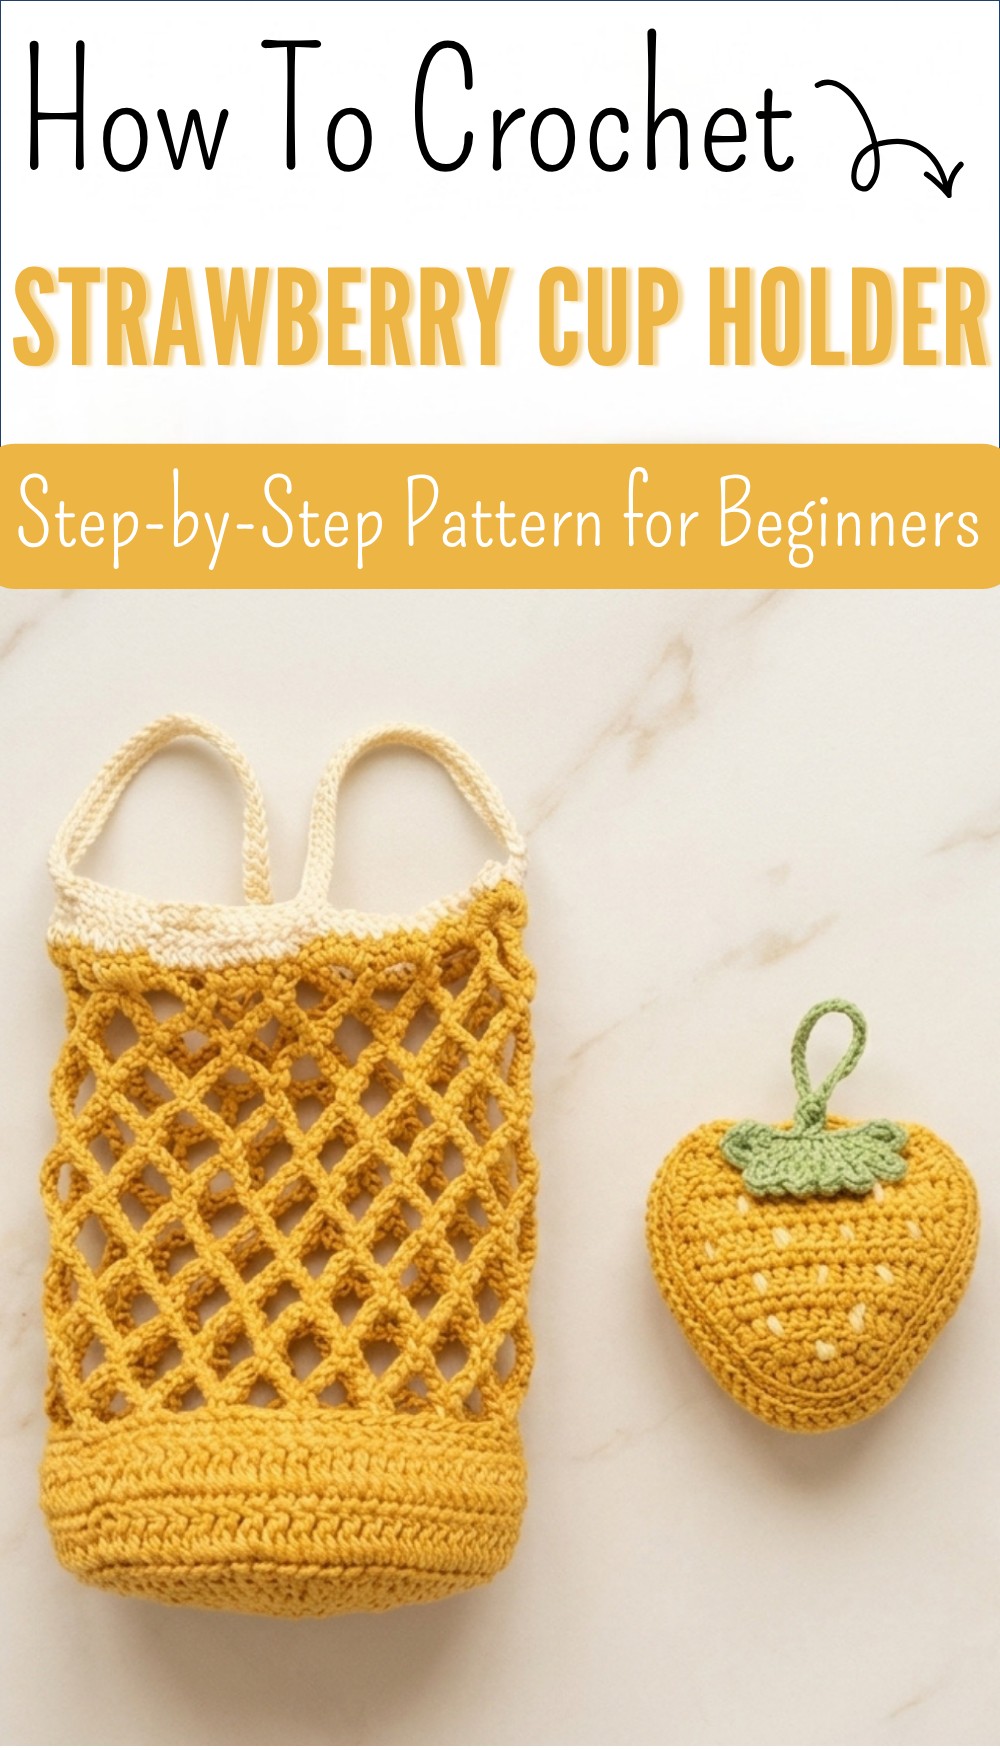
Free Pattern to Crochet Strawberry Cup Holder
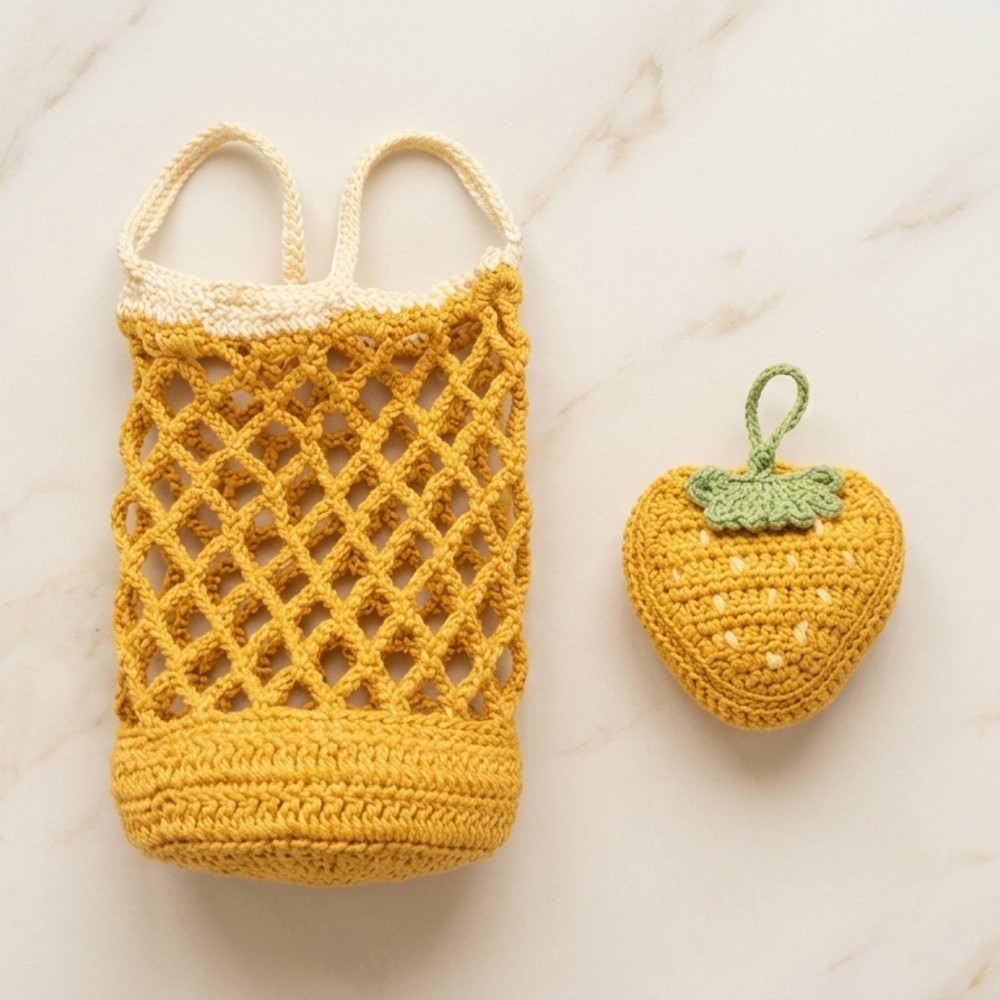
Sprinkle charm into your day with this sweet free crochet strawberry cup holder pattern that’s perfect for your drinks and small treasures.
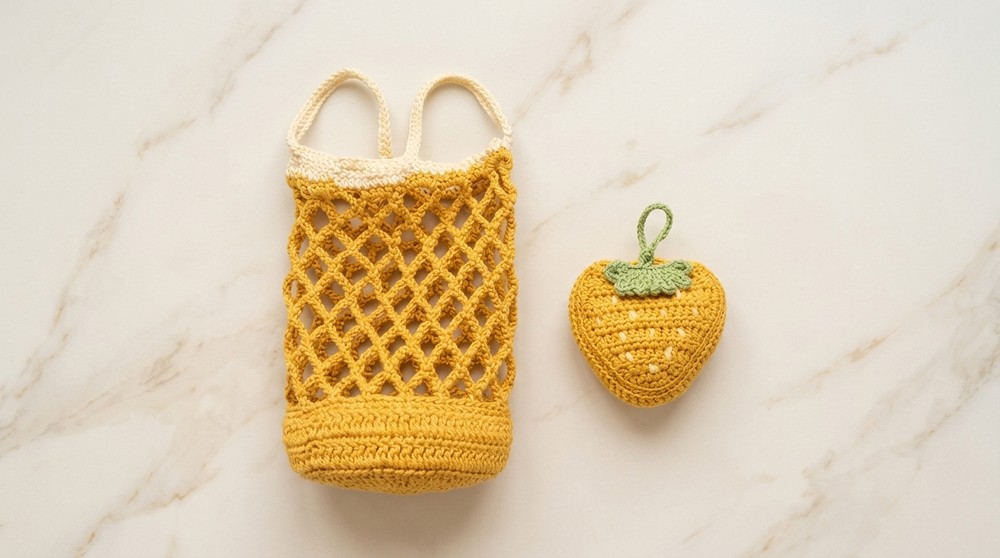
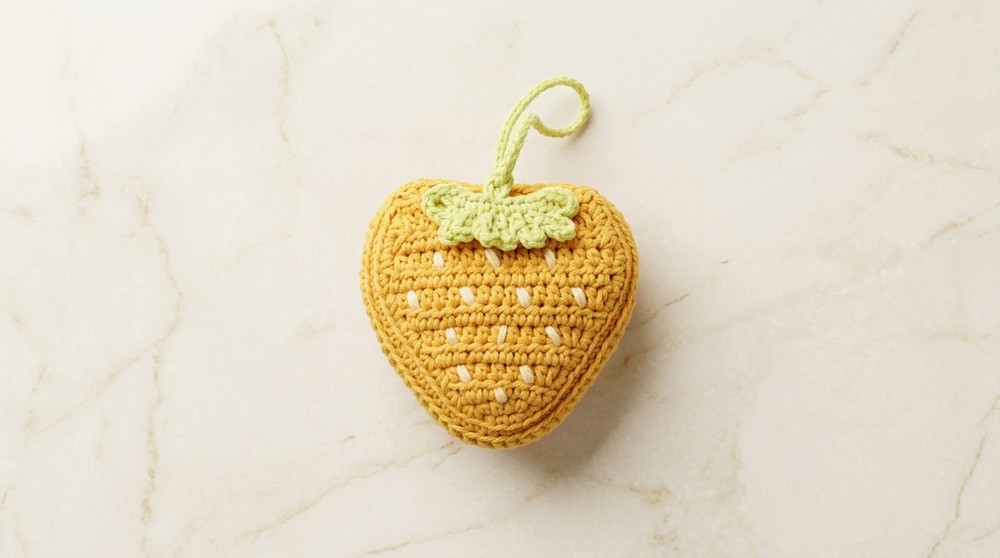
A little berry comes alive in your hands looking just like a real strawberry with its cheery colors and tiny leaves on top. This Crochet Strawberry Cup Holder pattern is as pretty as it is smart with a hidden mesh inside that pulls out to hold cups bottles or even small items like earphones and glasses. Its round shape and bright colors make everyone smile bringing a special touch to any bag or kitchen corner. The beauty of this pattern is in its simplicity because it folds up small for easy carrying and opens up big for everyday use.
Simple Strawberry Cup Holder Crochet Pattern for All
Anyone can enjoy its clever design—from little ones who need a helper for their snacks to adults needing an extra holder on the go. Taking only basic stitches and a little time this cup holder makes life easier and more cheerful offering a thoughtful gift or a personal treat that shows off warmth and care. Try it and see how useful and cute it is every day!
Swiss Strawberry Charm / Cup Holder Crochet Pattern
Materials
- Yarn: 4-ply cotton or acrylic (strawberry red, leaf green, mesh/coordinating color)
- Hook: 2.5 mm
- Notions:
- Stitch marker (recommended for beginners)
- Yarn needle for sewing
- Scissors
Key Abbreviations (US crochet terms)
| Abbreviation | Meaning |
|---|---|
| ch | chain |
| sc | single crochet |
| hdc | half double crochet |
| dc | double crochet |
| sl st | slip stitch |
| inc | increase (2 stitches into same stitch) |
| dec | decrease (work 2 stitches together) |
| sk | skip |
| st(s) | stitch(es) |
| FLO/BLO | front/back loop only (not used here) |
Special Notes
- Work in rows or continuous rounds as specified.
- When working around the edge, work two sc along the side of each row for smoothness.
- When working into chain spaces, insert the hook under the full chain space.
Instructions
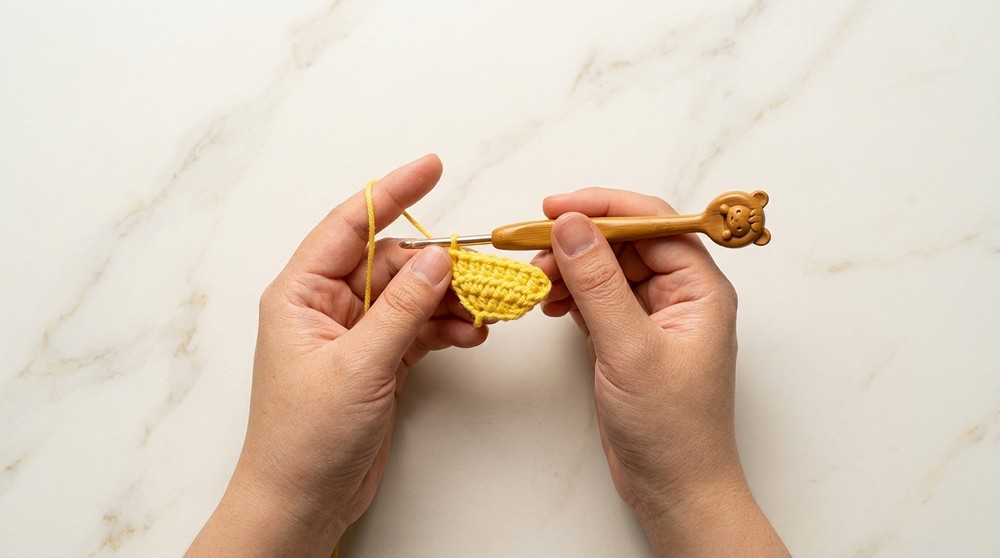
Strawberry Outer Shell (Make 2)
- Foundation:
Ch 5. - Row 1:
- Yarn over, insert hook into 3rd ch from end, pull up a loop, yarn over, pull through all three loops (hdc)
- Mark this first st with a stitch marker if desired.
- Hdc inc (hdc into same stitch again).
- Hdc in next ch.
- Hdc inc in first ch (from start of foundation chain).
- Row 2:
- Ch 2, turn.
- Hdc inc in 1st st,
- Hdc in each of next 3 sts,
- Hdc inc in last st.
- Rows 3–7:
- Ch 2, turn.
- Hdc inc in first st,
- Hdc in every middle st,
- Hdc inc in last st.
- (Middle hdc count increases by two each row.)
- Rows 8–9:
- Ch 2, turn.
- Hdc in each st across (no increases or decreases).
- Complete Rows 8 and 9 in this manner.
- Row 10:
- Turn.
- Hdc2tog (decrease): Yarn over, insert in next st and pull up loop, yarn over, insert in next st, pull up loop (3 loops on hook), yarn over, pull through all 5 loops.
- Hdc in each st across to last 2 sts,
- Hdc2tog in last 2 sts.
- Row 11:
- Ch 2, turn.
- Hdc2tog at start,
- Hdc in each st across to last 2 sts,
- Hdc2tog at end.
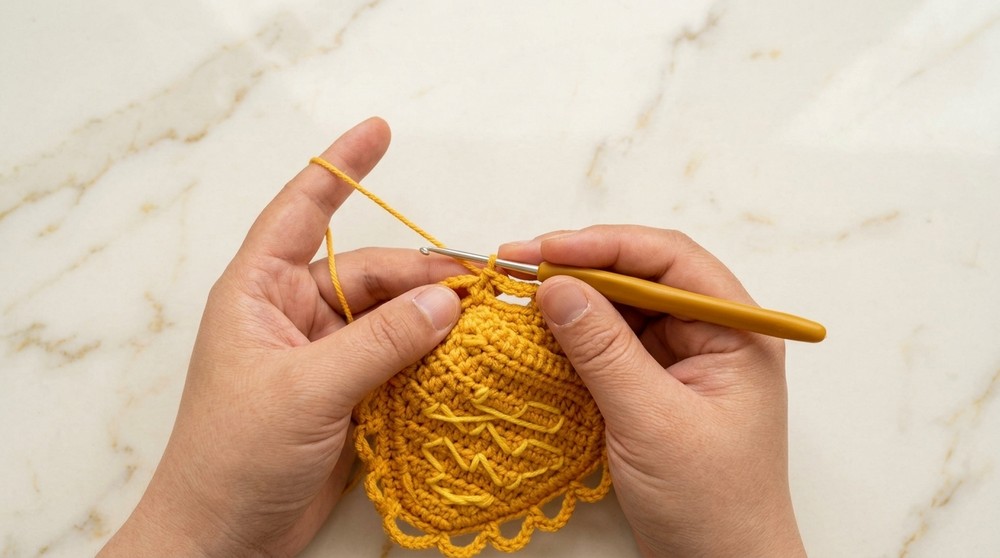
Edging for Each Piece
- Single crochet round:
- Ch 1, do not turn, begin working around the edge.
- Work 2 sc along the side of each row (22 sc per side).
- Across short edge (bottom), work 3 sc.
- Work up the other long side, again 2 sc per row (22 sc).
- Across the top edge, sc in each st (should be 13 sc).
- Join with sl st into first sc.
- Repeat:
- Make 2 total pieces, fasten off only one. Leave the second attached to continue.
Strawberry Top/Cup Holder Base
- Join both pieces:
- With right sides facing out, use working yarn from the second piece.
- Ch 2.
- Work in inner loops only (the loop closer to the inside/center of the piece).
- Around, work 1 round of dc, evenly distributing 60 dc.
- Join with sl st.
- Body of Cup Holder:
- Continue for 2 more rounds in dc, no increasing or decreasing.
- End after 3 dc rounds in total.
- Mark Openings:
- Count and mark 12 stitches in the middle of one side.
- Do the same for the other piece.
- Assembly:
- Sew the two pieces together along the unmarked edges using yarn or tapestry needle.
- Leave the 12 marked stitches open.
- Turn both pieces right side out.
Connecting the Sides with Single Crochet
- Join remaining pieces:
- With the right sides facing out, use the loop closest to you on each piece for joining.
- Join at marked points with sc (work through corresponding loops of both pieces).
- Continue until reaching the other marker for an even closing.
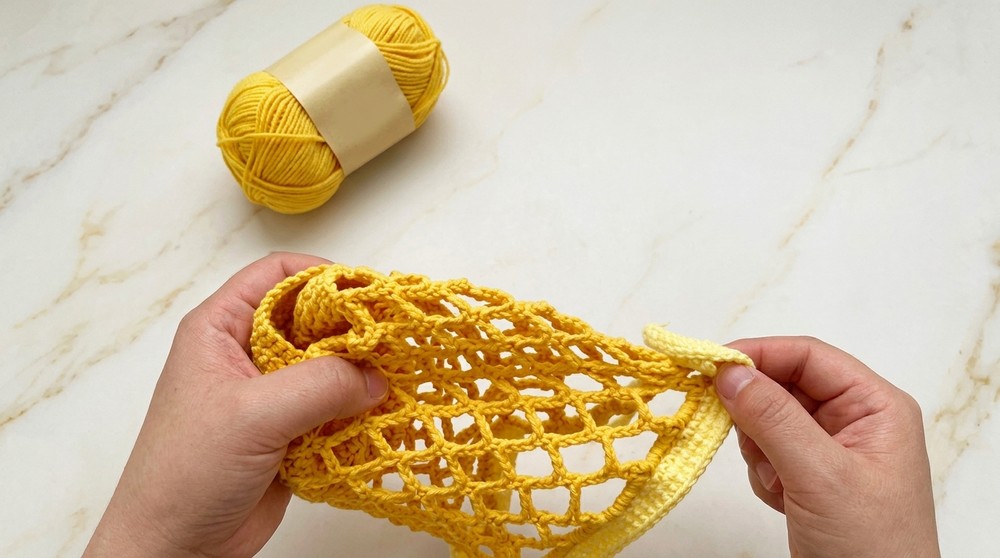
Mesh Body (Expandable Part)
- From open section:
- Ch 1, sc in first unjoined st.
- Ch 7, sk 3 sts, sc in next st. Ch 7, sk 3 sts, sc in next…
- Continue this all around the opening, creating mesh loops.
- At opening’s edge, continue the mesh pattern cleanly around.
- End of round:
- Sl st to first sc of round.
- For next round and all mesh rounds:
- Sl st into 4th ch of next ch-7 loop.
- Ch 7, sc in 4th ch of next ch-7 space, repeat around.
- Continue to desired height of mesh.
Mesh Top Finish
- After desired mesh height:
- Sl st twice to center of the ch-7 loop.
- Ch 1, make 2 sc into first loop, and then 5 sc in each ch-7 space around, until the last (first) opening, where you do 2 sc.
- At end, add 3 more sc.
- Change yarn color if desired.
- Work 1 round of sc around the top of mesh (into each sc and into 1 loop of each ch if working into chains).
- Total will be 75 sc.
Handles
- Next round:
- Sc 11,
- Ch 35 (for strap), sk 15 sts,
- Sc into next st, sc 23,
- Ch 35, sk 15 sts,
- Sc into next st,
- Sc 11 to end of round.
- Final round:
- Sc into each st and each ch (work sc into just one loop of the ch handle — this keeps it flexible).
- Fasten off and weave in ends.
Strawberry Leaf
- Ch 14.
- Insert hook into 7th ch from end, sc.
- Ch 6, insert hook into next ch, sc.
- Repeat ch 6, sc into next ch until first ch is worked.
- Result: Multiple “prongs” of the leaf.
- Turn to side:
- Insert hook into side edge, work 4 sc along side.
- Ch 7, in same sc, sl st,
- Work 4 sc more along remaining side.
- Fasten off and attach to strawberry as decorative closure.
Hanging Strap
- From center back of the strawberry top:
- Pull up a loop, ch 45.
- Sl st back into starting st.
- Fasten off and weave in ends.
Assembly & Use
- Tuck mesh cup holder fully into strawberry shell to create a compact charm.
- To use as a cup holder or small item carrier, pull mesh through the opening.
- Attach leaf as a decorative flap or cover over the top.
Pattern Correction
- Ensure your increases/decreases are made on the correct rows for the strawberry halves, and that both pieces match in size.
- When joining, make sure you leave the opening for the mesh to pull through (do not sew all the way around).
- Adjust number of mesh rounds and handle length for your preferred size and fit.
Tips
- Mark first stitch of each row/round for accuracy.
- Block finished project gently for best shape.
- Use a sturdy yarn for mesh, especially if carrying items heavier than a cup.
- Handles/strap lengths are adjustable for different uses or hand sizes.
Conclusion
This Swiss Strawberry convertible charm is fun and practical—a cute accessory that quickly turns into a cup holder or compact carrier. Customize the color and mesh length, and enjoy using or gifting your clever crochet creation.